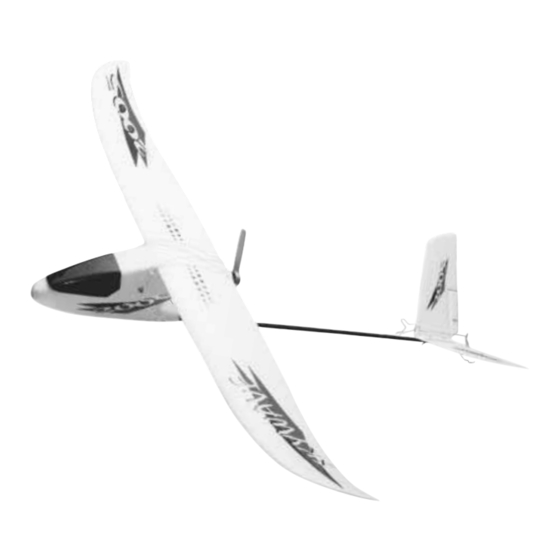
protech SkyWave T0351 Anleitung
T0351
INSTRUCTION MANUEL • GEBRUIKSAANWIJZING • INSTRUCTIONS DE MONTAGE • ANLEITUNG
RADIO INCLUDED
450 g
WARNING ! This R/C kit and the model
you will build is not a toy.
LET OP ! Deze bouwdoos van een
radiobestuurd vliegtuig is geen
speelgoed.
2
11,52 dm
ATTENTION ! Ce kit d'avion R/C n'est
pas un jouet.
ACHTUNG ! Dieser Bausatz von
ferngesteurte model
ist kein Spielzeug.
version: 16/104/2003 • T0351
Skywave - 1
Inhaltsverzeichnis

Verwandte Anleitungen für protech SkyWave T0351


Inhaltszusammenfassung für protech SkyWave T0351
- Seite 1 T0351 INSTRUCTION MANUEL • GEBRUIKSAANWIJZING • INSTRUCTIONS DE MONTAGE • ANLEITUNG RADIO INCLUDED 450 g WARNING ! This R/C kit and the model you will build is not a toy. LET OP ! Deze bouwdoos van een radiobestuurd vliegtuig is geen speelgoed.
- Seite 2 Specifications / Specificaties / Spécifications / Technische daten Wing span: 1030 mm Spanwijdte: 1030 mm Envergure: 1030 mm Spannweite: 1030 mm Length: 750 mm Lengte: 750 mm Longueur: 750 mm Länge: 750 mm Wing area: 11,52 dm Vleugelopp.: 11,52 dm Surface alaire: 11,52 dm Tragflügelinhalt: 11,52 dm...
-
Seite 3: Important Safety Notes
Important Safety Notes. Be sure to read right through the instructions covering assembly and operation of your model before you attempt to operate it for the first time. You alone are responsible for the safe operation of your radio-controlled model. Young people should only be permitted to build and fly these models under the instruction and supervision of an adult who is aware of the hazards involved in this activity. -
Seite 4: Conseils De Sécurité Importants
Conseils de sécurité importants Avant de tenter la première mise en service, la totalité des instructions de montage et d’utilisation devront être attentivement lues. Vous êtes seul responsable de la sécurité d’utilisation de votre modèle volant R/C. Il est conseillé aux adolescents de se faire assister pour la construction et pour les premiers vols par un adulte déjà familiarisé... - Seite 5 Tools & items / Gereedschap & benodigdheden / Outils et équipements / Werkzeuge und erforderliches To assemble this airplane some tools are needed. Voor het samenstellen van het vliegtuig zijn er enkele gereedschappen nodig. Zum bauen dieses Flugzeug werden einige Werkzeuge gebraucht . Certains outils sont requis pour assembler cet avion.
- Seite 6 Assembling the V-tail / Samenstellen van de V-staart / Assemblage de l’empennage / Montierung von das V-Leitwerk Fig. 3 Fig. 4 Fig. 5 Fig. 6 Insert the 2 screws through the Breng de 2 vijzen door de Insérez les 2 vis dans l’empen- Stecken Sie die 2 Schrauben tailmount.
- Seite 7 2 écrous. Lock’ (Protech Nut Lock #A600). Zie Fig. 7-8-9-10. Sécurisez en mettant une goutte Sehe Abb. 7-8-9-10. de “freine filet“ (Protech Nut lock #A600). Voir Fig. 7-8-9-10. Low / Weinig / Faible / Normal / Normaal / Normal /...
- Seite 8 Fixing the landinggear / Bevestigen van het landingsgestel / Installation du train d’attérissage / Befestigung von das Hauptfahrwerk Fig. 11 Fig. 12 Fig. 13 Insert the landinggear in the pre- Bevestig het landingsgestel in de Insérez le train d’attérissage dans Setzen Sie das Hauptfahrwerk im formed place at the bottom of the voorgevormde plaats aan de...
- Seite 9 Fixing the wing / Bevestigen van de vleugel / Installation de l’aile / Befestigung von Flügel Fig. 14 Fig. 15 Fig. 16 Position the wing to the fuselage Positioneer de vleugel op de romp Positionez l’aile sur le fuselage en Bringen Sie den Flügel auf die and take care it is well centered.
- Seite 10 Connecting the battery / Aansluiten van de batterij / Installation de l’accu / Anbringen von die Batterie Fig. 17 Fig. 18 Fig. 19 Fig. 20 Open the cockpit, take the con- Open de cockpit, haal de connec- Ouvrez le cockpit, sortez la fiche Öffnen Sie die Kabinehaube, und nector out, see Fig.
- Seite 11 Before flying / Vliegklaar maken van uw model / Avant de voler / Flugfertig machen von das Model Put 8 charged AA batteries (#P1108) in the transmitter. Make sure that the trims are in neutral position. Turn the transmitter on. Batteries not charged completely causes problems during Switch transmission.
- Seite 12 Hold the model on the nose so it won’t start and could cause serious damage to persons or objects. Push the powerswitch ‘on’ on the side of the fuselage. Take care ! The propeller may start to spin. Keep your hands away from the propeller.
- Seite 13 Always fully extent the transmitter antenna. Before take off you should check the direction of the wind. Beginning pilots should choose a day with little or no wind. Trek de antenne volledig uit. Kontroleer eerst de richting van de wind voor u begint te vliegen. Beginnende piloten kiezen best een dag zonder of met weinig wind.
- Seite 14 FLYING LOOSE CONTROL The left controlstick is for controlling the speed of the plane and STORINGEN also for elevator function. If you release the left stick the motor PERTE DE CONTROLE will stop working and the plane will descend. If you move the left stick up the plane will gain speed and start to climb.
- Seite 15 LANDING THE PLANE When the plane is about 30 feet above the ground turn it into the wind and lower the speed to land. LANDEN VAN HET MODEL Als het vliegtuig op ongeveer 10m hoogte vliegt draai dan in de wind en verminder de gas zodat u kan landen.
- Seite 16 ELEVATION ANGLE Normaly the plane should fly straight. Nose light If the plane has a pitch up, it shows that the nose is light. You Neus licht must adjust the elevation angle from the V-tail by adding a washer between the V-tail and the fuselage, see drawing (Pitch Nez trop léger down).
- Seite 17 INTERFERENCE Before flying you should always check to see if other planes in the area are on the same frequency, as this will cause transmitter interference between the planes and cause accidents. ZENDERSTORINGEN Voor het vliegen, moet U steeds kontroleren of er andere modellen in de buurt niet dezelfde frekwentie hebben, daar dit zenderstoringen kan geven tussen de verschillende modellen en ongelukken kan veroorzaken.
-
Seite 18: Important Safety Instructions
Attention / Opgelet / Attention / Achtung IMPORTANT SAFETY INSTRUCTIONS • Don’t fly facing the sun because you could be blinded and loose control. Always wear a cap and sunglasses for protec- tion. • Keep propeller away from face, eyes and fingers. •... - Seite 19 Recommendation / Aanbeveling / Recommandation / Empfelung • We recommend that an experianced pilot helps you to get started with R/C modeling. • Before each flight you must check your model and your R/C system. • Take optional batteries if you want to fly longer than 10-15 min. •...
- Seite 20 Conformity / Gelijkvormigheid / Conformité / Konformität • This product is in accordance with the R&TTE directive 1999/5/EG. • Deze apparatuur is overeenkomstig de R&TTE richtlijnen 1999/5/EG. • Ce produit est conforme la directive R&TTE 1999/5/EG. • Dieses Produkt ist konform der Richtlinie 1999/5/EG R&TTE. 20 - Skywave...
- Seite 21 Frequentie / Frequence / Frequency / Frequenz Frequentie Kanaal Frequentie Toegelaten in volgende landen Frequence Canal Frequence Admis dans les pays suivants Frequency Channel Frequency Admitted in folowing countries Frequenz Kanal Frequenz Zugelassen in folgende Länder 27 MHz-Band 26,965 26,975 26,985 26,995 27,005...
- Seite 22 40 MHz-Band 40,665 40,675 40,685 40,695 40,715 40,725 40,735 40,765 40,775 40,785 40,815 40,825 40,835 40,865 40,875 40,885 40,915 40,925 40,935 40,965 40,975 40,985 41 MHz-Band 41,000 41,010 41,020 41,030 41,040 41,050 41,060 41,070 41,080 41,090 41,100 41,110 41,120 41,130 41,140 41,150 41,160...
- Seite 23 In België is een ministriele vergunning voor het houden en gebruik van een radiobesturing vereist (aanmelding via het BIPT, Sterrenkundelaan 14 bus 21, 1210 Brussel). Voor andere landen van de EU kan een vergunning vereist zijn. Hiervoor kontakt opnemen met de autoriteiten per land.
- Seite 24 PROTECH® is a registered trademark P.O.-Box 60 • B-2250 Olen Tel.: +32 (0)14 25 92 80 Fax: +32 (0)14 25 92 89 info@protech.be http://www.protech.be Limited warranty / Beperkte garantie / Limitation de garantie / Begrenzte garantie • Your kit is warranted against defects •...