Planika Cabo Montageanleitung
Inhaltsverzeichnis
Verfügbare Sprachen
Verfügbare Sprachen
Quicklinks
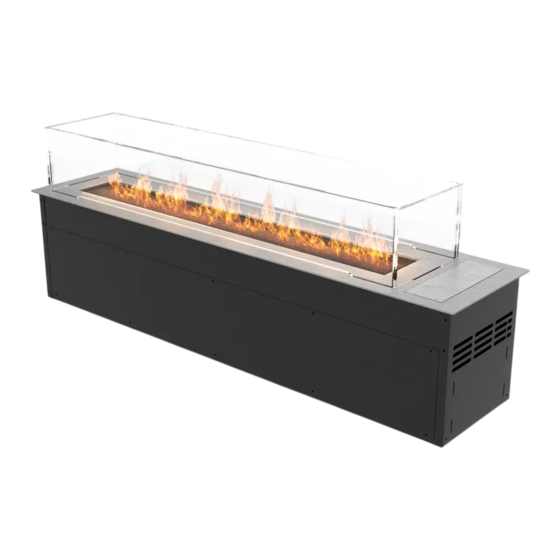
Cabo Burner
EN Installation manual / DE Montageanleitung / ES Manual de montaje /
FR Notice de montage / IT Istruzioni di montaggio / PL Instrukcja montażu /
RU инструкция по монтажу
WARNING / WARNUNG / ADVERTENCIA / AVERTISSEMENT / ATTENZIONE / OSTRZEŻENIE / ВНИМАНИЕ
EN This manual only applies to the installation and operation of Cabo burner only. The installation of the fireplace in Daze / Laurent / Gris firebox, Table is included in the other manual.
DE Diese Anleitung gilt nur für die Installation und den Betrieb des Cabo-Brenners. Die Installation des Kamins in Daze / Laurent / Gris Feuerraum, Tabelle ist in der anderen Anleitung enthalten.
ES Este manual sólo se aplica a la instalación y el funcionamiento del quemador Cabo solamente. La instalación de la chimenea en Daze / Laurent / Gris caja de fuego, Tabla se incluye en el otro
manual.
FR Ce manuel s'applique uniquement à l'installation et au fonctionnement du brûleur Cabo. L'installation du foyer dans la boîte à feu Daze / Laurent / Gris, Table est incluse dans l'autre manuel.
IT Questo manuale si applica solo all'installazione e al funzionamento del bruciatore Cabo. L'installazione del caminetto nel focolare Daze / Laurent / Gris, Table è inclusa nell'altro manuale.
PL Niniejsza instrukcja dotyczy wyłącznie instalacji i obsługi palnika Cabo. Instalacja kominka w palenisku Daze / Laurent / Gris, Table jest zawarta w innej instrukcji.
RU Данное руководство относится только к установке и эксплуатации только горелки Cabo. Установка камина в топку Daze / Laurent / Gris, Table включена в другое руководство.
Copyright Planika Sp. z o.o.
www.planika.com
I1515#07
25.02.2025
Inhaltsverzeichnis

Verwandte Anleitungen für Planika Cabo


Inhaltszusammenfassung für Planika Cabo
- Seite 1 DE Diese Anleitung gilt nur für die Installation und den Betrieb des Cabo-Brenners. Die Installation des Kamins in Daze / Laurent / Gris Feuerraum, Tabelle ist in der anderen Anleitung enthalten. ES Este manual sólo se aplica a la instalación y el funcionamiento del quemador Cabo solamente. La instalación de la chimenea en Daze / Laurent / Gris caja de fuego, Tabla se incluye en el otro manual.
- Seite 2 Natural air exchange rate in room – min. 1/h. (in case of indoor installations) No heat-sensitive and flammable objects can be placed within a 1 meter radius from and directly above the device. Only use manufacturer-approved decorative accessories for Planika fireplaces. Follow the provided guidelines to prevent damage to the unit.
- Seite 3 No se pueden colocar objetos sensibles al calor e inflamables en un radio de 1 metro desde y directamente encima del dispositivo. Utilice únicamente accesorios decorativos aprobados por el fabricante para las chimeneas Planika. Siga las directrices proporcionadas para evitar daños en el aparato.
- Seite 6 1162 1190 Quantity Firebox with Feuerraum mit Hogar con Focolare con Obudowa z Foyer avec brûleur Топка с горелкой burner Brenner quemador bruciatore paleniskiem Glass Glas Vidrio Verre Vetro Szyba Cтекло Cable USB de Cavetto per Kabel Service cable Service -Kabel Câble de service кабель...
- Seite 7 Assemble the lifting handles in premade holes (short ones), feed the electricity connection through the hole and put the burner into the cavity. Place the glasses in the prepared holes and connect the power cord to the waterproof socket. Montieren Sie die Hebegriffe in den vorgefertigten Löchern (kurze Löcher), führen Sie den Stromanschluss durch das Loch und setzen Sie den Brenner in den Hohlraum ein.
- Seite 9 SERVICE START ONLY STOP Prise de service Service-USB-Eingang Puerto de servicio Allumer/éteindre Ein – und Ausschalten des 1. Service port Iniciar / apagar el dispositivo l'appareil Kamins 2. Power ON/OFF Encender / apagar el Allumer / éteindre la Anzünden und Erlöschen 3.
- Seite 15 BRENNSTOFFNACHFÜLLEN Schalten Sie das Gerät ein, indem Sie drücken. 2.Wenn der Kraftstofftank leer ist (START/STOPP-TASTE BLAUES LICHT AN), öffnen Sie die Klappe und ziehen Sie den Kraftstoffschlauch (I) heraus. Das lose Ende in den Kraftstoffbehälter stecken und den Knopf der Kraftstoffpumpe (II) drücken und halten.
-
Seite 16: Konfiguration Der Drahtlosen Verbindung
KONFIGURATION DER DRAHTLOSEN VERBINDUNG Paarung des Gerätes mit der Applikation wird folgend durchgeführt (gleichzeitig kann nur ein Gerät gepaart werden): Find your Join the newsletter fireplace 1. Schalten Sie bitte die FLA3 NET- Auf dem ZERO Applikation auf dem Handy ein. Bildschrim Bestätigen Sie den Wunsch des zeigt sich... - Seite 17 Access Point Your fireplaces 6. Auf dem nächsten 7. Wenn Sie keinen von den verfügbaren Netzen Bildschrim YOUR verwenden möchten, können FIREPLACES, Sie ein gewidmetes Netz wählen Sie das erschaffen durch ACCESS Gerät aus und POINT und sich direkt mit dem drücken Gerät zu verbinden.
- Seite 18 Default Level Your fireplaces Contact Us Drücken Sie LOCK, um den Überprüfen Sie die Stellen Sie das Niveau der Kontaktieren Sie Planika verfügbaren Kamine. Steuerpaneel des Kamins zu Flamme ein, auf dem der durch durch E-Mail. blockieren. Drücken Sie Drücken Sie EDIT, um den Drücken Sie SEND, um...
- Seite 19 ALARMMITTEILUNGEN Help Error File a Report Führen Sie die Tätigkeit aus, die den Wenn Sie weiterhin die Hilfe des Drücken Sie HELP im MENU, um zum Service benötigen, so senden Sie Fehler betrifft. Wenn der ERROR Bookmark Troubleshooting zu weiterhin aufgezeigt wird, melden Sie die Nachricht mit der Beschreibung die Angelegenheit durch das Drücken gelangen.