ONKRON G200 Benutzerhandbuch
Vorschau ausblenden
Andere Handbücher für G200:
- Montageanleitung (2 Seiten) ,
- Montageanleitung (2 Seiten)
Quicklinks
ONKRON
Jji
G200
EN
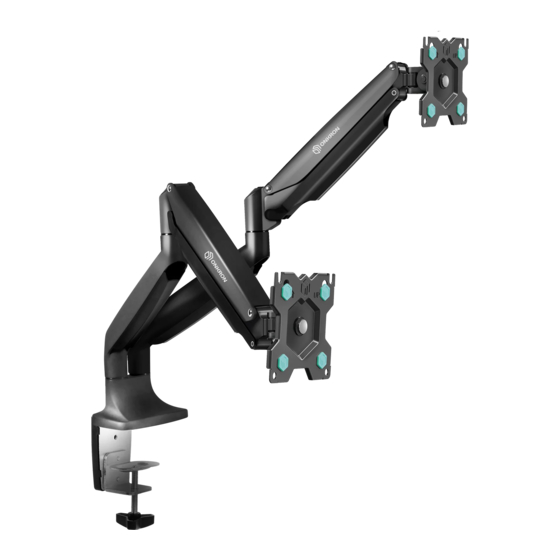
Dual monitor
desk mount with gas lift system
DE
Tischhalterung
RU
HaCTOJ1bHblV1 KPOHUJTelRH
KZ
ra3TlV1$Txyvaeci 6ap eKi M0HVITopnapFa apHaJIFaH ycren KPOHLUTeVIHl
o
Screen
size
Load capacity
1-9 kg (x2)
2.2-198" lbs (x2)
EN
User guide
DE
Benutzerhandbuch
PYKOBOACTBOnonb30BaTeJ19
RU
KZ
navwanaHYLIJbl HYCKaYf1blFbl
für zwei Monitore
mit Gaslift-System
ABYX MOHVITOPOB C CVICTeMOV1 ra3Ju,1$T
Tilt
Rotation
-900—+450
3600
Arm
extends
VESA (mm)
0 615 mm
75x75
0 24.2'
100x100
Swivel
1800
Height
adjustment
70
505
mm
6.69
9.9"

Verwandte Anleitungen für ONKRON G200


Inhaltszusammenfassung für ONKRON G200
- Seite 1 G200 ONKRON Dual monitor desk mount with gas lift system Tischhalterung für zwei Monitore mit Gaslift-System HaCTOJ1bHblV1 KPOHUJTelRH ABYX MOHVITOPOB C CVICTeMOV1 ra3Ju,1$T ra3TlV1$Txyvaeci 6ap eKi M0HVITopnapFa apHaJIFaH ycren KPOHLUTeVIHl Screen size Tilt Rotation Swivel -900—+450 3600 1800 Load capacity...
- Seite 2 Please take a moment (10.04"-12.4") (2.52") (1.02") (8.27") and eave us an online review. Thank you! Sincere y, ONKRON. USA: sa e@onkron.us / +13159682278 Europe: sale@onkron.de / +494029996807 Russia: support@onkron.ru / +78007772176 1800 -900...
- Seite 3 VI jederzeit kontaktieren und Wlr werden Ihnen helfen: YCTaHOBKk1. D pm B03HVIKHoaeHhVl Bonpocoe no c60pKe USA: sa e@onkron.us / +13159682278 npoAYKTa CB9XVITeCb CHClL_neVf cePBVICHOV1 cnyx60V1. Europa: info@onkron.de / +494029996807 BAXHO Russland: support@onkron.ru / +78007772176 [IEPER Haganorvl c60PKk1 y6eAk1Tecb BTOM,HTOdbl...
- Seite 4 Si tiene algun solicitud o necesita ayuda no dude on contactårnos USA: sa e@onkron.us / +13159682278 directamente y le asistimos 10 antes posible: Europa: sale@onkronde / +494029996807 Estados Unidos: sa e@onkron.us / +13159682278 Federazione Russa: support@onkron.ru / +78007772176 Europa: sale@onkron.de / +494029996807 Leggere completamente...
- Seite 5 Erep ciane cypayvap HeMece Kea-KenreH Macenenep TYblHaaca, 6i36eH Etats-Unis: sale@onkron.us / +13159682278 Ke3 KenreH yaKblTTa 6annaHblca anacb13, 6i3 ci3re KOMeKTeceMi3: Europe: sa e@onkron.de / +494029996807 Pece": support@onkron.ru / +78007772176 Russie: support@onkron.ru / +78007772176 MOHTaxaaYAbl XöHe OPHaTYAbl6acTaMac 6YPblHOCbl Lisez ce mode d'emploi...
- Seite 6 Ø10 mm (3/8") B (x8) D (xl) E (xl) J (xl) 4mm (xl) 6mm (xl) K (x2) G (x5) M4x12 (x8) M4x16 (x8) M6x12 (x8) M6x16 (x8) D6 (x8) M-F (x8) ONKRON...
- Seite 7 Sie ihn mit der Hand von oben fest, da er npnnepxme ero cBepxy PYK0ü, 1,1HageOHMOXeT pop up to hurt your jaw. sonst herausspringen hr Kinn verletzen BblCKOHhTb nopaHVITb Baw noa60POAOK. könnte. ONKRON...
- Seite 8 Setzen Sie die Halterung auf den Tisch und ziehen la-5. Instal key holder (E) on the mount, as Sie die Klammer durch Anziehen der Flügelmutter fest. Ha KPOHLLITeVIH. shown. la-S. Befestigen Sie den Schlüsselhalter (E) an der ONKRON Halterung.
- Seite 9 Montieren Sie die Halterung durch das Loch in lb-4. YCTaHOBl.1Te CKB03boraepcrme der Tischplatte und befestigen Sie sie an der CTOneLUHVlUe VI aaKpenl,1Te C HVIXHeVl CTOPOHbl CTOneUJHhUbl nnaHKOLül (I) raviKOV1 ( J). Unterseite des der Arbeitsplatte mit der Dichtung (l) und der Schraube (J). ONKRON...
- Seite 10 KynepoB. 2. Install the protective pads (B) 2. Bringen Sie die elastischen Einsdtze (B) 2. YCTaHOBl.q-re snac-rw-4Hble BCTaBKl.•1 (B) Ha each VESA panel of the mount (A). an jeder VESA Halterungsplatte (A) an Kaxmyo VESA naHeJ1b KPOHUJTeVIHa (A). 10 ONKRON...
- Seite 11 (M). Make sure the screen is an der Ha terung, so dass die Schrauben naHeTlV1. 3.3. 3aKpYTb,1Te AO ynopa BVlHTbl securely fixed. die oberen Schlitze der VESA- Platte passen. c nOMOLUblO Knoqa (M). 3.3. Ziehen oberen Schrauben einem Schraubenschlüssel Anschlag ONKRON...
- Seite 12 VESA Platte oder spacers (M-F). Use the key (M). Schrauben Sie die oberen Schrauben (M-B) 60V1(M-E), ncnonb3Y'R BTYfiKY(M-F) c und (M-D) mit Unterlegscheibe (M-E) ein, n0MOLUbK) Knowa (M). unter Verwendung der Tüllen (M-F) mit Hilfe eines Schraubenschlüssels (M). 12 ONKRON...
-
Seite 13: Stellen Sie Die Neigungsschraube
BVIHT, e cnv-l He06XOAVIMO. Bocn0Tlb3yVITecsKTUOHOM (M). ATTENTION: Repeat steps 3.1 to 5.2 for the WARNUNG: Wiederholen Sie die Schritte BHMMAHME: noBTOPhTe AeÜCTBV19, Y Ka3aHHble B second screen. 3.1.-5.2. für den zweiten Monitor. nyHKTax 3.1. - 5.2. BToporo MOHVlTOPa. ONKRON... - Seite 14 6.1. Slide the ower cable management pane 6.1. Schieben Sie den unteren Kunststoff 6.1. CABMHbTe HVIXHVIVInnaCTVIKOBblVl Ka6ens- upwards. Remove it careful y. kabelkanal nach oben. Entfernen KaHan BBepx. 6.2. Remove upper cable management vorsichtig. AKKypaTH0 CHVIMVlTe e ro. 6.2. Drücken Sie leicht auf die Stopfen 6.2.
- Seite 15 3600 3600 2700 7. Set desirable position of the screens. 7. Stellen Position Monitore ein. MOHMTOPOB. 7.1. Portrait mode. 7.1. Hochformatige Anordnung. 7.1. noprpeTHa9 OPÆHTCILVI*. 7.2. Landscape mode. 7.2. Horizontale Anordnung. 7.2. AJIb60M}-qa9opueHTa14L,1R. ONKRON...
- Seite 16 Learn more Mehr Informationen Learn more nonp06Hee o npoAYKTe www.onkron.us www.onkron.de www.onkron-uk.co.uk www.onkron.ru 20220505...