Inhaltsverzeichnis
Werbung
Verfügbare Sprachen
Verfügbare Sprachen
Quicklinks
Istruzioni per l'uso
I
GB
Italiano,1
English,15
Deutsch,43
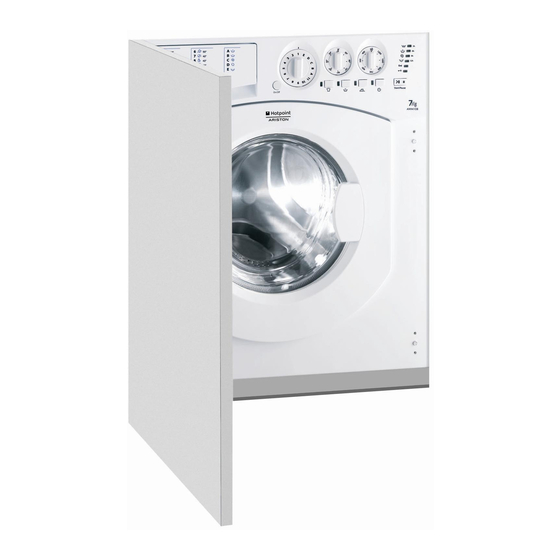
HWML 109
Sommario
Installazione, 2-3-4-5
FR
Français,29
un programma, 8-9
Spie
Avviare un programma
Programmi, 10
Assistenza, 14
LAVABIANCHERIA
I
1
Werbung
Kapitel
Inhaltsverzeichnis
Fehlerbehebung

Verwandte Anleitungen für Hotpoint Ariston HWML 109 EU


Inhaltszusammenfassung für Hotpoint Ariston HWML 109 EU
-
Seite 1: Inhaltsverzeichnis
Istruzioni per l’uso LAVABIANCHERIA Sommario Installazione, 2-3-4-5 Disimballo e livellamento Collegamenti idraulici ed elettrici Italiano,1 English,15 Français,29 Primo ciclo di lavaggio Dati tecnici Istruzioni per l’installatore Manutenzione e cura, 6 Escludere acqua e corrente elettrica Pulire la lavabiancheria Deutsch,43 Pulire il cassetto dei detersivi Curare oblò... -
Seite 2: Installazione
Installazione ! È importante conservare questo libretto per Un accurato livellamento dà stabilità alla poterlo consultare in ogni momento. In caso di macchina ed evita vibrazioni, rumori e spo- vendita, di cessione o di trasloco, assicurarsi stamenti durante il funzionamento. In caso di che resti insieme alla lavabiancheria per infor- moquette o di un tappeto, regolare i piedini in mare il nuovo proprietario sul funzionamento e... -
Seite 3: Collegamento Elettrico
Collegamento del tubo di scarico ! Non usare prolunghe e multiple. Collegare il tubo di ! Il cavo non deve subire piegature o compres- scarico, senza pie- sioni. garlo, a una condut- tura di scarico o a ! Il cavo di alimentazione deve essere sostituito uno scarico a muro solo da tecnici autorizzati. -
Seite 4: Istruzioni Per L'installatore
Istruzioni per l’installatore Accessori montaggio portina (Fig. 1-2-3-4-5). Applicazione del pannello in legno alla porta e inserimento della macchina nei mobili: Nel caso in cui, dopo il montaggio del pannello in legno, sia necessario spedire la macchina per l’installazione finale, consigliamo di lasciarla nel suo imballo originale. - Seite 5 Uso della maschera di foratura. - Per tracciare le posizioni dei fori sul lato sinistro del pannello, allinerare la maschera di foratura al lato superiore e sinistro del pannello facendo riferimento alle linee tracciate alle estremità. - Per tracciare le posizioni dei fori sul lato destro del pannello, allinerare la maschera di foratura al lato superiore e destro del pannello.
-
Seite 6: Manutenzione E Cura
Manutenzione e cura Escludere acqua e corrente elet- Per accedere alla precamera: trica 1. svitare il coper- chio ruotandolo in • Chiudere il rubinetto dell’acqua dopo ogni lavag- senso antiorario gio. Si limita così l’usura dell’impianto idraulico (vedi figura): è nor- della lavabiancheria e si elimina il pericolo di male che fuoriesca perdite. -
Seite 7: Precauzioni E Consigli
Precauzioni e consigli Il simbolo del cestino barrato è riportato su tutti i prodotti La lavabiancheria è stata progettata e costruita in conformi- per ricordare gli obblighi di raccolta separata. tà alle norme internazionali di sicurezza. Queste avvertenze Per ulteriori informazioni, sulla corretta dismissione sono fornite per ragioni di sicurezza e devono essere lette degli elettrodomestici, i detentori potranno rivolgersi al attentamente. -
Seite 8: Descrizione Della Lavabiancheria E Avviare Un Programma
Descrizione della lavabiancheria e avviare un programma Pannello di controllo SPIE AVANZAMENTO CICLO/ PARTENZA RITARDATA Manopola CENTRIFUGA Spia ON/OFF Tasto OBLÒ Manopola BLOCCATO TEMPERATURA Tasti con spie Manopola FUNZIONE Tasto con spia PROGRAMMI START/ Cassetto dei detersivi PAUSE Cassetto dei detersivi: per caricare detersivi e additivi Tasto START/PAUSE: per avviare i programmi o inter- (vedi “Detersivi e biancheria”). - Seite 9 Spie Spie fase in corso Una volta selezionato e avviato il ciclo di lavaggio desidera- to, le spie si accenderanno progressivamente per indicarne Le spie forniscono informazioni importanti. lo stato di avanzamento: Ecco che cosa dicono: Lavaggio Partenza ritardata Se è stata attivata la funzione “Partenza ritardata” (vedi Risciacquo “Personalizzazioni”), dopo avere avviato il programma, ini- zierà...
-
Seite 10: Programmi
Programmi Tabella dei programmi Detersivi Velocità Temp. max. Descrizione del Programma max. (giri al (°C) minuto) 1 Cotone + Prelavaggio: Bianchi estremamante sporchi. 90° 1000 62 2,21 78 170’ Cotone Standard 60° (1): Bianchi e colorati resistenti 60°... -
Seite 11: Personalizzazioni
Personalizzazioni Impostare la temperatura Ruotando la manopola TEMPERATURA si imposta la temperatura di lavaggio (vedi Tabella programmi). La temperatura si può ridurre sino al lavaggio a freddo ( ). La macchina impedirà automaticamente di impostare una tempe- ratura maggiore a quella massima prevista per ogni programma. Eccezione: selezionando il programma 2 la temperatura può... -
Seite 12: Detersivi E Biancheria
Detersivi e biancheria Cassetto dei detersivi Capi particolari Il buon risultato del lavaggio dipende anche dal corretto Camicie: utilizzare l’apposito programma 11 per lavare dosaggio del detersivo: eccedendo non si lava in modo più camicie di diversi tipo di tessuto e colore. efficace e si contribuisce a incrostare le parti interne della Ne garantisce la massima cura minimizzando la lavabiancheria e a inquinare l’ambiente. -
Seite 13: Anomalie E Rimedi
Anomalie e rimedi Può accadere che la lavabiancheria non funzioni. Prima di telefonare all’Assistenza (vedi “Assistenza”), controllare che non si tratti di un problema facilmente risolvibile aiutandosi con il seguente elenco. Anomalie: Possibili cause / Soluzione: La lavabiancheria • La spina non è inserita nella presa della corrente, o non abbastanza non si accende. -
Seite 14: Assistenza
Assistenza Prima di contattare l’Assistenza: • Verificare se l’anomalia può essere risolta da soli (vedi “Anomalie e rimedi”); • Riavviare il programma per controllare se l’inconveniente è stato ovviato; • In caso negativo, contattare il Numero Unico 199.199.199*. Non ricorrere mai a tecnici non autorizzati. Comunicare: •... - Seite 15 Instructions for use WASHING MACHINE Contents Installation, 16-17-18-19 Unpacking and levelling Connecting the electricity and water supplies English The first wash cycle Technical data Instructions for the fitter Care and maintenance, 20 Cutting off the water or electricity supply Cleaning the washing machine Cleaning the detergent dispenser drawer Caring for the door and drum of your appliance Cleaning the pump...
-
Seite 16: Installation
Installation ! This instruction manual should be kept in a Levelling the machine correctly will provide safe place for future reference. If the washing it with stability, help to avoid vibrations and machine is sold, transferred or moved, make excessive noise and prevent it from shifting sure that the instruction manual remains with while it is operating. -
Seite 17: Electrical Connections
Connecting the drain hose ! When the washing machine has been installed, the electricity socket must be within easy reach. Connect the drain hose, without bending ! Do not use extension cords or multiple sockets. it, to a drainage duct or a wall drain located ! The cable should not be bent or compressed. -
Seite 18: Instructions For The Fitter
Instructions for the fitter Door Mounting Accessories (Fig. 1-2-3-4-5). Mounting the wooden panel onto the door and inserting the machine into cabinets: In the case where the machine must be ship- ped for final installation after the wooden panel has been mounted, we suggest leaving it in its original packaging. - Seite 19 Using the Drilling Template. - To trace the positions of the holes on the left- hand side of the panel, align the drilling tem- plate to the top left side of the panel using the lines traced on the extremities as a reference. - To trace the positions of the holes on the right-hand side of the panel, align the drilling template to the top right side of the panel.
-
Seite 20: Care And Maintenance
Care and maintenance Cutting off the water and electri- To access the pre-chamber: city supplies 1. unscrew the lid by rotating it anti- • Turn off the water tap after every wash cycle. clockwise (see figu- This will limit wear on the hydraulic system re): a little water may inside the washing machine and help to pre- trickle out. -
Seite 21: Precautions And Tips
Precautions and tips your obligation, that when you dispose of the appliance it This washing machine was designed and constructed in must be separately collected. accordance with international safety regulations. The fol- Consumers should contact their local authority or retailer lowing information is provided for safety reasons and must for information concerning the correct disposal of their old therefore be read carefully. -
Seite 22: Description Of The Washing Machine And Starting A Wash Cycle
Description of the washing machine and starting a wash cycle Control panel WASH CYCLE PROGRESS/ DELAY TIMER indicator lights SPIN SPEED DOOR knob LOCKED indicator light TEMPERATURE ON/OFF button knob FUNCTION WASH CYCLE START/ buttons with knob Detergent dispenser drawer PAUSE indicator lights button with... -
Seite 23: Indicator Lights
Indicator lights Wash cycle phase indicator lights Once the desired wash cycle has been selected and has be- gun, the indicator lights switch on one by one to indicate which The indicator lights provide important information. phase of the cycle is currently in progress. This is what they can tell you: Wash Delayed start... -
Seite 24: Wash Cycles
Wash cycles Table of wash cycles Detergents Max. Max. Description of the wash cycle speed temp. (°C) (rpm) 90° 1000 62 2,21 78 170’ Cotton + Prewash: extremely soiled whites. 60° 1000 62 1,26 52,5 190’ Cotton Standard 60°... -
Seite 25: Personalisation
Personalisation Setting the temperature Turn the TEMPERATURE knob to set the wash temperature (see Table of wash cycles). The temperature may be lowered, or even set to a cold wash ( ). The washing machine will automatically prevent you from selecting a temperature which is higher than the maximum value set for each wash cycle. -
Seite 26: Detergents And Laundry
Detergents and laundry Detergent dispenser drawer How much does your laundry weigh? 1 sheet 400-500 g Good washing results also depend on the correct dose of 1 pillow case 150-200 g detergent: adding too much detergent will not necessa- 1 tablecloth 400-500 g rily result in a more efficient wash, and may in fact cause 1 bathrobe 900-1200 g build up on the inside of your appliance and contribute to... -
Seite 27: Troubleshooting
Troubleshooting Your washing machine could fail to work. Before contacting the Technical Assistance Centre (see “Assistance”), make sure that the problem cannot be not solved easily using the following list. Problem: Possible causes / Solutions: The washing machine does not •... -
Seite 28: Service
Service Before calling for Assistance: • Check whether you can solve the problem alone (see “Troubleshooting”); • Restart the programme to check whether the problem has been solved; • If this is not the case, contact an authorised Technical Assistance Centre using the telephone number provided on the guarantee certificate. - Seite 29 Mode d’emploi LAVE-LINGE Sommaire Installation, 30-31-32-33 Déballage et mise à niveau Raccordements eau et électricité Français Premier cycle de lavage Caractéristiques techniques Instructions pour l’installateur Entretien et soin, 34 Coupure de l’arrivée d’eau et du courant Nettoyage du lave-linge Nettoyage du tiroir à produits lessiviels. Entretien du hublot et du tambour Nettoyage de la pompe Contrôle du tuyau d’arrivée de l’eau...
-
Seite 30: Installation
Installation ! Conserver ce mode d’emploi pour pouvoir Une bonne mise à niveau garantit la stabilité le consulter à tout moment. En cas de vente, de l’appareil et évite qu’il y ait des vibrations, de cession ou de déménagement, veiller à du bruit et des déplacements en cours de ce qu’il suive toujours le lave-linge pour que fonctionnement. -
Seite 31: Branchement Électrique
Raccordement du tuyau de vidange ! Après installation du lave-linge, la prise de courant doit être facilement accessible. Raccorder le tuyau d’évacuation, sans ! N’utiliser ni rallonges ni prises multiples. le plier, à un conduit d’évacuation ou à une ! Le câble ne doit être ni plié ni trop écrasé. évacuation murale placés à... -
Seite 32: Instructions Pour L'installateur
Instructions pour l’installateur Accessoires montage porte (Fig.1-2-3-4-5). Application du panneau d’habillage en bois sur la porte et montage du machi- ne à laver à l’intérieur des éléments: Au cas où, après le montage du panneau en bois, il faudrait expédier la machine pour son installation finale, nous vous conseillons de la laisser dans son emballage d’origine. - Seite 33 Utilisation du gabarit de forage. - Pour marquer l’emplacement des trous sur le côté du panneau, alignez le gabarit de perçage avec le côté supérieur gauche du panneau en vous servant des lignes tracées aux extrémités. - Pour marquer l’emplacement des trous sur le côté...
-
Seite 34: Entretien Et Soin
Entretien et soin Coupure de l’arrivée d’eau et du Pour accéder à cette préchambre: courant 1. dévisser le cou- vercle en le tournant • Fermer le robinet de l’eau après chaque dans le sens inverse lavage. Cela réduit l’usure de l’installation des aiguilles d’une hydraulique du lave-linge et évite tout danger montre (voir figure): il... -
Seite 35: Précautions Et Conseils
Précautions et conseils apposée sur tous les produits pour rappeler les obligations Ce lave-linge a été conçu et fabriqué conformément aux nor- de collecte séparée. Les consommateurs devront contac- mes internationales de sécurité. Ces consignes sont fournies ter les autorités locales ou leur revendeur concernant la pour des raisons de sécurité, il faut les lire attentivement. -
Seite 36: Description Du Lave-Linge Et Démarrage D'un Programme
Description du lave-linge et démarrage d’un programme DÉROULEMENT Bandeau de commandes Voyants CYCLE/DÉPART DIFFÉRÉ Bouton Voyant ESSORAGE HUBLOT VERROUILLÉ ON/OFF Touche Bouton TEMPÉRATURE Tiroir à produits lessiviels Bouton Touches avec voyants PROGRAMMES FONCTION Touche avec voyant START/PAUSE Tiroir à produits lessiviels: pour charger les produits Touche avec voyant START/PAUSE: pour démarrer les lessiviels et les additifs (voir “Produits lessiviels et linge”). -
Seite 37: Démarrage D'un Programme
Voyants Voyants phase en cours Une fois que le cycle de lavage sélectionné a démarré, les voyants s’allument progressivement pour indiquer son Les voyants fournissent des informations importantes. stade d’avancement: Voilà ce qu’ils signalent: Lavage Départ différé Si la fonction “Départ différé” a été activée (voir “Personnali- Rinçage sations”), le voyant correspondant au temps sélectionné... -
Seite 38: Programmes
Programmes Tableau des programmes Produits lessiviels Vitesse Temp. maxi. maxi Description du Programme (°C) (tours minute) Coton + Prelavage: blancs extrêmement sales. 90° 1000 2,21 78 170’ 60° 1000 1,26 52,5 190’ Coton standard 60°C (1): blancs et couleurs résistantes très sales. (Max.90°) 40°... -
Seite 39: Personnalisations
Personnalisations Sélection de la température Tourner le bouton TEMPÉRATURE pour sélectionner la température de lavage (voir Tableau des programmes). La température peut être abaissée jusqu’au lavage à froid ( ). La machine interdira automatiquement toute sélection d’une température supérieure à la température maximale prévue pour chaque programme. ! Exception: lors de la sélection du programme 2 la température peut être augmentée jusqu’à... -
Seite 40: Produits Lessiviels Et Linge
Produits lessiviels et linge Tiroir à produits lessiviels Linge ou vêtements particuliers Chemises: sélectionner le programme 11 approprié au Un bon résultat de lavage dépend aussi d’un bon dosage de produit lessiviel: un excès de lessive ne lave pas mieux, lavage de chemises de couleurs et textiles différents. -
Seite 41: Anomalies Et Remèdes
Anomalies et remèdes Il peut arriver que le lave-linge ne fonctionne pas bien. Avant d’appeler le Service de dépannage (voir “Assistance”), contrôler s’il ne s’agit pas par hasard d’un problème facile à résoudre à l’aide de la liste suivante. Anomalies: Causes / Solutions possibles: Le lave-linge ne s’allume pas. -
Seite 42: Assistance
Assistance Avant d’appeler le service après-vente: • Vérifier si on ne peut pas résoudre l’anomalie par ses propres moyens (voir “Anomalies et Remèdes”); • Remettre le programme en marche pour contrôler si l’inconvénient a disparu; • Autrement, contacter le Centre d’Assistance technique agréé au numéro de téléphone indiqué sur le certificat de garantie. Ne jamais s’adresser à... - Seite 43 Bedienungsanleitungen WASCHVOLLAUTOMAT INHALTSVERZEICHNIS Installation 44-45-46-47 Auspacken und Aufstellen Wasser- und Elektroanschlüsse Deutsch Erster Waschgang Technische Daten Anleitungen für den Installateur Reinigung und Pflege 48 Abstellen der Wasser- und Stromversorgung Reinigung des Gerätes Reinigung der Waschmittelschublade Pflege der Gerätetür und Trommel Reinigung der Pumpe Kontrolle des Wasserzulaufschlauchs Vorsichtsmaßregeln und Hinweise 49...
-
Seite 44: Installation
Installation ! Es ist äußerst wichtig, diese Bedienungsanlei- Eine präzise Nivellierung verleiht dem Gerät die tung sorgfältig aufzubewahren, um sie jederzeit erforderliche Stabilität, durch die Vibrationen, zu Rate ziehen zu können. Sorgen Sie dafür, Betriebsgeräusche und ein Verrücken des dass sie im Falle eines Umzugs oder einer Über- Gerätes vermieden werden. -
Seite 45: Stromanschluss
Anschluss des Ablaufschlauches ! Verwenden Sie bitte keine Verlängerungen oder Mehrfachstecker. Schließen Sie den ! Das Netzkabel darf nicht gebogen bzw. ein- Ablaufschlauch ohne geklemmt werden. ihn dabei abzuknicken ! Das Versorgungskabel darf nur durch autori- an einen geeigneten sierte Fachkräfte ausgetauscht werden. Abfluss an. -
Seite 46: Anleitungen Für Den Installateur
Anleitungen für den Installateur Montagezubehör für die Tür (Abb. 1-2-3-4-5). Montage des Holzpaneels auf die Tür und Einfügen der maschine in die Möbel: Falls nach der Montage des Holzpaneels eine Versendung zur End-Installation der Maschine notwendig ist, empfehlen wir, die Maschine in ih- rer ursprünglichen Verpackung zu belassen. -
Seite 47: Befestigung Der Sockelführung
Gebrauch der Bohrschablone. a) Zur Positionsmarkierung der Bohrungen auf der linken Seite des Paneels, legen Sie die Boh- rmaske oben links am Paneel an und halten Sie sich an die an den Enden markierten Linien. b) Zur Positionsmarkierung der Bohrungen auf der rechten Seite des Paneels, legen Sie die Boh- rmaske oben rechts am Paneel an. -
Seite 48: Reinigung Und Pflege
Reinigung und Pflege Abstellen der Wasser- und Strom- Zugang zur Vorkammer: versorgung 1. Drehen Sie den Deckel gegen den • Drehen Sie den Wasserhahn nach jedem Uhrzeigersinn ab Waschvorgang zu. Hierdurch wird der Ver- (siehe Abbildung): es schleiß der Wasseranlage verringert und ist ganz normal, wenn Wasserlecks vorgebeugt. -
Seite 49: Vorsichtsmaßregeln Und Hinweise
Vorsichtsmaßregeln und Hinweise und die Einflüsse auf die Umwelt und die Gesundheit zu Der Waschvollautomat wurde nach den strengsten inter- reduzieren. Das Symbol „durchgestrichene Mülltonne“ nationalen Sicherheitsvorschriften entworfen und gebaut. auf jedem Produkt erinnert Sie an Ihre Verpflichtung, Nachstehende Hinweise werden aus Sicherheitsgründen dass Elektrohaushaltsgeräte gesondert entsorgt werden geliefert und sollten aufmerksam gelesen werden. -
Seite 50: Beschreibung Des Waschvollautomaten Und Starten Eines Waschprogramms
Beschreibung des Waschvollautomaten und Starten eines Waschprogramms Bedienblende Kontrollleuchten PROGRAMMABLAUF/ STARTZEITVORWAHL Wählschalter Kontrollleuchte SCHLEUDERN GERÄTETÜR GESPERRT ON/OFF Taste Wählschalter TEMPERATUREN Wählschalter Taste mit Tasten mit PROGRAMME Kontrollleuchte Waschmittelschublade Kontrollleuchten START/ FUNKTIONEN PAUSE Waschmittelschublade: für Waschmittel und Zusätze Kontrollleuchte GERÄTETÜR GESPERRT: Diese Taste (siehe „Waschmittel und Wäsche“). -
Seite 51: Kontrollleuchten
Kontrollleuchten Laufende Programmphase Wurde das Waschprogramm gewählt und gestartet, leuchten die Kontrollleuchten nach und nach auf, und Die Kontrollleuchten liefern wichtige Hinweise. zeigen so den jeweiligen Programmstand an. Sie signalisieren: Hauptwäsche Startzeitvorwahl Wurde die Funktion „Startzeitvorwahl” (siehe „Personalisie- Spülen rungen“) aktiviert, und das Programm in Gang gesetzt, Schleudern schaltet die Kontrollleuchte, die der eingestellten Zeitver- schiebung entspricht, auf Blinklicht:... -
Seite 52: Waschprogramme
Waschprogramme Programmtabelle Waschmittel Max. Schleu- Max. der Ge- Beschreibung des Programms Temperatur schwin- (°C) digkeit (U/min) Baumwolle + Voräsche: stark verschmutzte Weißwäsche. 90° 1000 62 2,21 78 170’ Baumwolle 60° (1): stark verschmutzte Weiß- und far- 60° 1000 62 1,26 52,5 190’... -
Seite 53: Personalisierungen
Personalisierungen Temperatureinstellung Drehen Sie den Wählschalter „TEMPERATUREN“, um die Waschtemperatur einzustellen (siehe Programmtabelle). Die Temperatur kann bis auf Kaltwäsche ( ) herabgesetzt werden. Der Waschvollautomat verhindert automatisch die Einstellung einer höheren Schleuderstufe, sollte diese die für das jeweilige Programm vorgeschriebene Höchstgeschwindigkeit übersteigen. ! Ausnahme: Wird das Waschprogramm 2 eingestellt, kann die Temperatur bis auf 90°... -
Seite 54: Waschmittel Und Wäsche
Waschmittel und Wäsche Waschmittel und Wäsche Wie schwer ist Wäsche? 1 Betttuch 400-500 gr Ein gutes Waschergebnis hängt auch von einer korrekten 1 Kissenbezug 150-200 gr Waschmitteldosierung ab: Eine zu hohe Dosierung bedeu- 1 Tischdecke 400-500 gr tet nicht unbedingt reinere Wäsche, sie trägt nur dazu bei, 1 Bademantel 900-1.200 gr die Maschineninnenteile zu verkrusten und die Umwelt zu 1 Handtuch 150-250 gr... -
Seite 55: Störungen Und Abhilfe
Störungen und Abhilfe Bei Funktionsstörung: Bevor Sie sich an den Technischen Kundendienst wenden (siehe „Kundendienst“), vergewissern Sie sich zuerst, ob es sich nicht um eine Kleinigkeit handelt, die Sie selbst beheben können. Ziehen Sie hierzu nachstehendes Verzeichnis zu Rate. Störungen: Mögliche Ursachen / Lösungen: Der Waschvollautomat schaltet sich •... -
Seite 56: Kundendienst
Kundendienst 195120027.01 02/2014 - Xerox Fabriano Bevor Sie sich an den Kundendienst wenden: • Sollten einige Kontrollen vorab selbst durchgeführt werden (siehe „Störungen und Abhilfe“); • Starten Sie daraufhin das Programm erneut, um sicherzustellen, dass die Störung auch wirklich behoben wurde; •...