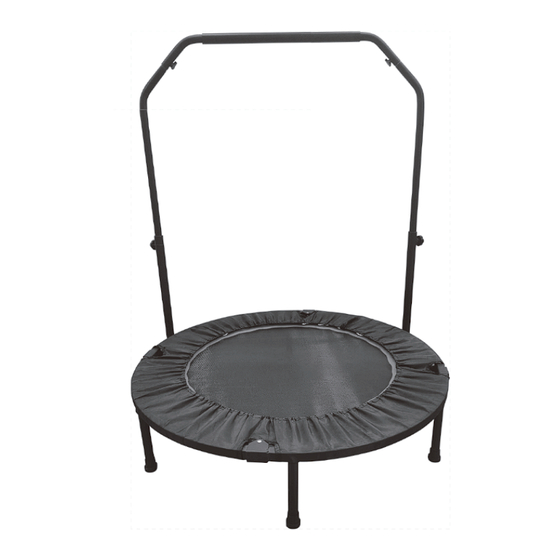
Inhaltszusammenfassung für HOMCOM A71-034V00
- Seite 1 IN230300102V02_UK_ES_DE A71-034V00 Yoga Trampoline *The maximum user weight is 100 Kg *Please check the legs of the trampoline are firmly installed. IMPORTANT, RETAIN FOR FUTURE REFERENCE: READ CAREFULLY UESR’S MANUAL...
- Seite 4 Product analysis diagram Armrest cross Right armrest bracket Trampoline Pentagonal screw Bracket link Triangle screw Safety bolt Leg tube...
- Seite 5 Part list 1.Trampoline x1 2.Protective case x1 3.Armrest bracket x2 4.Bracket link x2 5.Armrest cross x1 6.Leg tube x6 Mute foot plug x6 Pentagonal screw x2 Long pentagonal screw x2 Safety bolt x2...
- Seite 6 Installation steps Fig. 1 Fig. 2 Fig. 3 Fig. 4 Fig. 5 Step 1: Place the trampoline on the floor in its folded position (Fig. 1), pull the left and right sides, so the trampoline is in a semi circle. Ensure the folding clamp stick is close to the ground (Fig.
- Seite 7 Fig. 6 Fig. 7 Fig. 8 Fig. 9 Step 5: Pull out the silent foot plug or suction cup, put the support connecting rod on the two feet respectively (Fig. 6), then lock with triangle screws. When screwing the foot tube, hold it and not the support rod. Step 6: After connecting the handrail bracket with the cross bar, tighten with triangle screws (Fig.
- Seite 8 IN230300102V02_UK_ES_DE A71-034V00 Trampolín de yoga El peso máximo del usuario no puede exceder 100 Kg. *Comprueba que las patas del trampolín estén firmemente instaladas. IMPORTANTE - CONSERVE ESTA INFORMACIÓN PARA SU CONSULTA POSTERIOR: LEER DET ALLA DAMENTE MANUAL DE INSTRUCCIONES...
- Seite 11 Diagrama de análisis de producto Armrest corss Right armrest bracket Trampoline Pentagonal screw Bracket link Triangle screw Safety bolt Leg tube...
- Seite 12 Lista de piezas 1.Trampolín x1 2.Funda protectora x1 3.Soporte de reposabrazos x2 4.Bracket link x2 5.Barra transversal x1 6.Tubo de la pata x6 Tapón del pie silencioso x6 Tornillo pentagonal x2 Tornillo largo pentagonal x2 Perno de seguridad x2...
- Seite 13 Pasos de instalación Fig. 1 Fig. 2 Fig. 3 Fig. 4 Fig. 5 Paso 1: Coloca el trampolín en el suelo en su posición plegada (Fig. 1), tira de los lados izquierdo y derecho para que el trampolín quede en forma de semicírculo. Asegúrate de que el dispositivo de sujeción plegable esté...
- Seite 14 Fig. 6 Fig. 7 Fig. 8 Fig. 9 Paso 5: Saca el tapón del pie silencioso o ventosa, coloca la barra de conexión del soporte en los dos pies respectivamente (Fig. 6), luego asegúralos con tornillos triangu- lares. Al enroscar el tubo del pie, sujétalo y no la barra de soporte. Paso 6: Después de conectar el soporte del reposabrazos con la barra transversal, aprieta con tornillos triangulares (Fig.
- Seite 15 IN230300102V02_UK_ES_DE A71-034V00 Yogatrampolin *Das maximale Benutzergewicht beträgt 100 kg. *Bitte überprüfen Sie, ob die Beine des Trampolins fest installiert sind. WICHTIG - BITTE HEBEN SIE DIESE ANLEITUNG FÜR EINE SPÄTERE BEZUGNAHME AUF: SORGFÄLTIG DURCHLESEN MONTAGEANLEITUNG...
- Seite 18 Produktanalyse-Diagramm Armlehrenkreuz Rechter Armlehrenhalter Trampolin Pentagon-Schraube Halteklammer Dreiecksschraube Sicherungsbolzen Beinrohr...
- Seite 19 Teileliste 1.Trampolin x1 2.Schutzabdeckung x1 3.Armlehrenhalter x2 4.Halteklammer x2 5.Armlehrenkreuz x1 6.Beinrohr x6 Geräuschlose Fußstopfen x6 Pentagon-Schraube x2 Lange Pentagon-Schraube x2 Sicherungsbolzen x2...
- Seite 20 Installationsanleitung Abb. 1 Abb. 2 Abb. 3 Abb. 4 Abb. 5 Schritt 1: Platzieren Sie das Trampolin im zusammengeklappten Zustand auf dem Boden (Abb. 1), ziehen Sie dann die linken und rechten Seiten, sodass das Trampolin einen Halbkreis bildet. Stellen Sie sicher, dass die Klappklammer nah am Boden ist (Abb.
- Seite 21 Abb. 6 Abb. 7 Abb. 8 Abb. 9 Schritt 5: Ziehen Sie den geräuschlosen Fußstopfen oder Saugnapf heraus, legen Sie die Stützverbindungsstange jeweils auf die beiden Füße (Abb. 6) und befestigen Sie sie dann mit Dreiecksschrauben. Halten Sie beim Eindrehen des Fußrohrs das Fußrohr und nicht die Stützstange fest.


