Herunterladen Diese Seite drucken

Werbung

Verfügbare Sprachen
  • DE

Verfügbare Sprachen

  • DEUTSCH, seite 40
ENE RGYS I LE NCE A ERO 5 40
Ventilador de techo de 60 W y 52" con luz LED
60-W and 52" ceiling fan with LED light.
Manual de instrucciones
Instruction manual
Manuel d'instructions
Bedienungsanleitung
Manuale di istruzioni
Manual de instruções
Handleiding
Instrukcja obsługi
Návod k použití

Werbung

loading

Inhaltszusammenfassung für cecotec ENERGYSILENCE AERO 540

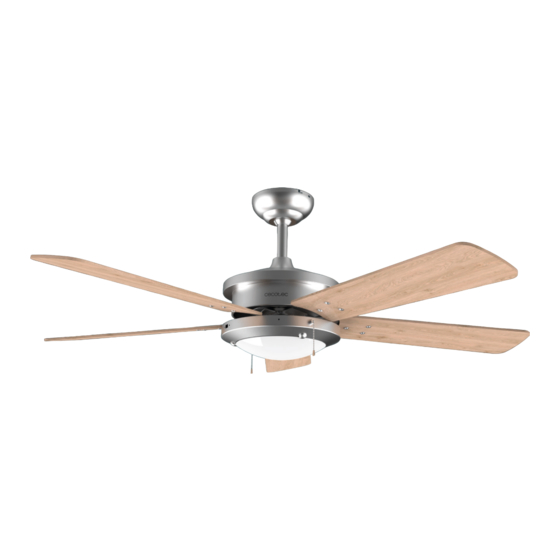
  • Seite 1 ENE RGYS I LE NCE A ERO 5 40 Ventilador de techo de 60 W y 52” con luz LED 60-W and 52” ceiling fan with LED light. Manual de instrucciones Instruction manual Manuel d’instructions Bedienungsanleitung Manuale di istruzioni Manual de instruções Handleiding Instrukcja obsługi Návod k použití...
  • Seite 3 INDICE Instrucciones de seguridad Safety instructions 1. Parti e componenti Instructions de sécurité 2. Prima dell’uso Sicherheitshinweise 3. Montaggio del prodotto Istruzioni di sicurezza 4. Funzionamento Instruções de segurança 5. Pulizia e manutenzione Veiligheidsvoorschriften 6. Specifiche tecniche Instrukcje bezpieczeństwa 7. Riciclaggio di elettrodomestici Bezpečnostní...
  • Seite 4 Inspeccione el cable de alimentación regularmente en busca de daños visibles. Si el cable presenta daños, debe ser reparado por el Servicio de Asistencia Técnica oficial de Cecotec para evitar cualquier tipo de peligro. No utilice el producto si el cable, el enchufe o la estructura presentan daños o si no funcionan correctamente, han sufrido...
  • Seite 5 Tenga mucho cuidado si está cerca de las aspas del ventilador. Para controlar la velocidad de las aspas del ventilador, utilice los medios de control de la velocidad proporcionados por Cecotec. No doble ni curve el sistema de agarre de las aspas durante la instalación ni durante la limpieza.
  • Seite 6 Check the power cord regularly for visible damage. If the cord is damaged, it must be replaced by the official Technical Support Service of Cecotec in order to avoid any type of danger. Do not use the appliance if its cord, plug, or housing is damaged, nor after it malfunctions or has been dropped or damaged in any way.
  • Seite 7 Do not bend the blade-attachment system during the installation or cleaning process. Cleaning and maintenance must be carried out according to this instruction manual to make sure the appliance functions properly. Turn off and unplug the appliance before cleaning it. Make sure the fan is not placed close to curtains or other objects that could tangle.
  • Seite 8 S’il présente des dommages, il doit être réparé par le Service Après-Vente Officiel de Cecotec pour éviter tout type de danger. N’utilisez pas l’appareil si le câble, la prise ou la structure en général ne fonctionnent pas correctement, ont souffert une chute ou ont été...
  • Seite 9 Pour assurer le correct fonctionnement de l’appareil, le nettoyage et l’entretien doivent être réalisés en accord avec ce manuel d’instructions. Éteignez et débranchez l’appareil avant de le nettoyer. Assurez-vous que le ventilateur ne soit pas placé près des rideaux ou d’autres objets qui puissent s’emmêler dans le ventilateur.
  • Seite 10 Sie den Ventilator an der Struktur des Gebäudes wie in dieser Bedienungsanleitung beschrieben und benutzen Sie ausschließlich mitgelieferten Teile und Zubehör von Cecotec. Zur Vermediung von Elektrounfälle schalten Sie immer das Stromnetz aus, indem Sie die Stromschalten vor der Montage des Ventilators abschalten.
  • Seite 11 Sie die Geschwindigkeitsregelung des Ventilators von Cecotec. Biegen Sie nicht das Befestigung-System der Ventilatorflügel während der Installation oder der Reinigung. Die Reinigung und die Wartung sollten gemäß dieses Bedienungsanleitung durchgeführt werden, um den korrekten Betrieb des Gerätes zu gewährleisten. Schalten Sie das Gerät aus und trennen Sie es von der Steckdose, bevor Sie es reinigen.
  • Seite 12 Se il cavo dovesse presentare danni, dovrà essere riparato dal Servizio di Assistenza Tecnica ufficiale di Cecotec per evitare qualsiasi tipo di pericolo. Non utilizzare il prodotto se il cavo, la spina o la struttura presenta danni o se non funziona correttamente, ha patito una caduta o è...
  • Seite 13 Prestare molta attenzione se si è vicini alle pale del ventilatore. Per controllare la velocità delle pale del ventilatore, utilizzare i controlli di velocità forniti da Cecotec. Non piegare nè curvare il sistema di presa delle pale durante l’installazione e la pulizia.
  • Seite 14 Inspecione o cabo de alimentação regularmente em busca de danos visíveis. Se o cabo apresentar danos, deve ser reparado pelo Serviço de Assistência Técnica Oficial da Cecotec para evitar qualquer tipo de perigo. Não utilize o produto se o cabo, a tomada ou a estrutura apresentam danos ou se não funciona corretamente, sofreu...
  • Seite 15 Tenha muito cuidado se estiver perto das pás da ventoinha. Para controlar a velocidade das pás da ventoinha, utilize os meios de controlo da velocidade proporcionados pela Cecotec. Não dobre nem curve o sistema de agarre das aspas durante a instalação nem durante a limpeza.
  • Seite 16 Cecotec om het risico op beschadigingen te verkleinen. Verbreek de verbinding met het elektriciteitsnet door de schakelaars in de groepenkast uit te schakelen voordat u de ventilator installeert om het risico op elektrische schokken te vermijden.
  • Seite 17 Wees zeer voorzichtig als u in de buurt van de ventilatorbladen bent. Om de snelheid van de ventilatorbladen te regelen, kunt u gebruik maken van de snelheidsregelaar van Cecotec. Vouw en buig het grijpsysteem van de bladen niet tijdens de installatie of het schoonmaken.
  • Seite 18 Jeśli kabel jest uszkodzony, musi zostać naprawiony przez oficjalny serwis pomocy technicznej Cecotec, aby uniknąć wszelkiego rodzaju zagrożeń. Nie używaj produktu, jeśli przewód, wtyczka lub rama są uszkodzone lub nie działają prawidłowo, zostały upuszczone lub uszkodzone.
  • Seite 19 Zachowaj ostrożność, jeśli znajdujesz się w pobliżu łopatek wentylatora. Aby kontrolować prędkość łopatek wentylatora, użyj środków kontroli prędkości dostarczonych przez Cecotec. Nie zginać ani nie zginać uchwytu ostrza podczas instalacji lub czyszczenia. Aby zapewnić prawidłowe działanie urządzenia, czyszczenie i konserwacja produktu muszą być przeprowadzane zgodnie z niniejszą...
  • Seite 20 že zásuvka je uzemněná. Pravidelně kontrolujte přívodový kabel, abyste zjistili viditelná poškození. Pokud je kabel poškozen, musí být opraven u oficiálního technického servisu Cecotec, aby se tak předešlo jakýmkoli nebezpečím. Přístroj nepoužívejte, pokud kabel, zásuvka nebo samotný...
  • Seite 21 Nikdy neinstalujte ventilátor v místnosti s vysokou vlhkostí. Pokud jste v blízkosti lopatek ventilátoru, buďte velmi opatrní. Pro ovládání rychlosti lopatek ventilátoru použijte prostředky pro regulaci rychlosti poskytované společností Cecotec. Během instalace nebo čištění neohýbejte ani nepřehýbejte systém uchycení lopatek.
  • Seite 22 Saque todos los componentes del producto de la caja y asegúrese de que todos están incluidos y en buenas condiciones. Si observara algún daño visible, contacte de forma inmediata con el Servicio de Asistencia Técnica oficial de Cecotec. 3. MONTAJE DEL PRODUCTO Se requieren las siguientes herramientas para llevar a cabo la instalación: destornillador, destornillador plano, alicates, escalera, pelacables, resina epoxi y cinta aislante.
  • Seite 23 ESPAÑOL Montaje estándar Soporte Montaje en inclinación, en el que el dispositivo se cuelga de un techo abovedado o en pendiente Montaje en inclinación Soporte Instalación de la placa de montaje Techo de madera Fig. 4. Utilice los 4 tornillos autorroscantes y las 4 arandelas proporcionadas para fijar la placa de montaje al techo.
  • Seite 24 ESPAÑOL Pase la varilla central que desea utilizar por el agujero central de la cubierta embellecedora y luego por la bola de suspensión. Asegúrese de que la bola de suspensión está colocada en el extremo con 2 agujeros de pasador y 1 de tornillo. Utilice los tornillos proporcionados para fijar la bola de suspensión de nuevo a la varilla central y vuelva a insertar el pasador y la horquilla.
  • Seite 25 ESPAÑOL Gire el florón hasta que ambos tornillos sujeten de manera segura el dispositivo, inserte de nuevo los tornillos y utilice un destornillador para apretarlos. Aviso: por motivos de seguridad, se recomienda que una persona sujete la escalera durante este paso. Montaje de las aspas Fig.
  • Seite 26 No utilice disolventes ni otros productos químicos para limpiarlo. Utilice un paño suave y húmedo para limpiar la superficie del producto. 6. ESPECIFICACIONES TÉCNICAS Modelo: EnergySilence Aero 540 Referencia del producto: 05941 60 W, 220-240 V ~ 50 Hz 12 W (máx.) LED Fabricado en China | Diseñado en España...
  • Seite 27 Si en alguna ocasión detecta una incidencia con el producto o tiene alguna consulta, póngase en contacto con el Servicio de Asistencia Técnica oficial de Cecotec a través del número de teléfono +34 96 321 07 28.
  • Seite 28 Take all the product components out of the box and make sure all of them are included and in good conditions. If any visible signs of damage are observed, contact immediately the Technical Support Service of Cecotec. 3. PRODUCT ASSEMBLY The following tools are required to carry out the installation: Screwdriver, flat-head screwdriver,adjustable pliers or wrench, stepladder, wire cutter, epoxy resin and rated electrical tape.
  • Seite 29 ENGLISH Standard assembly where the device hangs from a straight flat ceiling. Standard assembly Support Angled assembly where the device hangs from a vaulted or angled ceiling. Angled assembly Support Mounting bracket assembly Wooden ceiling Fig. 4. Use the 4 provided self-tapping screws with its corresponding 4 washers to fix the mounting bracket to the ceiling.
  • Seite 30 ENGLISH Pass the desired down rod through the decorative cover’s centre hole and then introduce it in the hanging ball again. Make sure the hanging ball is placed in the end with 2 pin holes and 1 screw hole. Use the screws provided to tighten back the hanging ball to the rod and insert the stop pin and stop pin’s clip again.
  • Seite 31 ENGLISH Note: For safety reasons, it is suggested that 1 person holds the stepladder during this step. Blade assembly Fig. 8. Remove the 15 blade-fastening screws from the motor housing’s lower part. Introduce the blades in their respective slots, make sure the holes on the blade’s ends match the screw holes and use the screws with washers in place to tighten them.
  • Seite 32 Do not use solvents or any other chemical products for cleaning it. Use a soft, damp cloth to clean the device’s surface. 6. TECHNICAL SPECIFICATIONS Model: EnergySilence Aero 540 Product reference: 05941 60 W, 220-240 V ~ 50 Hz 12 W (max.) LED Made in China | Designed in Spain 7.
  • Seite 33 In the event of misuse, the warranty will not apply. If at any moment you detect any problem with your product or have any doubt, do not hesitate to contact Cecotec Technical Support Service at +34 963 210 728. ENERGYSILENCEAERO 540...
  • Seite 34 Sortez tous les composants de l’appareil de la boîte et assurez-vous qu’ils soient tous présents et en bon état. Si vous observez un dommage visible, contactez immédiatement le Service Après-Vente Officiel de Cecotec. 3. MONTAGE DE L’APPAREIL Vous aurez besoin des outils suivants pour réaliser l’installation : tournevis, tournevis plat, pince, échelle, pince coupante, résine époxyde et ruban isolant.
  • Seite 35 FRANÇAIS Montage standard avec lequel l’appareil se suspend sur un plafond droit et plat. Montage standard Support Montage en inclinaison avec lequel l’appareil se suspend sur un plafond vouté ou en pente. Montage en inclinaison Support Installation de la plaque de montage Plafond en bois Img.
  • Seite 36 FRANÇAIS Délissez vers le bas pour la sortir de la tige centrale. Passez la tige centrale que vous souhaitez utiliser par l’orifice centrale du cache embellisseur puis par la boule de suspension. Assurez-vous que la boule de suspension soit bien placée sur l’extrémité...
  • Seite 37 FRANÇAIS la plaque de montage avec les orifices du couvercle de protection. Tournez le couvercle de protection jusqu’à ce que les deux vis soutiennent de manière sécurisée l’appareil, insérez de nouveau les vis et utilisez un tournevis pour les visser. Note : pour des motifs de sécurité, il est recommandé...
  • Seite 38 N’utilisez aucun solvant ni d’autres produits chimiques pour le nettoyer. Utilisez un chiffon propre, doux et humide pour nettoyer la surface de l’appareil. 6. SPÉCIFICATIONS TECHNIQUES Modèle : EnergySilence Aero 540 Référence : 05941 60 W, 220-240 V~, 50 Hz.
  • Seite 39 Si vous détectez un incident ou un problème avec le produit, ou vous avez des doutes concernant le produit, veuillez contacter le Service Après-Vente Officiel de Cecotec au +34 9 63 21 07 28.
  • Seite 40 Nehmen Sie das Produkt aus der Verpackung und prüfen Sie, ob die Lieferung vollständig und in gutem Zustand sind. Falls Sie sichtbare Schäden bemerken, kontaktieren Sie sofort den technischen Kundendienst von Cecotec. 3. MONTAGE DES PRODUKT Für die Installation sind die folgenden Werkzeuge erforderlich: Schraubendreher, Schlitzschraubendreher, Greifzange, Leiter, Abisolierzange, Epoxidharz und Isolierband.
  • Seite 41 DEUTSCH Abb. 3. Standardinstallation, bei der das Gerät an einer geraden und flachen Decke aufgehängt wird. Standardinstallation Halterung Neigbare Montage/Installation, bei der das Gerät an einem gewölbten oder schrägen Dach aufgehängt wird. Neigbare Montage/Installation Halterung Installation der Befestigungsplatte Holzdecke Abb. 4. Verwenden Sie die 4 selbstschneidende Schrauben und Unterlegscheiben, um die Deckenhalterung an die Decke zu befestigen.
  • Seite 42 DEUTSCH Gabelbolzen entnehmen. Schieben Sie es nach unten, um es aus der Verbindungsstange herauszunehmen. Führen Sie die Verbindungsstange durch den Hauptloch der Kappe und durch den Halbkugel. Vergewissern Sie sich, dass die Halbkugel an seinem Ende mit 2 Splintlöcher und einer Schraube eingesteckt ist.
  • Seite 43 DEUTSCH Drehen Sie den Baldachin bis die zwei Schrauben sicher das Gerät festhalten, stecken Sie die Schrauben erneut ein und benutzen Sie einen Schraubendreher, um sie zu befestigen. Warnung: Aus Sicherheitsgründen wird es empfohlen, dass einen Person während der Montage den Leiter festhaltet. Montage der Ventilatorflügel Abb.
  • Seite 44 Verwenden Sie keine Lösemittel oder anderen Chemikalien, um es zu reinigen. Verwenden Sie ein feuchtes Tuch, um den Außenteil des Gerätes zu reinigen. 6. TECHNISCHE SPEZIFIKATIONEN Modell: EnergySilence Aero 540 Produktreferenz: 05941 60 W, 220-240 V ~ 50 Hz 12 W (max.) LED Made in China | Entworfen in Spanien 7.
  • Seite 45 Verbraucher zugerechnet werden kann. Das Produkt von Personen demontiert, repariert oder modifiziert wurde, die nicht vom offiziellen Technischen Kundendienst durch Cecotec autorisiert worden sind. Der Grund hierfür durch die normale Abnutzung und Verschleiß der Teile und des Zubehörs entstanden ist.
  • Seite 46 Rimuovere tutte le componenti del prodotto dalla scatola e assicurarsi che tutto sia incluso e in buone condizioni. Se si osservano danni visibili, contattare immediatamente il Servizio di Assistenza Tecnica ufficiale di Cecotec. 3. MONTAGGIO DEL PRODOTTO Per l’installazione sono necessari i seguenti attrezzi: cacciavite, cacciavite piatto, pinze, scala, spellacavi, resina epossidica e nastro isolante.
  • Seite 47 ITALIANO Montaggio su inclinazione, il dispositivo è appeso ad un soffitto a volta o inclinato. Montaggio in inclinazione Supporto Installazione della piastra di montaggio Soffitto in legno Fig. 4. Utilizzare le 4 viti a stella e 4 rondelle fornite per fissare la placca di montaggio al soffitto. Soffitto da lavoro Fig.
  • Seite 48 ITALIANO Utilizzare le viti fornite per fissare la lampada di sospensione di nuovo all’asta centrale reinserire il passante e la forcina. Avviso: assicurarsi che il passante sia allineato con le fessure situate all’interno della lampada di sospensione. Allentare le viti e i dadi della parte superiore della copertura del motore e ritirare il passante e la forcina dall’asta centrale.
  • Seite 49 ITALIANO Avviso: per motivi di sicurezza, si consiglia che una persona sostenga la scala durante questo passaggio. Montaggio delle pale Fig. 8. Rimuovere le 15 viti di fissaggio dalle pale della parte inferiore della copertura del motore. Introdurre le pale nelle rispettive fessure, assicurarsi che i fori nelle estremità delle pale coincidano con i fori delle viti e utilizzare le viti con le rondelle collocate per fissarle.
  • Seite 50 Non utilizzare dissolvente nè altri prodotti chimici per pulirlo. Utilizzare un panno morbido e umido per pulire la superficie del prodotto. 6. SPECIFICHE TECNICHE Modello: EnergySilence Aero 540 Riferimento di prodotto: 05941 60 W, 220-240 V ~ 50 Hz 12 W (max.) LED Made in China | Progettato in Spagna 7.
  • Seite 51 Non tentare di riparare il dispositivo per conto proprio, bensì contattare con il Servizio di Assistenza Tecnica di Cecotec attraverso il numero di telefono +34 96 321 07 28. ENERGYSILENCEAERO 540...
  • Seite 52 Tire o produto da caixa e certifique-se de que todas a peças e componentes estejam em boas condições. Se observar algum dano visível, entre em contacto imediatamente com o Serviço de Assistência Técnica oficial da Cecotec. 3. MONTAGEM DO PRODUTO As seguintes ferramentas serão necessárias para a instalação da ventoinha: chave de fendas de estrela, chave de fendas plana, escadote, descarnador de cabos, alicate, resina epóxi e fita-...
  • Seite 53 PORTUGUÊS Fig. 3. Montagem standard em que o dispositivo é pendurado num teto reto e plano Montagem standard Suporte Montagem em inclinação, em que o dispositivo fica pendurado num teto inclinado ou abobadado Montagem em inclinação Suporte Instalação da placa de montagem Teto de madeira Fig.
  • Seite 54 PORTUGUÊS Retire a bola de suspensão da vara central desapertando ligeiramente os parafusos da vara e tirando o passador e a forquilha do passador. Deslize para baixo para puxar a vara central. Passe a vara central que deseja utilizar pelo buraco central da carcaça de adorno e depois pela bola de suspensão.
  • Seite 55 PORTUGUÊS Alce o suporte até à placa de montagem, alinhando os parafusos desapertados da placa de montagem com os buracos do suporte. Gire o suporte até que ambos parafusos fixem de maneira segura o produto, volte a inserir os parafusos e utilize uma chave de fendas para os apertar. Aviso: por motivos de segurança, é...
  • Seite 56 Não utilize solventes nem outros produtos químicos para limpar o produto. Utilize um pano suave e húmido para limpar a superfície do produto. 6. ESPECIFICAÇÕES TÉCNICAS Modelo: EnergySilence Aero 540 Referência do produto: 05941 60 W, 220-240 V ~ 50 Hz 12 W (máx.) LED...
  • Seite 57 Se em alguma ocasião deteta uma ocorrência com o produto ou tem alguma consulta, entre em contacto com o Serviço de Assistência Técnica oficial da Cecotec através do número de telefone +34 96 321 07 28.
  • Seite 58 Haal het product uit de doos en controleer of alle onderdelen en componenten zich in een goede staat bevinden. Contacteer de technische dienst van Cecotec indien u schade vaststelt. 3. HET TOESTEL MONTEREN De volgende gereedschappen zijn nodig om de installatie uit te voeren: schroevendraaier, platte schroevendraaier, tang, ladder, draadstripper, epoxyhars en isolatietape.
  • Seite 59 NEDERLANDS Standaard installatie waarbij het apparaat aan een recht en vlak plafond wordt opgehangen Standaard montage Steun Schuine montage, waarbij het apparaat aan een plafond met een helling of schuin plafond wordt opgehangen. Schuine montage Steun Installatie van de montageplaat Houten plafond Fig.
  • Seite 60 NEDERLANDS Schuif het naar beneden om het van de centrale stang te verwijderen. Steek de centrale stang die u wilt gebruiken door het middelste gat van de afdekkap en vervolgens door de ophangbal. Zorg ervoor dat de ophangbal aan het uiteinde is gepositioneerd met 2 pennengaten en 1 schroefgat.
  • Seite 61 NEDERLANDS Draai de overkapping tot beide schroeven het apparaat stevig vasthouden, steek de schroeven er weer in en draai ze met een schroevendraaier vast. Opmerking: Om veiligheidsredenen wordt aanbevolen dat een persoon de ladder tijdens deze stap vasthoudt. Montage van de ventilatorbladen Fig.
  • Seite 62 Gebruik geen oplosmiddelen of andere chemische producten om het schoon te maken. Gebruik een zachte en vochtige doek om het oppervlak van het toestel schoon te maken. 6. TECHNISCHE SPECIFICATIES MODEL: EnergySilence Aero 540 Referentie van het product: 05941 60 W, 220-240 V ~ 50 Hz 12 W (máx.) LED...
  • Seite 63 Als u ooit een incident met het product ontdekt of vragen hebt, neem dan contact op met de officiële Technische Assistentie van Cecotec via het telefoonnummer +34 96 321 07 28. ENERGYSILENCEAERO 540...
  • Seite 64 Wyjmij wszystkie elementy produktu z pudełka i upewnij się, że są dołączone i są w dobrym stanie. Jeśli zauważysz jakiekolwiek widoczne uszkodzenia, natychmiast skontaktuj się z oficjalnym Serwisem Pomocy Technicznej Cecotec. 3. MONTAŻ PRODUKTU Do wykonania instalacji potrzebne są następujące narzędzia: śrubokręt, śrubokręt płaski, szczypce, drabinka, szczypce do ściągania izolacji, żywica epoksydowa i taśma izolacyjna.
  • Seite 65 POLSKI Rys. 3. Standardowy montaż polegający na zawieszeniu urządzenia na prostym, płaskim suficie Montaż standardowy Wsparcie Uchwyt uchylny, w którym urządzenie jest zawieszone na skośnym lub sklepionym suficie Uchwyt uchylny Wsparcie Instalowanie płyty montażowej Dach drewniany Rys. 4. Do zamocowania płyty montażowej do sufitu użyj 4 wkrętów samogwintujących i 4 dostarczonych podkładek.
  • Seite 66 POLSKI i łącznik ze sworznia. Przesuń go w dół, aby wyjąć go ze środkowego pręta. Przełóż pręt środkowy, którego chcesz użyć, przez środkowy otwór w osłonie, a następnie przez kulę zawieszenia. Upewnij się, że kula zawieszenia jest przymocowana do końca za pomocą...
  • Seite 67 POLSKI śrubokrętem. Uwaga: Ze względów bezpieczeństwa zaleca się, aby na tym etapie osoba trzymała drabinę. Montaż ostrzy Rys. 8. Odkręć 15 śrub mocujących z ostrzy na dole obudowy silnika. Włóż ostrza do odpowiednich szczelin, upewnij się, że otwory na końcach ostrzy pasują do otworów na śruby i użyj śrub z podkładkami, aby je zabezpieczyć.
  • Seite 68 Nie zanurzaj ani nie spryskuj żadnej części urządzenia wodą ani innym płynem. Do czyszczenia nie używaj rozpuszczalników ani innych chemikaliów. Do czyszczenia powierzchni produktu używaj miękkiej, wilgotnej szmatki. 6. SPECYFIKACJA TECHNICZNA Model: EnergySilence Aero 540 Referencje produktu: 05941 60 W, 220-240 V ~ 50 Hz 12 W (maks.) LED Made in China | Designed in Spain 7.
  • Seite 69 W przypadku niewłaściwego użycia przez użytkownika serwis gwarancyjny nie będzie odpowiedzialny za naprawę. W przypadku wykrycia incydentu z produktem lub w razie jakichkolwiek pytań prosimy o kontakt z oficjalną pomocą techniczną Cecotec pod numerem telefonu +34 96 321 07 28. ENERGYSILENCEAERO 540...
  • Seite 70 Vyjměte všechny součásti produktu z krabice a ujistěte se, že jsou všechny součástí a jsou v dobrém stavu. Pokud najdete nějaké viditelné poškození, okamžitě se obraťte na oficiální Technický servis firmy Cecotec. 3. MONTÁŽ PRODUKTU K dokončení instalace jsou zapotřebí následující nástroje: šroubovák, plochý šroubovák, kleště, žebřík, odizolovací...
  • Seite 71 ČEŠTINA Obr. 3. Standardní montáž, kde je zařízení zavěšeno z rovného plochého stropu Standardní montáž Podpora Sklopný držák, kde je zařízení zavěšeno ze šikmého nebo klenutého stropu Montáž s náklonem Podpora Instalace montážní desky Dřevěný strop Obr. 4. K upevnění montážní desky ke stropu použijte 4 samořezné šrouby a 4 podložky, které jsou součástí...
  • Seite 72 Pamatujte, že zdravý rozum a opatrnost jsou primární faktory při montáži a používání tohoto ventilátoru. Připojení kabelů Pro ovládání rychlosti lopatek ventilátoru používají prostředky pro regulaci rychlosti chlazení společnosti Cecotec. Černá> motor (fáze) Modré> světlo (fáze) Bílá> neutrální...
  • Seite 73 ČEŠTINA Montáž čepelí Obr. 8. Vyšroubujte 15 upevňovacích šroubů z nožů ve spodní části krytu motoru. Vložte čepele do příslušných otvorů, ujistěte se, že otvory na koncích čepelí odpovídají otvorům pro šrouby, a zajistěte je pomocí šroubů s připevněnými podložkami. Ujistěte se, že jsou plně...
  • Seite 74 Neponořujte ani nestříkejte žádnou část zařízení vodou ani jinou tekutinou. K čištění nepoužívejte rozpouštědla ani jiné chemikálie. Použijte jemný vlhký hadřík pro čištění venkovní části přístroje. 6. TECHNICKÉ SPECIFIKACE Modelo: EnergySilence Aero 540 Reference produktu: 05941 60 W, 220-240 V ~ 50 Hz 12 W (max.) LED Vyrobeno v Číně...
  • Seite 75 V případě špatného zacházení ze strany spotřebitele není záruční servis odpovědný za opravu. Pokud byste někdy zjistili s přístrojem problém nebo máte nějaký dotaz, spojte se okamžitě s oficiálním Technickým asistenčním servisem Cecotec na telefonním čísle +34 96 321 07 28. ENERGYSILENCEAERO 540...
  • Seite 76 Fig./Img./Abb./Rys./Obr. 1 Fig./Img./Abb./Rys./Obr.2...
  • Seite 77 Fig./Img./Abb./Rys./Obr.3 Fig./Img./Abb./Rys./Obr.4 Fig./Img./Abb./Rys./Obr.6 Fig./Img./Abb./Rys./Obr.5 Fig./Img./Abb./Rys./Obr.7 Fig./Img./Abb./Rys./Obr.8...
  • Seite 78 Fig./Img./Abb./Rys./Obr.9 Fig./Img./Abb./Rys./Obr.10 Fig./Img./Abb./Rys./Obr.11 Fig./Img./Abb./Rys./Obr.12...
  • Seite 80 Supervise a los niños para asegurarse de que no jueguen con Grupo Cecotec Innovaciones S. L. C/de la Pinadeta s/n, 46930 Quart de Poblet, Valencia, Spain...