Eneo INB-58M2713M0A Schnellinstallationsanleitung

Verwandte Anleitungen für Eneo INB-58M2713M0A


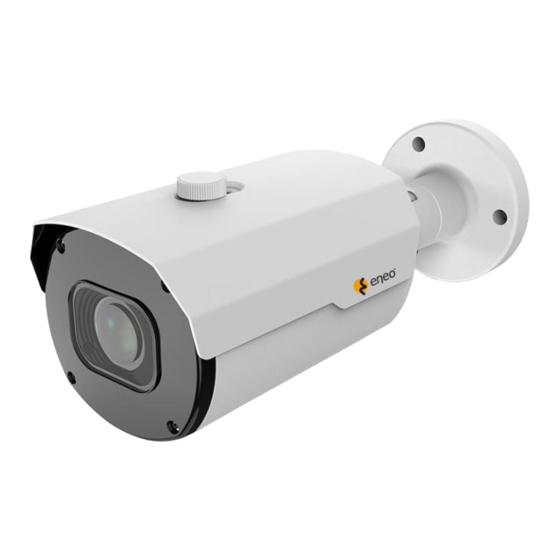
Inhaltszusammenfassung für Eneo INB-58M2713M0A
- Seite 2 THIS DOCUMENT CABLES & PLUGS ��������������������������������������������������������������������������������������������������������������������3 SD & RESET �����������������������������������������������������������������������������������������������������������������������������5 ENGLISH ����������������������������������������������������������������������������������������������������������������������������������7 DEUTSCH �������������������������������������������������������������������������������������������������������������������������������21...
- Seite 3 CONNECTION CABLES / ANSCHLUSSKABEL B - Extended / Erweitert English Deutsch No. Connector Description Anschluss Beschreibung Ethernet, RJ-45 port Ethernet, RJ-45 Anschluss RJ-45 compatible with 10/100 RJ-45 kompatibel mit 10/100 Mbps PoE Modular Jack Mbps PoE Modulbuchse Mic: Audio In Mic: Audio In Audio Input, 2-Pin Terminal Audio Input, 2-Pin Terminal...
- Seite 21 Deutsch...
- Seite 22 TABLE OF CONTENT ÜBER DIESES DOKUMENT ���������������������������������������������������������������������������������������������������� 23 SICHERHEITSHINWEISE �������������������������������������������������������������������������������������������������������� 24 OPEN SOURCE SOFTWARE LICENSE INFORMATION ��������������������������������������������������������� 26 VOR GEBRAUCH / INSTALLATION ��������������������������������������������������������������������������������������� 27 Abmessungen (in mm) & Spezifikationen ........................27 Lieferumfang ..................................... 27 1 - INSTALLATION ������������������������������������������������������������������������������������������������������������������ 28 2 - KAMERA ANSCHLUSSDIAGRAMM ��������������������������������������������������������������������������������� 29...
-
Seite 23: Über Dieses Dokument
ÜBER DIESES DOKUMENT In diesem Dokument finden Sie eine umfassende Beschreibung einer bestimmten Geräteserie, die mit großer Sorgfalt und Genauigkeit erstellt wurde, um Ihnen einen detaillierten Einblick in die allgemeinen Funktionen und Merkmale zu geben, die diese Geräteserie auszeichnen. Bitte beachten Sie jedoch, dass sich die detaillierte Charakterisierung in diesem Dokument auf die allgemeine Produktlinie bezieht. -
Seite 24: Sicherheitshinweise
SICHERHEITSHINWEISE Lesen Sie die Sicherheitshinweise und die Bedienungsanleitung vor der Installation des Produkts sorgfältig durch. Je nach Produkttyp können einzelne Punkte entfallen. Montage & Installation • Stellen Sie sicher, dass der vorgesehene Montageort für das jeweilige Produkt geeignet ist (z.B. hinsichtlich Gewicht). -
Seite 25: Betrieb
Betrieb • Die Geräte dürfen nur innerhalb der im Datenblatt angegebenen Temperatur- und Feuchtebereiche betrieben werden. • Zur Vermeidung von Überhitzung ist für ausreichende Belüftung zu sorgen. Dies gilt insbesondere für Geräte wie Recorder und Switches, die Wärme erzeugen können. •... -
Seite 26: Open Source Software License Information
• die Produkt-Detailseiten auf der eneo Website (www.eneo-security.com), • das eneo Download-Portal (https://datacloud.videor.com/s/eneodownloadportal). Sollte der vorherige Link nicht mehr funktionieren, finden Sie den aktuellen Link zum eneo Downloadportal auf der jeweiligen eneo Produktseite unter www.eneo-security.com. • das Download-Paket Ihrer Firmware. Die vollständigen Open Source Software-Lizenzinformationen für Ihr Produkt sind in dem entsprechenden Software-Download-Paket enthalten, das Sie in unserem Download-Portal finden. -
Seite 27: Vor Gebrauch / Installation
VOR GEBRAUCH / INSTALLATION • Vergewissern Sie sich, dass das Gerät ordnungsgemäß funktioniert und Ihren Erwartungen entspricht. • Vergewissern Sie sich, dass auf dem Gerät die neueste Firmware installiert ist. • Installieren Sie das Produkt an einem geeigneten Ort. • Nutzen Sie für die Montage je nach Ort das mitgelieferte Material. Abmessungen (in mm) &... -
Seite 28: Installation
1 - INSTALLATION Schritt 1: Verwenden Sie die Montageschablone, um die gewünschte Montageposition zu markieren. Montageschablone Schritt 2: Bohren Sie die auf der Montageschablone markierten Löcher und verwenden Sie Dübel und Schrauben, um die Basis zu befestigen. Dübel Schrauben Schritt 3: Richten Sie die Kamera auf den gewünschten Winkel aus. -
Seite 29: Kamera Anschlussdiagramm
2 - KAMERA ANSCHLUSSDIAGRAMM iPhone / iPad Android Phone Internet DC 48V Power & Data PoE Camera PoE Injector Router / Switch DC 48V Phone PoE Camera PoE Injector PoE NVR Router / Switch HINWEIS: Es gibt zwei Verbindungsmodi: • Bei einem Nicht-PoE-Router schließen Sie die Kamera bitte über einen PoE-Switch oder einen PoE-Injektor an. - Seite 30 APP INSTALLATION Mobil 1. Suchen und installieren Sie die eneo INsight Mobile App, je nach verwendetem Gerät, im Apple App Store oder Google Play Store. Alternativ können Sie auch den entsprechenden QR-Code unten scannen, um direkt zur Store-Seite zu gelangen.
- Seite 31 3. Um Geräte hinzuzufügen, tippen Sie auf Geräte. Wenn Sie auf das + in der oberen rechten Ecke tippen, können Sie den Gerätetyp auswählen. Folgen Sie dann den Anweisungen in der App. Sollten Sie Probleme haben, empfehlen wir Ihnen, die Erklärungen im Hauptmenüpunkt Hilfe zu lesen.
- Seite 32 App installiert wurde, wird das neue Gerät sofort erkannt. Sie können von hier aus auf das Gerät zugreifen. Laden Sie die eneo Site Manager App herunter unter: https://eneo-security.com/de/eneo-site-manager.html 2. Klicken Sie mit der rechten Maustaste auf das Gerät in der Liste, um das Kontextmenü...
- Seite 33 3. Alternativ können Sie das Gerät über das Kontextmenü im Browser Ihrer Wahl öffnen und das Kennwort über die Weboberfläche ändern. Sie können anschließend auf die übrigen Funktionen zugreifen. 4. Sobald Sie das Kennwort aktualisiert haben, können Sie sich beim Gerät anmelden.