babyplus CompactTWIN Montage- Und Bedienungsanleitung
Verfügbare Sprachen
Verfügbare Sprachen
Quicklinks
Montage- und Bedienungsanleitung
TWIN
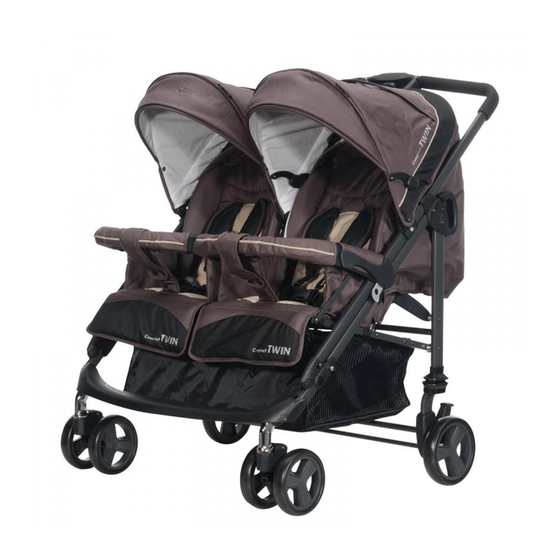
Compact
Geeignet für ein Kind mit einem maximalen
Körpergewicht von 15 kg.
Wichtige Hinweise:
Gebrauchsanleitung lesen und aufheben! Kassenbon aufbewahren!
Änderungen beim Lieferumfang, technische Änderungen sowie kundenspezifische Abweichungen vorbehalten!
Gemäß EN-1888 / 01.05.2012
02.12.2013
Produziert für:
BABY-PLUS eG • Tiefe Gasse 11-13 • D-97084 Würzburg
Telefon: +49 (0) 931/2 99 25-0 • www.baby-plus.de
D

Verwandte Anleitungen für babyplus CompactTWIN


Inhaltszusammenfassung für babyplus CompactTWIN
- Seite 1 Montage- und Bedienungsanleitung TWIN Compact Geeignet für ein Kind mit einem maximalen Körpergewicht von 15 kg. Wichtige Hinweise: Gebrauchsanleitung lesen und aufheben! Kassenbon aufbewahren! Änderungen beim Lieferumfang, technische Änderungen sowie kundenspezifische Abweichungen vorbehalten! Gemäß EN-1888 / 01.05.2012 02.12.2013 Produziert für: BABY-PLUS eG •...
- Seite 2 Aufstellen: Öffnen Sie als erstes die Sicherheitsverriegelung, welche sich auf der linken Seite des Gestells befin- det (Abb. 1). Drücken Sie nun gleichzeitig mit der rechten Hand den Sicherungsknopf am Schieber zu sich und mit der linken Hand drücken Sie den Haltegriff nach vorne (Abb. 2). Ziehen Sie nun das Ge- stell soweit auseinander, bis ein deutliches Einrastgeräusch hörbar ist.
- Seite 3 Abb. 6 Zum Abnehmen wiederholen Sie den Vorgang in umgekehrter Reihenfolge. Befestigen der Hinterachse: Stecken Sie die beiden Gestellrohre in die Aufnahmeöffnung der Achse (Abb. 7). Zum Abnehmen der Hinterachse klappen Sie den Bremshebel nach hinten und drücken den Metallknopf nach in- nen und ziehen die Achse vom Gestell (Abb.
- Seite 4 ACHTUNG: Wenn Sie mit dem Kinderwagen anhalten, immer Bremse betätigen. Parken Sie nicht bergauf oder bergab. Abb. 11 Abb. 12 Verstellbare Rückenlehne: Drücken Sie den Kunststoffhebel, welcher sich an der Rückseite des Sitzes befindet nach oben. Nun können Sie die Rückenlehne in die gewünschte Posi- tion bringen (Abb.
- Seite 5 Anbringen/Abnehmen des Bügels: Zum Anbringen des Haltebügels schieben Sie die Bügelenden mit der Öffnung auf die Fixierungszap- fen der Armlehnen (Abb. 17). Zum Abnehmen des Bügels, drücken Sie die Kunststoffhebel an der Unterseite der Bügelenden (Abb. 18) und ziehen den Bügel nach oben (Abb. 19). Abb.
- Seite 6 Warn- und Sicherheitsinformationen! Bitte befolgen Sie diese Hinweise um die Sicherheit des Kindes zu garantieren. Bitte beachten Sie, dass dieses Produkt ausschließlich für den Transport von Babys und Kleinkindern konzipiert wurde und jede nicht bauartgerechte Verwendung Schäden am Produkt verursachen kann, welche in weite- rer Folge auch die Sicherheit Ihres Kindes gefährden könnte.
-
Seite 7: Pflege Und Instandhaltung Des Produktes
Beim Befahren von Stufen oder Treppe oder falls Ihr Kinderwagen gehoben oder getragen wird, sollten Sie Ihr Kind grundsätzlich aus dem Wagen nehmen. Betreffend die zulässige Beladung des Kinderwagens, beachten Sie die Hinweise des Herstel- lers oder wenden Sie sich an Ihr Fachgeschäft. ...