Herunterladen Diese Seite drucken

Werbung

Verfügbare Sprachen
  • DE

Verfügbare Sprachen

  • DEUTSCH, seite 6

Werbung

loading

Inhaltszusammenfassung für D-Link DGS-1224TP

  • Seite 2 This guide gives step-by-step instructions for setting up The switch can be mounted in an EIA standard size 19- all D-Link Web Smart switches. Please note that the inch rack, which can be placed in a wiring closet with model you have purchased may appear slightly different other equipment.
  • Seite 3 192.168.0.x (where x is a number between 2 and 254), and a subnet mask of 255.255.255.0. If you want to manage only one D-Link Web Smart Switch, the Web-Based Management Utility is the better Open your web browser and enter http://192.168.0.1 option.
  • Seite 4 CD-Rom) and click OK. Follow the on-screen instructions to install the utility. Upon completion, go to Start > Programs > D-Link SmartConsole Utility and open the SmartConsole Utility. Just connect the Smart Switch to the same L2...
  • Seite 6 
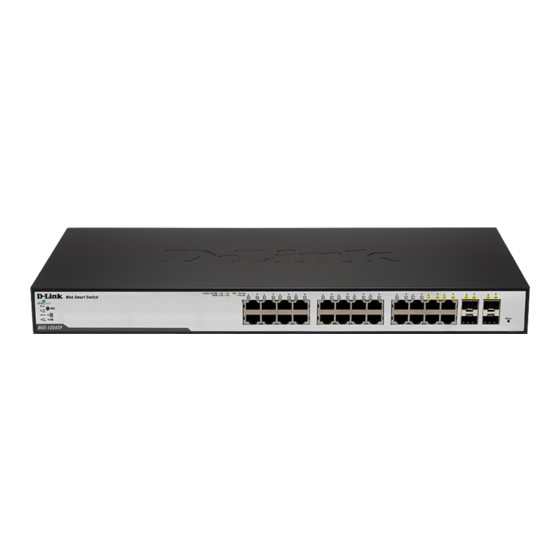
Über dieses Handbuch Diese Kurzanleitung für die Installation hilft Ihnen Schritt für Schritt bei der Inbetriebnahme aller Web Smart Switches von D-Link. Bitte beachten Sie, dass das von Ihnen erworbene Modell im äußeren Erscheinungsbild leicht von den in den Illustrationen abgebildeten Modellen abweichen kann.
  • Seite 7 Switch über eine Wenn Sie nur einen D-Link Web Smart Switch verwalten Ethernetverbindung konfigurieren zu können, muss die möchten, eignet sich dafür am besten die webbasierte IP-Adresse des PC im gleichen Bereich wie die des Verwaltungsoberfläche. Jedem Switch muss eine eigene Switch liegen.
  • Seite 8 Für weitere deinstallieren, bevor Sie die neueste Version von Informationen zu den Produkten von D-Link sowie SmartConsole installieren können. Marketing-Informationen besuchen Sie die Website http://www.dlink.eu. Bei Support-Fragen gehen Sie ebenfalls auf diese Website http://support.dlink.com.tw. 1. Option: Führen Sie die folgenden Schritte durch, Hier werden Sie dann auf die entsprechende lokale D- um SmartConsole über das auf der Installations-CD...
  • Seite 10 Ce guide vous explique, étape par étape, comment Vous pouvez monter votre switch dans une armoire configurer tous les Smart Switches Web de D-Link. 19 pouces EIA standard, à insérer dans une armoire de Remarque : il se peut que votre modèle d’appareil diffère câblage avec d’autres équipements.
  • Seite 11 Étape 2 Pour que vous puissiez vous connecter et configurer le Le Smart Switch Web de D-Link peut être géré via switch via une connexion Ethernet, l’adresse IP de votre n’importe quel port de l’unité, par le biais de l’utilitaire PC doit être située dans la même plage que celle du...
  • Seite 12 Guide de ou manuellement. l’utilisateur ou en ligne. Pour en savoir plus sur les Remarque : avant d’installer la dernière version de produits D-Link et pour toute information d’ordre l’utilitaire SmartConsole, veillez à supprimer toute marketing, visitez...
  • Seite 14 Esta guía ofrece las instrucciones detalladas para El switch se puede montar en un rack EIA estándar de configurar todos los switches Web Smart de D-Link. 19'', que se puede colocar en un armario de cableado Tenga en cuenta que el modelo que ha comprado puede junto a otros equipos.
  • Seite 15 PC debería ser 192.168.0.x (donde x es un número comprendido entre 2 y 254) y una máscara de subred de Si quiere gestionar solo un switch Web Smart de D-Link, 255.255.255.0. la mejor opción es la utilidad de gestión basada en web.
  • Seite 16 Si desea más operativos Windows 2000, Windows XP, y Windows información sobre los productos de D-Link o sobre Vista x64/86. Para la instalación de la utilidad márquetin, visite el sitio web: http://www.dlink.com.tw; si SmartConsole se dispone de dos opciones: a través del...
  • Seite 18 Montare lo switch all’interno del rack, utilizzando le viti confrontandolo con l’elenco riportato nel manuale utente. fornite con quest’ultimo. Se un componente dovesse risultare mancante o danneggiato, contattare il rivenditore D-Link locale per la sostituzione. - 1 Web Smart Switch D-Link - Staffe per montaggio su rack...
  • Seite 19 192.168.0.1, il PC dovrebbe avere indirizzo IP uguale a 192.168.0.x (dove x è un numero compreso tra 2 e 254) Per la gestione di un unico Web Smart Switch di D-Link, e subnet mask uguale a 255.255.255.0. l'opzione migliore è rappresentata dall'Utility di gestione basata sul web.
  • Seite 20 PC. Questo strumento può essere utilizzato supporto accedere al sito http://support.dlink.com.tw che esclusivamente con computer dotati di sistema operativo vi ridirigerà al sito D-Link locale più appropriato. Windows 2000, Windows XP o Windows Vista x64/86. Per l'installazione della SmartConsole Utility sono...
  • Seite 22 Введение Данное руководство содержит пошаговые инструкции для настройки всех коммутаторов серии D-Link Web Smart. Пожалуйста, имейте в виду, что приобретенная модель может незначительно отличаться от изображенной на иллюстрациях. За более подробной информацией о коммутаторе, его компонентах, подключении к сети и технической...
  • Seite 23 В случае сбоя питания коммутатор должен быть отключен. При восстановлении питания включите его снова. Рисунок 6. Подключение Ethernet-кабеля Функции управления Коммутатор D-Link Web Smart настраивается и управляется через любой порт по Web-интерфейсу Шаг 2 утилиты управления (Web-based Management Utility) или из любого компьютера с помощью утилиты...
  • Seite 24 CD-ROM. Из меню Пуск на рабочем столе Windows, выберите Выполнить. В диалоговом окне Запуск программы, введите D:\D-Link SmartConsole Utility\setup.exe (где D:\ - буква привода CD-ROM) и нажмите OK. Рисунок 8. Окно аутентификации пользователя Следуйте инструкциям на экране для установки Шаг 4 утилиты.
  • Seite 26 Este guia fornece instruções passo a passo para O switch pode ser montado em um rack tamanho padrão configurar todos os switches D-Link Web Smart. Favor de 19 polegadas EIA que pode ser colocado em um observar que o modelo que você adquiriu pode ter um armário de fiação com outros equipamentos.
  • Seite 27 Etapa 2 Para fazer o login e configurar o switch via uma conexão O Switch D-Link Web Smart pode ser gerenciado por Ethernet, o PC deve ter um endereço IP na mesma faixa meio de qualquer porta no dispositivo utilizando o do switch.
  • Seite 28 Windows 2000, usuário ou on-line. Para obter maiores informações Windows XP e Windows Vista x64/86. Há duas opções sobre os produtos da D-Link ou informações de para a instalação do SmartConsole Utility, uma por meio marketing, favor visitar o website http://www.dlink.com.tw;...
  • Seite 30 更多關於您的交換器細節資訊、配件、設定網連接路與技 術規格,請參閱產品包裝中的使用手冊。 1 – 步驟 打開包裝 小心打開包裝後,請參閱包裝內容物資料,確認所有品項 數量正確以及均正常沒有損壞,假如有任何品項遺失或損 圖 2. 固定機架固定架 壞,請聯絡當地的零售商更換。 - D-Link Web 智慧型交換器。 然後,使用包裝內所提供的螺絲,將交換器鎖到機架上 - 機架固定架。 面。 - 電源線。 - 使 用 手 冊 光 碟 片 ( 包 含 SmartConsole Utility program)。 - 多國語言版設定指南。 2 –...
  • Seite 31 址必須為 192.168.0.x(x 需要介於 2 與 254 中間),子網 管理設定 路遮罩為 255.255.255.0。 開啟您的瀏覽器,在 URL 欄位輸入 http://192.168.0.1 D-Link Web 智慧型交換器使用 Web-based Management Utility,可以經由設備上的任何網路連接埠 (原廠設定值),接著按下<Enter>。 管理,或可以透過任何電腦使用 SmartConsole Utility 進 行管理。 假如您僅想要管理一部 D-Link Web 智慧型交換器,Web- Based Management Utility 將會是比較好的選擇,每部交 換器會取得自己的 IP 位址,可以讓 Web-Based 圖 7. 在瀏覽器輸入 IP 位址 192.168.0.1 Management Utility 或...
  • Seite 32 其他協助資訊,請參閱使用手冊背面的說明或線上資訊, SmartConsole Utility 為 了 尋 找 更 多 D-Link 產 品 或 行 銷 資 訊 , 請 連 結 至 http://www.dlink.com.tw,如有其他支援需求,請連結至 產品提供 SmartConsole Utility 程式,可以利用它經由電 http://support.dlink.com.tw。 腦搜尋與該電腦相同 L2 網段的交換器,這個工具僅支援 使用 Windows 2000、XP 與 Vista x64/86 作業系統的電 腦,安裝 SmartConsole Utility 有兩種方式,一是透過安...
  • Seite 34 Switch dapat dipasang pada rak dengan ukuran standar diperlukan untuk mengatur semua D-Link Web Smart EIA 19 inci, dimana dapat ditempatkan pada ruang Switch. Tolong perhatikan bahwa model yang anda beli komunikasi/server dengan perangkat lainnya. Untuk mungkin sedikit berbeda dengan yang ditunjukkan dalam...
  • Seite 35 SmartConsole Utility. alamat IP dari blok 192.168.0.x (dimana x adalah angka antara 2 sampai dengan 254) dan subnet mask Jika anda hanya ingin mengatur hanya satu unit D-Link 255.255.255.0 Web Smart Switch maka Pengaturan Berbasiskan Web merupakan pilihan terbaik. Setiap switch harus Buka web browser anda dan ketik http://192.168.0.1...
  • Seite 36 SmartConsole Utility secara manual. Masukkan CD Instalasi pada CD-ROM Drive anda. Dari menu Start, pilih Run. Pada kotak Run, ketik D:\D-Link SmartConsole Utility\setup.exe (dimana D:\ melambangkan huruf drive CD-ROM anda) dan klik OK. Ikuti langkah-langkah yang tertera pada layar untuk memasang Utility.
  • Seite 38 ックマウントキットを付属のネジで本製品の両側面に取り付 けます。 お手元のスイッチの詳細や、付属品、ネットワーク設定の方 法、スペックなどについては、スイッチに付属のユーザマニュ アルをご覧ください。 1―パッケージ内容 梱包を開けて、中身をていねいに取り出します。ユーザマニ 図2 ラックマウントキットを取り付ける ュアルの付属品一覧を見て、同梱物がすべてそろっているか 確認してください。万一不足している部品や破損している部 品がありましたら、弊社ホームページにてユーザ登録を行い、 次に、付属のネジを使用して、スイッチをラックに固定します。 サポート窓口までご連絡ください。 - D-Link スマートスイッチ 1台 - ラックマウントキット - 電源ケーブル - ユーザマニュアル CD(「SmartConsole ユーティリティ」を収 録) - スタートガイド(多言語版) 2―設置 図3 スイッチをラックに取り付ける 安全にお使いいただくために、以下の点に注意してください。 3―電源ケーブルの接続 ♦ 電源ケーブルを本体の電源コネクタに確実に差し込ん でください。 電源ケーブルを本体背面の電源コネクタに接続し、もう一方 ♦ 本製品の周囲には、放熱と通気のために十分なスペ...
  • Seite 39 「 192.168.0.1 」 で あ る 場 合 、 コ ン ピ ュ ー タ の IP ア ド レ ス を いう、2つの方法があります。 「192.168.0.x」(x は2~254 の数字)、サブネットマスクを 「255.255.255.0」にします。 管理する D-Link スマートスイッチが1台の場合は、Web Web ブラウザを起動し、アドレス欄に「http://192.168.0.1」(初 ベース管理ユーティリティをおすすめします。Web ベー 期設定の IP アドレス)と入力し、Enter キーを押します。 ス管理ユーティリティまたはその他の SNMP ネットワー...
  • Seite 40 「OK」をクリックする 画面の指示に従ってユーティリティをインストー ルしてください。 インストールが完了したら、「スタート」メニュ ー の 「 す べ て の プ ロ グ ラ ム 」 か ら 「 D-Link SmartConsole Utility」をクリックして SmartConsole ユーティリティを起動します。 スマートスイッチを設定用コンピュータと同じレ イ ヤ 2 ネ ッ ト ワ ー ク セ グ メ ン ト に 接 続 し 、...
  • Seite 41 Ver. 1.02(ww) 2009/03/30 29072600DE12281...

Diese Anleitung auch für:

Dgs-1224tDgs-1248tDes-1228p