Werbung
Verfügbare Sprachen
Verfügbare Sprachen
Quicklinks
Bedienungsanleitung
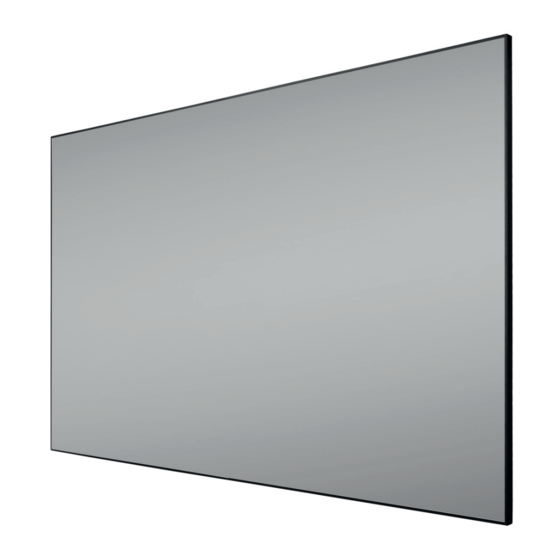
celexon CLR HomeCinema
UST Rahmenleinwand V2.0
Vielen Dank für den Kauf dieses Produkts.
Für eine optimale Leistung und Sicherheit lesen Sie diese Anweisungen bitte sorgfältig
durch, bevor Sie dieses Produkt anschließen oder betreiben. Bitte bewahren Sie diese
Anleitung für eine spätere Verwendung auf.
Version: 32423_071
Werbung

Verwandte Anleitungen für celexon CLR HomeCinema UST V2.0


Inhaltszusammenfassung für celexon CLR HomeCinema UST V2.0
- Seite 1 Bedienungsanleitung celexon CLR HomeCinema UST Rahmenleinwand V2.0 Vielen Dank für den Kauf dieses Produkts. Für eine optimale Leistung und Sicherheit lesen Sie diese Anweisungen bitte sorgfältig durch, bevor Sie dieses Produkt anschließen oder betreiben. Bitte bewahren Sie diese Anleitung für eine spätere Verwendung auf.
- Seite 2 Beschädigungen am Produkt zu finden sind. Sollten Sie äußerliche Beschädi- gungen an dem Gerät oder unerwartete unübliche Funktionsweisen feststellen, darf das Produkt nicht weiter genutzt werden. Kontaktieren Sie umgehend den Händler, bei dem Sie das Produkt gekauft haben oder celexon direkt (Web: www.celexon.de, Mail: info@celexon.de) für weitere Informationen. •...
- Seite 3 (Web: www.celexon.de, Mail: info@celexon.de). • Technische Änderungen und Irrtümer vorbehalten. Der Hersteller übernimmt keine Verantwortung für Sachschäden oder Personenschäden, wenn die Leinwand außerhalb der empfohlenen Spezifikationen verwendet wird, oder bei unsachgemäßer Installation. Verwenden Sie diese Leinwand nicht in der Nähe von Heizungen oder Klimaanlagen.
- Seite 4 HAFTUNGSAUSSCHLUSS Die Angaben in diesem Dokument können ohne vorherige Ankündigung durch den Hersteller geändert werden. Änderungen werden jeweils in den folgenden Versionen dieses Handbuchs ergänzt. Der Hersteller übernimmt keine Garantie oder Gewährleistung auf die Richtigkeit der Angaben in diesem Dokument. PFLEGEHINWEIS Reinigen Sie die Leinwand NIEMALS mit Alkohol oder anderen Reinigungsmit- teln, die Lösungsmittel enthalten.
- Seite 5 Seitenbefestigungs-Stifte für 2x Montagelaschen Rahmen 2x Rundmagnete + Aufsetz- Tuch (vorinstalliert - Anzahl chip (Set) variiert je nach Größe) 2x Ersatz 2x Konterplatten für Magnete 1x Obere Wandmontage- 8x Montageschrauben 5x50 schiene + Dübel 32x silberne Montage- 4x schwarze Montage- 4x Senkkopfschrauben 2x Schutzhandschuhe schrauben-Sets...
- Seite 6 SCHRITT 1: MONTAGE INNERER, SILBERNER RAHMEN Prüfen Sie die benötigten Teile! • Legen Sie die EPE Schutzfolie auf dem Boden aus und sorgen für um- laufend mind. 1 m zusätzlichen Platz, um die Leinwand sicher und ohne Schäden mit 2 Personen aufbauen zu können. •...
- Seite 7 SCHRITT 1: MONTAGE INNERER, SILBERNER RAHMEN Montieren Sie die inneren, silbernen vertikalen Profile zum Rahmen: • Stecken Sie die Eckverbinder in beide Enden der 2 vertikalen, silbernen Profile. • Verbinden Sie nun die vertikalen Rahmenteile mit den horizontalen Rah- menteilen. (Beide Seiten nacheinander mit 2 Personen!) •...
- Seite 8 SCHRITT 1: MONTAGE INNERER, SILBERNER RAHMEN Montieren Sie die Stützstrebe: • Schieben Sie die im Rahmen befindliche Mutter in die Mitte der horizon- talen Verbindungsstücke und platzieren die Stützstrebe MIttig des inne- ren Rahmens. Schrauben Sie die Strebe mit den M5x8 mm Schrauben handfest.
- Seite 9 SCHRITT 2: MONTAGE DES TUCHES Tuch ausrollen: • Legen Sie den inneren Rahmen beiseite, dieser kann auch stehend mit 2 Personen an z.B. einer Wand abgestellt werden. Achten Sie darauf, dass er nicht umfallen kann und sich nicht zu nah an der Montagestelle be- findet, an welcher Sie das Tuch nun ausrollen! Achten Sie darauf, keine Schäden an Ihrer Wand zu verursachen.
- Seite 10 SCHRITT 2: MONTAGE DES TUCHES Inneren Rahmen platzieren: • Achten Sie darauf, dass die Rahmenecken nicht das Tuch beschädigen! • Legen Sie den inneren Rahmen nun mit 2 Personen vorsichtig und um- laufend zeitgleich auf das Tuch. Achten Sie darauf ihn so zu platzieren, dass er auf der markierten Rückseite des Tuches und mit den markierten Ecken passend liegt und „Top“...
- Seite 11 SCHRITT 2: MONTAGE DES TUCHES Tuch auf den Rahmen spannen: • 2 Personen ziehen parallel nach folgendem Muster (siehe auch Grafik!) das Tuch mit seinen Montagelöchern über die Befestigungsstifte des Rahmens: AA - BB - CC - DD • Die Ecken des Tuches ziehen Sie dabei in folgenden Schritten, wie in der Grafik zu sehen: 1 - 2 - 3 •...
- Seite 12 SCHRITT 2: MONTAGE DES TUCHES Planlage nach Installation prüfen: • Achten Sie darauf, die Handschuhe zu tragen, um das Tuch nicht zu be- schmutzen. Die Handschuhe sollten noch sauber und frei von Rückstän- den sein. • Stellen Sie den Rahmen mit 2 Personen vorsichtig auf der EPE Unterlage auf.
- Seite 13 SCHRITT 3: MONTAGE SCHWARZER ABDECKRAHMEN Schaumpolster platzieren: • Es befinden sich kleine Schaumteile im Lieferumfang. Legen Sie diese wie in der Grafik umlaufend unter den Rahmen, bevor sie den Abdeck- rahmen installieren. Schaumteile Vertikale Abdeckrahmen-Profile anbringen: • Schieben Sie die Abdeckrahmenprofile alle wie in der Grafik dargestellt vorsichtig auf.
- Seite 14 SCHRITT 3: MONTAGE SCHWARZER ABDECKRAHMEN Horizontale Abdeckrahmen-Profile + Plastik-Ecken anbringen: • Schieben Sie nun vorsichtig die horizontalen Abdeckrahmen-Profile auf, sodass sie mittig und an den Ecken bündig zueinander anliegen. Auch hier müssen Steg der Profile und Nut des Innenrahmens ineinander grei- fen.
- Seite 15 SCHRITT 4: WANDMONTAGE • Achten Sie darauf zu lokalisieren, wo die Ober- und Unterseite des Tuches ist, es ist rückseitig markiert. Das Tuch funktioniert nur in einer Richtung, der UST-Projektor muss stets unter der Leinwand stehen. • Installieren Sie die Montagelaschen an der Oberseite des Rahmens mit den silbernen M5x8 mm Schrauben, wie in der Grafik, mittig, mit dem Abstand “A”, wie in der Tabelle gezeigt.
- Seite 16 Wand hin auf die Magnete ab, bis sie an den Magneten anhaftet. Siehe Grafik. • Lassen Sie die Leinwand vorsichtig los und stellen sicher, dass sie fest hängt. vertikale Linie Die komplette Installation ist hiermit abgeschlossen! Wir wünschen viel Freude mit Ihrer neuen celexon CLR Leinwand.
- Seite 17 • Die meisten Themen und Beschädigungen, welche wir mit diesen Leinwän- den feststellen konnten, sind auf Installationsfehler zurückzuführen und können vor Ort vermieden oder behoben werden. celexon Europe GmbH | Gutenbergstraße 2 | 48282 Emsdetten | DE...
- Seite 18 Operating instructions celexon CLR HomeCinema UST Fixed Frame screen V2.0 Thank you for purchasing this product. For optimum performance and safety, please read these instructions carefully before connecting or operating this product. Please retain these instructions for future use. Version: 32423_071...
- Seite 19 Immediately contact the dealer from whom you purchased the product, from whom you purchased the product or celexon directly (Web: www. celexon.co.uk, Mail: info@celexon.co.uk) for further information.
- Seite 20 Incorrect installation or use may also invalidate the warranty. • If you are unsure about the use of the product, please contact your specialist per- sonnel, your dealer or celexon directly (Web: www.celexon.co.uk, Mail: info@celexon. co.uk). • Technical changes and errors excepted.
- Seite 21 DISCLAIMER The information in this document is subject to change without notice by the manufacturer. Changes will be added to subsequent versions of this manual. The manufacturer does not guarantee or warranty for the correctness of the information in this document. CARE INSTRUCTIONS NEVER clean the screen with alcohol or other cleaning agents containing sol- vents.
- Seite 22 Side mounting pins for cloth 2x Mounting brackets frame 2x round magnets + clip-on (pre-installed - number varies chip (set) depending on size) 2x spare 2x Counter plates for magnets 1x Upper wall mounting rail 8x Mounting screws 5x50 + dowels 32x silver mounting 4x black mounting...
- Seite 23 STEP 1: ASSEMBLING THE INNER SILVER FRAME Check the parts you need! • Lay out the EPE protective film on the floor and make sure there is ad- ditional space of at least 1 m to be able to set up the screen safely and without damage with 2 people.
- Seite 24 STEP 1: ASSEMBLING THE INNER SILVER FRAME Mount the inner, silver vertical profiles to the frame: • Insert the corner connectors into both ends of the 2 vertical silver pro- files. • Now connect the vertical frame parts with the horizontal frame parts. (Both sides one after the other with 2 people!).
- Seite 25 STEP 1: ASSEMBLING THE INNER SILVER FRAME Fit the support strut: • Slide the nut in the frame into the centre of the horizontal connectors and place the support strut in the centre of the frame. Screw the strut in place with the M5x8 mm screws.
- Seite 26 STEP 2: ATTACHING THE FABRIC Roll out the fabric: • Put the inner frame aside, this can also be placed upright with 2 persons, e.g. against a wall. Make sure that it cannot fall over and that it is not too close to the place where you are going to unroll the fabric! Be careful not to damage your wall.
- Seite 27 STEP 2: ATTACHING THE FABRIC Place the inner frame: • Make sure that the frame corners do not damage the cloth! • Now place the inner frame carefully and simultaneously on the cloth with 2 people. Make sure to place it in such a way that it is on the marked back of the fabric and with the marked corners and that „Top“...
- Seite 28 STEP 2: ATTACHING THE FABRIC Stretch the fabric on the frame: • Two people pull in parallel according to the following pattern (see also graphic!)the fabric with its mounting holes over the fastening pins of the frame: AA - BB - CC - DD •...
- Seite 29 STEP 2: ATTACHING THE FABRIC Check the flatness after installation: • Be sure to wear gloves so as not to soil the cloth. The gloves should still be clean and free of residues. • Carefully place the frame on the EPE base with 2 people. •...
- Seite 30 STEP 3: MOUNTING THE BLACK COVER FRAME Place foam padding: • There are small foam parts in the scope of delivery. Place these under the frame as shown in the diagram before installing the cover frame. foam padding Attach the vertical cover frame profiles: •...
- Seite 31 STEP 3: MOUNTING THE BLACK COVER FRAME Fit horizontal cover frame profiles + plastic corners: • Now carefully push on the horizontal cover frame profiles so that they are centred and flush with each other at the corners. Also the profiles and the groove of the inner frame must interlock.
- Seite 32 STEP 4: WALL MOUNTING • Make sure you locate where the top and bottom of the cloth is, it is marked on the back. • The fabric only works in one direction, the UST projector must always be under the screen. •...
- Seite 33 See diagram. • Carefully release the screen and make sure it hangs firmly. Vertical line The complete installation is now complete! We hope you enjoy your new celexon CLR screen.
- Seite 34 If the seams of the fabric are still visible despite the cover frame, check whether the inner frame and/or cover frame(s) have been correctly instal- led. • In case of other problems or uncertainties, contact your dealer or celexon directly. • Most of the issues and damage we have encountered with these projection screens are due to installation errors and can be avoided or rectified on site.