afx light HYPER-STROBE-RGB+W Bedienungsanleitung
Inhaltsverzeichnis
Quicklinks
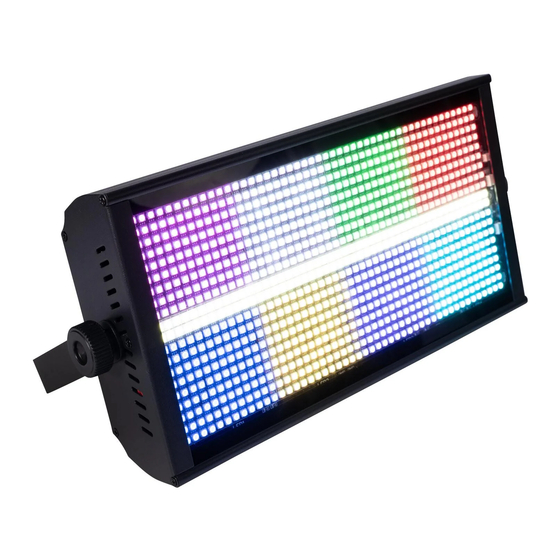
HYPER-STROBE-RGB+W
CODE: 16-2106
STROBE 2-IN-1 RGB + WHITE
STROBOSCOPE 2-EN-1 RGB + BLANC
STROBOSKOP 2-IN-1 RGB + WEISS
STROBE 2-IN-1 RGB + WIT
ESTROBOSCOPIO 2-EN-1 RGB + BLANCO
DMX Channels - p. 2
GB - User Manual - p. 7
F - Manuel d'Utilisation - p. 10
D - Bedienungsanleitung - S. 14
NL - Handleiding - p. 18
E - Manual de Instrucciones - p. 22
Inhaltsverzeichnis

Verwandte Anleitungen für afx light HYPER-STROBE-RGB+W


Inhaltszusammenfassung für afx light HYPER-STROBE-RGB+W
- Seite 1 HYPER-STROBE-RGB+W CODE: 16-2106 STROBE 2-IN-1 RGB + WHITE STROBOSCOPE 2-EN-1 RGB + BLANC STROBOSKOP 2-IN-1 RGB + WEISS STROBE 2-IN-1 RGB + WIT ESTROBOSCOPIO 2-EN-1 RGB + BLANCO DMX Channels - p. 2 GB - User Manual - p. 7 F - Manuel d'Utilisation - p.
- Seite 2 DMX CHANNEL CHARTS 4 CHANNELS Channel value Description 000-255 Red bead linear dimming 000-255 Green bulb linear dimming 000-255 Blue bead linear dimming 000-255 White bulb linear dimming 11 CHANNELS Channel value Description 000-255 Total dimming 000-255 Three in one stroboscopic 000-255 Three in the first mock exam (see: six, mode effect) 000-255...
- Seite 3 39 CHANNELS Channel value Description 000-255 Total dimming 000-255 Three in one stroboscopic 000-255 The first mock exam is the first mock exam. Three in one mode (see: six, three in one mode). 000-255 Three in the first mock exam speed 000-255 Section 1 three in one red light bead linear dimming 000-255...
- Seite 4 42-44 A section of red and green colored light running horse. 45-47 A section of red and blue colored light running horse. 48-50 A section of green and blue colored light running horse. 51-53 A section of red, green and blue colored light running horse. 54-56 Integrated mode code 11-17 cycle.
- Seite 5 159-161 53 A section of blue light beads and a section of red and green colored lights run back. 162-164 54 A red and green colored light and a red and blue colored light run back. 165-167 55 A section of red and blue staining light and a section of green and blue staining light return to the shape.
- Seite 6 12-17 Second white light 18-23 Third section white light 24-29 Fourth section white light 30-35 Section V white light 36-41 Section 6 white light 42-47 Seventh paragraph white light 48-53 Paragraph 8 white light 54-59 A white light runs from left to right. 60-65 A white light runs from right to left.
-
Seite 7: Unpacking Instructions
In the event that a fixture must be returned to the factory, it is important that the fixture be returned in the original factory box and packing. CONTENTS OF THE CARTON • 1 pc. HYPER-STROBE-RGB+W • 1 pc. power cable • 1 pc. bracket •... -
Seite 8: Disconnect Device
the unit by yourself. Repairs carried out by unskilled people can lead to damage or malfunction. Please contact the nearest authorized technical assistance center. Always use the same type of spare parts. • Make sure the power cord is never crimped or damaged. •... -
Seite 9: Master Slave Mode
3 of the XLR connector MASTER SLAVE MODE Connect two or more HYPER-STROBE-RGB+W via a 3-pin DMX connector and set all units to any DMX address between A001 ~ A512. All units must be set to the SAME address! The first device is the master and all other ones are slaves. - Seite 10 Conservez le carton et tous les matériaux d’emballage afin de pouvoir trans- porter l’appareil en toute sécurité. CONTENU DE L'EMBALLAGE • 1 pc. HYPER-STROBE-RGB+W • 1 pc. cordon d'alimentation • 1 pc. étrier • 1 pc. mode d'emploi EXPLICATION DES SYMBOLES SUR L'APPAREIL L’éclair dans le triangle attire l’attention sur un danger physique (due à...
-
Seite 11: Connexion Dmx
• Débranchez l’appareil du secteur avant toute manipulation ou entretien. • La température ambiante ne doit pas dépasser 40°C. Ne pas faire fonctionner l’appareil à des températures supérieures. • En cas de dysfonctionnement, arrêtez immédiatement l’appareil. N’essayez jamais de réparer l’appareil par vous-même. -
Seite 12: Structure Du Menu
120Ω entre les broches 2 et 3. FONCTIONNEMENT EN MAÎTRE-ESCLAVE Connectez deux HYPER-STROBE-RGB+W ou plus via un connecteur DMX à 3 broches et réglez les appareils sur n'importe quelle adresse DMX entre A001 ~ A512. Tous les appareils doivent être réglés sur la MEME... -
Seite 13: Caractéristiques Techniques
adresse DMX. Le premier appareil est le maître et tous les autres sont les esclaves. L'affichage des appareils es- claves ne clignote pas. Tous les esclaves fonctionneront exactement de la même manière que le maître. Remarque : Chaque groupe d'appareils ne peut avoir qu'un seul maître. Le mode Maître-Esclave ne fonctionne que lorsque la console DMX512 est éteinte. -
Seite 14: Auspacken
Zustand sein. Sofort die Transportfirma benachrichtigen und das Verpackungsmaterial aufbewahren, wenn Teile Transportschäden aufweisen. Verpackungsma- terial auch für späteren Transport des Geräts aufbewahren. VERPACKUNGSINHALT • 1 HYPER-STROBE-RGB+W • 1 Stromkabel • 1 Befestigungsbügel • 1 Bedienungsanleitung ZEICHENERKLÄRUNG... -
Seite 15: Anschluss Des Signalkabels
• Darauf achten, dass die Belüftungsschlitze nicht blockiert oder verstopft sind. • Immer erst das Gerät vom Netz trennen, bevor es gewartet oder die Sicherung ersetzt wird. Die Sicherung nur durch eine identische ersetzen. • Das Gerät mit einer Sicherheitskette befestigen. •... -
Seite 16: Bedienfeld
°C beträgt. Wenn der 10K-Thermistor nicht installiert ist, wird T000 angezeigt. MASTER SLAVE EINSTELLUNG Verbinden Sie zwei oder mehr HYPER-STROBE-RGB+W über einen 3-poligen DMX-Anschluss und stellen Sie alle Geräte auf dieselbe DMX-Adresse zwischen A001 ~ A512 ein. Das erste Gerät ist der Master und alle anderen sind Slaves. Das Display der Slaves blinkt nicht. Alle Slaves funktionieren genauso wie der Master. -
Seite 17: Werkseinstellungen
WERKSEINSTELLUNGEN Drücken Sie die Menütaste für 5 Sekunden, um die Werkseinstellung aufzurufen. Die Werkseinstel- lungen umfassen hauptsächlich die Lampenausgangsleistung, den Lüftereinstellungsmodus, die Einstellung des Temperaturschutzpunkts und das Senden von Parametern. Werkseitig kann jeder beliebige Modus eingestellt werden. 5 Sek. die Menü Taste drücken, um die Werkseinstellungen zu verlassen. -
Seite 18: Verklaring Van De Tekens
HANDLEIDING UITPAKKEN Onmiddellijk naar de aankoop van het toestel, verwijder voorzichtig de verpakking en wees zeker dat het toestel in goede toestand is. Breng direct uw dealer op de hoogte en bewaar het verpak- kingsmateriaal indien onderdelen of het karton door het transport beschadigd zijn. Bewaar het karton en alle verpakkingsmaterialen. -
Seite 19: Aansluiting Van De Voedingskabel
• Het product is uitsluitend bedoeld voor decoratieve doeleinden en niet geschikt als verlichting van de huiskamer. • Als de externe flexibele kabel of het snoer van deze armatuur beschadigd is, wordt deze uitslui- tend vervangen door de fabrikant of zijn technicus of een soortgelijk gekwalificeerd persoon om gevaar te voorkomen. -
Seite 20: Fabrieksinstellingen
Als de 10K-thermistor niet is geïnstalleerd, wordt T000 weergegeven. MASTER-SLAVE-BESTURING Verbind twee of meer HYPER-STROBE-RGB+W via een 3-pins DMX-connector en stel alle toestellen in hetzelfde DMX-adres tussen A001 ~ A512. Het eerste apparaat is de master en alle andere zijn slaves. Het display van de slave-units knippert niet. -
Seite 21: Specificaties
W032-W255 Wijzig de witte LED (w032-w255) met OMHOOG/OMLAAG en klik op OK om op te slaan. De standaardwaarde is W240. FAN0-FAN1 Ventilatorstand: FAN0 betekent dat de ventilator gaat werken als het armatuur wordt ingeschakeld. FAN1 betekent dat de ventilator pas gaat werken als het ar- matuur het ingestelde temperatuurbeschermingspunt heeft bereikt. -
Seite 22: Contenido De La Caja
MANUAL DE INSTRUCCIONES Lea atentamente el manual antes de la puesta en marcha. CONTENIDO DE LA CAJA • 1 PC. HYPER-STROBE-RGB+W • 1 PC. cable de energía • 1 PC. soporte • 1 PC. manual de usuario Explicación de los símbolos El símbolo del rayo relámpago con punta de flecha, dentro de un triángulo equilátero, pre-... -
Seite 23: Funciones De Los Botones
DISPOSITIVO DE CORTE: Cuando un enchufe o un interruptor sean utilizados para desconectar el equipo, estos dispositivos han de permanecer fácilmente accesibles en todo momento. INSTALACIÓN Fije el aparato al soporte mediante los tornillos incluidos. Asegúrese de que el equipo está firme- mente fijado para evitar vibraciones y movimientos durante su funcionamiento. -
Seite 24: Conexión Del Cable De Señal
2 y el pin 3 del conector XLR MODO ESCLAVO MAESTRO Conecte dos o más HYPER-STROBE-RGB+W a través de un conector DMX de 3 pines y configure todas las unidades en cualquier dirección DMX entre A001 y A512. ¡Todas las unidades deben configurarse en la MISMA dirección! - Seite 25 ESPECIFICACIONES Alimentación ....................110-240V~ 50/60Hz Consumo ............................500W Fuentes luminosas .................864 LED RGB 5050 3-en-1 ........................96 LED blancos 5730 Estroboscopio ........................1 – 25Hz Dimensiones ..................... 415 x 220 x 100mm Peso ............................4.5kg NOTA IMPORTANTE: Los productos eléctricos no deben ser tirados a la basura normal. Vigile que se hagan reciclar en un lugar adecuado tal y como un centro de reciclado.
- Seite 26 Any problem or question? Contact us on facebook Follow us on Instagram View the product on our website and download the manual in other languages Assembled in PRC Designed by LOTRONIC S.A. Av. Z. Gramme 9 B - 1480 Saintes ...