Herunterladen Inhalt Inhalt Diese Seite drucken

Werbung

Verfügbare Sprachen
  • DE

Verfügbare Sprachen

  • DEUTSCH, seite 10
Technical Support
If you need any technical help, please visit our official support site and
contact our support team before returning the products,
https://support.reolink.com
Technische Unterstützung
Wenn Sie Hilfe brauchen, kontaktieren Sie bitte Reolink Support Team
zuerst, bevor Sie Ihre Bestellung zurücksenden. Meiste Fragen oder
Probleme können von unserem Online Support Center beantwortet
und gelöst werden: https://support.reolink.com
Support technique
Si vous avez besoin d'aide, veuillez contacter Reolink avant de
retourner votre produit. La plupart des questions peuvent être
répondues via notre centre de support en ligne à l'adresse
https://support.reolink.com
Assistenza Tecnica
Se avete bisogno di aiuto, le chiediamo gentilmente di contattare
Reolink prima di restituire il prodotto. La maggior parte delle domande
può essere risolta tramite il nostro centro di assistenza online
all'indirizzo https://support.reolink.com
Soporte técnico
Si necesita ayuda, comuníquese con Reolink antes de devolver su
producto. La mayoría de las preguntas se pueden responder a través
de nuestro centro de soporte en línea en https://support.reolink.com
REOLINK INNOVATION LIMITED
FLAT/RM 705 7/F FA YUEN COMMERCIAL BUILDING 75-77 FA YUEN
STREET MONG KOK KL HONG KONG
Product Ident GmbH
EU
REP
Hoferstasse 9B, 71636 Ludwigsburg, Germany
prodsg@libelleconsulting.com
APEX CE SPECIALISTS LIMITED
UK
REP
89 Princess Street, Manchester, M1 4HT, UK
info@apex-ce.com
Aug 2 02 1
QSG1 _B
58.03 .005.0013
Operational Instruction
Apply to: RLC-510A, RLC-810A,
RLC-410-5MP, RLC-811A
@ReolinkTech https://reolink.com
EN/DE/FR/IT/ES

Werbung

Inhaltsverzeichnis
loading

Inhaltszusammenfassung für Reolink RLC-410-5MP

  • Seite 1 Assistenza Tecnica Operational Instruction Se avete bisogno di aiuto, le chiediamo gentilmente di contattare Reolink prima di restituire il prodotto. La maggior parte delle domande può essere risolta tramite il nostro centro di assistenza online all'indirizzo https://support.reolink.com Apply to: RLC-510A, RLC-810A, Soporte técnico...
  • Seite 2: Inhaltsverzeichnis

    Contents What’s in the Box What’s in the Box Camera Introduction Connection Diagram Camera Waterproof Lid Set up the Camera Ethernet Cable Mount the Camera Troubleshooting Specifications Notification of Compliance Quick Start Guide Surveillance Sign Mounting Hole Template Pack of Screws NOTE: Camera and accessories vary with different camera models that you purchase.
  • Seite 3: Camera Introduction

    Camera Introduction Mount Mount Metal Case Infrared Lights Infrared Lights Lens Lens Daylight Sensor Daylight Sensor Built-in Mic Built-in Mic Waterproof Lid Waterproof Lid Network Cable Network Cable Reset Button Reset Button * Press for about 10 seconds to restore the * Press for about 10 seconds to restore the device to factory settings.
  • Seite 4: Connection Diagram

    Before using the camera, please connect your camera as instructed Mount below to finish initial setup. 1. Connect the camera to a Reolink NVR (not included) with an Ethernet Metal Aluminum Case cable. 2. Connect the NVR to your router, and then power on the NVR.
  • Seite 5: Set Up The Camera

    • The camera may work in extreme cold conditions as low as -25°C. Because when it is powered on, the camera will produce heat. You may NOTE: If you are connecting the camera to a Reolink PoE NVR, please power on the camera indoors for a few minutes before installing it set up the camera via the NVR interface.
  • Seite 6: Install The Camera

    NOTE: There are two different types of mounts for bullet cameras. Please check out the mount included in the package and follow the corresponding instruction to install the camera properly. To get the best field of view, loosen the adjustment knob on security mount and turn Install the Camera the camera.
  • Seite 7: Troubleshooting

    If your camera is not powering on, please try the following solutions: • Make sure your camera is powered properly. The PoE camera should be powered by a PoE switch/injector, the Reolink NVR or a 12V power adapter. • If the camera is connected to a PoE device as listed above, connect 360°...
  • Seite 8: Specifications

    Specifications Simplified EU Declaration of Conformity Hardware Features Reolink declares that this device is in compliance with the essential Night Vision: 30 Meters (100ft) requirements and other relevant provisions of Directive 2014/30/EU. Day/Night Mode: Auto Switchover...
  • Seite 9: Überblick

    Keep out of reach of children. End User License Agreement By using the Product Software that is embedded on the Reolink product, you agree to the terms of this End User License Agreement (“EULA”) between you and Reolink. Learn more: https://reolink.com/eula/.
  • Seite 10: Lieferumfang

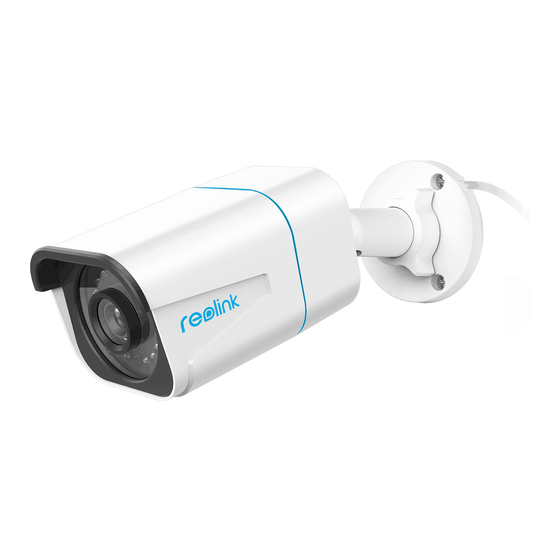
    Lieferumfang Allgemeine Einführung Montagesockel Kamera Wasserdichter Netzwerkkabel Infrarot-LEDs Deckel 1 Meter Objektiv Tageslichtsensor Internes Mikrofon Kurzanleitung Schild Montage- Videoüberwachung Lochschablone Wasserdichter Deckel Netzwerkkabel Reset-Taste * Zum Zurücksetzen auf die Werkseinstellungen ca. 10 Sekunden lang drücken. Päckchen Strom (Optional) mit Schrauben HINWEIS: Kamera und Zubehör variieren je nach dem Kameramodell Ihrer Bestellung.
  • Seite 11 Montagesockel Halterung Aluminiumgehäuse Aluminiumgehäuse Infrarot-LEDs Tageslichtsensor Objektiv Infrarot-LEDs Hochauflösendes Tageslichtsensor Objektiv Internes Mikrofon Scheinwerfer Lautsprecher Wasserdichter Deckel Eingebautes Mikrofon Netzwerkkabel Reset-Taste * Zum Zurücksetzen auf die Werkseinstellungen ca. HINWEIS: 10 Sekunden lang drücken. • Bitte überprüfen Sie die im Paket enthaltene Kamera und deren Details gemäß...
  • Seite 12: Diagramm Für Kameraanschluss

    > Support > App & Client. Netzwerkkabel Netzwerkkabel HINWEIS: Wenn Sie die Kamera an einen Reolink PoE NVR anschließen möchten, bitte richten Sie die Kamera über die NVR-Schnittstelle ein. * Sie können auch die Kamera an einen PoE-Switch oder PoE-Injector anschließen.
  • Seite 13: Installation Der Kamera

    Installation der Kamera HINWEIS: Es gibt zwei verschiedene Weisen für Installation der Bullet-Kameras. Bitte überprüfen Sie zuerst die Halterung im Paket und befolgen Sie dann die Anweisungen, um die Kamera richtig zu Montagetipps installieren. Installation der Kamera • Richten Sie die Kamera nicht auf Lichtquelle. •...
  • Seite 14 HINWEIS: Wenn Ihre Kamera eine andere Halterung ohne Einstellknopf hat, lösen Sie bitte die Einstellschraube mit dem mitgelieferten Sechskantschlüssel und drehen Sie die Kamera wie unten gezeigt, um Um das beste Sichtfield zu erhalten, den Winkel einzustellen. lösen Sie den Einstellknopf auf der Sicherheitshalterung und drehen Sie die Kamera.
  • Seite 15: Spezifikationen

    Fehlerbehebung Auto-Infrarotlichter in der Nacht auf der Seite der Live-Sicht über Reolink App/Client. • Aktualisieren Sie die Firmware Ihrer Kamera auf die neueste Version. Die Kamera ist nicht einzuschalten • Herstellen Sie die Werkseinstellungen der Kamera wieder und überprüfen Sie die Infrarotlicht-Einstellungen noch einma.
  • Seite 16: Fcc-Konformitätserklärung

    Nachtsicht: 30 Meter/100 Fuß Vereinfachte EU-Konformitätserklärung Tag/Nacht Modus: Auto-Umschaltung Reolink erklärt, dass dieses Gerät den grundlegenden Anforderungen Allgemein und anderen relevanten Bestimmungen der Richtlinie 2014/30/EU entspricht. Betriebstemperatur: -10°C to 55°C (14°F to 131° F) Betriebsfeuchtigkeit: 10%-90% Witterungsbeständigkeit: IP66 Korrekte Entsorgung dieses Produkts Weitere Spezifikationen finden Sie unter...
  • Seite 17: Endbenutzer-Lizenzvertrag

    Die Nutzung des Produkts unterliegt Ihrer Zustimmung zu AGB und Datenschutzrichtlinien auf: https://reolink.com/de/. Configurer la caméra Endbenutzer-Lizenzvertrag Monter la Caméra Durch die Verwendung der in das Reolink-Produkt integrierten Dépannage Produktsoftware stimmen Sie den Bestimmungen dieses Endbenutzer-Lizenzvertrags („EULA“) zwischen Ihnen und Reolink zu. Spécifications Weitere Informationen: https://reolink.com/eula/.
  • Seite 18: Contenu De La Boîte

    Contenu de la boîte Introduction de caméra Base de montage Caméra Couvercle étanche Câble Ethernet LED infrarouge Objektiv Capteur de lumière du jour Micro intégré Guide de Signe de Gabarit de perçage démarrage rapide surveillance des trous de fixation Couvercle étanche Câble réseau Trou de réinitialisation * Appuyez pendant environ 10 secondes pour...
  • Seite 19: Haut-Parleur

    Support Base de montage Boîtier métallique Boîtier métallique en aluminium Capteur de LED infrarouge lumière du jour LED infrarouge Objectif Objectif de Capteur de haute définition lumière du jour Projecteur Micro intégré Haut-parleur Wasserdichter Deckel Micro intégré Netzwerkkabel Reset-Taste * Zum Zurücksetzen auf die Werkseinstellungen ca. REMARQUE: 10 Sekunden lang drücken.
  • Seite 20: Diagramme De Connexion

    à l'écran pour terminer la configuration initiale. indiqué ci-dessous pour terminer la configuration initiale. 1. Connectez la caméra à un NVR Reolink avec un câble Ethernet. • Sur Smartphone 2. Connectez l’NVR à votre routeur et mettez-le sous tension.
  • Seite 21: Monter La Caméra

    Monter la Caméra REMARQUE: Il existe deux types de supports différents pour les caméras bullet. Veuillez consulter le support inclus dans le paquet et suivre les instructions correspondantes pour installer correctement l'appareil. Conseils sur l'installation Monter la Caméra • N'orientez pas la caméra vers une fenêtre en verre. Cela pourrait entraîner une mauvaise qualité...
  • Seite 22 REMARQUE: Si votre caméra a un autre support sans le bouton de réglage, veuillez desserrer la vis de réglage avec la clé hexagonale fournie et tourner la caméra comme indiqué ci-dessous pour ajuster l'angle. Pour régler l'angle de la caméra, desserrez le bouton de réglage sur le support de sécurité, puis tournez la caméra pour obtenir le meilleur...
  • Seite 23: Dépannage

    Fonctionnalités du matériel via Reolink App/Client. • Vérifiez si le mode Jour/Nuit est activé et configurez les lumières Vision nocturne: 30 Mètres/100ft infrarouges automatiques la nuit sur la page Vue en direct via Reolink Mode jour/nuit: Commutation automatique App/Client. Français...
  • Seite 24: Avis De Conformité

    Général Reolink déclare que cet appareil est conforme aux exigences essentielles et autres dispositions pertinentes de la Directive 2014/30/EU. Température de fonctionnement: -10°C to 55°C (14°F to 131° F) Humidité de fonctionnement: 10%-90% Résistance aux intempéries: IP66 Élimination correcte de ce produit Pour plus de spécifications, visitez...
  • Seite 25 Presentazione della Telecamera Contrat de licence d'utilisateur final Diagramma di Collegamento En utilisant le logiciel qui est intégré au produit Reolink, vous acceptez les Configurare la Telecamera termes de ce Contrat de Licence Utilisateur Final ("CLUF") entre vous et Reolink. Pour en savoir plus: https://reolink.com/eula/.
  • Seite 26: Cosa C'è Nella Scatola

    Cosa c’è nella Scatola Presentazione della Telecamera Base di Montaggio Telecamera Coperchio Cavo di Luci a Infrarossi Impermeabile Ethernet da 1 m Obiettivo Sensore Luce Diurna Microfono Incorporato Guida Rapida Cartello di Avviso Dima per Fori di Sorveglianza di Montaggio Coperchio Impermeabile Cavo di Ethernet Pulsante di Ripristino...
  • Seite 27 Staffa di Montaggio Base di Montaggio Alloggiamento Metallico in Alluminio Alloggiamento Metallico Sensore di Luce Diurna Luci a Infrarossi Luci a Infrarossi Obiettivo Obiettivo di Alta Definizione Sensore Luce Diurna Faretto Microfono Incorporato Altoparlante Coperchio Impermeabile Microfono incorporato Cavo di Ethernet Pulsante di Ripristino AVVISO: * Premere per circa 10 secondi per ripristinare...
  • Seite 28: Diagramma Di Collegamento

    Scaricare ed avviare l’app Reolink o software Client, e seguire l’istruzione configurazione iniziale prima di utilizzare la telecamera. per finire la configurazione iniziale. 1. Collegare la telecamera a un NVR Reolink con un cavo di Ethernet. 2. Collegare l’NVR al tuo router e accendere l’iniettore. • Sullo Smartphone Scansionare per scaricare l’app Reolink.
  • Seite 29: Montare La Telecamera

    Montare la Telecamera AVVISO: Ci sono due tipi diversi di staffa montaggio per le telecamere bullet. Controlla il tipo della staffa nella confezione e seguire l'istruzione corrispondente per montare la telecamera in modo corretto. Suggerimenti per l'Installazione Base di Montaggio con Manopola di Regolazione •...
  • Seite 30 AVVISO: Allentare la vite di regolazione con la chiave nella confezione e puntare la telecamera in una direzione adatta per ottenere una migliore campo di visione. Allentare la manopola della regolazione sulla staffa per puntare la telecamera ad ottenere un migliore campo di visione.
  • Seite 31: Risoluzione Dei Problemi

    • Assicurarsi che la telecamera è alimentata in modo corretto. La telecamera PoE deve essere alimentata all’iniettore o switch PoE, all’NVR Reolink o all’adattatore d’alimentazione da 12V. Se non si riesce ad aggiornare il firmware della telecamera, provare le • Se la telecamera viene collegata a un dispositivo PoE come indicato soluzioni seguenti: sopra, collegarla a un’altra porta PoE e controllare se la telecamera si...
  • Seite 32: Notifica Di Conformità

    Per maggiori informazioni, visitare: Questo prodotto viene fornito con una garanzia limitata di 2 anni, la https://reolink.com/fcc-compliance-notice/. quale si applica solo ai prodotti acquisiti sul negozio ufficiale Reolink o i rivenditori autorizzati dalla parte Reolink. Ulteriori informazioni: https://reolink.com/warranty-and-return/.
  • Seite 33 Introducción de Cámara Contratto di Licenza per l’Utente Finale Diagrama de Conexión Utilizzando il software prodotto incorporato al prodotto Reolink, voi Configure la Cámara accettate i termini di questo accordo di licenza per l’utente finale (“EULA”) fra voi e Reolink. Scopri di più: https://reolink.com/eula/.
  • Seite 34: Qué Hay En La Caja

    ¿Qué Hay en la Caja? Introducción de Cámara Base de Montaje Cámara Tapa Impermeable Cable de Luces Infrarrojas Ethernet de 1m Objetivo Sensor de Luz Solar Micrófono Incorporado Guía de Inicio Señal de Plantilla de Rápido Vigilancia Orificio de Montaje Tapa Impermeable Cable de Red Orificio de Reinicio...
  • Seite 35 Base de Montaje Soporte Caja Metálica de Aluminio Caja Metálica Sensor de Luz Solar Luces Infrarrojas Luces Infrarrojas Objetivo Objetivo de Alta Definición Sensor de Luz Solar Foco Micrófono Incorporado Altavoz Micrófono Incorporado Tapa Impermeable Cable de Red Orificio de Reinicio NOTA: * Presione durante unos 10 segundos para •...
  • Seite 36: Diagrama De Conexión

    Configure la Cámara Antes de usar la cámara, conecte su cámara como se indica a Descargue e inicie la aplicación Reolink o el software de Client, y siga las instrucciones en pantalla para finalizar la configuración inicial. continuación para finalizar la configuración inicial.
  • Seite 37: Monte La Cámara

    Monte la Cámara NOTA: Existen dos tipos diferentes de soportes para cámaras Bullet. Verifique el soporte incluido en el paquete y siga lasinstrucciones correspondientes para instalar la cámara correctamente. Consejos sobre Instalación Monte la Base con Perilla de Ajuste • No enfrente la cámara hacia ninguna fuente de luz. •...
  • Seite 38 NOTA: Si su cámara tiene otro soporte sin la perilla de ajuste, afloje el tornillo de ajuste con la llave hexagonal proporcionada y gire la cámara como se muestra a continuación para ajustar el ángulo. Para obtener el mejor campo de visión, afloje la perilla de ajuste en el soporte de seguridad y gire la cámara.
  • Seite 39: Solución De Problemas

    • Restaure la cámara a la configuración de fábrica y revise la configuración de la luz infrarroja de nuevo. La cámara no se enciende si no funciona, comuníquese con el equipo de soporte de Reolink https://support.reolink.com/. Si su cámara no se enciende, intente las siguientes soluciones: •...
  • Seite 40: Notificación De Cumplimiento

    General Declaración de Conformidad de la UE Simplificada Temperatura de Funcionamiento: -10°C a 55°C (14°F a 131°F) Reolink declara que este dispositivo cumple con los requisitos esenciales Humedad de Funcionamiento: 10% -90% y otras disposiciones relevantes de la Directiva 2014/30/UE.
  • Seite 41 Contrato de Licencia de Usuario Final Al utilizar el Software del producto que está integrado en el producto Reolink, usted acepte los términos de este Contrato de Licencia de Usuario Final ("EULA") entre usted y Reolink. Obtenga más información: https://reolink.com/eula/.

Diese Anleitung auch für:

Rlc-810aRlc-510aRlc-811a

Inhaltsverzeichnis