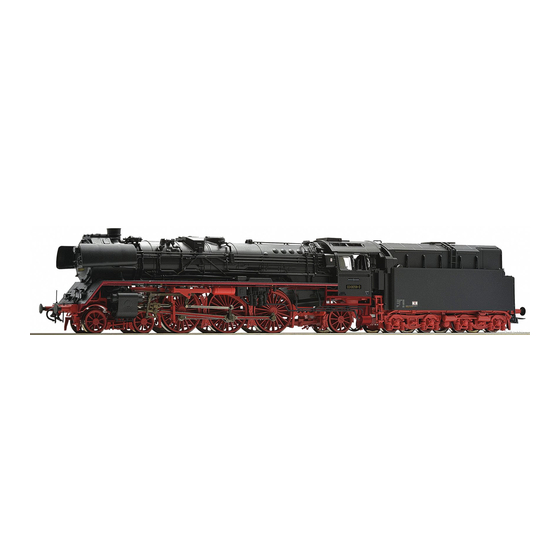
Herunterladen Inhalt Inhalt Diese Seite drucken
Inhaltsverzeichnis

Werbung

Verfügbare Sprachen

Verfügbare Sprachen

Dampflokomotive
Steam locomotive
Locomotive vapeur
70067.indd 1
70067.indd 1
BR 03.10 DR
BR 03.10 DR
BR 03.10 DR
70067
PluX
16
70068
78068
Handbuch
Manual
Manuel
www.roco.cc
02.02.2023 08:24:09
02.02.2023 08:24:09

Werbung

Inhaltsverzeichnis
loading

Inhaltszusammenfassung für roco 70067

  • Seite 1 Dampflokomotive BR 03.10 DR Steam locomotive BR 03.10 DR Locomotive vapeur BR 03.10 DR 70067 PluX 70068 78068 Handbuch Manual Manuel www.roco.cc 70067.indd 1 70067.indd 1 02.02.2023 08:24:09 02.02.2023 08:24:09...
  • Seite 2 Auspacken des Modells! / Unwrap model!/ Déballage du modèle! Beiblatt Auspacken beachten! Please follow unwrap extra sheet! Notez la feuille supplémentaire Déballage ! 70067.indd 2 70067.indd 2 02.02.2023 08:24:09 02.02.2023 08:24:09...
  • Seite 3 Auspacken des Modells! / Unwrap model!/ Déballage du modèle! 70067.indd 3 70067.indd 3 02.02.2023 08:24:09 02.02.2023 08:24:09...
  • Seite 4: Inhaltsverzeichnis

    ) ....... 26 multiMAUS ▪ Nachrüsten eines Seuthe Dampfgenerators ....... 11 ▪ Zusatzfunktion ..............26 ▪ Nachrüsten eines PluX Decoders (Nur für Artikel 70067) .. 12 Ausgangsbelegung ............73 Wartung und Pflege Ihres Modells Ersatzteilliste ..............74 – 91 ▪ Lok-Tender trennen, Gehäuse abnahme ....13 – 15 ▪...
  • Seite 5: Einleitung

    Dank für den Kauf unseres Modells der BR 03.10. Die vorliegende Betriebsanleitung soll Ihnen helfen, die umfangreichen Funktionen Ihrer BR 03.10 zu nutzen. Wir wünschen viel Vergnügen und eine Gute Fahrt! Ihr Roco-Team 70067.indd 5 70067.indd 5 02.02.2023 08:24:09 02.02.2023 08:24:09...
  • Seite 6 Ölhauptfeuerung umgebaut. Die Lokomotiven wurden im täglichen Schnellzugverkehr eingesetzt, ehe in den 1970er Jahren für die meisten Maschinen das „Aus“ kam und sie auf die Abstellgleise rollten. In ihren Dienstjahren bei der DR erbrachten sie dabei rekordverdächtige Laufleistungen von rund 20.000 Kilometern im Monat. 70067.indd 6 70067.indd 6 02.02.2023 08:24:09...
  • Seite 7: Inbetriebnahme Ihrer Lokomotive

    Inbetriebnahme ihrer Lokomotive ▪ Vor der ersten Inbetriebnahme Um schlechte Laufeigenschaften oder Schäden zu vermeiden müssen die Kuppelstangenlager vor der ersten Inbetriebnahme an Ihrer Lokomo- tive geölt werden. Hierzu empfehlen wir den ROCO-Öler 10906. 70067.indd 7 70067.indd 7 02.02.2023 08:24:10...
  • Seite 8: Einfahren Des Modells

    Der kleinste befahrbare Radius für dieses Modell – ohne Kolbenschutzrohre – ist R2 (358 mm) des ROCO-Gleissystems. Der einwandfreie Lauf Ihrer Lokomotive ist nur auf sauberen Schienen gewährleistet. Hierzu empfehlen wir den ROCO-Schienenreinigungswagen Art. Nr. 46400 und bei etwas stär- kerer Verschmutzung den ROCO-Schienen-Reinigungsgummi Art. Nr. 10002. Nur für Vitrine 70067.indd 8...
  • Seite 9: Aufrüstung

    ▪ Aufrüstung Sie können für ihren Fahrbetrieb unter verschiedenen Kupplungen wählen. Wir empfehlen den Einsatz der ROCO-Kurzkupplung. Wahlweise 70067.indd 9 70067.indd 9 02.02.2023 08:24:10 02.02.2023 08:24:10...
  • Seite 10 Im beigelegten Zurüstbeutel finden Sie auch kleine vorbildgetreue Steckteile für eine er- weiterte Aufrüstung Ihrer Lokomotive, die Sie bitte vorsichtig montieren. Kleben nur mit audrücklichen Hinweis! Kleben 70067.indd 10 70067.indd 10 02.02.2023 08:24:10 02.02.2023 08:24:10...
  • Seite 11: Nachrüsten Eines Seuthe Dampfgenerators

    Zuerst den Rauchfang abnehmen und dann den Dampfgenerator Art. Nr. 40160 einbauen. Bei einem eingebauen Dampfgenerator im Di- gitalbetrieb mit einem nachgerüsteten Decoder 10895 ist mit der F1 Taste das Ein- und Ausschal- ten des Dampfgenerators möglich. 70067.indd 11 70067.indd 11 02.02.2023 08:24:10 02.02.2023 08:24:10...
  • Seite 12: Nachrüsten Eines Plux Decoders (Nur Für Artikel 70067)

    ▪ Nachrüsten eines PluX (nur für Artikel 70067) Zuerst das Lokgehäuse abnehmen (siehe Kapitel: War- tung und Pflege Fig. 1). Danach den Brückenstecker aus der Schnittstelle entfernen (sorgsam Aufbewah- ren). Zuletzt den Stecker des Steuerbausteines lage- richtig einsetzen. siehe Fig. 1...
  • Seite 13: Wartung Und Pflege Ihres Modells ▪ Lok-Tender Trennen, Gehäuse Abnahme

    Wartung und Pflege des Modells Damit Ihnen Ihre Lokomotive lange Freude bereitet, sind regelmäßig (ca. alle 30 Betriebsstunden) gewisse Servicearbeiten zweckmäßig. Fig. 1 Fig. 2 70067.indd 13 70067.indd 13 02.02.2023 08:24:11 02.02.2023 08:24:11...
  • Seite 14 1. 2. Fig. 1+2 voir 70067.indd 14 70067.indd 14 02.02.2023 08:24:12 02.02.2023 08:24:12...
  • Seite 15 Fig. 3 70067.indd 15 70067.indd 15 02.02.2023 08:24:12 02.02.2023 08:24:12...
  • Seite 16: Reinigung Der Radstromkontakte

    ▪ Reinigung der Radstromkontakte Radstromkontakte können auf unsauberen Schienen leicht ver- schmutzen. Bitte entfernen Sie vorsichtig mit einem kleinen Pinsel den Schmutz an den gekennzeichneten Stellen. 70067.indd 16 70067.indd 16 02.02.2023 08:24:13 02.02.2023 08:24:13...
  • Seite 17: Schmierung

    ▪ Schmierung Versehen Sie die im Schmierplan gekennzeichneten Stellen mit nur kleinen Öltropfen. Wir empfehlen den ROCO-Öler Art. Nr 10906. Zur Schmierung der Getriebeteile (Zahn- räder, Schnecke) empfehlen wir das ROCO-Spezialfett 10905. Im Falle der Schmierung diese Teile bitte nicht ölen (Gehäuseabnahme siehe Fig.
  • Seite 18: Kohlebürstenwechsel

    ▪ Kohlebürstenwechsel Tendergehäuse abnehmen (Fig. 3). Danach wird der Motor ausgebaut und die Kohlebürsten ausgewechselt. 70067.indd 18 70067.indd 18 02.02.2023 08:24:14 02.02.2023 08:24:14...
  • Seite 19: Haftreifenwechsel

    Haftreifenwechsel Die Haftreifen mit einer Nadel oder mit einem feinen Schraubendreher abziehen. Beim Auf- ziehen der neuen Haftreifen bitte darauf ach- ten, dass dieser sich nicht verdreht. ▪ Schleiferwechsel (nur für 78068) 70067.indd 19 70067.indd 19 02.02.2023 08:24:14 02.02.2023 08:24:14...
  • Seite 20: Montage Der Beiliegenden Ätzschilder

    1. Ohne sie aus dem Ätzrahmen zu entfernen, die Schilder mit ihrer Rückseite auf eine harte und völlig ebene Oberfläche legen. 2. Mit dem ROCO-Rubber (Art.-Nr. 10002), mit einem scharfen Messer mit gerader Klinge oder mit einem ähnlichen Gerät die Farbe von der Oberfläche der Zeichen vorsichtig und sauber abziehen.
  • Seite 21 70067.indd 21 70067.indd 21 02.02.2023 08:24:14 02.02.2023 08:24:14...
  • Seite 22: Der Sounddecoder (Für Artikel 70068/78068)

    Die Lok ist ab Werk auf die Adresse 03 eingestellt F-Taste Funktion für 70068 / 78068 Licht vorne weiß Sound Pfeife kurz Pfeife lang Schaffnerpfiff An/Abkuppeln Rangiergang Kurvenquietschen (nur mit F1 und in Fahrt) Triebwerksbeleuchtung Luftpumpe langsam Speisepumpe Kohleschaufeln 70067.indd 22 70067.indd 22 02.02.2023 08:24:14 02.02.2023 08:24:14...
  • Seite 23 F-Taste Funktion für 70068 / 78068 Injektor Entwässern (nur wenn F1 EIN) Mute - Taste Lichtmaschine Hilfsbläser Ausschlacken Luftpumpe schnell Bahnhofsansage Wasserfassen Sanden Lautstärke + Lautstärke - 70067.indd 23 70067.indd 23 02.02.2023 08:24:14 02.02.2023 08:24:14...
  • Seite 24: Lokeinstellungen

    Adresse (= kurze Adresse) 01 – 99 Anfahrspannung (kleinste Kriechgeschwindigkeit) 01 – 255 Beschleunigungszeit (vom Stillstand bis Maximalgeschwindigkeit) 00 – 255 Bremszeit (von Maximalgeschwindigkeit bis Stillstand) 00 – 255 Maximalgeschwindigkeit 00 – 255 70067.indd 24 70067.indd 24 02.02.2023 08:24:14 02.02.2023 08:24:14...
  • Seite 25: Einstellungen

    32 – Funktion F12 | 64 – Analogbetrieb ohne Verzögerung möglich (CV3, CV4) | 128 –Analogbetrieb geregelt Lange Adresse (Vorraussetzung: In CV29 ist die lange Adresse eingeschalten) 100 – 9999 Einstellungen Gesamtlautstärke aller Geräusche 00 – 255 Bremssoundschwelle 00 – 255 70067.indd 25 70067.indd 25 02.02.2023 08:24:14 02.02.2023 08:24:14...
  • Seite 26: Betrieb Mit Dcc-Zentrale (Multimaus)

    ▪ Zusatzfunktionen Eine Fülle anderer, jedoch wohl recht selten benötigter Einstellmöglichkeiten hinsichtlich Fahrstufenkurve, Lastnachregelungseinstellung oder Geräuschsynchronisation können Sie im ausführlichen Handbuch in Erfahrung bringen. Bitte beachten Sie hierzu die Anleitung MX645P16 auf www.zimo.at 70067.indd 26 70067.indd 26 02.02.2023 08:24:14 02.02.2023 08:24:14...
  • Seite 27 ▪ Fittings ..............32 – 33 ▪ Retrofitting a Seuthe steam generator ......34 ▪ More Functions ..............49 ▪ Retrofitting a PluX (only for item 70067)......35 Decoder interface .............. 73 Replacement parts .............74 – 91 Maintenance of the model ▪...
  • Seite 28: Introduction

    Thank you very much for purchasing our BR 03.10 model. These operating instructions will help you to take advantage of the comprehensive functions of your BR 03.10. We hope that you enjoy your product and wish you a pleasant journey! Your Roco Team 70067.indd 28 70067.indd 28 02.02.2023 08:24:15...
  • Seite 29 The locomotives were operated in daily express train transport until most of them were withdrawn from service in the 1970s and rolled into sidings. During their years of service at the DR, they achieved in part record-breaking running performances of approx- imately 20,000 kilometres per month. 70067.indd 29 70067.indd 29 02.02.2023 08:24:15...
  • Seite 30: Starting Locomotive Operation

    ▪ Prior to initial commissioning In order to prevent poor running characteristics or damage from occurring, the coupling rod bearings on your locomotive must be oiled prior to undertaking the initial commissioning. We recommend using the ROCO oiler 10906. 70067.indd 30 70067.indd 30...
  • Seite 31: Running The Model In

    ▪ Operating instructions The smallest radius this model should run is R2 (358 mm) of the ROCO track system (model without tubes protecting pistons). Your locomotive will run smoothly on clean tracks only. For this purpose we recommend using item no.
  • Seite 32: Fittings

    ▪ Fittings Operation is possible with different couplings. We recommend using the ROCO close coupling. Optional 70067.indd 32 70067.indd 32 02.02.2023 08:24:15 02.02.2023 08:24:15...
  • Seite 33 In the enclosed accessory bag you will find small kits to be fitted on your loco- optional R3 ! motive. Please mount them cautiously. Use glue only if indicated! Cement 70067.indd 33 70067.indd 33 02.02.2023 08:24:15 02.02.2023 08:24:15...
  • Seite 34: Retrofitting A Seuthe Steam Generator

    10895 decoder, it is possible to switch the steam generator on and off via the F1 key. First remove the smokestack and then push in the steam generator art. no. 40160. 70067.indd 34 70067.indd 34 02.02.2023 08:24:15 02.02.2023 08:24:15...
  • Seite 35: Retrofitting A Plux (Only For Item 70067)

    ▪ Retrofitting a Plux decoder (only for Item 70067) First remove locobody (fig. 1). Then remove the jumper from the interface. Finally put the plug of the chip into the interface as shown. siehe Fig. 1 voir Decoder 16-pin 10895 / 10893 70067.indd 35...
  • Seite 36: Maintenance Of The Model

    Maintenance of the model In order to ensure that your locomotive provides you with many years of pleasure, certain service work at regular intervals (approx. every 30 operating hours) is advisable. Fig. 1 Fig. 2 70067.indd 36 70067.indd 36 02.02.2023 08:24:17 02.02.2023 08:24:17...
  • Seite 37 1. 2. Fig. 1+2 voir 70067.indd 37 70067.indd 37 02.02.2023 08:24:17 02.02.2023 08:24:17...
  • Seite 38 Fig. 3 70067.indd 38 70067.indd 38 02.02.2023 08:24:17 02.02.2023 08:24:17...
  • Seite 39: Cleaning Of Wheel Contact

    ▪ Cleaning of wheel contacts Wheel contacts easily get dirty on tracks which are not entirely clean. Use a small brush to remove dirt fom spots marked. 70067.indd 39 70067.indd 39 02.02.2023 08:24:18 02.02.2023 08:24:18...
  • Seite 40: Lubrication

    ▪ Lubrication Only apply small oil droplets onto the positions as marked in the lubrication plan. We recommend ROCO oiler Art. No. 10906. In order to lubricate the transmission parts (gear wheel, screw), we recom- mend using ROCO special grease 10905.
  • Seite 41: Carbon Brush Changing

    ▪ Carbon brush changing First remove tender body (fig. 3) and then the motor. 70067.indd 41 70067.indd 41 02.02.2023 08:24:19 02.02.2023 08:24:19...
  • Seite 42: Replacement Of Traction Tyres

    ▪ Replacement of traction tyres Remove the traction tyres using a needle or a thin screwdriver. When applying the new traction tyres, please ensure that they do not rotate. ▪ AC pick up (only for 78068) 70067.indd 42 70067.indd 42 02.02.2023 08:24:19 02.02.2023 08:24:19...
  • Seite 43: Mounting Of The Enclosed Etched Labels

    1. Before removing the labels from the etched frame place them with their backs on a firm and completely level surface. 2. Remove the paint from the surface of the characters carefully either with the ROCO rubber (art. no. 10002) a sharp knife having a straight edge or similar object (e.g.
  • Seite 44 70067.indd 44 70067.indd 44 02.02.2023 08:24:19 02.02.2023 08:24:19...
  • Seite 45: The Sounddecoder (For 70068/78068)

    Function for 70068 / 78068 Front light, white Sound Whistle short Whistle long Conductor whistle Coupling / Decoupling Shunting gear Curve squeaking (only with F1 and whilst driving) Circulation lighting Airpump slow Feed pump Coal shovelling 70067.indd 45 70067.indd 45 02.02.2023 08:24:19 02.02.2023 08:24:19...
  • Seite 46 F-Key Function for 70068 / 78068 Injector Drainage (only if F1 ON) Mute key Generator Blower Slagging Air pump fast Station announcement Water drum Sanding Volume + Volume- 70067.indd 46 70067.indd 46 02.02.2023 08:24:19 02.02.2023 08:24:19...
  • Seite 47: Locomotive Settings

    Minimum speed (lowest creeping speed) 01 – 255 Start-up delay (from standstill to maximum speed) 00 – 255 Braking delay (from maximum speed to stand-still) 00 – 255 Maximum speed 00 – 255 70067.indd 47 70067.indd 47 02.02.2023 08:24:19 02.02.2023 08:24:19...
  • Seite 48 08 – Function F10 | 16 – Function F11 | 32 – Function F12 Long address (requirement: corresponding CV29 long address setting is activated) 100 – 9999 Settings Total Volume of all Sounds 00 – 255 Breaking Sound 00 – 255 70067.indd 48 70067.indd 48 02.02.2023 08:24:19 02.02.2023 08:24:19...
  • Seite 49: Operation With A Dcc Command Station (Multimaus)

    You can find out about a range of other possible settings, which are probably very rarely needed, relating to drive speed curve, load control setting or noise synchronization from the detailed handbook. This can be downloaded as a pdf document MX645P16 from www.zimo.at. 70067.indd 49 70067.indd 49 02.02.2023 08:24:19...
  • Seite 50 ▪ Post-montage d’un générateur de vapeur Seuthe ..... 57 ▪ Liste CV BR 03.10 ............70 – 72 ▪ Post-montage d’un décodeur PluX (pour rèf. 70067) ..58 ▪ Système avec centrale DCC (multiMAUS) ......72 ▪ Fonction complémentaire ..........72 Maintenance et entretien du modèle...
  • Seite 51: Introduction

    Nous vous remercions d’avoir acheté notre modèle de la BR 03.10. La présente notice d’utilisation devrait vous aider à utiliser les diverses fonctions de votre BR 03.10. Nous vous souhaitons de bien vous amuser et bonne route ! L’équipe Roco 70067.indd 51 70067.indd 51 02.02.2023 08:24:19 02.02.2023 08:24:19...
  • Seite 52 étaient mises hors service dans les années 1970 et abandonnées sur des voies de garage. Au cours de leurs années de service à la DR, elles ont signé un record de performance kilométrique d‘environ 20.000 kilomètres par mois. 70067.indd 52 70067.indd 52 02.02.2023 08:24:19...
  • Seite 53: Mise En Service De Votre Locomotive

    ▪ Avant la première mise en marche Pour éviter les mauvaises propriétés de fonctionnement ou les vices, il s’impose d’huiler les paliers des tiges d’accouplement avant la première mise en marche. Pour ce faire nous conseillons l’huileur ROCO 10906. 53 53 70067.indd 53...
  • Seite 54: Rodage Du Modèle

    Le rayon minimal admissible du modèle present est fixé à soit 358 mm, soit le rayon R2 des voies ROCO (sans des tignes de piston!)Une marche impeccable de votre modèle n‘est réalisable que sur des voies vraiment propres. A ces fins nous vous recommandons notre wagonnettoyeur Roco réf.
  • Seite 55: Les Attelages

    ▪ Les attelages En vue d‘une exploitation pratique sur votre rèseau vous pouvez choisir parmi plusieurs types d‘attelages conformes aux différents systémes d‘attelage pratiqués en H0. Nous vous recommandons l‘emploi de l‘attelage court ROCO. à choisir 55 55 70067.indd 55 70067.indd 55...
  • Seite 56 à la optional R3 ! réalite et à rapporter avec précaution par le modéliste si désiré. N‘utilisez de la colle qu‘aux endroits ex- pressément indiqués coller aux dessins! 56 56 70067.indd 56 70067.indd 56 02.02.2023 08:24:20 02.02.2023 08:24:20...
  • Seite 57: Post-Montage D'un Générateur De Vapeur Seuthe

    ▪ Post-montage d’un générateur de vapeur Seuthe Veuillez démonter d‘abord la cheminée de votre locomotive et introduissez ensuite le fumigéne au chassis. Attention: Le fumigène art. no. 40160. 70067.indd 57 70067.indd 57 02.02.2023 08:24:20 02.02.2023 08:24:20...
  • Seite 58: Post-Montage D'un Décodeur Plux (Pour Rèf. 70067)

    ▪ Post-montage d’un décodeur Plupour rèf. 70067 Veuillez démonter d‘abord la caisse de votre locomotive (fig. 1). Enlevez ensuite la fiche de shuntage de l‘inter- face (à conserver!) et enfichez finalement la fiche du module de télécommande aux prises de l‘interface. Veil- lez à...
  • Seite 59: Maintenance Et Entretien Du Modèle

    Maintenance et entretien du modèle Pour que vous profitiez longtemps de votre locomotive, certains travaux de service réguliers (environ toutes les 30 heures de fonctionne- ment) sont indispensables. Fig. 1 Fig. 2 59 59 70067.indd 59 70067.indd 59 02.02.2023 08:24:21 02.02.2023 08:24:21...
  • Seite 60 1. 2. Fig. 1+2 voir 60 60 70067.indd 60 70067.indd 60 02.02.2023 08:24:22 02.02.2023 08:24:22...
  • Seite 61 Fig. 3 61 61 70067.indd 61 70067.indd 61 02.02.2023 08:24:22 02.02.2023 08:24:22...
  • Seite 62: Nettoyage Des Contacts D'alimentation Des Roues

    ▪ Nettoyage des contacts d’alimentation des roues Les lames de contact risquent de s‘encrasser rapidement sur des voies poussiéreuses. Veuillez enlever la poussiére aux endroits marqués à laide d‘un petit pinceau. 62 62 70067.indd 62 70067.indd 62 02.02.2023 08:24:23 02.02.2023 08:24:23...
  • Seite 63: Lubrification

    ▪ Lubrification Appliquez uniquement de petites gouttes d’huile aux endroits marqués sur le plan de lubrification. Nous conseillons l’huileur ROCO, art. n° 10906. Pour lubrifier les éléments de l’entraîne- ment (pignons, vis sans fin) nous vous conseillons la graisse spéciale ROCO 10905.
  • Seite 64: Changement De Balai De Charbon

    ▪ Changement de balai de charbon Démontez la caisse du tender voir le chapitre: Lubrification (fig. 3). Sortez ensuite le moteur de son logement et échangez finalement le balais. 64 64 70067.indd 64 70067.indd 64 02.02.2023 08:24:23 02.02.2023 08:24:23...
  • Seite 65: Èchange Des Bandages D'adhérence

    Elevez les bandages d‘adhérence à l‘aide d‘une ai- guille ou d‘un tourne-vis fin. Lors du montage des nouveaux bandages veuillez veiller à ce que les bandages ne soient pas tordues. ▪ Fotteur pour Systeme (pour rèf 78068) 65 65 70067.indd 65 70067.indd 65 02.02.2023 08:24:23 02.02.2023 08:24:23...
  • Seite 66: Préparation Et Montage Des Plaques D'immatriculation Photogravées

    1. Poser l’ensemble des plaques (sans les détacher de leur cadre) sur une surface dure et bien plane. 2. Gratter soigneusement la couche supérieure de la peinture des caractères de préférence avec la gomme ROCO (réf. 10002) ou un couteau bien aiguisé...
  • Seite 67 67 67 70067.indd 67 70067.indd 67 02.02.2023 08:24:24 02.02.2023 08:24:24...
  • Seite 68: Affectation Des Touches De Fonction De La Br 03.10 (À La Livraison)

    Sifflet long Sifflet court Sifflement du contrôleur Attelage / Détalage Vitesse de manœuvre Grincement de virages (uniquement avec F1 et en marche) Éclairage circulaire Pompe à air Pompe d’alimentation Pelletage du charbon 70067.indd 68 70067.indd 68 02.02.2023 08:24:24 02.02.2023 08:24:24...
  • Seite 69 F-Goût Fonction pour 70068 / 78068 Injecteur Élimination d’eau (seulement si F1 activé) Touche muette Dynamo Soufflante auxiliaire Décrassage Pompe à air Annonce de quai Plein d’eau Sabler Volume + Volume - 70067.indd 69 70067.indd 69 02.02.2023 08:24:24 02.02.2023 08:24:24...
  • Seite 70: Réglages De La Locomotive

    Tension de démarrage (vitesse de fluage la plus petite) 01 – 255 Temps d’accélération (de l’arrêt jusqu’à la vitesse maximale) 00 – 255 Temps de freinage (de la vitesse maximale jusqu’à l’arrêt) 00 – 255 70067.indd 70 70067.indd 70 02.02.2023 08:24:24 02.02.2023 08:24:24...
  • Seite 71 00 – 255 01 – Locomotive la lumière (avant) | 02 – Locomotive la lumière (arrière) | 04 – Fonction F9 08 – Fonction F10 | 16 – Fonction F11 | 32 – Fonction F12 70067.indd 71 70067.indd 71 02.02.2023 08:24:24...
  • Seite 72: Système Avec Centrale Dcc (Multimaus)

    Vous pouvez lire les valeurs de type octet ou bit avec un équipement approprié (par exemple Z21 / z21 / z21start ). ▪ Fonction complémentaire Vous pouvez télécharger ce manuel par Internet à l’adresse MX645P16 www.zimo.at comme document. 70067.indd 72 70067.indd 72 02.02.2023 08:24:24...
  • Seite 73: Ausgangsbelegung

    Lautsprecher A / Speaker A / Haut-parleur A Aux. 1 Rauchgenerator / Smoke generator / Générateur de fumée 17 18 Lautsprecher B / Speaker B / Haut-parleur B Aux. 2 Triebwerksbeleuchtung / Circulation lighting / Éclairage circulaire 70067.indd 73 70067.indd 73 02.02.2023 08:24:25 02.02.2023 08:24:25...
  • Seite 74: Ersatzteilliste

    Symbolische Darstellung / Symbolic Illustration / Illustration figurative 70067.indd 74 70067.indd 74 02.02.2023 08:24:26 02.02.2023 08:24:26...
  • Seite 75 Nummerntafel 2Stk. / Numberboard 2pieces / Plaque d‘immatriculation 2 pieces 149273 Ventilstange / Valve rod / Tige de soupape 137548 TS-Rauchkammerhandrad / Handwheel / Volant 147212 Aschkasten / Ash pan / Cendrier 137507 70067.indd 75 70067.indd 75 02.02.2023 08:24:26 02.02.2023 08:24:26...
  • Seite 76 Symbolische Darstellung / Symbolic Illustration / Illustration figurative 70067.indd 76 70067.indd 76 02.02.2023 08:24:26 02.02.2023 08:24:26...
  • Seite 77 Seutheisolierung / Seuthe insulation / Seuthe isolation 141221 Gewicht / Weight / Poids 138419 Sound Sounddecoder / Sounddecoder / Sounddecoder 129300 Lokplatine / Printed circuit ass. / La cpl. carte principale 137559 Lautsprecher / Loudspeaker / Haut-parleur 129524 70067.indd 77 70067.indd 77 02.02.2023 08:24:26 02.02.2023 08:24:26...
  • Seite 78 Symbolische Darstellung / Symbolic Illustration / Illustration figurative 70067.indd 78 70067.indd 78 02.02.2023 08:24:27 02.02.2023 08:24:27...
  • Seite 79 Umlaufbeleuchtung kpl. / Runningboard lighting / Feuille de circulation éclairage 137541 TS-Abdeckung / Part set cover / Jeu de couverture 137510 TS-Rohrleitungen / Part set pipeline / Jeu de tuyauterie 137511 SK-Schraube M1,6x4 / SK-Screw M1,6x4 / SK-Vis M1,6x4 115161 70067.indd 79 70067.indd 79 02.02.2023 08:24:27 02.02.2023 08:24:27...
  • Seite 80 Symbolische Darstellung / Symbolic Illustration / Illustration figurative 70067.indd 80 70067.indd 80 02.02.2023 08:24:28 02.02.2023 08:24:28...
  • Seite 81 TS - Gegenkurbel / Part set counter crank / Jeu de pièces contre manivelle 117445 Niet langer Ansatz 3,2 mm / Rivet / Rivet 117446 TS - Nieten / Part set rivet / Jeu de rivet 113252 70067.indd 81 70067.indd 81 02.02.2023 08:24:28 02.02.2023 08:24:28...
  • Seite 82 1 15 2 16 3 17 4 18 4 18 5 19 Symbolische Darstellung / Symbolic Illustration / Illustration figurative 70067.indd 82 70067.indd 82 02.02.2023 08:24:28 02.02.2023 08:24:28...
  • Seite 83 Vorlaufgestell kpl. / Pilot frame ass. / Entraîner trame 137553 Schraube M1,5x5 / Scre M1,5x5 / Vis M1,5x5 108137 AC-Schleiferkontakt / AC-Slider contact / AC curseur contact 137563 Schleifer / Slider / Curseur 86031 70067.indd 83 70067.indd 83 02.02.2023 08:24:29 02.02.2023 08:24:29...
  • Seite 84 Symbolische Darstellung / Symbolic Illustration / Illustration figurative 70067.indd 84 70067.indd 84 02.02.2023 08:24:29 02.02.2023 08:24:29...
  • Seite 85 TS-Gewicht / Part set weight / Jeu de poids 129205 TS-Wasserklappen / Part set waterkeys / Jeu de clés d‘eau 120293 Einfüllstutzen / Filler pipe / Tuyau de remplissage 116870 Motorspange / Motor clasp / Fermoir à moteur 108264 70067.indd 85 70067.indd 85 02.02.2023 08:24:29 02.02.2023 08:24:29...
  • Seite 86 Symbolische Darstellung / Symbolic Illustration / Illustration figurative 70067.indd 86 70067.indd 86 02.02.2023 08:24:30 02.02.2023 08:24:30...
  • Seite 87 137531 Tenderleitungen / Lines / Lignes 114666 Schnecke / Worm / Escargot technique 86704 Kohlebürste / Carbon brush / Brosse en carbone 89743 Bürstenfeder / Brush spring / Ressort de brosse 114197 70067.indd 87 70067.indd 87 02.02.2023 08:24:30 02.02.2023 08:24:30...
  • Seite 88 Zahnräder without gear Symbolische Darstellung / Symbolic Illustration / Illustration figurative 70067.indd 88 70067.indd 88 02.02.2023 08:24:30 02.02.2023 08:24:30...
  • Seite 89 Zahnrad Z=24 rot M=0,4 / Gear Z=24 red M=0,4 / Equipement Z=24 red M=0,4 86516 TS-Tenderblende / Part set tender panel / Jeu de panneau d‘appel d‘offres 117467 Kegeldruckfeder / Spring / Languette 122204 70067.indd 89 70067.indd 89 02.02.2023 08:24:30 02.02.2023 08:24:30...
  • Seite 90 1 19 2 21 3 20 3 20 2 21 70067.indd 90 70067.indd 90 02.02.2023 08:24:31 02.02.2023 08:24:31...
  • Seite 91 Haftringsatz 10Stk. / Set w. traction tieres 10pcs / Ensemble d‘anneau de liaison 10 pcs 40074 Radsatz / Wheelset / Essieu 108304 Radsatz m. Haftreifen u. Zahnrad / Wheelset w. traction tieres a. gear / Essieu 108305 70067.indd 91 70067.indd 91 02.02.2023 08:24:31 02.02.2023 08:24:31...
  • Seite 92 Cela implique le risque de perte de ces composants. Dans ce cas, vous pouvez commander ces pièces aux S.A.V. ROCO; nous ne pouvons cependant pas donner suite à une réclamation èventuelle à cause de ces pièces perdues. Attention! II Modelleisenbahn GmbH y a danger de blessure à...

Diese Anleitung auch für:

Br 03.10 dr7806870068

Inhaltsverzeichnis