Inhaltsverzeichnis
Werbung
Verfügbare Sprachen
Verfügbare Sprachen
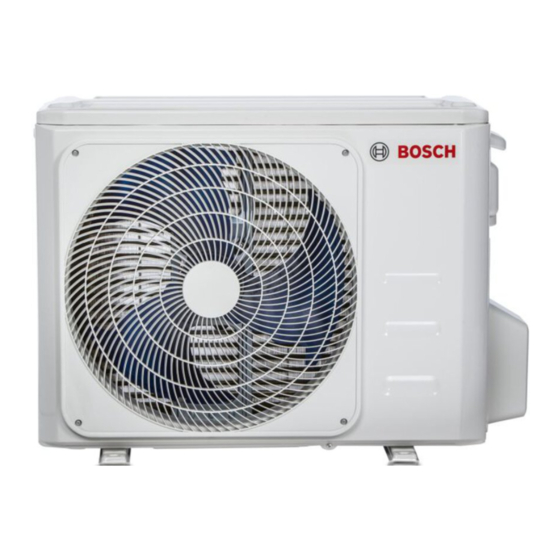
Climate 5000 MS ...
14 OUE | 18 OUE | 21 OUE | 27 OUE | 28 OUE | 36 OUE | 42 OUE
da
Multi-Split-klimaanlæg
de
Multi-Split-Klimagerät
en
Multi-Split air conditioner
es
Acondicionador de aire Multi Split
fr
Climatiseur multi-split
it
Condizionatore multisplit
nl
Multi-split-airconditioning
pl
Urządzenie klimatyzacyjne Multi Split
pt
Unidade de ar condicionado Multi-Split
tr
Multi-Split klima cihazı
Installationsvejledning til installatøren . . . . . . . . . . . . . . . . . . . . . . . . . . . . . . . . . . . . . . 2
Installationsanleitung für die Fachkraft . . . . . . . . . . . . . . . . . . . . . . . . . . . . . . . . . . . . . 14
Installation instructions for the qualified person . . . . . . . . . . . . . . . . . . . . . . . . . . . . . 26
Manual de instalación para el técnico . . . . . . . . . . . . . . . . . . . . . . . . . . . . . . . . . . . . . . 38
Notice d'installation pour le spécialiste . . . . . . . . . . . . . . . . . . . . . . . . . . . . . . . . . . . . . 51
Istruzioni per l'installazione per il tecnico specializzato . . . . . . . . . . . . . . . . . . . . . . . . 63
Installatie-instructie voor de vakman. . . . . . . . . . . . . . . . . . . . . . . . . . . . . . . . . . . . . . . 76
Instrukcja montażu dla instalatora . . . . . . . . . . . . . . . . . . . . . . . . . . . . . . . . . . . . . . . . . 88
Manual de instalação para técnico especializado . . . . . . . . . . . . . . . . . . . . . . . . . . . . 102
Yetkili servis personeli için montaj kılavuzu. . . . . . . . . . . . . . . . . . . . . . . . . . . . . . . . . 115
0010034957-001
Werbung
Kapitel
Inhaltsverzeichnis
Fehlerbehebung

Verwandte Anleitungen für Bosch Climate 5000 MS14 OUE


Inhaltszusammenfassung für Bosch Climate 5000 MS14 OUE
- Seite 1 Climate 5000 MS ... 14 OUE | 18 OUE | 21 OUE | 27 OUE | 28 OUE | 36 OUE | 42 OUE Multi-Split-klimaanlæg Installationsvejledning til installatøren ........2 Multi-Split-Klimagerät Installationsanleitung für die Fachkraft .
-
Seite 2: Inhaltsverzeichnis
Indholdsfortegnelse Indholdsfortegnelse Symbolforklaring og sikkerhedsanvisninger Symbolforklaring Symbolforklaring og sikkerhedsanvisninger....2 Symbolforklaring ....... 2 Advarselshenvisninger Generelle sikkerhedshenvisninger . -
Seite 3: Generelle Sikkerhedshenvisninger
▶ Hvis der slipper kølemiddel ud ved montering, skal Overensstemmelseserklæringens fulde tekst findes på internettet: rummet ventileres grundigt. www.bosch-climate.dk. ▶ Kontrollér anlæggets tæthed efter monteringen. Typeoversigt ▶ Der må ikke slippe andre stoffer end det angivne Alt efter den udvendige enhed kan der tilsluttes forskellige indendørsen-... -
Seite 4: Anbefalede Apparatkombinationer
Oplysninger om produktet Anbefalede apparatkombinationer Vægapparat (B): Indendørsenhed til vægmontering (fyldt med kvælstof) Tabellerne fra side 138 viser kombinationsmuligheder af indendørsen- Fjernbetjening med batterier heder på en udvendig enhed. Om muligt reserveres den største tilslut- Luftfilter ning for den største indendørsenhed. Hvis ikke alle tilslutninger Fastgøringsmateriale (5 skruer og 5 rawplugs) anvendes, kan fordeling på... -
Seite 5: Installation
Installation Krav til opstillingsstedet Kedeltype Maksimal rørlængde Maksimal rørlængde ▶ Overhold mindsteafstande ( kapitel 2.5 på side 4). Climate 5000 MS ... i alt pr. tilslutning ▶ Bemærk minimalt rumareal. 14 OUE ≤ 40 ≤ 25 18 OUE Installations- Ekstra kølemiddel [kg] 21 OUE ≤... -
Seite 6: Montering Af Apparatet
Installation Henvisninger vedr. udendørsenheder 3.3.2 Monter indendørsenhed i loftet ▶ Den udvendige enhed må ikke udsættes for maskinoliedamp, varme driftsdampe, svovlgas osv. ▶ Den udvendige enhed må ikke monteres direkte på vandet eller Vi anbefaler, at rørene forlænges, allerede inden indendørsenheden udsættes for havvind. -
Seite 7: Montering Af Udvendig Enhed
Installation 3.3.4 Montering af udvendig enhed 3.4.2 Tilpas luftindgangsretning (fra bagsiden på undersiden) ▶ Vend kartonen opad. Foretag ombygningen iht. fig. 42: ▶ Skær lukkebåndene op og fjern dem. ▶ Fjern filtergitteret [3]. ▶ Træk kartonen af oppefra, og fjern emballagen. ▶... -
Seite 8: Tilslut Kondensatudløbet På Indendørsenheden
Installation Udvendig rørdiameter Ø Tilspændingsmoment Diameter af bertlet åbning Bertlet rørende Formonteret [mm] [Nm] (A) [mm] bertlingsmøtriksgevind 6,35 (1/4") 18-20 8,4-8,7 3/8" 90°± 4 9,53 (3/8") 32-39 13,2-13,5 3/8" 12,7 (1/2") 49-59 16,2-16,5 5/8" 45°± 2 15,9 (5/8") 57-71 19,2-19,7 3/4"... -
Seite 9: El-Tilslutning
Installation El-tilslutning Kassetteapparat ▶ Fjern afdækningen fra elektronikken. 3.6.1 Generelle anvisninger ▶ Tilslut kablerne på afdækningen og kommunikationskablet på inden- dørsenheden ( fig. 37), og lås den på trækaflastningen. ADVARSEL – Sæt kablet på afdækningen ind i den 5-polede og 10-polede Livsfare på... -
Seite 10: Opstart
Opstart Funktionstest Opstart Efter udført montering med tæthedskontrol og elektrisk tilslutning kan systemet afprøves: Tjekliste til opstart ▶ Etablér strømforsyning. ▶ Tænd for indendørsenheden med fjernbetjeningen. Udvendig enhed og indendørsenhederne er monte- ret korrekt. ▶ Tilkobl køledrift, og indstil den laveste temperatur. ▶... -
Seite 11: Miljøbeskyttelse Og Bortskaffelse
Data Protection Officer, Information Security and Privacy (C/ og bortskaffelse. ISP), Robert Bosch GmbH, Postfach 30 02 20, 70442 Stuttgart, TYSK- LAND. Symbolet gælder for lande med regler for elektronisk affald, f.eks. "Europæisk direktiv 2012/19 / EF om affald af elektrisk og elektro- De er til enhver tid berettiget til at modsætte Dem behandlingen af Deres... -
Seite 12: Tekniske Data
Tekniske data Tekniske data Udvendig enhed Climate 5000 MS ... 14 OUE 18 OUE 21 OUE 27 OUE Ved kombination med indendørsenheder af type: CL3000i UW 26 E CL3000i UW 26 E CL3000i UW 26 E CL3000i UW 26 E Køling Nominel kapacitet Nominel kapacitet... - Seite 13 Tekniske data Udvendig enhed Climate 5000 MS ... 28 OUE 36 OUE 42 OUE Ved kombination med indendørsenheder af type: CL3000i UW 26 E CL3000i UW 26 E CL3000i UW 26 E Energieffektivitetsklasse ved 2 °C – A+++ A+++ A+++ Generelt Strømforsyning V / Hz...
-
Seite 14: Symbolerklärung Und Sicherheitshinweise
Inhaltsverzeichnis Inhaltsverzeichnis Symbolerklärung und Sicherheitshinweise Symbolerklärung Symbolerklärung und Sicherheitshinweise ....14 Symbolerklärung ......14 Warnhinweise Allgemeine Sicherheitshinweise . -
Seite 15: Allgemeine Sicherheitshinweise
Anbringen dieser Kennzeichnung vorsehen. ber sowie von Personen mit verringerten physischen, Der vollständige Text der Konformitätserklärung ist im Internet verfüg- sensorischen oder mentalen Fähigkeiten oder Mangel bar: www.bosch-einfach-heizen.de. an Erfahrung und Wissen benutzt werden, wenn sie Typenübersicht beaufsichtigt oder bezüglich des sicheren Gebrauchs Je nach Außeneinheit können unterschiedliche viele Inneneinheiten an-... -
Seite 16: Empfohlene Kombinationen Der Geräte
Angaben zum Produkt Die Außeneinheiten sind für die beliebige Kombination mit folgenden Gerätetyp Adapterdurchmesser Anzahl Magnetringe Modellen vorgesehen: Climate 5000 MS ... in [mm] Typbezeichnung Gerätetyp 14 OUE – Climate 5000 MS ... OUE Außeneinheit 18 OUE – CL3000i UW ... E / Wandgerät 1 ×... -
Seite 17: Installation
Installation ▶ Je nach Gerätetyp der Außeneinheit die maximale Anzahl ange- Anforderungen an den Aufstellort schlossener Inneneinheiten beachten. ▶ Mindestabstände einhalten ( Kapitel 2.5 auf Seite 16). ▶ Maximale Rohrlänge und maximalen Höhenunterschied zwischen In- ▶ Minimale Raumfläche beachten. neneinheiten und Außeneinheit einhalten. Installations- Zusätzliches Kältemittel [kg] Gerätetyp... -
Seite 18: Gerätemontage
Installation Hinweise zu Außeneinheiten 3.3.2 Inneneinheit in der Decke montieren ▶ Die Außeneinheit keinem Maschinenöldampf, keinen heißen Quell- dämpfen, Schwefelgas usw. aussetzen. ▶ Die Außeneinheit nicht direkt am Wasser installieren oder dem Mee- Wir empfehlen, die Rohre bereits vor dem Aufhängen der Inneneinheit reswind aussetzen. -
Seite 19: Außeneinheit Montieren
Installation 3.3.4 Außeneinheit montieren 3.4.2 Lufteinlassrichtung anpassen (von der Rückseite auf die Unterseite) ▶ Karton nach oben ausrichten. Umbau entsprechend Bild 42 vornehmen: ▶ Verschlussbänder aufschneiden und entfernen. ▶ Filtergitter [3] abnehmen. ▶ Den Karton nach oben abziehen und die Verpackung entfernen. ▶... -
Seite 20: Kondensatablauf An Der Inneneinheit Für Wandmontage Anschließen
Installation Rohr-Außendurchmesser Ø Anzugsmoment [Nm] Durchmesser der gebör- Gebördeltes Rohrende Vormontiertes [mm] delten Öffnung (A) [mm] Bördelmuttergewinde 6,35 (1/4") 18-20 8,4-8,7 3/8" 90°± 4 9,53 (3/8") 32-39 13,2-13,5 3/8" 12,7 (1/2") 49-59 16,2-16,5 5/8" 45°± 2 15,9 (5/8") 57-71 19,2-19,7 3/4"... -
Seite 21: Elektrischer Anschluss
Installation Elektrischer Anschluss Kanalgerät Zum Anschließen des Kommunikations-Kabels: 3.6.1 Allgemeine Hinweise ▶ Abdeckung der Elektronik abnehmen. ▶ Kabel an der Zugentlastung sichern und an den Klemmen L, N, S und WARNUNG anschließen. Lebensgefahr durch elektrischen Strom! ▶ Zuordnung der Adern zu den Anschlussklemmen notieren. Das Berühren von elektrischen Teilen, die unter Spannung stehen, kann ▶... -
Seite 22: Inbetriebnahme
Inbetriebnahme Funktionstest Inbetriebnahme Nach erfolgter Installation mit Dichtheitsprüfung und elektrischem An- schluss kann das System getestet werden: Checkliste für die Inbetriebnahme ▶ Spannungsversorgung herstellen. ▶ Inneneinheit mit der Fernbedienung einschalten. Außeneinheit und Inneneinheiten sind ordnungs- gemäß montiert. ▶ Kühlbetrieb einschalten und niedrigste Temperatur einstellen. ▶... -
Seite 23: Umweltschutz Und Entsorgung
Elektronik-Altgeräten wenden Sie sich bitte an die zuständigen unseren Datenschutzbeauftragten wenden: Datenschutzbeauftragter, Behörden vor Ort, an Ihr Abfallentsorgungsunternehmen oder an den Information Security and Privacy (C/ISP), Robert Bosch GmbH, Post- Händler, bei dem Sie das Produkt gekauft haben. fach 30 02 20, 70442 Stuttgart, DEUTSCHLAND. -
Seite 24: Technische Daten
Technische Daten Technische Daten Außeneinheit Climate 5000 MS ... 14 OUE 18 OUE 21 OUE 27 OUE Bei Kombination mit Inneneinheiten vom Typ: CL3000i UW 26 E CL3000i UW 26 E CL3000i UW 26 E CL3000i UW 26 E Kühlen Nennleistung Nennleistung Btu/h... - Seite 25 Technische Daten Außeneinheit Climate 5000 MS ... 28 OUE 36 OUE 42 OUE Bei Kombination mit Inneneinheiten vom Typ: CL3000i UW 26 E CL3000i UW 26 E CL3000i UW 26 E Energieeffizienzklasse bei 2 °C – A+++ A+++ A+++ Allgemein Spannungsversorgung V / Hz 220-240 / 50...
-
Seite 26: Explanation Of Symbols And Safety Instructions
Table of contents Table of contents Explanation of symbols and safety instructions Explanation of symbols Explanation of symbols and safety instructions ..26 Explanation of symbols ......26 Warnings General safety instructions . -
Seite 27: General Safety Instructions
H Safety of electrical devices for domestic use The complete text of the Declaration of Conformity is available on the and similar purposes Internet: worcester-bosch.co.uk. The following requirements apply in accordance with Type overview EN 60335-1 in order to prevent hazards from... -
Seite 28: Model Designation
Product Information The outdoor units are designed to be combined with any of the following Unit type Adapter diameter in Number of magnet types: Climate 5000 MS ... [mm] rings Model designation Unit type 14 OUE – Climate 5000 MS ... OUE Outdoor unit 18 OUE –... -
Seite 29: Installation
Installation ▶ Observe the maximum number of connected indoor units which Requirements for installation site depends on the appliance type of the outdoor unit. ▶ Observe minimum clearances ( Chapter 2.5 on page 28). ▶ Observe maximum piping length and maximum difference in height ▶... -
Seite 30: Unit Installation
Installation Notices regarding outdoor units 3.3.2 Installing the indoor unit in the ceiling ▶ The outdoor unit must not be exposed to machine oil vapour, hot spring vapour, sulphur gas, etc. ▶ Do not install the outdoor unit directly next to water or where it is We recommend preparing the pipes before hanging the indoor unit so exposed to sea air. -
Seite 31: Installing The Outdoor Unit
Installation 3.3.4 Installing the outdoor unit 3.4.2 Adjusting air inlet direction (from the rear to the underside) ▶ Place the box so it is facing upwards. Carry out modification as shown in Fig. 42: ▶ Cut and remove the packing straps. ▶... -
Seite 32: Connecting Condensate Pipe To The Wall-Mounted Indoor Unit
Installation External diameter of pipe Ø Tightening torque [Nm] Flared opening diameter Flared pipe end Pre-assembled flare nut [mm] (A) [mm] thread 6.35 (1/4") 18-20 8.4-8.7 3/8" 90°± 4 9.53 (3/8") 32-39 13.2-13.5 3/8" 12.7 (1/2") 49-59 16.2-16.5 5/8" 45°± 2 15.9 (5/8") 57-71 19.2-19.7... -
Seite 33: Electrical Connection
Installation Electrical connection Cassette indoor unit ▶ Remove the cover of the electronics. 3.6.1 General notes ▶ Connect the cable of the cover and the communication cable to the indoor unit ( Fig. 37) and secure to the strain relief. WARNING –... -
Seite 34: Commissioning
Commissioning Functional test of the unit Commissioning The system can be tested once the installation including tightness test has been carried out and the electrical connection has been established: Commissioning checklist ▶ Connect the power supply. ▶ Switch on indoor unit with the remote control. Outdoor unit and indoor units are correctly installed. -
Seite 35: Environmental Protection And Disposal
Data Protection Officer, Information Security and Privacy (C/ISP), This symbol means that the product must not be disposed Robert Bosch GmbH, Postfach 30 02 20, 70442 Stuttgart, GERMANY. of with other waste, and instead must be taken to the waste... -
Seite 36: Technical Data
Technical data Technical data Outdoor unit Climate 5000 MS ... 14 OUE 18 OUE 21 OUE 27 OUE When combined with indoor units of the type: CL3000i UW 26 E CL3000i UW 26 E CL3000i UW 26 E CL3000i UW 26 E Cooling Rated output Rated output... - Seite 37 Technical data Outdoor unit Climate 5000 MS ... 28 OUE 36 OUE 42 OUE When combined with indoor units of the type: CL3000i UW 26 E CL3000i UW 26 E CL3000i UW 26 E Energy efficiency class at 2 °C –...
- Seite 38 Índice Índice Aviso de protección de datos ......48 Datos técnicos ........49 Explicación de los símbolos e indicaciones de seguridad.
-
Seite 39: Explicación De Los Símbolos E Indicaciones De Seguridad
Explicación de los símbolos e indicaciones de seguridad Indicaciones generales de seguridad Explicación de los símbolos e indicaciones de H Avisos para el grupo objetivo seguridad Este manual de instalación se dirige a los técnicos Explicación de los símbolos especialistas en instalaciones de ventilación, eléctri- cas y en electrotécnica. -
Seite 40: Indicaciones Sobre Estas Instrucciones
– la colocación de esta identificación. – El texto completo de la declaración de conformidad está disponible en internet: www.bosch-climate.es. Tab. 5 Climate 5000 MS 21 OUE+ 2 × CL...W/CAS/DCT Relación de modelos La tab. 5 visualiza las posibilidades de combinación de 2 unidades Dependiendo de la unidad exterior, puede conectarse un número dife-... -
Seite 41: Dimensiones Y Distancias Mínimas
Datos sobre el producto ▶ Dependiendo del tipo de aparato de la unidad exterior, tener en Tipo de aparato Diámetro del Número de anillos cuenta la máxima cantidad de unidades interiores conectadas. Climate 5000 MS ... adaptador en [mm] magnéticos ▶... -
Seite 42: Instalación
Instalación Indicaciones acerca de unidades interiores con instalación de pared Instalación ▶ El aparato puede ser instalado en una habitación con una superficie básica de 4 m m, con la condición de que la altura de montaje sea de Antes de proceder a la instalación por lo menos 1,8 m. -
Seite 43: Montar La Unidad Interior En El Techo
Instalación ▶ En caso dado, doblar los tubos en la dirección deseada y abrir un ori- 3.3.3 Montaje de la cubierta en cassettes encastrables ficio en el lado de la unidad interior ( fig. 21). ▶ Retirar la rejilla de entrada de aire del recubrimiento ( fig. 32). ▶... -
Seite 44: Adaptar La Dirección De Entrada De Aire (Desde El Lado Posterior Al Lado Inferior)
Instalación 3.4.2 Adaptar la dirección de entrada de aire (desde el lado posterior al lado inferior) Realizar la modificación según la fig. 42: Tubería de cobre están disponibles en medidas métricas y pulgadas; no ▶ Retirar la rejilla de filtro [3]. obstante, las roscas de la tuerca de rebordeo son las mismas. -
Seite 45: Prueba De La Salida De Condensados
Instalación 3.5.4 Prueba de la salida de condensados Conexión eléctrica 3.6.1 Indicaciones generales Mediante una prueba de la salida de condensados se puede asegurar ADVERTENCIA que todas las uniones están impermeabilizadas. ¡Peligro de muerte por corriente eléctrica! ▶ Comprobar la salida de condensados antes de cerrar el techo. El contacto con piezas eléctricas que se encuentran bajo tensión puede tener por consecuencia una descarga de corriente. -
Seite 46: Conectar La Unidad Exterior
Puesta en funcionamiento Aparato de montaje en canal Puesta en funcionamiento Para conectar el cable de comunicación: ▶ Retirar el recubrimiento del sistema electrónico. Lista de verificación para la puesta en marcha ▶ Asegurar el cable en el retenedor de cable y conectarlo a los bornes L, N, S y La unidad exterior y las unidades interiores están cor- ▶... -
Seite 47: Entrega Al Cliente
Eliminación de fallos Entrega al cliente ▶ Una vez configurado el sistema, entregar el manual de instalación al cliente. ▶ Explicar al cliente el manejo del sistema a partir del manual de usua- rio. ▶ Recomendar al cliente leer atentamente el manual de usuario. Eliminación de fallos Errores con indicaciones En caso de surgir un error durante el funcionamiento, los LEDs parpa-... -
Seite 48: Protección Del Medio Ambiente Y Eliminación De
Aparatos usados empresas afiliadas a Bosch. En algunos casos, pero solo si se asegura Los aparatos viejos contienen materiales que pueden volver a utilizarse. una protección de datos adecuada, se podrían transferir datos persona- Los materiales son fáciles de separar y los plásticos se encuentran seña-... -
Seite 49: Datos Técnicos
Datos técnicos Datos técnicos Unidad exterior Climate 5000 MS ... 14 OUE 18 OUE 21 OUE 27 OUE En caso de combinación con unidades interiores CL3000i UW 26 E CL3000i UW 26 E CL3000i UW 26 E CL3000i UW 26 E del tipo: Refrigerar Potencia nominal... - Seite 50 Datos técnicos Unidad exterior Climate 5000 MS ... 28 OUE 36 OUE 42 OUE En caso de combinación con unidades interiores del tipo: CL3000i UW 26 E CL3000i UW 26 E CL3000i UW 26 E Eficiencia energética (SCOP) a 2 °C –...
-
Seite 51: Explication Des Symboles Et Mesures De Sécurité
Sommaire Sommaire Explication des symboles et mesures de sécurité Explications des symboles Explication des symboles et mesures de sécurité ..51 Explications des symboles..... . .51 Avertissements Consignes générales de sécurité... -
Seite 52: Consignes Générales De Sécurité
8 ans ainsi que par des personnes aux capacités Le texte complet de la déclaration de conformité est disponible sur physiques, sensorielles ou mentales réduites ou Internet : www.bosch-chauffage.fr. dénuées d'expérience ou de connaissance, s'ils (si Tableau des modèles elles) sont correctement surveillé(e)s ou si des ins-... -
Seite 53: Combinaisons Recommandées
Informations sur le produit Les unités extérieures sont conçues pour pouvoir être combinées avec Type d’appareil Diamètre de l’adaptat- Quantité d’anneaux les types suivants : Climate 5000 MS ... eur en [mm] magnétiques Désignation du modèle Type d’appareil 14 OUE –... -
Seite 54: Conduites De Fluide Frigorigène
Installation 2.5.2 Conduites de fluide frigorigène Installation Légende de la figure 4: Tuyau de gaz Avant l’installation Tuyau de liquide Coude en forme de siphon comme piège à huile PRUDENCE Risque d'accident dû aux arêtes vives ! ▶ Porter des gants de protection pour l’installation. Si les unités intérieures sont placées plus bas que les unités extérieures, prévoir un coude piège à... -
Seite 55: Montage Des Appareils
Installation Consignes relatives aux unités murales ▶ Le cas échéant, courber le tube dans la direction souhaitée et percer une ouverture sur le côté de l’unité intérieure ( fig. 21). ▶ L’appareil peut être installé dans une pièce avec une surface au sol de 4 m à... -
Seite 56: Montage Du Cache Pour Les Cassettes
Installation 3.3.3 Montage du cache pour les cassettes 3.4.2 Adapter l’orientation de reprise d’air (de l’arrière au dessous) ▶ Retirer la grille d’entrée d’air du cache ( fig. 32). Procéder à la modification comme indiqué dans la fig. 42 : ▶... -
Seite 57: Murale
Installation ▶ Poser et fixer l’isolation de tubes. Diamètre extérieur du Couple de serrage [Nm] Diamètre de l’ouverture Extrémité du tube avec Filetage prémonté de tube Ø [mm] avec cône (A) [mm] cône l’écrou du cône 6,35 (1/4") 18-20 8,4-8,7 3/8"... -
Seite 58: Raccordement Électrique
Installation Raccordement électrique Gainable Pour raccorder le câble de communication : 3.6.1 Remarques générales ▶ Retirer le cache de l’électronique. ▶ Fixer le câble sur le serre-câble et le raccorder aux bornes de raccor- AVERTISSEMENT dement L, N. S et Danger de mort par électrocution ! ▶... -
Seite 59: Mise En Service
Mise en service Contrôle du fonctionnement Mise en service Après avoir terminé l’installation ainsi que le contrôle d’étanchéité et le raccordement électrique, le système peut être testé : Liste de contrôle pour la mise en service ▶ Etablir l’alimentation électrique. ▶... -
Seite 60: Protection De L'environnement Et Recyclage
à des prestataires de service externes et/ou à des entreprises Le symbole s’applique aux pays concernés par les règle- affiliées à Bosch. Dans certains cas, mais uniquement si une protection ments sur les déchets électroniques, par ex. la « Directive européenne des données appropriée est assurée, les données à... -
Seite 61: Caractéristiques Techniques
Caractéristiques techniques Caractéristiques techniques Unité extérieure Climate 5000 MS ... 14 OUE 18 OUE 21 OUE 27 OUE Combinaison avec des unités intérieures de type : CL3000i UW 26 E CL3000i UW 26 E CL3000i UW 26 E CL3000i UW 26 E Refroidissement Puissance nominale Puissance nominale... - Seite 62 Caractéristiques techniques Unité extérieure Climate 5000 MS ... 28 OUE 36 OUE 42 OUE Combinaison avec des unités intérieures de type : CL3000i UW 26 E CL3000i UW 26 E CL3000i UW 26 E Classe d’efficience énergétique à –7 °C –...
- Seite 63 Indice Indice Informativa sulla protezione dei dati ....73 Dati tecnici ......... 74 Significato dei simboli e avvertenze di sicurezza .
-
Seite 64: Significato Dei Simboli E Avvertenze Di Sicurezza
Significato dei simboli e avvertenze di sicurezza Avvertenze di sicurezza generali Significato dei simboli e avvertenze di sicurezza H Informazioni per il gruppo di destinatari Significato dei simboli Le presenti istruzioni di installazione si rivolgono ai tecnici specializzati nei settori del raffrescamento e Avvertenze di sicurezza generali Nelle avvertenze le parole di segnalazione indicano il tipo e la gravità... -
Seite 65: Informare In Particolare Sui Seguenti Punti
Climate 5000 MS 21 OUE: Il testo completo della dichiarazione di conformità è disponibile su Inter- A...C Collegamento da A a C all'unità esterna net: www.bosch-clima.it. +...+P Potenza totale di tutte le unità interne collegate ... P Potenza dell'unità interna sul collegamento da A a C Panoramica dei modelli A seconda dell'unità... -
Seite 66: Dimensioni E Distanze Minime
Installazione ▶ A seconda del tipo di apparecchio di unità esterna fare attenzione al Tipo di apparecchio Diametro adattatore Numero di anelli numero massimo di unità interne collegate. Climate 5000 MS ... in [mm] magnetici ▶ Rispettare la lunghezza massima del tubo e la differenza massima di 14 OUE –... -
Seite 67: Requisiti Del Luogo Di Installazione
Installazione Requisiti del luogo di installazione Avvisi sulle unità esterne ▶ Non esporre l'unità esterna ai vapori d'olio emessi da macchine, a ▶ Rispettare le distanze minime ( capitolo 2.5 a pag. 66). vapori termali molto caldi, gas solforosi e simili. ▶... -
Seite 68: Montaggio Dell'unità Interna Al Soffitto
Installazione Per rimuovere l'unità interna dalla piastra di montaggio: Non rimontare la griglia di aspirazione dell'aria prima di aver effettuato il collegamento elettrico. ▶ tirare verso il basso il lato inferiore del mantello in corrispondenza delle due cavità e tirare l'unità interna in avanti ( fig. 24). 3.3.4 Installazione dell'unità... -
Seite 69: Regolare La Direzione Di Ingresso Dell'aria (Dal Retro Sul Lato Inferiore)
Installazione 3.4.2 Regolare la direzione di ingresso dell'aria (dal retro sul lato inferiore) Eseguire la modifica come illustrato in fig. 42: I tubi di rame sono disponibili in misure metriche e in pollici, ma le filet- ▶ Togliere la griglia del filtro [3]. tature dei dadi svasati sono uguali. -
Seite 70: Test Dello Scarico Condensa
Installazione 3.5.4 Test dello scarico condensa Collegamento elettrico 3.6.1 Indicazioni generali Con un test dello scarico condensa è possibile garantire che tutti i punti AVVERTENZA di collegamento siano a tenuta ermetica. Pericolo di morte per corrente elettrica! ▶ Testare lo scarico condensa prima che venga chiuso il soffitto. Toccando componenti elettrici sotto tensione si rischia la folgorazione. -
Seite 71: Collegamento Dell'unità Esterna
Messa in funzione Apparecchio canalizzato Messa in funzione Per collegare il cavo di comunicazione: ▶ Togliere il pannello protettivo dell'elettronica. Lista di controllo per la messa in funzione ▶ Fissare il cavo conduttore al ferma cavo e collegarlo ai morsetti L, N, L'unità... -
Seite 72: Consegna Al Gestore
Risoluzione dei problemi Consegna al gestore ▶ Terminata l'installazione del sistema, consegnare le istruzioni di installazione al cliente. ▶ Illustrare al cliente l'impostazione di comando del sistema facendo riferimento alle istruzioni per l'uso. ▶ Raccomandare al cliente di leggere con attenzione le istruzioni per l'uso. -
Seite 73: Protezione Ambientale E Smaltimento
Apparecchi obsoleti trasferire dati a fornitori di servizi esterni e/o aziende affiliate a Bosch. Gli apparecchi dismessi contengono materiali che possono essere rici- Talvolta, ma soltanto con adeguata garanzia di tutela, i dati personali clati. -
Seite 74: Dati Tecnici
Dati tecnici Dati tecnici Unità esterna Climate 5000 MS ... 14 OUE 18 OUE 21 OUE 27 OUE In caso di combinazione con unità interne con sigla CL3000i UW 26 E CL3000i UW 26 E CL3000i UW 26 E CL3000i UW 26 E prodotto: Raffrescamento Potenza nominale... - Seite 75 Dati tecnici Unità esterna Climate 5000 MS ... 28 OUE 36 OUE 42 OUE In caso di combinazione con unità interne con sigla prodotto: CL3000i UW 26 E CL3000i UW 26 E CL3000i UW 26 E Efficienza energetica (SCOP) a –7 °C –...
-
Seite 76: Toelichting Bij De Symbolen En Veiligheidsinstructies
Inhoudsopgave Inhoudsopgave Toelichting bij de symbolen en veiligheidsin- structies Toelichting bij de symbolen en veiligheidsinstructies ..76 Toelichting op de symbolen Toelichting op de symbolen..... . 76 Algemene veiligheidsinstructies . -
Seite 77: Algemene Veiligheidsinstructies
De volledige tekst van de conformiteitsverklaring is via internet beschik- Ter voorkoming van gevaar door elektrische appara- baar: www.bosch-thermotechniek.nl. tuur gelden conform EN 60335-1 de volgende instruc- Type-overzicht ties: Afhankelijk van de buitenunit kunnen verschillende aantallen binnen- “Dit toestel kan door kinderen vanaf 8 jaar en ouder en... -
Seite 78: Geadviseerde Toestelcombinaties
Productinformatie De buitenunits zijn bedoeld voor willekeurige combinatie met de volgen- Toesteltype Adapterdiameter in Aantal de modellen: Climate 5000 MS ... [mm] magneetringen Type Toesteltype 14 OUE – Climate 5000 MS ... OUE Buitenunit 18 OUE – CL3000i UW ... E / Wandtoestel 1 ×... -
Seite 79: Installatie
Installatie ▶ Afhankelijk van het toesteltype van de buitenunit het maximale aantal Eisen aan de opstellingsplaats aangesloten binnenunits aanhouden. ▶ Minimale afstanden aanhouden ( hoofdstuk 2.5 op pagina 78). ▶ Maximale buislengte en maximale hoogteverschil tussen binnenunits ▶ Minimale ruimteoppervlak aanhouden. en buitenunit aanhouden. -
Seite 80: Montage Van Het Toestel
Installatie Aanwijzingen voor buitenunits 3.3.2 Binnenunit in het plafond monteren ▶ De buitenunit niet blootstellen aan machine-oliedamp, hete stoom, zwavelgas enzovoort. ▶ De buitenunit niet vlak bij water installeren of aan de zeewind bloot- Wij adviseren, de buizen al voor het ophangen van de binnenunit voor te stellen. -
Seite 81: Buitenunit Monteren
Installatie 3.3.4 Buitenunit monteren 3.4.2 Pas de luchtinlaatrichting aan (vanaf de achterzijde naar de onderzijde) ▶ Karton naar boven uitrichten. Ombouw conform afb. 42 uitvoeren: ▶ Sluitbanden open snijden en verwijderen. ▶ Filterrooster [3] afnemen. ▶ Het karton naar boven aftrekken en de verpakking verwijderen. ▶... -
Seite 82: Condensafvoer Op De Binnenunit Voor Wandmontage Aansluiten
Installatie Buisbuitendiameter Ø [mm] Aandraaimoment [Nm] Diameter van de Geflensd buisuiteinde Voorgemonteerd flensopening (A) [mm] flensmoerschroefdraad 6,35 (1/4") 18-20 8,4-8,7 3/8" 90°± 4 9,53 (3/8") 32-39 13,2-13,5 3/8" 12,7 (1/2") 49-59 16,2-16,5 5/8" 45°± 2 15,9 (5/8") 57-71 19,2-19,7 3/4" R0.4~0.8 Tabel 14 Specificatie van de buisverbindingen 3.5.2... -
Seite 83: Aansluiten Elektrisch
Installatie Aansluiten elektrisch Kanaaltoestel Voor aansluiten van de communicatiekabel: 3.6.1 Algemene aanwijzingen ▶ Afdekking van de elektronica afnemen. ▶ Kabel via de trekontlasting zekeren en op de klemmen L, N, S en WAARSCHUWING aansluiten. Levensgevaar door elektrische stroom! ▶ Toekenning van de aders aan de aansluitklemmen noteren. Aanraken van elektrische onderdelen die onder spanning staan, kan een ▶... -
Seite 84: Inbedrijfstelling
Inbedrijfstelling Werkingscontrole Inbedrijfstelling Na uitgevoerde installatie met dichtheidstest en elektrische aansluiting kan het systeem worden getest: Checklist voor de inbedrijfname ▶ Voedingsspanning tot stand brengen. ▶ Binnenunit met de afstandsbediening inschakelen. Buitenunit en binnenunits zijn correct gemonteerd. ▶ Koelmodus inschakelen en laagste temperatuur instellen. ▶... -
Seite 85: Milieubescherming En Afvalverwerking
Data Protection Officer onder: Data Protection Officer, Information beperken. Bovendien draagt het recyclen van elektronisch schroot bij Security and Privacy (C/ISP), Robert Bosch GmbH, Postfach 30 02 20, aan het behoud van natuurlijke hulpbronnen. 70442 Stuttgart, DUITSLAND. -
Seite 86: Technische Gegevens
Technische gegevens Technische gegevens Buitenunit Climate 5000 MS ... 14 OUE 18 OUE 21 OUE 27 OUE Bij combinatie met binnenunits van het type: CL3000i UW 26 E CL3000i UW 26 E CL3000i UW 26 E CL3000i UW 26 E Koelen Nominaal vermogen Nominaal vermogen... - Seite 87 Technische gegevens Buitenunit Climate 5000 MS ... 28 OUE 36 OUE 42 OUE Bij combinatie met binnenunits van het type: CL3000i UW 26 E CL3000i UW 26 E CL3000i UW 26 E Opgenomen vermogen (minimaal - maximaal) 280-3200 525-3684 610-3300 Energiezuinigheid (SCOP) bij –7 °C –...
- Seite 88 Spis treści Spis treści Informacja o ochronie danych osobowych....99 Dane techniczne........100 Objaśnienie symboli i wskazówki dotyczące bezpieczeństwa .
-
Seite 89: Objaśnienie Symboli I Wskazówki Dotyczące Bezpieczeństwa
Objaśnienie symboli i wskazówki dotyczące bezpieczeństwa Ogólne zalecenia bezpieczeństwa Objaśnienie symboli i wskazówki dotyczące H Wskazówki dla grupy docelowej bezpieczeństwa Niniejsza instrukcja montażu jest adresowana do Objaśnienie symboli instalatorów instalacji chłodniczych, klimatyzacyjnych i elektrotechnicznych. Należy przestrzegać Wskazówki ostrzegawcze We wskazówkach ostrzegawczych zastosowano hasła ostrzegawcze wskazówek zawartych we wszystkich instrukcjach oznaczające rodzaj i ciężar gatunkowy następstw zaniechania działań... -
Seite 90: Wskazówki Dot. Niniejszej Instrukcji
Informacje o produkcie H Odbiór przez użytkownika Przegląd typów W zależności od jednostki zewnętrznej można podłączyć różną liczbę W trakcie odbioru należy udzielić użytkownikowi jednostek wewnętrznych: informacji na temat obsługi i warunków pracy Typ urządzenia Liczba instalacji klimatyzacyjnej. Climate 5000 MS ... Przyłącza Jednostki ▶... -
Seite 91: Zakres Dostawy
Informacje o produkcie Przykład: Climate 5000 MS 21 OUE + 2 × CL...W/CAS/DCT Wymiary i odległości minimalne +...+P [kBTU/h] ... P [kBTU/h] 2.5.1 Jednostka wewnętrzna i jednostka zewnętrzna Jednostka zewnętrzna – Rysunki 2 do 3. – Jednostka ścienna Rys. 14. Tab. -
Seite 92: Instalacja
Instalacja Specyfikacja rur Wysokość Dodatkowy czynnik chłodniczy [kg] instalacji [m] Min. długość przewodu rurowego Standardowa długość przewodu 7,5 m Powierzchnia pomieszczenia [m rurowego 58,0 63,0 67,5 Dodatkowy czynnik chłodniczy dla rur Dla Ø 6,35 mm (1/4"): 12 g/m dłuższych niż 7,5 m (strona cieczy) Dla Ø... -
Seite 93: Montaż Urządzenia
Instalacja Montaż urządzenia WSKAZÓWKA Upewnić się, że urządzenie zmieści się między sufitem nośnym a Szkody materialne wskutek nieprawidłowego montażu! podwieszanym. Nieprawidłowy montaż może skutkować upadkiem urządzenia ze ściany. ▶ Osłona jednostki kasetonowej musi być połączona z sufitem podwieszanym. ▶ Montować urządzenie wyłącznie na stabilnej i równej ścianie. Ściana ▶... -
Seite 94: Montaż Przewodu Powietrza W Jednostkach Kanałowych
Instalacja Montaż przewodu powietrza w jednostkach 3.4.3 Montaż rury świeżego powietrza kanałowych W jednostce kanałowej znajduje się otwór świeżego powietrza, z którego można skorzystać w razie potrzeby ( rys. 39). 3.4.1 Montaż rury i osprzętu dodatkowego Maksymalnie 15 % przepływu powietrza może odbywać się przez otwór Do zamontowania rur itp. -
Seite 95: Podłączanie Odpływu Kondensatu Do Jednostki Wewnętrznej Do Montażu Na Ścianie
Instalacja 3.5.2 Podłączanie odpływu kondensatu do jednostki Kontrola szczelności wewnętrznej do montażu na ścianie Podczas kontroli szczelności przestrzegać przepisów krajowych i Taca skroplin jednostki wewnętrznej jest wyposażona w dwa przyłącza. lokalnych. Fabrycznie jest do niej podłączony wąż kondensatu i korek. które można ▶... -
Seite 96: Podłączenie Elektryczne
Instalacja Podłączenie elektryczne Jednostka kanałowa W celu podłączenia kabla komunikacyjnego: 3.6.1 Wskazówki ogólne ▶ Zdjąć pokrywę układu elektronicznego. ▶ Zabezpieczyć kabel na uchwycie odciążającym i podłączyć do OSTRZEŻENIE zacisków przyłączeniowych L, N, S i Zagrożenie dla życia spowodowane przez prąd elektryczny! ▶... -
Seite 97: Uruchomienie
Uruchomienie Test działania Uruchomienie Po pomyślnym montażu z kontrolą szczelności i podłączeniem elektrycznym można przetestować system: Lista kontrolna uruchomienia ▶ Podłączyć zasilanie elektryczne. ▶ Włączyć jednostkę wewnętrzną za pomocą pilota zdalnego Jednostka zewnętrzna i jednostki wewnętrzne sterowania. prawidłowo zamontowane. ▶ Włączyć tryb chłodzenia i ustawić najniższą temperaturę. ▶... -
Seite 98: Usuwanie Usterek
Usuwanie usterek Usuwanie usterek Usterki wskazywane na wyświetlaczu Jeśli podczas eksploatacji wystąpi usterka, diody LED migają przez dłuższy czas lub na wyświetlaczu zostaje wskazany kod usterki OSTRZEŻENIE (np. EH 02). Zagrożenie dla życia spowodowane przez prąd elektryczny! Jeśli usterka występuje dłużej niż 10 min: ▶... -
Seite 99: Ochrona Środowiska I Utylizacja
Ochrona środowiska i utylizacja Informacja o ochronie danych osobowych Ochrona środowiska to jedna z podstawowych zasad działalności grupy My, Robert Bosch Sp. z o.o., ul. Jutrzenki 105, Bosch. 02-231 Warszawa, Polska, przetwarzamy informacje Jakość produktów, ekonomiczność i ochrona środowiska stanowią dla o wyrobach i wskazówki montażowe, dane techniczne... -
Seite 100: Dane Techniczne
Dane techniczne Dane techniczne Jednostka zewnętrzna Climate 5000 MS ... 14 OUE 18 OUE 21 OUE 27 OUE Dla kombinacji z jednostkami wewnętrznymi typu: CL3000i UW 26 E CL3000i UW 26 E CL3000i UW 26 E CL3000i UW 26 E Chłodzenie Moc znamionowa Moc znamionowa... - Seite 101 Dane techniczne Jednostka zewnętrzna Climate 5000 MS ... 28 OUE 36 OUE 42 OUE Dla kombinacji z jednostkami wewnętrznymi typu: CL3000i UW 26 E CL3000i UW 26 E CL3000i UW 26 E Klasa efektywności energetycznej dla 2 °C – A+++ A+++ A+++ Informacje ogólne...
- Seite 102 Índice Índice Aviso de Proteção de Dados ......112 Caraterísticas técnicas ......113 Esclarecimento dos símbolos e indicações de segurança .
-
Seite 103: Esclarecimento Dos Símbolos E Indicações De Segurança
Esclarecimento dos símbolos e indicações de segurança Indicações gerais de segurança Esclarecimento dos símbolos e indicações de H Indicações para grupo-alvo segurança Estas instruções de instalação destinam-se a especia- Explicação dos símbolos listas em tecnologia de refrigeração e ar condicio- nado, bem como em engenharia elétrica. -
Seite 104: Notas Acerca Destas Instruções
Informações sobre o produto H Entrega ao proprietário As unidades exteriores estão concebidas para qualquer combinação com os seguintes modelos: Instrua o proprietário aquando da entrega sobre a uti- Tipo Tipo de Aparelho lização e as condições operacionais do aparelho de ar Climate 5000 MS ... -
Seite 105: Dimensões E Distâncias Mínimas
Informações sobre o produto 2.5.2 Tubagens de gás refrigerante Tipo de Aparelho Diâmetro do adapta- Quantidade de Legenda da fig. 4: Climate 5000 MS ... dor em [mm] anéis magnéticos Tubo de gás 14 OUE – Tubo de líquido 18 OUE –... -
Seite 106: Instalação
Instalação Indicações sobre unidades interiores com instalação na parede Instalação ▶ O dispositivo pode ser instalado numa sala com uma área útil de , desde que a altura da instalação seja de pelo menos 1,8 m. Antes da instalação Com uma altura de instalação mais baixa, a área do piso deve ser cor- respondentemente maior. -
Seite 107: Montar A Unidade Interior No Teto
Instalação ▶ Se necessário, curve a tubagem na direção desejada e abra uma 3.3.3 Montagem do painel das unidades de cassete abertura na lateral da unidade interior ( imagem 21). ▶ Retirar a grelha de admissão de ar do painel ( fig. 32). ▶... -
Seite 108: Alterar A Posição De Admissão De Ar (Da Parte Traseira Para A Parte Inferior)
Instalação 3.4.2 Alterar a posição de admissão de ar (da parte traseira para a parte inferior) Efetuar a conversão de acordo com a fig. 42: Os tubos de cobre estão disponíveis em metros e polegadas, mas as ros- ▶ Retirar a grelha do filtro [3]. cas da porca são as mesmas. -
Seite 109: Teste De Saída De Condensados
Instalação 3.5.4 Teste de saída de condensados ▶ Evacuar e secar os tubos com uma bomba de vácuo ( fig. 11, [5]) durante pelo menos 30 minutos, até atingir 500 Micron. ▶ Abrir a válvula [3] do lado do líquido. Um teste à... -
Seite 110: Ligar A Unidade Exterior
Arranque Unidade de mural Arranque Para conectar o cabo de comunicação: ▶ Levante o painel frontal ( imagem 26). Lista de verificação de colocação em funcionamento ▶ Desaperte o parafuso e remova a tampa no painel de controlo. ▶ Desaperte o parafuso e remova a tampa [1] do terminal de ligações A unidade exterior e as unidades interiores estão (... -
Seite 111: Entrega Ao Proprietário
Eliminação de avarias Entrega ao proprietário ▶ Quando o sistema estiver configurado, entregue as instruções de ins- talação ao cliente. ▶ Explique ao cliente como operar o sistema usando as instruções de operação. ▶ Recomende ao cliente que leia as instruções de operação cuidadosa- mente. -
Seite 112: Proteção Ambiental E Eliminação
Desta maneira, poderão ser separados em diferentes grupos e filiais da Bosch. Em alguns casos, mas apenas se for garantida a proteção posteriormente enviados a uma reciclagem ou eliminados. -
Seite 113: Caraterísticas Técnicas
Caraterísticas técnicas Caraterísticas técnicas Unidade exterior Climate 5000 MS ... 14 OUE 18 OUE 21 OUE 27 OUE Em combinação com unidades interiores do tipo: CL3000i UW 26 E CL3000i UW 26 E CL3000i UW 26 E CL3000i UW 26 E Arrefecimento Potência nominal Potência nominal... - Seite 114 Caraterísticas técnicas Unidade exterior Climate 5000 MS ... 28 OUE 36 OUE 42 OUE Em combinação com unidades interiores do tipo: CL3000i UW 26 E CL3000i UW 26 E CL3000i UW 26 E Classe de eficiência energética a 2 °C –...
-
Seite 115: Sembol Açıklamaları Ve Emniyetle İlgili Bilgiler
İçindekiler İçindekiler Sembol Açıklamaları ve Emniyetle İlgili Bilgiler Sembol açıklamaları Sembol Açıklamaları ve Emniyetle İlgili Bilgiler ..115 Sembol açıklamaları ......115 Uyarılar Emniyetle İlgili Genel Bilgiler . -
Seite 116: Emniyetle İlgili Genel Bilgiler
Uygunluk Beyanı'nın eksiksiz metnine İnternet üzerinden ulaşabilirsiniz: oldukları sürece 8. yaşını aşmış çocuklar ve kısıtlı www.bosch-thermotechnology.com/tr. fiziksel, duyusal veya mental yeteneklere sahip veya Tiplere genel bakış eksik deneyime ve bilgiye sahip kişiler tarafından Dış... -
Seite 117: Önerilen Cihaz Kombinasyonları
Ürün İle İlgili Bilgiler Dış üniteler, aşağıda belirtilen iç ünite modelleri ile kullanılabilir: Teslimat kapsamı Sistem bileşimine bağlı olarak teslim edilen cihazlar farklı olabilir. Tip tanımı Cihaz tipi Mümkün cihazların teslimat kapsamı için bkz. Şekil 1. Gösterilen cihazlar Climate 5000 MS ... OUE Dış... -
Seite 118: Soğutucu Akışkan Hatları
Montaj 2.5.2 Soğutucu akışkan hatları Montaj Şekil 4 ile ilgili açıklamalar: Gaz hattı bağlantısı Montaj öncesi Sıvı hattı bağlantısı Yağ separatörü olarak sifon biçimli dirsek DİKKAT Keskin kenarlar nedeniyle yaralanma tehlikesi! ▶ Montaj sırasında koruyucu eldivenler kullanın. İç üniteler dış üniteden daha alçak bir yere yerleştirildiğinde, gaz tarafının en fazla 6 metre ilerisine ve her 6 metrede bir sifon biçimli bir dirsek yerleştirin (... -
Seite 119: Cihazın Montajı
Montaj Duvara monte edilen iç üniteler ile ilgili genel uyarılar ▶ Gerekirse boru tesisatını istenen yönde bükün iç ünitenin yan tarafındaki deliği kırarak açın ( Şekil 21). ▶ Montaj yüksekliği en az 1,8 m olduğunda, cihaz 4 m büyüklüğünde bir odaya monte edilebilir. Montaj yüksekliği daha aşağıda olduğunda ▶... -
Seite 120: Kaset Tipi Cihazlarda Panelin Monte Edilmesi
Montaj 3.3.3 Kaset tipi cihazlarda panelin monte edilmesi 3.4.2 Hava giriş yönünün uygun hale getirilmesi (arka taraftan alt tarafa doğru olmalıdır) ▶ Hava giriş ızgarasını panelden çıkarın ( Şekil 32). Şekil 42 uyarınca dönüştürme işleminin yapılması: ▶ Paneli birlikte teslim edilen vidalar ile iç üniteye takın ve bu sırada panelin doğru yönde olmasına dikkat edin (... -
Seite 121: Yoğuşma Suyu Tahliyesinin Duvara Monte Edilen Iç Üniteye Bağlanması
Montaj Boru dış çapı Ø [mm] Sıkma torku [Nm] Açılmış deliğin çapı (A) Açılmış boru ucu Önceden monte edilen [mm] konik somun dişlisi 6,35 (1/4") 18-20 8,4-8,7 3/8" 90°± 4 9,53 (3/8") 32-39 13,2-13,5 3/8" 12,7 (1/2") 49-59 16,2-16,5 5/8" 45°±... -
Seite 122: Elektrik Bağlantısı
Montaj Elektrik bağlantısı Kaset tipi cihaz ▶ Elektronik donanımın kapağını çıkarın. 3.6.1 Genel uyarılar ▶ Kapağın kablosunu ve iletişim kablosunu iç üniteye bağlayın ( Şekil 37) ve sabitleme bandından emniyete alın. İKAZ – Kapağın kablolarını 5 kutuplu ve 10 kutuplu klemense takın. Elektrik akımı... -
Seite 123: İşletime Alınması
İşletime alınması Çalıştma testi İşletime alınması Montaj tamamlandıktan sonra, sistem sızdırmazlık kontrolü ve elektrik bağlantısı ile test edilebilir: Devreye almak için kontrol listesi ▶ Gerilim beslemesini oluşturun. ▶ İç üniteyi uzaktan kumanda ile devreye alın. Dış ünite ve iç üniteler usulüne uygun şekilde monte edilmiştir. -
Seite 124: Çevre Koruması Ve Imha
▶ Kompresörü değiştirin. Tab. 17 Çevre koruması ve imha Çevre koruması, Bosch Grubu'nun temel bir şirket prensibidir. Soğutucu akışkan R32 Ürünlerin kalitesi, ekonomiklilik ve çevre koruması, bizler için aynı önem Cihazda, az yanıcı ve az zehirli florlu sera gazı bulunmaktadır seviyesindedir. -
Seite 125: Teknik Veriler
Teknik veriler Teknik veriler Dış ünite Climate 5000 MS ... 14 OUE 18 OUE 21 OUE 27 OUE Aşağıda belirtilen tip iç ünitelerin kombinasyonu CL3000i UW 26 E CL3000i UW 26 E CL3000i UW 26 E CL3000i UW 26 E durumunda: Soğutma Nominal güç... - Seite 126 CL5000MS 12 DCT CL5000MS 18 DCT 24,3/29,6 Tab. 21 İç ünitelerin net/brüt ağırlığı (gizli tavan tipi ünite) Bosch Termoteknik Isıtma ve Klima Sanayi Ticaret Anonim Şirketi Merkez: Organize Sanayi Bölgesi - 45030 Manisa Çin'de üretilmiştir. İrtibat Adresi: Aydınevler Mahallesi İnönü Caddesi No:20 Kullanım Ömrü...
- Seite 127 Teknik veriler 0010034298-002 Climate 5000 MS – 6721830160 (2020/12)
- Seite 128 Teknik veriler ≥ 6 0 0 ≥ 3 0 0 ≥ 3 ≥ 6 0 0 ≤ 6 m ≤ 6 m 0010034026-001 ≥ 2 0010032599-003 Climate 5000 MS ... [mm] [mm] [mm] [mm] [mm] [mm] 14 OUE ≤ 10 m ≤...
- Seite 129 Teknik veriler > 50 90° 0010032880-001 0010032916-001 0010032754-001 0010034321-001 S(x) N(x) L(x) S(A) S(E) N(A) N(E) L(A) L(E) x = A/B/C/D/E 230 V AC x = A x = E 0010035260-002 0010034354-001 Climate 5000 MS – 6721830160 (2020/12)
- Seite 130 Teknik veriler 0010034353-001 Climate 5000 MS – 6721830160 (2020/12)
- Seite 131 CL3000i UW ... E /CL5000i UW ... E/ CL5000...IBW/RAC...IBW CL3000i UW ... E /CL5000i UW ... E/ CL5000...IBW/RAC...IBW ≥ 1 2 0 ≥ 1 2 0 ≥ 1 5 0 ≥ 1 8 0 0 0010032602-001 CL3000i UW ... E /CL5000i UW ... E/CL5000...IBW/RAC...IBW 0010032598-001 CL3000i UW ...
- Seite 132 CL3000i UW ... E /CL5000i UW ... E/ CL5000...IBW/RAC...IBW 0010032752-001 0010032748-001 CL3000i UW ... E /CL5000i UW ... E/CL5000...IBW/RAC...IBW CL3000i UW ... E /CL5000i UW ... E/CL5000...IBW/RAC...IBW 3. 3. 3. 3. 3. 3. 2. 2. 2. 2. 2. 2. 0010032754-001 0010032609-001 CL3000i UW ...
- Seite 133 CL3000i UW ... E /CL5000i UW ... E/ CL5000...IBW/RAC...IBW < 17 °C < 17 °C 0010032873-002 0010034303-001 CL3000i UW ... E /CL5000i UW ... E/CL5000...IBW/RAC...IBW 3. 3. 3. 2. 2. 2. 0010032750-001 CL3000i UW ... E /CL5000i UW ... E/CL5000...IBW/RAC...IBW 2.
- Seite 134 CL5000MS ... CAS CL5000MS ... CAS 0010035704-001 CL5000MS ... CAS 0010034313-001 CL5000MS ... CAS >1000 >1000 0010035705-001 CL5000MS ... CAS 0010034312-001 CL5000MS ... CAS 0010034304-001 CL5000MS ... CAS Climate 5000 MS – 6721830160 (2020/12)
- Seite 135 CL5000MS ... CAS 1000-1500 5× 10× S N L 1/100 0010035707-001 CL5000MS ... CAS 1000-1500 1/100 ≤300 ≤530 ≤750 0010034329-001 CL5000MS ... CAS 0010035706-001 CL5000MS ... CAS 0010034303-001 0010035266-001 CL5000MS ... CAS Climate 5000 MS – 6721830160 (2020/12)
- Seite 136 CL5000MS ... DCT CL5000MS ... DCT 00100034309-001 CL5000MS ... DCT A [mm] B [mm] C [mm] D [mm] E [mm] F [mm] G [mm] H [mm] I [mm] J [mm] K [mm] 2,0 - 3,5 kW Ø 92/113 5,3 kW Ø...
- Seite 137 CL5000MS ... DCT 0010034348-001 0010034303-001 CL5000MS ... DCT CL5000MS ... DCT 1000-1500 1/50 0010034303-001 1000-1500 1/50 ≤200 ≤550 0010034330-001 CL5000MS ... DCT 0010035265-001 CL5000MS ... DCT Climate 5000 MS – 6721830160 (2020/12)
- Seite 138 2 × CL...W/CAS/DCT Climate 5000 MS 28 OUE + 2 × CL...W/CAS/DCT 2 × CL...W/CAS/DCT +...+P [kBTU] ... P [kBTU] Climate 5000 MS 14 OUE+ 2 × CL...W/CAS/DCT [kBTU] ... P [kBTU] – – – – – – – – –...
- Seite 139 3 × CL...W/CAS/DCT +...+P [kBTU] ... P [kBTU] 3 × CL...W/CAS/DCT Climate 5000 MS 21 OUE + 3 × CL...W/CAS/DCT – +...+P [kBTU] ... P [kBTU] – – – – – – – Climate 5000 MS 21 OUE + 3 × CL...W/CAS/DCT –...
- Seite 140 4 × CL...W/CAS/DCT Climate 5000 MS 42 OUE + 4 × CL...W/CAS/DCT 4 × CL...W/CAS/DCT +...+P [kBTU] ... P [kBTU] Climate 5000 MS 28 OUE + 4 × CL...W/CAS/DCT +...+P [kBTU] ... P [kBTU] – – – – – – –...
- Seite 141 5 × CL...W/CAS/DCT 5 × CL...W/CAS/DCT Climate 5000 MS 42 OUE + 5 × CL...W/CAS/DCT +...+P [kBTU] ... P [kBTU] Climate 5000 MS 42 OUE + 5 × CL...W/CAS/DCT Climate 5000 MS – 6721830160 (2020/12)
- Seite 144 Bosch Thermotechnik GmbH Junkersstrasse 20-24 D-73249 Wernau www.bosch-thermotechnology.com...