Inhaltsverzeichnis
Werbung
Verfügbare Sprachen
Verfügbare Sprachen
Quicklinks
Werbung
Inhaltsverzeichnis

Verwandte Anleitungen für Palram CANOPIA Arizona-WINGS


Inhaltszusammenfassung für Palram CANOPIA Arizona-WINGS
- Seite 3 HAVE A CONCERN? Please take a look at our You didn't find what you Still can't find what you "How to Assemble" video guide. were looking for? are looking for? WE CAN HELP. Scan the QR Code below or go to We can help at Please see next page for Before returning your purchase:...
- Seite 5 SITE PREPARATION & FOUNDATION A - PREPARE THE SITE PRÉPARER LE TERRAIN Déblayer le terrain Niveler le sol The product must be positioned and La produit doit être positionnée et fixée sur une surface plane fixed on a flat level surface. VORBEREITUNG DES UNTERGRUNDES Untergrund ausgleichen Standort säubern...
- Seite 6 B - FOUNDATION In order to assemble this product, it is Pour assembler ce produit, il est essentiel de creuser d'abord 2 trous (fosses) conformément aux instructions (pour toutes les surfaces), essential to first dig 2 holes (pits) according FONDATIONS Voir les étapes 1 à...
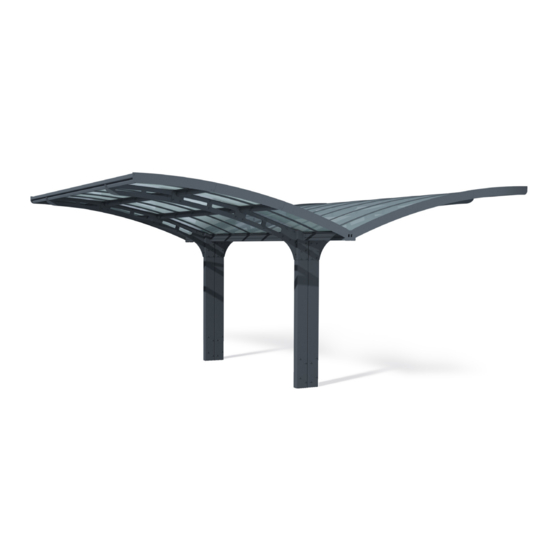
- Seite 8 C - DIMENSIONS Requis pour l’assemblage (en plus des huit (8) poutres en bois de Équipement de forage compatible avec DIMENSIONS Béton outils précédemment décrits) 6’ po de long au minimum (1.8 m) le type de sol et les mesures requises The Illustration describes center-to-center Tiefbau- Einrichtung, kompatibel mit distance between poles.
-
Seite 11: Sicherheitshinweise
INFORMATIONEN SICHERHEITSHINWEISE WÄHREND DER MONTAGE Es ist sehr wichtig, dass alle Teile gemäß den Anweisungen in dieser Anleitung zusammengebaut werden. Lassen Sie bitte keinen Schritt aus. Während der Montage werden Sie verschiedene Symbole für unterschiedliche • • Tragen Sie bei der Montage unbedingt Arbeitshandschuhe. Wir empfehlen Ihnen außerdem dringend, festes Schuhwerk und eine Schutzbrille zu tragen. Produkte sehen. - Seite 24 WICHTIGE MONTAGESCHRITTE Wenn Sie bei der Montage auf dieses Informationssymbol stoßen, finden Sie im jeweiligen Montageschritt wichtige Zusatzhinweise. FLÜGEL (WING PARKING): BOGEN (ARCH PARKING): Schritt 1: Schritt 11: Graben Sie zwei (2) Löcher entsprechend den angegebenen Messungen und stellen Sie sicher, Graben Sie (4) Löcher entsprechend den angegebenen Messungen und stellen Sie sicher, dass dass der Boden fest gestrafft ist.
- Seite 67 GARANTIE LIMITÉE À 10 ANS DE PALRAM - CANOPIA BEGRÄNSNINGAR I PALRAM - CANOPIA 10-ÅRS GARANTI Palram Canopia Ltd. (Compagnie n° 512106824) dont le siège social est adressé au Parc Industriel Teradion, M.P. Misgav Palram Canopia Ltd. (Bolagsnummer: 512106824) vars registrerade huvudkontor har adressen: Teradion Industrial Park, 2017400, Israël (“Canopia”) garantit que le produit est exempt de tout défaut de matériau ou de fabrication pendant...