Herunterladen Inhalt Inhalt Diese Seite drucken

Werbung

Verfügbare Sprachen
  • DE

Verfügbare Sprachen

  • DEUTSCH, seite 62
Robot de cocina multifunción
Robot de cozinha multifunções
manual de instrucciones
ES
manual de instruções
PT
instructions manual
EN
mode d'emploi
FR
manuale di istruzioni
IT
bedienungsanleitung
DE
Ръководство за инструкции
BG
‫تعليامت االستخدام‬
AR

Werbung

Inhaltsverzeichnis
loading

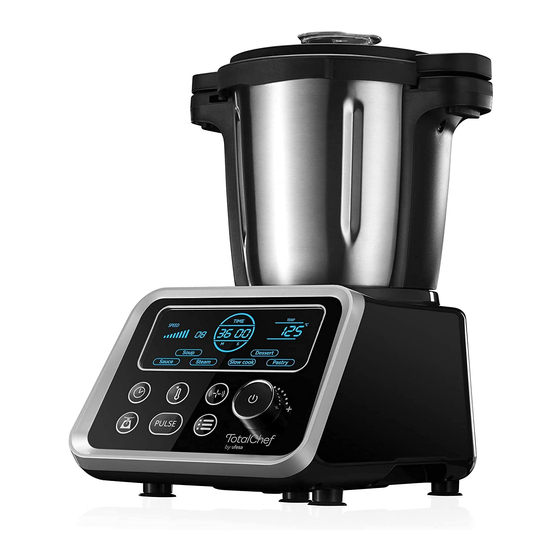
Inhaltszusammenfassung für Ufesa TotalChef RK5

  • Seite 1 Robot de cocina multifunción Robot de cozinha multifunções manual de instrucciones manuale di istruzioni manual de instruções bedienungsanleitung instructions manual Ръководство за инструкции mode d’emploi ‫تعليامت االستخدام‬...
  • Seite 5 Press here Z3...
  • Seite 6 Stand-by state...
  • Seite 8 GRACIAS POR ELEGIR UFESA. DESEAMOS QUE EL FUNCIONAMIENTO DEL PRODUCTO LE SATISFAGA PLENAMENTE. ATENCIÓN Lea las instrucciones de uso con atención antes de utilizar el producto. Guárdelas en un lugar seguro para consultarlas en el futuro. DESCRIPCIÓN A. Taza medidora (máx. 100 ml) O.
  • Seite 9 Tenga cuidado al manipular las cuchillas afiladas, al vaciar el bol y durante la limpieza. Vigile al verter el líquido caliente en la licuadora, ya que el aparato podría salpicar debido a una repentina acción del vapor. Desconecte siempre la licuadora de la corriente cuando no vaya a utilizarse y antes de cualquier acción de montaje, desmontaje o limpieza.
  • Seite 10 líquidos ni lo ponga bajo el grifo. Utilice solo un trapo húmedo para limpiarlo. Este aparato está destinado a utilizarse hasta una altitud máxima de 2000m sobre el nivel del mar. Las superficies pueden calentarse durante su uso. INFORMACIÓN IMPORTANTE Este aparato está...
  • Seite 11 INSTALACIÓN La capacidad máxima del bol es de 2 litros. ¡No procese más de 2 litros de alimentos! Precaución: El bol lleva un logotipo con la inscripción Superficie caliente: (D) ¡Indica que el artículo puede estar caliente y no debe tocarlo sin tomar precauciones! Cómo instalar el anillo hermético 1: (E) Ver figura E.
  • Seite 12: Configuración Predeterminada

    Modo de espera: (J) Al enchufar y encender el aparato, entra en el modo de espera. La pantalla LCD muestra lo siguiente: Visualización de la velocidad: 00; Visualización de la hora: 00:00; Visualización de la temperatura: 000. Introducción a los botones de función: 1.
  • Seite 13 B. Función Postre: Utilícela para preparar deliciosos postres, como magdalenas. Le recomendamos la siguiente fórmula: Configuración predeterminada: Temperatura: la temperatura final es 95ºC. Una vez pulsado el botón Temp., puede volver a configurar la temperatura entre 30ºC y 100ºC girando el mando K1.
  • Seite 14 F. Función Pastelería: Utilícela para preparar masa de pan. Le recomendamos la siguiente fórmula: Configuración predeterminada: Temperatura: la temperatura final es 0ºC. Puede volver a configurar la temperatura entre 0ºC y 35ºC. Tiempo: el tiempo de funcionamiento es 2 minutos y 30 segundos. Velocidad: la velocidad de funcionamiento es 03.
  • Seite 15 Siga los pasos: 1. Instale la cuchilla y, a continuación, instale el bol sobre el cuerpo del aparato. 2. Añada el agua (0,5 L=agua=2 L) en el bol. (Precaución: En el bol debe haber más de 0,5 L de agua. 0,5 L de agua sirven para cocer alimentos al vapor durante 30 minutos). 3.
  • Seite 16 7. Oirá un pitido cuando finalice el tiempo de funcionamiento. Todas las configuraciones se borrarán y el aparato volverá al modo de espera. 8. Después del uso, apague el aparato. Quite la tapa del bol. 9. Retire del bol los alimentos procesados. Precaución: 1.
  • Seite 17: Limpieza Y Mantenimiento

    5. Enchufe y pulse el botón de encendido/apagado. 6. Configure el tiempo, la velocidad (entre 01 y 04) y la temperatura que necesita. Pulse el botón de encendido/apagado; el aparato empezará a funcionar y el temporizador empezará la cuenta atrás. Si no configura el tiempo, el temporizador sigue funcionando.
  • Seite 18: Códigos De Error

    CÓDIGOS DE ERROR Código Estado Solución En la pantalla LCD se muestra Se ha producido un error en el aparato. Debe llevarlo E 01 E 01 y se oye un pitido. al servicio técnico autorizado para que lo reparen. El bol no está instalado. Instale el bol siguiendo las instrucciones de funcionamiento.
  • Seite 19 GOSTARÍAMOS DE LHE AGRADECER POR ESCOLHER A UFESA. ESPERAMOS QUE O PRODUTO SEJA DO SEU AGRADO E DA SUA SATISFAÇÃO. AVISO Ler as instruções de utilização cuidadosamente antes de utilizar o produto. Guardar estas instruções num local seguro para referência futura.
  • Seite 20 misturadora, pois pode ser ejetado para fora do aparelho devido a vapores súbitos. Desligue sempre a misturadora da fonte de alimentação se for deixada sem supervisão e antes da montagem, desmontagem ou limpeza. Desligue o aparelho e desligue da fonte de alimentação antes de trocar os acessórios ou de se aproximar das peças que se movem em utilização.
  • Seite 21 Utilize apenas um pano humedecido para limpar o aparelho. Este aparelho está preparado para ser utilizado a uma altitude máxima de até 2000 m acima do nível do mar. É provável que as superfícies aqueçam durante a utilização. INFORMACIÓN IMPORTANTE Este aparelho foi concebido para utilização doméstica e nunca deverá...
  • Seite 22: Instalação

    1) A velocidade de operação será limita às velocidades 01-04. 2) O aparelho mudará automaticamente a velocidade de operação para a velocidade 04, mesmo se a velocidade de operação estiver definida a velocidades de 05 a 10. Desligar imediatamente o produto da tomada elétrica em caso de falha ou danos e contactar um serviço de suporte técnico oficial.
  • Seite 23 Como instalar o recipiente (I): 1. Coloque a tampa do recipiente sobre o recipiente. E gire a tampa do recipiente no sentido dos ponteiros de um relógio para a bloquear no recipiente. Nesse momento, soará um “clique”, o que significa que a tampa está corretamente instalada. 2.
  • Seite 24 Passo 3: tempo de funcionamento de 1 minuto, velocidade 10 e temperatura definida de 0 °C. (Atenção: Durante esta etapa, a velocidade será limitada à 04 quando a temperatura atual do recipiente é igual ou superior a 60 °C.) Conselhos: 1) Todos as definições por defeito anteriores não podem ser redefinidas.
  • Seite 25 E. Função “Cozedura lenta”: pode usá-la para guisar carne. A receita recomendada é a seguinte: Definições por defeito: Temperatura: temperatura definida de 100 °C. Tempo: o tempo de funcionamento é de 99 minutos. Pode redefinir o tempo entre 0 minutos e 99 minutos. Velocidade: a velocidade de funcionamento é...
  • Seite 26 hortaliças com carne, salsichas, pão cozido a vapor, peixe cozido a vapor, etc. Pode utilizar os vaporizadores em qualquer das seguintes combinações: Combinação 1: Tampa (M)+vaporizador (Bandeja) (N) + Vaporizador (O) Utilize esta combinação para confecionar diferentes alimentos. Combinação 2: Tampa (M) + Vaporizador (O) Utilize esta combinação para maiores quantidades do mesmo tipo de alimentos, por ex.: hortaliças, batatas, grandes nacos de carne ou salsichas.
  • Seite 27 Utilização da borboleta: Por favor, siga os passos seguintes: 1. Instale a lâmina e a borboleta no recipiente. 2. Coloque os alimentos no recipiente. 3. Depois, tape-o com a tampa. 4. Gire a tampa do recipiente até ficar bloqueada na sua posição respetiva. E coloque o copo de medição sobre a tampa do recipiente.
  • Seite 28 Cuidado: 1. A quantidade máxima de água acrescentada no recipiente deve ser de 600 ml e com o nível abaixo da cesta! 2. Risco de queimadura por vapor quente ou água condensada quente. 3. O vapor quente e a água condensada quente são perigosos. Por favor, manusear com cuidado. 4.
  • Seite 29: Códigos De Erro

    CÓDIGOS DE ERRO Código Estado Solução “E 01” aparece no painel Algo não está bem com o aparelho. Este deve ser enviado E 01 LCD e soará um “bip”. para um centro de serviços autorizado para ser reparado. O recipiente não foi instalado. Instale o recipiente seguindo as instruções de funcionamento.
  • Seite 30: Safety Instructions

    WE WOULD LIKE TO THANK YOU FOR CHOOSING UFESA. WE WISH THE PRODUCT PERFORMS TO YOUR SATISFACTION AND PLEASURE. WARNING Please read the instructions for use carefully prior to using the product. Store these in a safe place for future reference.
  • Seite 31 can be ejected out of the appliance due to a sudden steaming. Always disconnect the blender from the supply if it is left unattended and before assembling, disassembling or cleaning. Switch off the appliance and disconnect from supply before changing accessories or approaching parts that move in use.
  • Seite 32: Important Warnings

    liquid, nor rinse it under the tap. Use only a moist cloth to clean the appliance. This device is designed for use at a maximum altitude up to 2000m above sea level. Surfaces are liable to get hot during use. IMPORTANT WARNINGS This appliance is designed for home use and should never be used for commercial or industrial use under any circumstances.
  • Seite 33 to speed 04, even through the current working speed is set at speed 05-10. Unplug the product immediately from the mains in the event of any breakdown or damage and contact an official technical support service. In order to prevent any risk of danger, do not open the device. Only qualified technical personnel from the brand´s Official technical support service may carry out repairs or procedures on the device.
  • Seite 34 How to remove the bowl: Press the button “Z3” of each handle with both hands, and then draw the bowl out of the main appliance at the same time. The bowl can be easily removed. HOW TO USE Stand-by state: (J) Plug in and power on, the appliance goes into stand-by state.
  • Seite 35 Default setting: Temperature: target temperature is 95ºC. After you press “Temp” button, you may reset the temperature between 30ºC and 100ºC by rotating knob (K1). Time: working time is 45 minutes. After you press “Time” button, you may reset the time (second or minute) between 10 seconds and 99 minutes by rotating knob (K1).
  • Seite 36 Default setting: Temperature: target temperature is 0ºC. You may reset the temperature between 0ºC and 35ºC. Time: working time is 2 minutes and 30 seconds. Speed: working speed is 03. Tips: Sound “Beep” will be heard after the working time is up. All the settings are cleared and the appliance goes back to stand-by state.
  • Seite 37 0.5 liter. 0.5L water can be used for steaming food for 30 minutes.) 3. Put the airproof ring on the bowl lid, and then cover the bowl lid. 4. Turn the bowl lid until it is locked in position. 5. Put on the steamer. 6.
  • Seite 38 How to use the inner basket: The inner basket is suitable for cooking small quantity food, such as rice, fish and meat. Install inner basket: (M) 1. Put the inner basket in the bowl, and install the bowl lid correctly. 2.
  • Seite 39: Fault Codes

    4. While using the appliance, always keep the contact pins at the bottom of the bowl clean and dry! Wipe the contact pins at the bottom of the bowl with a dry cloth! 5. Never use pointed or sharp objects for cleaning as this may damage functional parts or affect the safety of the appliance.
  • Seite 40: Consignes De Sécurité

    NOUS VOUS REMERCIONS D’AVOIR CHOISI UFESA. NOUS SOUHAITONS QUE CE PRODUIT VOUS APPORTE ENTIÈRE SATISFACTION ET QUE VOUS AYEZ PLAISIR À L’UTILISER. AVERTISSEMENT Lire attentivement la notice avant d’utiliser le produit. La conserver dans un endroit sûr pour la consulter ultérieurement.
  • Seite 41 Faites preuve de prudence lorsque vous versez du liquide chaud dans le mixeur, car des éclaboussures peuvent jaillir de l’appareil à cause du dégagement soudain de vapeur d’eau. Débranchez toujours le mixeur de l’alimentation lorsqu’il n’est pas utilisé, et avant l’assemblage, le démontage ou le nettoyage de l’appareil.
  • Seite 42: Avertissements Importants

    - les hôtels, les motels et tout autre lieu similaire; - les chambres d’hôtes. Ne jamais plonger le corps de l’appareil dans de l’eau ni dans tout autre liquide, ni le rincer sous le robinet. Utiliser uniquement un chiffon humide pour nettoyer l’appareil.
  • Seite 43 Ne pas l’utiliser lorsque la lame fonctionne. Ne pas toucher le verre doseur lorsque de la nourriture chaude est transformée (à une température supérieure à 60°C). Lorsque la température actuelle du bol est égale ou au- dessus de 60°C: 1) La vitesse de fonctionnement sera limitée à 01-04. 2) L’appareil se mettra automatiquement en vitesse de fonctionnement à...
  • Seite 44 Retrait de la lame: (G) Faire pivoter la clé dans le sens inverse des aiguilles d’une montre pour retirer la lame. Attention: 1. La lame est très tranchante ! Veuillez la manipuler avec précaution! 2. Tenir uniquement le haut de la lame! Installation du bol: (I) 1.
  • Seite 45 Étape 2: la durée de fonctionnement est de 15 minutes, la vitesse est de 04 et la température est de 0°C. Étape 3: la durée de fonctionnement est de 1 minute, la vitesse est de 10 et la température est de 0°C. (Remarques : Pendant cette étape, la vitesse sera limitée à...
  • Seite 46 Paramètre par défaut: Température: la température cible est 100°C. Durée: la durée de fonctionnement est de 20 minutes. Il est possible de reconfigurer la durée entre 10 et 60 minutes. Vitesse: la vitesse de fonctionnement est de 00. Conseils: Vous entendrez un « bip » à la fin de la durée de fonctionnement. Toutes les configurations sont effacées et l’appareil repasse en mode veille.
  • Seite 47 8. Bouton « Marche/Arrêt » (K2): 1) Après les configurations, appuyez sur le bouton « Marche/Arrêt »; l’appareil se mettra en route. 2) Appuyer sur le bouton « Marche/Arrêt » lorsque l’appareil est en marche, le fonctionnement en cours s’arrêtera. Lorsqu’on appuie à nouveau sur le bouton, le fonctionnement interrompu reprend. Conseils: Si vous appuyez sur le bouton «...
  • Seite 48 Installer/enlever le papillon: (L) 1. Tenir l’extrémité en forme sphérique du papillon. 2. Introduire le papillon dans le haut de la lame; vous entendez un « clic ». Cela signifie que le papillon est bien installé sur la lame. (Voir ci-dessus la figure) Si vous souhaitez retirer le papillon de la lame, maintenez simplement l’extrémité...
  • Seite 49 Attention: 1. La quantité maximale d’eau ajoutée dans le bol doit être de 600 ml et le niveau doit être en-dessous du panier! 2. Risque de brûlure dû à la vapeur chaude et l’eau chaude condensée. 3. La vapeur chaude et l’eau chaude condensée sont dangereuses. Veuillez manipuler l’appareil avec précaution.
  • Seite 50: Codes D'erreur

    CODES D’ERREUR Code Statut Solution « E 01 » s’affiche sur l’écran Une erreur s’est produite avec l’appareil. Il doit être E 01 LCD, et on entend un « Bip ». envoyé au service technique agréé pour être réparé. « E 02 » s’affiche sur l’écran Le bol n’était pas installé.
  • Seite 51: Istruzioni Per La Sicurezza

    GRAZIE PER AVER SCELTO UFESA. DESIDERIAMO CHE IL PRODOTTO VI SODDISFI E SIA DI VOSTRO GRADIMENTO. AVVERTENZA Si prega di leggere attentamente le istruzioni per l’uso prima di utilizzare il prodotto. Conservarle in un luogo sicuro per futura consultazione. DESCRIZIONE A.
  • Seite 52 Fare attenzione se si versano liquidi caldi nell’impastatrice poiché possono essere espulsi fuori dall’apparecchio a causa di un’improvvisa vaporizzazione. Scollegare sempre l’impastatrice dall’alimentazione elettrica se lasciata incustodita e prima dell’assemblaggio, smontaggio o pulizia. Spegnere l’apparecchio e scollegarlo dall’alimentazione elettrica prima di cambiare gli accessori o le parti vicine che si muovono durante l’uso.
  • Seite 53: Avvertenze Importanti

    - ambienti del tipo bed and breakfast. Non immergere mai l’apparecchio in acqua o qualsiasi altro liquido, né sciacquarlo sotto il rubinetto. Utilizzare soltanto un panno umido per pulire l’apparecchio. Il dispositivo è progettato per utilizzo a un’altitudine massima di 2000 m sul livello del mare. Le superfici possono divenire calde durante l’uso.
  • Seite 54 Quando la temperatura corrente della ciotola è uguale o superiore a 60°C, troverete ch: 1) La velocità di lavorazione sarà limitata a velocità 01-04. 2) L’apparecchio cambierà automaticamente la velocità di lavorazione a velocità 04, anche se la velocità di lavorazione corrente è...
  • Seite 55 Come installare la ciotola: (I) 1. Porre il coperchio della ciotola sulla ciotola. Ruotare il coperchio della ciotola in senso orario per bloccarlo sulla ciotola. Stavolta si udirà un suono “click”, che significa che il coperchio è installato correttamente. 2. Inserire la ciotola nell’incavo della ciotola. Accertarsi che la posizione Z1 punti verso la posizione Z2. Anche questa volta si udirà...
  • Seite 56: Impostazioni Predefinite

    3) Si udirà un suono “Bip” alla fine del tempo di lavorazione. Tutte le impostazioni vengono azzerate e l’apparecchio ritorna in stato stand-by. 4) Durante il Passaggio 2, si può rimuovere il contenitore di misurazione (A) così che la temperatura interna scenda a 80 gradi, dopo 15 minuti, andrà...
  • Seite 57 Manzo: 800 g, bacon: 100 g, burro: 50 g, vino rosso: 660 g, aglio: 1 spicchio, farina: 2 Cc, funghi: 250 g, cipolla: 300g. Impostazioni predefinite: Temperatura: la temperatura target è 100° C. Tempo: il tempo di lavorazione è 99 minuti. Si può ripristinare il tempo tra 0 minuti e 99 minuti. Velocità: la velocità...
  • Seite 58 Come usare la vaporiera: (K) La vaporiera è perfettamente adatta per preparare cibi come verdure con carne, salsicce, pane al vapore, pesce al vapore etc. Si possono usare le vaporiere in una delle due combinazioni seguenti: Combinazione 1: Coperchio (M) + Vaporiera (Vassoio) (N) + Vaporiera (O) Utilizzare questa combinazione per cucinare cibi differenti.
  • Seite 59 Utilizzo della farfalla: Seguire i passaggi seguenti: 1. Installare la lama e la farfalla sulla ciotola. 2. Porre il cibo nella ciotola. 3. Poi coprire il coperchio della ciotola. 4. Ruotare il coperchio della ciotola fino a bloccarlo in posizione. E porre il contenitore di misurazione sul coperchio della ciotola.
  • Seite 60 Come usare la protezione della lama (N) 1. Installare la lama e la protezione della lama sulla ciotola. 2. Porre il cibo nella ciotola. 3. Poi coprire il coperchio della ciotola. 4. Ruotare il coperchio della ciotola fino a bloccarlo in posizione. E porre il contenitore di misurazione sul coperchio della ciotola.
  • Seite 61: Codici Di Guasto

    CODICI DI GUASTO Codice Stato Soluzione “E 01” appare sull’LCD, e si Qualcosa non va nell’apparecchio. Deve essere E 01 udirà un suono “Bip”. portato al centro servizi autorizzato per la riparazione. “E 02” appare sull’LCD, e si La ciotola non è stata installata. Installare la ciotola E 02 udirà...
  • Seite 62: Warnhinweis

    VIELEN DANK, DASS SIE SICH FÜR UFESA ENTSCHIEDEN HABEN. WIR WÜNSCHEN IHNEN VIEL FREUDE UND ZUFRIEDENHEIT MIT IHREM GERÄT. WARNHINWEIS Bitte lesen Sie diese Gebrauchsanweisung vor der Verwendung des Geräts sorgfältig durch. Bewahren Sie sie an einem sicheren Ort zum späteren Nachschlagen auf.
  • Seite 63 Bei der Handhabung der scharfen Schneidklingen, beim Entleeren der Schüssel und bei der Reinigung ist Vorsicht geboten. Seien Sie vorsichtig, wenn heiße Flüssigkeit in den Mixer gegossen wird, da sie durch plötzliches Dämpfen aus dem Gerät herausgeschleudert werden kann. Trennen Sie den Mixer immer von der Stromversorgung, wenn er unbeaufsichtigt bleibt und bevor Sie ihn zusammenbauen, zerlegen oder reinigen.
  • Seite 64: Hotels, Motels Und Anderen Wohnungsähnlichen Umgebungen

    - Hotels, Motels und anderen wohnungsähnlichen Umgebungen; - Pensionsähnlichen Einrichtungen. Tauchen Sie das Gerät niemals in Wasser oder andere Flüssigkeiten ein oder halten es unter fließendes Wasser. Verwenden Sie zum Reinigen des Geräts nur ein feuchtes Tuch. Dieses Gerät ist für den Einsatz in einer maximalen Höhe von 2000 m über dem Meeresspiegel ausgelegt.
  • Seite 65: Die Schüssel

    Wenn die Temperatur der Schale bei oder über 60 °C liegt, werden Sie feststellen: 1) Die Arbeitsgeschwindigkeit wird bei auf die Stufen 01 - 04 begrenzt. 2) Das Gerät schaltet die Arbeitsgeschwindigkeit automatisch herunter auf Geschwindigkeit 04, auch wenn zurzeit eine Stufe von 05 bis 10 gewählt war. Ziehen Sie im Falle einer Störung oder Beschädigung sofort den Netzstecker und wenden Sie sich an einen offiziellen technischen Kundendienst.
  • Seite 66: Entfernen Der Klinge: (G)

    Entfernen der Klinge: (G) Drehen Sie den Spannring gegen den Uhrzeigersinn, um die Klinge zu entfernen. Vorsicht: 1. Die Klinge ist sehr scharf! Bitte behandeln Sie es mit Vorsicht! 2. Halten Sie die Klinge nur am oberen Teil fest! Installieren der Schüssel: (I) 1.
  • Seite 67: Standardeinstellung

    Standardeinstellung: Schritt 1: Arbeitszeit 20 Minuten, Geschwindigkeit 01 und Zieltemperatur 100 ºC. Schritt 2: Arbeitszeit 15 Minuten, Geschwindigkeit 04 und Temperatur 0 ºC. Schritt 3: Arbeitszeit 1 Minuten, Geschwindigkeit 10 und Temperatur 0 ºC. (Anmerkung: Während dieses Schrittes wird die Geschwindigkeit auf 04 begrenzt, wenn die Temperatur der Schüssel bei oder über 60 ºC liegt) Tipps: 1) Die genannten Standardeinstellungen können nicht verändert werden.
  • Seite 68 Standardeinstellung: Temperatur: Die Zieltemperatur beträgt 100 ºC. Zeit: Die Arbeitszeit beträgt 20 Minuten. Sie können die Zeit zwischen 10 60 Minuten einstellen. Geschwindigkeit: Die Arbeitsgeschwindigkeit ist 00. Tipps: Ein “Beep” ertönt nach Ablauf der Arbeitszeit. Alle Einstellungen werden gelöscht und das Gerät kehrt in den Bereitschaftsmodus zurück.
  • Seite 69: Einsatz Des Dampfgarers: (K)

    7. Knopf (K1): Drehen Sie diesen Knopf, um das gewünschte Temperatur/Zeit/Geschwindigkeit oder das Kurzmenü auszuwählen. 8. Start-/Stopp-Taste : (10) 1) Nachdem Sie alle Einstellungen vorgenommen haben, drücken Sie die Taste “Start/Stopp”. Das Gerät beginnt zu arbeiten. 2) Drücken Sie die Taste “Start/Stopp” während des Betriebs, um die laufende Arbeit zu stoppen. Wenn Sie sie erneut drücken, wird die gestoppte Funktion weitergeführt.
  • Seite 70: Verwendung Des Rühraufsatzes (Schneebesen)

    Bewegen nur am Griff. 7. Für 30 Minuten Dampfgaren sind 0,5 Liter (500 ml) Wasser erforderlich, für jede weiteren 15 Minuten müssen Sie etwa 250 ml Wasser hinzufügen Verwendung des Rühraufsatzes (Schneebesen): Der Schneebesen wird Ihnen helfen, die besten Ergebnisse zu erzielen, wenn Sie Sahne, Mayonnaise oder Eiweiß...
  • Seite 71: Verwendung Des Klingenschutzes: (N)

    Schüsseldeckel auf. 6. Stecken Sie den Stecker ein und drücken Sie die “Ein-/Aus”-Taste. 7. Stellen Sie die Zeit, die Geschwindigkeit (01-04) und die gewünschte Temperatur ein. Drücken Sie die Taste “Start/Stopp”. Das Gerät beginnt zu arbeiten und der Timer zählt herunter. Wenn Sie den Timer nicht setzen, zählt er die Zeit.
  • Seite 72: Reinigung

    REINIGUNG 1. Bevor Sie das Gerät reinigen, schalten Sie es aus und ziehen Sie den Stecker aus der Steckdose. 2. Schrauben Sie den Schraubring ab und entfernen Sie alle Teile des Aufsatzes. 3. Das gesamte Zubehör kann in der Spülmaschine gereinigt werden! 4.
  • Seite 73: Zubereitungsleitfaden

    ZUBEREITUNGSLEITFADEN Zubehör Lebensmittel Maximale Betriebszeit Geschwindigkeiten Schneebesen (H) Eiweiß 3 Einheiten 3 Minuten Mehl 500 g Klinge (D) 2 Minuten Wasser 300 g ENTSORGUNG DES GERÄTS Am Ende seiner Lebensdauer darf dieses Gerät nicht über den normalen Hausmüll entsorgt werden, sondern muss an einer Sammelstelle zum Recycling elektrischer und elektronischer Geräte abgegeben werden.
  • Seite 74: Инструкции За Безопасност

    БЛАГОДАРИМ ВИ, ЧЕ ИЗБРАХТЕ UFESA. НАДЯВАМЕ СЕ ТОЗИ ПРОДУКТ ДА ВИ Е ПОЛЕЗЕН И УДОБЕН ЗА РАБОТА. ПРЕДУПРЕЖДЕНИЕ Моля, прочетете инструкциите за употреба преди да използвате продукта. Съхранявайте ги на безопасно място за бъдеща справка. ОПИСАНИЕ A. Мерителна чашка (макс. 100 мл) O.
  • Seite 75 остриета, изпразването на купата и по време на почистване. Внимавайте, ако гореща течност бъде изсипана в блендера, тя може да бъде изхвърлена от уреда поради внезапно отделяне на пара. Винаги изключвайте блендера от захранването, ако е оставен без надзор и преди сглобяване, разглобяване...
  • Seite 76: Важни Предупреждения

    Никога не потапяйте основния уред във вода или други течности и не го изплаквайте под течаща вода. За почистване на устройството използвайте само влажна кърпа. Това устройство е проектирано за употреба на максимална надморска височина до 2000 м над морското равнище. Повърхността...
  • Seite 77 Когато текущата температура на купата е 60°C или повече, ще откриете: 1) Работната скорост ще бъде ограничена при скорост 01-04. 2) Уредът автоматично ще превключи работната скорост до скорост 04, въпреки че текущата работна скорост е настроена на скорост 05-10. Изключете...
  • Seite 78: Как Да Използвате

    Как да отстраните острието: (G) Завъртете напречника обратно на часовниковата стрелка, за да извадите острието. Внимание: 1. Острието е много остро! Моля, работете с него внимателно! 2. Задръжте само горната част на острието! Как да монтирате купата: (I) 1. Поставете капака на купата върху купата. И завъртете капака на купата по посока на часовниковата...
  • Seite 79 Настройки по подразбиране: Стъпка 1: работното време е 20 минути, скоростта е 01 и целевата температура е 100ºC. Стъпка 2: работното време е 15 минути, скоростта е 04 и целевата температура е 0ºC. Стъпка 3: работното време е 1 минута, скоростта е 10 и целевата температура е 0ºC. (Забележки: по...
  • Seite 80 D. Функция „Пара“: Препоръчителната рецепта е дадена по-долу: Сьомга: 2 броя (50 г/бр.), есетра: 100 г, моркови: 650 г, боб: 250 г. Поставете съставките в приспособлението за приготвяне на пара (N&O) и добавете 1,5 л хладка вода в купата от неръждаема стомана (F). Настройки...
  • Seite 81 6. „Пулсов“ бутон: Функция за ускоряване на бърза скорост. Можете да я използвате за бързо смесване на храната. Задръжте „Пулсовия“ бутон, уредът незабавно започва да работи с най-високата скорост 10. Ако отпуснете бутона, уредът веднага ще възстанови предишната работна скорост. Съвети: когато...
  • Seite 82 Внимание: 1. Опасност от изгаряне от гореща пара и гореща кондензирана вода. 2. Никога не нагрявайте купата, когато е празна. 3. Ако капакът не е поставен правилно, парата ще излиза и храната в приспособлението за приготвяне на пара няма да се готви правилно. 4.
  • Seite 83 Употреба на вътрешната кошница: Моля, следвайте стъпките: 1. Монтирайте острието върху купата. 2. Добавете водата в купата. 3. Поставете вътрешната кошница в купата и добавете храната в нея. 4. След това поставете капака на купата. 5. Завъртете капака на купата, докато се заключи на мястото си. И поставете мерителната чашка върху...
  • Seite 84: Кодове За Грешки

    ПОЧИСТВАНЕ 1. Изключете устройството преди почистване и извадете щепсела от контакта. 2. Развийте винтовия пръстен и отстранете всички части на приставката. 3. Всички аксесоари могат да се почистват в съдомиялна машина! 4. Докато използвате устройството, винаги поддържайте контактните щифтове в долната част на купата...
  • Seite 85 РЪКОВОДСТВО ЗА ОБРАБОТКА Приставка Храна Максимум Работно време Скорости Пеперуда (Н) Белтък 3 единици 3 минути Брашно 500 г Острие (D) 2 минути Вода 300 г ИЗХВЪРЛЯНЕ НА ПРОДУКТА В края на експлоатационния си живот този продукт не трябва да се изхвърля с нормалните...
  • Seite 86 ‫اﻟﻌرﺑﯾﺔ‬ .‫ﻟﺑﺿﻊ ﺛوان‬ ‫إذا واﺟﮭت ﺻﻌوﺑﺔ ﻓﻲ ﺗﻧظﯾف اﻟوﻋﺎء واﻟﺳﻛﯾن، ﯾﻣﻛﻧك إﺿﺎﻓﺔ ﺑﻌض اﻟﻣﺎء اﻟﺳﺎﺧن واﻟﺻﺎﺑون إﻟﻰ اﻟوﻋﺎء وﺗﺷﻐﯾل اﻟﺟﮭﺎز ﺑﺳرﻋﺔ‬ ‫رﻣوز اﻟﺧطﺄ‬ ‫اﻟﺣل‬ ‫اﻟﺣﺎﻟﺔ‬ ‫اﻟرﻣز‬ ، ‫ﻋﻠﻰ ﺷﺎﺷﺔ‬ « » ‫ﺳﺗظﮭر‬ E 01 .‫اﻟﺧدﻣﺔ اﻟﻣﻌﺗﻣد ﻟﻺﺻﻼح‬ ‫ﺣدث ﺧطﺄ ﻣﺎ ﺑﺎﻟﺟﮭﺎز. ﯾﺟب إرﺳﺎﻟﮫ إﻟﻰ ﻣرﻛز‬ .«...
  • Seite 87 ‫اﻟﻌرﺑﯾﺔ‬ :‫ﻛﯾﻔﯾﺔ اﺳﺗﺧدام اﻟﺳﻠﺔ اﻟداﺧﻠﯾﺔ‬ ‫ﺗ ُ ﻌد‬ .‫اﻟﺳﻠﺔ اﻟداﺧﻠﯾﺔ ﺧﯾﺎر ً ا ﻣﻧﺎﺳ ﺑ ً ﺎ ﻟطﮭﻲ ﻛﻣﯾﺎت ﺻﻐﯾرة ﻣن اﻟطﻌﺎم، ﻣﺛل اﻷرز واﻷﺳﻣﺎك واﻟﻠﺣوم‬ (‫ﺗرﻛﯾب اﻟﺳﻠﺔ اﻟداﺧﻠﯾﺔ: )م‬ .‫ﺿﻊ اﻟﺳﻠﺔ اﻟداﺧﻠﯾﺔ ﻓﻲ اﻟوﻋﺎء، ورﻛب ﻏطﺎء اﻟوﻋﺎء ﺑﺷﻛل ﺻﺣﯾﺢ‬ .‫أدﺧل...
  • Seite 88 ‫اﻟﻌرﺑﯾﺔ‬ .‫اﻹﻋدادات وﯾﻌود اﻟﺟﮭﺎز إﻟﻰ وﺿﻊ اﻻﺳﺗﻌداد‬ ‫ﻋﻧد اﻧﺗﮭﺎء وﻗت اﻟطﮭﻲ. وﺗم ﻣﺳﺢ ﺟﻣﯾﻊ‬ « ‫ﺻﻔﯾر‬ » ‫ﺳﺗﺳﻣﻊ ﺻوت‬ .‫ﺑﻌد اﻻﺳﺗﺧدام، ﻗم ﺑﺈﯾﻘﺎف ﺗﺷﻐﯾل اﻟﺟﮭﺎز اﻟرﺋﯾﺳﻲ وإزاﻟﺔ ﻏطﺎء اﻟﻘدر اﻟﺑﺧﺎري‬ .‫أﺧرج اﻟطﻌﺎم اﻟﻣطﮭﻲ ﻣن اﻟﻘدر اﻟﺑﺧﺎري‬ :‫ﺗﻧﺑﯾﮫ‬ .‫اﺣذر ﺧطر ﻟﻺﺻﺎﺑﺔ ﺑﺣروق ﻧﺗﯾﺟﺔ اﻟﺗﻌرض ﻟﻠﺑﺧﺎر اﻟﺳﺎﺧن واﻟﻣﺎء اﻟﻣﻛﺛف اﻟﺳﺎﺧن‬ .‫وﻋﺎء...
  • Seite 89 ‫اﻟﻌرﺑﯾﺔ‬ .‫ﺟم‬ :‫ﺟم ﺑﺻل‬ :‫ﻣﻠﻌﻘﺔ ﻛﺑﯾرة ﻋﯾش اﻟﻐراب‬ :‫طﺣﯾن ﺣﺑوب‬ :‫ﺟم ﺛوم‬ :‫ﺟم ﻧﺑﯾذ أﺣﻣر‬ :‫ﺟم زﺑدة‬ :‫ﺟم ﻟﺣم ﻣﻘدد‬ :‫ﻟﺣم ﺑﻘري‬ :‫ﻋدادات اﻻﻓﺗراﺿﯾﺔ‬ ‫اﻹ‬ .‫درﺟﺔ ﻣﺋوﯾﺔ‬ ‫درﺟﺔ اﻟﺣرارة: درﺟﺔ اﻟﺣرارة اﻟﻣطﻠوﺑﺔ‬ ‫. ﯾﻣﻛﻧك إﻋﺎدة ﺿﺑط اﻟﺳرﻋﺔ ﻋﻧد‬ ‫دﻗﯾﻘﺔ. اﻟﺳرﻋﺔ: ﺳرﻋﺔ اﻟﻌﻣل‬ ‫دﻗﺎﺋﻖ...
  • Seite 90 ‫اﻟﻌرﺑﯾﺔ‬ :« ‫اﻟوﻗت‬ » ‫زر‬ .(‫دﻗﯾﻘﺔ‬ ‫ﺛﺎﻧﯾﺔ‬ .:‫( ﻟﺿﺑط اﻟوﻗت )ﺛﺎﻧﯾﺔ أو دﻗﯾﻘﺔ( )اﻟﻧطﺎق اﻟزﻣﻧﻲ‬ ‫اﺿﻐط ﻋﻠﻰ زر "اﻟوﻗت"، ﺛم أدر اﻟﻣﻘﺑض )ك‬ .‫دﻗﯾﻘﺔ‬ ‫ﻧﺻﺎﺋﺢ: إذا ﻟم ﺗﺣدد وﻗت اﻟطﮭﻲ، ﻓﺳﯾﺗوﻗف اﻟﺟﮭﺎز ﻋن اﻟﻌﻣل ﺗﻠﻘﺎﺋ ﯾ ً ﺎ وﯾدﺧل ﻓﻲ وﺿﻊ اﻻﺳﺗﻌداد ﺑﻌد‬ :«...
  • Seite 91 ‫اﻟﻌرﺑﯾﺔ‬ ‫، ﻋﻠﻰ اﻟرﻏم ﻣن أن‬ ‫ﺳرﻋﺔ اﻟﺟﮭﺎز‬ ‫ﻣل اﻟﺟﮭﺎز ﺗﻠﻘﺎﺋ ﯾ ً ﺎ ﻋﻠﻰ ﺗﺑدﯾل ﺳرﻋﺔ اﻟﻌﻣل‬ ‫ﺳﯾﻌ‬ ‫ﺳرﻋﺔ اﻟﻌﻣل اﻟﺣﺎﻟﯾﺔ ﻣﺿﺑوطﺔ ﻋﻠﻰ اﻟﺳرﻋﺔ‬ ‫ﻻ‬ .‫ﺗﻔﺗﺢ اﻟﺟﮭﺎز‬ ‫اﻓﺻل اﻟﺟﮭﺎز ﻓور ً ا ﻋن ﻣﺻدر اﻟﺗﯾﺎر اﻟﻛﮭرﺑﺎﺋﻲ ﻓﻲ ﺣﺎﻟﺔ ﺣدوث أي ﻋطل أو ﺗﻠف واﺗﺻل ﺑﺧدﻣﺔ اﻟدﻋم اﻟﻔﻧﻲ اﻟﻣﻌﺗﻣدة. ﻟﻣﻧﻊ ﺣدوث أي ﺧطر، ﻻ‬ .‫ﯾ...
  • Seite 92 ‫اﻟﻌرﺑﯾﺔ‬ .‫اﻟﺟﮭﺎز ﺑطرﯾﻘﺔ آﻣﻧﺔ وﻛﺎﻧوا ﯾﻔﮭﻣون اﻟﻣﺧﺎطر اﻟﻣﺗﺿﻣﻧﺔ‬ .‫ﯾ ُ ﺣظر ﻋﻠﻰ اﻷطﻔﺎل اﻟﻠﻌب ﺑﺎﻟﺟﮭﺎز‬ .‫وﻟﺿﻣﺎن إﻏﻼق ﺳﻛﯾن اﻟﺧﻠط، ﯾ ُ رﺟﻰ ﻋدم ﺗرك ﺳﻛﯾن اﻟﺧﻠط ﯾﻌﻣل ﺑدون ﺣﻣل‬ :‫ﻟﻼﺳﺗﺧدام اﻟﻣﻧزﻟﻲ وﻟﯾس ﻣﺧﺻ ﺻ ً ﺎ ﻟﻼﺳﺗﺧدام ﻓﻲ ﺗطﺑﯾﻘﺎت ﻣﺛل‬ ‫ھذا...
  • Seite 93 ‫اﻟﻌرﺑﯾﺔ‬ .‫. ﻧﺗﻣﻧﻰ أن ﯾﻧﺎل اﻟﻣﻧﺗﺞ رﺿﺎﻛم وﺳﻌﺎدﺗﻛم‬ UFESA ‫ﻧود أن ﻧﺷﻛرﻛم ﻋﻠﻰ اﺧﺗﯾﺎر‬ ‫ﺗﺣذﯾر‬ .‫ﯾ ُ رﺟﻰ ﻗراءة ﺗﻌﻠﯾﻣﺎت اﻻﺳﺗﺧدام ﺑﻌﻧﺎﯾﺔ ﻗﺑل اﺳﺗﺧدام اﻟﻣﻧﺗﺞ. اﺣﺗﻔظ ﺑﮭﺎ ﻓﻲ ﻣﻛﺎن آﻣن ﻟﻠرﺟوع إﻟﯾﮭﺎ ﻓﻲ اﻟﻣﺳﺗﻘﺑل‬ ‫اﻟوﺻف‬ « ‫اﻟوﻗت‬ » ‫ﺷﺎﺷﺔ ﻋرض‬...
  • Seite 94 BOLETÍN DE GARANTÍA B&B TRENDS, SL. garantiza la conformidad de este producto al uso para el que se destina, durante un periodo de tres años. Durante la vigencia de esta garantía y en caso de avería, el usuario tiene derecho a la reparación y en su defecto, a la subs- titución del producto, sin cargo alguno, salvo que una de estas opciones resultase imposible o desproporcionada, y entonces podrá...
  • Seite 95: Boletim De Garantia

    This warranty should be retained by the user as well as the invoice, receipt or the delivery docket to facilitate the exercise of these rights. For technical service and af- ter-sales care outside the Spanish territory, please submit your query to the point of sale where you purchased the item.
  • Seite 96 (+34) 902 997 053 sat@bbtrends.es B&B TRENDS, S.L. C. Cataluña, 24 P.I. Ca N’Oller 08130 Santa Perpètua de Mogoda (Barcelona) España C.I.F. B-86880473 www.bbtrends.es Consulte el SAT autorizado más cercano en https://sat.ufesa.com/ Check out your nearest service station at https://sat.ufesa.com/...
  • Seite 98 B&B TRENDS, S.L. C.I.F. B-86880473 C. Cataluña, 24 P.I. Ca N’Oller 08130 Santa Perpètua de Mogoda (Barcelona) · España www.bbtrends.es Ver. 05/2021...

Inhaltsverzeichnis