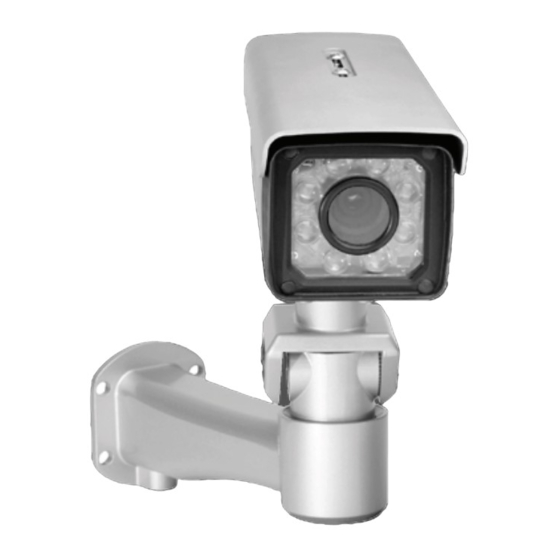
Herunterladen Inhalt Inhalt Diese Seite drucken

Werbung

Verfügbare Sprachen
  • DE

Verfügbare Sprachen

  • DEUTSCH, seite 7
Day & Night OutDOOr
PoE NEtwOrk CamEra
DCS-7510
Quick Installation
Guide+
Installations-Anleitung+
Guide
d'installation+
Guía de
instalación+
Guida di
Installazione+
1 1

Werbung

Inhaltsverzeichnis
loading

Inhaltszusammenfassung für D-Link DCS-7510

  • Seite 1 Day & Night OutDOOr PoE NEtwOrk CamEra DCS-7510 Quick Installation Guide+ Installations-Anleitung+ Guide d’installation+ Guía de instalación+ Guida di Installazione+...
  • Seite 3: Package Contents

    Quick Installation Guide DCS-7510 DAy & NIGht OutDOOr PoE NEtWOrk CAmErA Package Contents If any of the items are missing, please contact your reseller. DCS-7510 Day & Wire-in Bracket user manual and CAt5 Ethernet AC Power Adapt- Night Outdoor PoE...
  • Seite 4 Step3. Next, continue passing the cables through the wire-in bracket, pulling them through the other end. Step4. Attach the camera bracket to the wire-in bracket using screws. Step5. Finally, attach the camera on the top of the camera bracket using screws. Step6.
  • Seite 5: Technical Support

    Ensure that the ports configured for the DCS-7510 on the router or firewall are correct. In order to do that, you need to determine if the DCS-7510 is behind a router or firewall and then properly configure the ports of your DCS-7510. Other possible problems might be due to the network cable.
  • Seite 6 Notes...
  • Seite 7: Packungsinhalt

    Schnellinstallationshandbuch DCS-7510 DAy & NIGht OutDOOr PoE NEtWOrk CAmErA Packungsinhalt Wenn eines dieser Elemente fehlt, wenden Sie sich bitte an Ihren Vertriebspartner. DCS-7510 Day & kabelführbare Benutzerhand- kat.5 Netzteil/Stromad- Night Outdoor PoE halterung buch und Softwa- Ethernetkabel apter 12V 1,25A...
  • Seite 8 Schritt 3. Führen Sie als Nächstes die kabel durch die halterung der kamera und ziehen Sie sie am anderen Ende aus der halterung heraus. Schritt 4. Bringen Sie mithilfe von Schrauben die kamerabefestigungsbügel an die kabelführende halterung an. Schritt 5. Schrauben Sie abschließend die kamera auf den kamerabefestigungsbügel.
  • Seite 9: Technische Unterstützung

    Ports, müssen geöffnet sein. (4). Warum kann ich die DCS-7510 nicht von einem Webbrowser aus aufrufen? Vergewissern Sie sich, dass die für die DCS-7510 auf dem router oder der Firewall konfigurierten Ports korrekt sind. Dazu müssen Sie feststellen, ob sich die DCS-7510 hinter einem Router oder hinter einer Firewall befindet und dann die Ports Ihrer DCS-7510 ordnungsgemäß...
  • Seite 10 Notes...
  • Seite 11: Contenu De La Boîte

    Guide d'installation rapide DCS-7510 DAy & NIGht OutDOOr PoE NEtWOrk CAmErA Contenu de la boîte Contactez immédiatement votre revendeur s'il manque l'un des éléments. DCS-7510 Day & Support de manuel d'utili- Câble Adaptateur sec- Night Outdoor PoE connexion sation et logiciel Ethernet CAt5 teur CA (12 V ;...
  • Seite 12 Étape 3. Ensuite, faites passer les câbles dans le support de connexion en les tirant par l'autre extrémité. Étape 4. Fixez le support de caméra au support de connexion à l'aide des vis fournies. Étape 5. Pour finir, fixez la caméra sur son support à l'aide des vis fournies.
  • Seite 13: Résolution Des Problèmes

    Le mPEG-4 et le mJPEG sont utilisés pour fournir des images de grande qualité nécessitant peu de bande passante. 3. Puis-je installer et utiliser la DCS-7510 si le réseau est protégé par un pare-feu ? Si un pare-feu protège le réseau, le port 80 doit être ouvert pour permettre la transmission des données habituelles ainsi que des flux audio et vidéo.
  • Seite 14 Notes...
  • Seite 15: Qué Contiene La Caja

    Guía de instalación rápida DCS-7510 DAy & NIGht OutDOOr PoE NEtWOrk CAmErA ¿Qué contiene la caja? Si falta cualquiera de los componentes, póngase en contacto con el proveedor. DCS-7510 Day & Soporte de manual de Cable Ethernet Adaptador de Night Outdoor PoE...
  • Seite 16 Paso 3. A continuación, siga pasando los cables a través del soporte de entrada de cable, tirando de ellos desde el otro extremo. Paso 4. Acople el soporte de la cámara al soporte de entrada de cable utilizando los tornillos. Paso 5.
  • Seite 17: Solución De Problemas

    4. ¿Porqué no puedo acceder a la DCS-7510 desde el explorador Web? Asegúrese de que los puertos configurados para la DCS-7510 en el router o el cortafuegos son correctos. Para ello, necesita determinar si la DCS-7510 está detrás de un router o un cortafuegos y, a continuación, configurar correctamente los puertos de la DCS-7510.
  • Seite 18 Notes...
  • Seite 19: Guida Di Installazione Rapida

    Guida di installazione rapida DCS-7510 DAy & NIGht OutDOOr PoE NEtWOrk CAmErA Contenuto della confezione Se uno o più articoli risultano mancanti, rivolgersi al rivenditore. DCS-7510 Day & Staffa con pas- manuale Cavo Ethernet Alimentatore CA Night Outdoor PoE sacavi...
  • Seite 20 Passo 3. A questo punto far passare i cavi attraverso la staffa con passacavi. Passo 4. Fissare la staffa della videocamera alla staffa passacavi utilizzando le apposite viti. Passo 5. Fissare la videocamera nella parte superiore della staffa della videocamera utilizzando le apposite viti.
  • Seite 21: Risoluzione Dei Problemi

    Per ottenere immagini di elevata qualità a larghezze di banda ridotte, vengono utilizzati mPEG-4 e mJPEG. 3. È possibile installare e utilizzare la videocamera DCS-7510 se nella rete è presente un firewall? Se nella rete è presente un firewall, è necessario aprire la porta 80 per le normali trasmissioni di dati, nonché...
  • Seite 22 Notes...
  • Seite 23 Notes...
  • Seite 24 Ver. 1.00(E) 2009/10/22 6ECS7510Q.01G...

Inhaltsverzeichnis