Inhaltsverzeichnis
Werbung
Verfügbare Sprachen
Verfügbare Sprachen
Quicklinks
Werbung
Inhaltsverzeichnis

Verwandte Anleitungen für Nubeo Curiosity STORM BLACK NB-6043-04


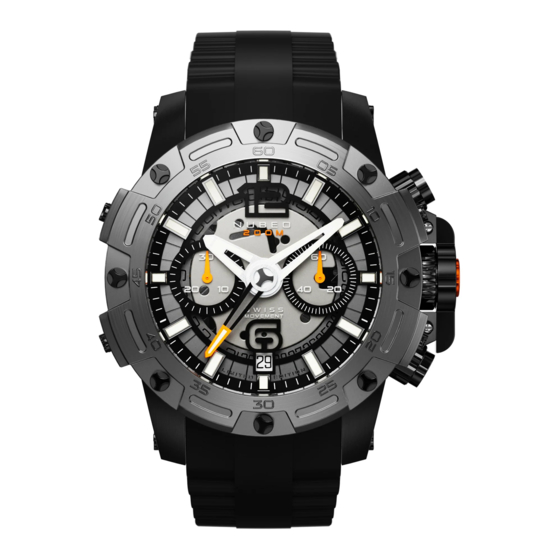
Inhaltszusammenfassung für Nubeo Curiosity STORM BLACK NB-6043-04
- Seite 1 I N S T R U C T I O N M A N U A L B E D I E N U N G S A N L E I T U N G...
- Seite 3 Curiosity is a car-sized Mars rover designed to explore Mars as part of NASA's Mars Science Laboratory (MSL) mission. The MSL mission founded in 1993 was formed to help determine whether Mars could ever have supported life, as well as determining the role of water, and to study the climate and geology of Mars.
-
Seite 4: Screw-Down Crown
PLEASE READ THE FOLLOWING BEFORE UNSCREWING THE CROWN SCREW-DOWN CROWN This watch is equipped with a screw down crown . Do not pull the crown unless it is unscrewed first. TO UNSCREW: Turn the crown anti-clockwise until it turns freely without tension. Gently pull the crown out to the other desired positions for watch setting (see specific operating instructions on the following pages). - Seite 5 CHRONOGRAPH / SWISS MADE MOVEMENT Uni-directional Minute Hand Turning Bezel Open Cover Hour Hand Push Button A Screwed Down Position Chronograph 30 Minute Hand Crown Push Button B Positions Chronograph Small Second Hand Second Hand Date As your watch has a screw down crown feature, release the watch from the screw-down position before setting.
- Seite 6 HOW TO SET THE DATE AND TIME * Before setting the time, check that the chronograph measurement is stopped. 1. Pull out the crown to the position [2]-(1st click). 2. Turn the crown clockwise until the preview day’s date appears. 3.
- Seite 7 * Do not set the date between 9:00 P.M. and 00:30 A.M., otherwise the day may not change properly. If it is necessary to set the date during the time period, first change the time to any time outside it, set the date and then reset the correct time.
-
Seite 8: Stopwatch Function
STOPWATCH FUNCTION • The stopwatch can measure up to 2 hours. Standard Measurement START STOP RESET... - Seite 9 Split Time Measurement START SPLIT SPLIT RELEASE STOP RESET Measurement and release of split time can be repeated as many times as necessary by pressing the button B.
- Seite 10 ADJUSTING THE STOPWATCH HAND POSITION * Before setting the time, check if all the chronograph hands (second, minute) - are at the “0” (12 o’clock) position. * If the stopwatch is in use, press the buttons in the following order to reset it, and then, check if the hands return to “0”...
- Seite 11 AFTER BATTERY EXCHANGE OR MISHANDLING ONLY To reset chronograph, minute and second chronograph. 1. Pull the crown in position [2]- (1st click). 2. Push the pusher A two times with a time interval of 2s. The hand of counter 9h makes a turn.
- Seite 12 3. Push B continually for quick setting and push step by step to ajust the minute. 4. Push the pusher A. The second hand makes a turn.
- Seite 13 5. Push B continually for quick setting and push step by step to ajust the second. 6. Push the crown in position [0] to exit.
- Seite 14 STOPWATCH HANDS ZERO POSITIONS * Turn slightly the crown. To facilitate the synchronization.
- Seite 15 WATER RESISTANT All Nubeo timepieces are designed with a minimum water resistance rating of 5 ATM (50m). The water-resistance of a timepiece protects the movement from dust, moisture, and risk of damage to the movement should it be immersed in water.
- Seite 16 USE PRECAUTIONS - RESISTANCE TO WATER All Nubeo timepiece are designed to withstand use as indicated on the following chart. Always make sure the crown is screwed-down completely before use.
- Seite 17 CARE AND PRECAUTIONS Each Nubeo timepiece is designed and manufactured to exceed the highest of standards. In order to ensure optimal performance and longevity from your timepiece, please review the simple guidelines for care and precautions of your new Nubeo timepiece.
- Seite 18 TWO (2) YEAR INTERNATIONAL WARRANTY Your Nubeo watch is warranted for a period two (2) years from the original date of purchase under the terms and conditions of the warranty. The Nubeo warranty covers materials and manufacturing defects. A copy of the receipt or dealer stamp in the warranty booklet is required for proof of purchase.
- Seite 19 - There is no presentation of the warranty. This warranty is void if the watch has been damaged by accident, negligence of persons other than authorized Nubeo sales or services agents, unauthorized service, or other factors not due to defects in materials or workmanship.
- Seite 20 These charges are subject to change. For repairs of your Nubeo watch, we recommend that you contact an authorized Nubeo dealer or the authorized international watch service center closest to you.
- Seite 21 BEDIENUNGSANLEITUNG (DEUTSCH)
- Seite 22 BITTE LESEN SIE DIE FOLGENDEN PUNKTE, BEVOR SIE DIE KRONE ABSCHRAUBEN VERSCHRAUBTE KRONE Diese Uhr ist möglicherweise mit einer verschraubten Krone ausgestattet. Ziehen Sie die Krone nur dann heraus, wenn sie zuvor gelöst wurde. Drehen Sie die Krone gegen den Zum Lösen: Uhrzeigersinn, bis sie sich ohne Spannung frei dreht.
- Seite 23 CHRONOGRAPH / SCHWEIZER BEWEGUNG Unidirektional Minutenzeiger Lünettenring Offene Abdeckung Stundenzeiger Druckknopf A Verschraubte Krone Chronograph Minutenzähler Krone Druckknopf B Positionen Mittlerer Sekunden Sekundenzeiger -Stoppuhrzeiger Datum Wie Ihre Uhr über eine verschraubte Krone verfügt, lösen Sie die verschraubte Position.
-
Seite 24: Einstellen Der Uhrzeit
EINSTELLEN DER UHRZEIT 1. Ziehen Sie die Krone bis zur Position 3, ihrer maximalen Auszugslänge, heraus. Der Sekundenzeiger bleibt stehen. 2. Drehen Sie die Krone entweder im oder gegen den Uhrzeigersinn, bis die Uhrzeiger auf die gewünschte Zeit gestellt sind. 3. -
Seite 25: Einstellen Des Datums
EINSTELLEN DES DATUMS 1. Ziehen Sie die Krone auf Position 2 heraus. 2. Drehen Sie die Krone im oder gegen den Uhrzeigersinn, bis das gewünschte Datum im Datumsfenster angezeigt wird. 3. Wenn das gewünschte Datum erreicht ist, drücken Sie die Krone zurück auf Position 1 und verschrauben Sie sie gegebenenfalls. -
Seite 26: Stoppuhr-Funktion
STOPPUHR-FUNKTION • Die Stoppuhr kann bis zu 2 Stunden messen. STANDARDMESSUNG START STOPP RESET... -
Seite 27: Messung Der Kumulierten Verstrichenen Zeit
MESSUNG DER KUMULIERTEN VERSTRICHENEN ZEIT ZWISCHENZEIT START ZWISCHENZEIT -FREIGABE STOPP RESET Neustart und Stopp der Stoppuhr können durch Drücken der Taste A wiederholt werden. -
Seite 28: Einstellung Der Stoppuhr-Zeiger Und Stoppuhrzeiger-Positionen
EINSTELLUNG DER STOPPUHR-ZEIGER UND STOPPUHRZEIGER-POSITIONEN * Ü berprüfen Sie vor der Zeiteinstellung, ob sich alle Stoppuhrzeiger in der - Sekunden (wo vorhanden), Sekunde, Minute - in der “0”-Stellung (12 Uhr) befinden. * Wenn die Stoppuhr im Einsatz ist, dann betätigen Sie die Tasten wie folgt, um eine Rücksetzung durchzuführen, und prüfen Sie anschließend ob sich die Zeiger in der. - Seite 29 NUR NACH BATTERIEWECHSEL ODER FALSCHER HANDHABUNG Setzen des Chronographen sowie der Minuten- und Sekunden- Chronographen auf Nullstellung. 1. Ziehen Sie die krone in Position [2]-(1st click). 2. Drücken Sie den Drücker A zweimal mit einem Zeitabstand von 2 Sekunden. Der Zeiger des 9-Stunden-Zählers dreht sich.
- Seite 30 3. Drücken Sie B kontinuierlich für die 2 Schnelleinstellung und drücken Sie Schritt für Schritt, um die Minuten einzustellen. 4. Drücken Sie Drücken A. Der Sekundenzeiger 3 dreht sich.
- Seite 31 5. Drücken Sie B kontinuierlich für die Schnelleinstellung und drücken Sie Schritt für Schritt, um die Sekunden einzustellen. 6. Ziehen Sie die krone in Position 0, um den Einstellungsmodus zu verlassen.
- Seite 32 CHRONOGRAPHEN -ZEIGER NULL POSITIONEN * Leichtes drehen der stellwelle um die synchronisation zu erleichtern.
-
Seite 33: Wasserbeständigkeit
WASSERBESTÄNDIGKEIT Alle Nubeo Zeitmesser sind bis 5 BAR wasserfest. Die Wasserfestigkeit einer Uhr schützt das Uhrwerk vor Staub, Feuchtigkeit und Beschädigung, sollte sie ins Wasser getaucht werden. In der Tabelle finden Sie Richtlinien für die empfohlenen Einsatzbereiche für verschiedene Druckstufen. Es ist wichtig, nicht zu versuchen, die Position der Krone zu verstellen, während der Zeitmesser mit Wasser in Kontakt ist. -
Seite 34: Vorsichtsmassnahmen - Wasserfestigkeit
VORSICHTSMASSNAHMEN - WASSERFESTIGKEIT Alle Nubeo-Uhren sind so konzipiert, dass sie dem Gebrauch gemäß der folgenden Tabelle standhalten. Vergewissern Sie sich vor dem Gebrauch immer, dass die Krone vollständig verschraubt ist. -
Seite 35: Pflege Und Vorsichtsmassnahmen
PFLEGE UND VORSICHTSMASSNAHMEN Bei der Entwicklung und Fertigung der Nubeo Zeitmesser legen wir Wert darauf, sogar höchste Qualitätsstandards zu übertreffen. Lesen Sie bitte diese Pflegerichtlinien und Vorsichtsmaßnahmen für Ihren Nubeo Zeitmesser, um eine optimale Leistung und die Langlebigkeit Ihrer Uhr sicherzustellen. - Seite 36 ZWEI (2) JAHRE INTERNATIONALE GARANTIE Die Garantie für Ihre Nubeo Uhr gilt für zwei (2) Jahre ab Kaufdatum gemäß den vorliegenden Garantiebedingungen. Die Nubeo Garantie deckt Material- und Herstellungsfehler ab. Als Kaufbeleg ist eine Kopie der Rechnung oder ein Händlerstempel im Garantieheft erforderlich.
-
Seite 37: Nicht Von Der Garantie Abgedeckt
- Keine Vorlage der Garantiebescheinigung. Diese Garantie ist ungültig, wenn die Uhr durch ein Versehen, Fahrlässigkeit von Personen, die keine autorisierten Nubeo Verkaufs- oder Servicevertreter sind, nicht autorisierten Service oder andere Faktoren, die nicht auf Material- oder Verarbeitungsfehler zurückzuführen sind, beschädigt wurde. -
Seite 38: Anforderung Der Garantie Und Anderer Uhrenreparaturen
Kundendienst die gewünschten Arbeiten gegen eine Gebühr, je nach Art der Uhr und gewünschten Arbeiten, durchführen. Änderungen dieser Gebühren sind vorbehalten. Für Reparaturen Ihrer Nubeo Uhr empfehlen wir, dass Sie Ihren autorisierten Nubeo Händler oder einen autorisierten internationalen Kundendienst in Ihrer Nähe kontaktieren. - Seite 41 N U B E O W A T C H E S . C O M V O L . 1 . 4 3 E N / D E...