oka HomeLine 1 OH Montageanleitung
Inhaltsverzeichnis
Quicklinks
Inhaltsverzeichnis

Verwandte Anleitungen für oka HomeLine 1 OH


Inhaltszusammenfassung für oka HomeLine 1 OH
- Seite 1 Montageanleitung MTA 0134 Assembly Instructions OKA HomeLine Korpusmöbel Stand/Version 11/2021...
- Seite 3 Inhaltsverzeichnis Table of contents Allgemeine Hinweise General notes Produktsystematik Product systematics Aufbau und Montage Construction and assembly Montagebeispiel Assembly example Demontage/ Montage der abnehmbaren Rückwand Disassembly/assembly of the removable back wall Kabelmanagement und Beleuchtung Cable management and lighting Montage und Einstellung der Ausstattungen Assembly and adjustment of the equipment Einstellung Drehtüren Setting revolving door...
-
Seite 4: Allgemeine Hinweise
Allgemeine Hinweise Genral notes... -
Seite 5: Außenkorpus
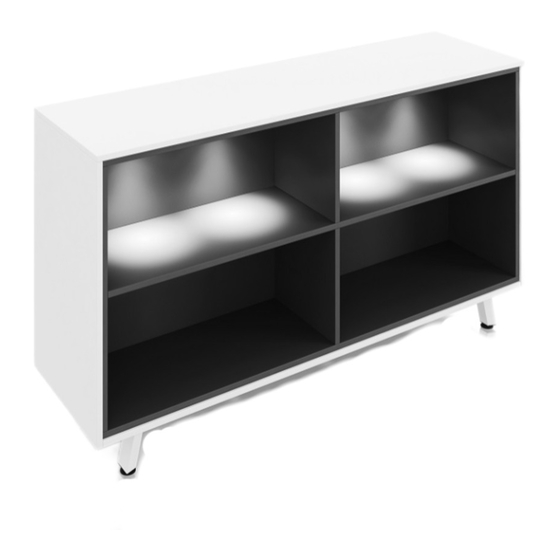
1.1 Produktsystematik Product systematics Außenkorpus Outer Body 1 OH 2 OH 3 OH Außenkorpus optional mit Elektrifizierung Outer body optionally with electrification • Innenkorpus Inner Body 1 OH 2 OH 3 OH halbe Breite half width • 1 OH 2 OH 3 OH volle Breite full width... -
Seite 6: Optionale Ausstattung
Innenkorpus: geschlossene Module Inner body: closed modules 1 OH Schubkästen 1 OH Hängeregistratur 1 OH drawer 1 OH suspension file drawer 2 OH Schubkästen 2 OH Hängeregistratur 2 OH Kombination 2 OH drawer 2 OH suspension file drawer 2 OH combination 1 OH Drehtüren 2 OH Drehtüren 3 OH Drehtüren... -
Seite 7: Aufbau Und Montage
1.2 Aufbau und Montage Construction and assembly Korpusmöbel in 44 cm Höhe (1 OH) werden immer Corpus furniture at a height of 44 cm (1 FH) is always komplett montiert ausgeliefert. Korpusmöbel in delivered fully assembled. Corpus furniture at heights 84 und 124 cm Höhe (2 und 3 OH) werden immer of 84 and 124 cm (2 and 3 OH) are always delivered teilmontiert ausgeliefert. - Seite 8 Korpus entpacken Unpack body Vor Montagebeginn die Transportverpackung Before starting the assembly, remove the transport entfernen und die Lieferung auf Vollständigkeit, packaging and check the delivery for completeness, Richtigkeit und Qualität überprüfen. correctness and quality. In der Montageanleitung werden alle alternativen All alternative or optional equipment variants are bzw.
- Seite 9 Versandaufkleber Shipping label Außenkorpus Outer body Innenkorpus Inner body Position des Versandaufklebers mit Infor- Versandaufklebers mit Information über mationen der zugehörigen Unterpositio- Einbauposition Shipping label with informa- nen (Einbauten) Position of the shipping la- tion about the installation position bel with information on the associated sub- Beispiel: W300W30000000000000 UL items (fixtures) Example: W300W30000000000000 UL...
-
Seite 10: Seite Mit Deckplatte Lösen
Außenkorpus vorbereiten Prepare outer body Demontage Rückwand Rear wall Disassembly Beide Sicherungsschrauben lockern Loosen both locking screws Rückwand aushebeln Lever out the rear wall Seite mit Deckplatte lösen Loosen the side with the cover plate Exzenterschraube Lösen (Pfeil nach außen drehen) Loosen the eccentric screw (turn the arrow outwards) -
Seite 11: Innenkorpusse Positionieren
Innenkorpusse positionieren Position the inner bodies Anschlag an der Rückseite Stop on the back Positionierung über Dübel am Unterboden Positioning via dowels on the sub-floor Weitere Module auf die unteren Korpusse aufsetzen Place further modules on the lo- wer carcass Korpus bündig an der Hinterkante und der Seite positionieren Position the body flush... -
Seite 12: Seiten Mit Deckplatte Montieren
Seiten mit Deckplatte montieren Mount sides with cover plate Seiten mit Oberboden über Innenkorpusse Exzenterschraube schließen (Pfeil nach in- platzieren und mit Unterboden verbinden nen drehen) Close the eccentric screw (turn Place the sides with the top panel over the the arrow inwards) inner body and connect to the bottom panel Verschraubung Innenkorpus mit Außenkorpus... -
Seite 13: Beleuchtung
Beleuchtung Lighting Allgemeine Vorbereitung General preparation Kabelkanäle und Verteilersteckdose an gewünschter Position an Rückwand be- festigen Fasten the cable ducts and distri- bution socket in the desired position on the rear wall Netzteil an gewünschter Position auf Un- terboden befestigen Fasten the power supply unit in the desired position on the sub-floor... -
Seite 14: Montage Rückwand
Montage Rückwand rear wall assembley Rückwand einhängen Hang in the rear wall Beide Sicherungsschrauben eindrehen Screw in both locking screws Höhenausgleich Height adjustment Höhenausgleichsschraube Height adjustment screw 10 mm... - Seite 15 1.3 Montagebeispiel Assemably example Konfiguration Configuration 2 OH Korpusmöbel 2 OH corpus furniture • untere Ebene Schubkästen lower level dra- • wers obere Ebene offenes Regal mit Schiebetür • upper level open shelf with sliding door Packstücke Packages 1 x 2 OH Außenkorpus 1 x 2 OH outer body •...
- Seite 16 2. De-/Montage der abnehmbaren Rückwand Dis-/assembly of the removable rear wall Demontage Disassembly Montage Assembly Beide Sicherungsschrauben lockern Rückwand einhängen Loosen both locking screws Hang in the rear wall Rückwand aushebeln Beide Sicherungsschrauben eindrehen Lever out the rear wall Screw in both locking screws...
-
Seite 17: Kabelmanagement Und Beleuchtung
3. Kabelmanagement und Beleuchtung Cable management and lighting Kabel nicht knicken oder hoch belasten Do not kink or strain the cable Bei teilmontierter Auslieferung (2+3 OH) Das Netzteil, die Fernbedienung für die Be- leuchtung und die Kabelüberlängen von Zu- behörartikel befinden sich sich in einer Klapp- schachtel im jeweiligen Innenkorpus der die Beleuchtung beinhaltet. - Seite 18 Einstellung der Ausstattungen Adjustment of the equipment...
- Seite 19 4.1 Einstellung der Drehtür Adjustment of the revolving door Montage Assembly Montage Türband Hinge Assembly Höhenverstellung Height adjustment Auflagenverstellung Overlay adjustment Tiefenverstellung Depth adjustment Demontage Disassembly Push to Open Push to Open Demontage Türband Hinge Disassembly Einstellung Push to open Push to open adjustment...
-
Seite 20: Einstellung Der Schubladen
4.2 Einstellung der Schubladen Adjustment of the drawers Montage & Demontage Assembly & Disassembly Montage: Schubkasten auf Schiene stellen und bis zum Anschlag einschieben sambly: Place the drawer on the rail and push it in as far as it will go Demontage: Kunststoff- platte eindrüken und Schub anheben... -
Seite 21: Einstellung Der Schiebetür
4.3 Einstellung der Schiebetür Adjustment of the sliding door Demontage Dissassembly Montage Assembly Führungsteile zur Demontage der Schiebetür Siehe Schritt 1 der Demontage See step 1 of auf der Schrankinnenseite Guide parts for dis- disassembly mantling the sliding door on the inside Tür mit Laufteile auf Schiene setzen und Tür Feststeller nach innen drücken und nach un- mit den Feststeller auf Schiene positionieren. -
Seite 22: Einstellung Klappen
4.4 Einstellung Klappen Adjustment flaps Demontage Dissassembly Montage Assembly Einschwenkbeschlag zur Demontage der Siehe Schritt 1 der Demontage See step 1 of Klappe auf Türinnenseite Swivel fitting for dis- disassembly mantling the flap on the inside of the door Tür einseitig mit Befestigungsstiften in Schiene Tür hoch schwenken Befestigungsstifte nach positionieren. -
Seite 23: Einstellung Tischmodul
4.5 Einstellung Tischmodul Setting table module Einstellmodul aus Blech bis an die Zwi- schenblende positionieren Position the module made of sheet metal up to the intermediate panel... -
Seite 24: Tischinstallation In Und Auf Schrank
5. Tischinstallation in und auf Schrank Table installation in and on closet In Schrank In closet Auf Schrank On closet Tisch anheben Lift the table Tisch anheben Lift the table Tisch in Einstellmodul platzieren und bis Tisch auf Schrank platzieren (min. 100 mm zur Rückwand in de Korpus schieben Abstand zwischen Tischfüßen und Kor- Place the table in setting module and... - Seite 25 6. Kabeldurchlass Tisch Cable passage table Raum für Kabelüberlängen Space for excess cables...
-
Seite 26: Pflegehinweise
7. Pflegehinweise Care instructions Anwendung bei glatten Flächen Use on smooth surfaces Reinigung mit weichen, sauberen, nicht flusenden The surfaces of the furniture should only be cleaned Tüchern, Wasser und etwas handelsüblichem All- with soft, clean and lint-free cloths and a small quan- zweckreiniger oder Geschirrspülmittel.