Inhaltszusammenfassung für Num'axes EYENIMAL PET VISION LIVE
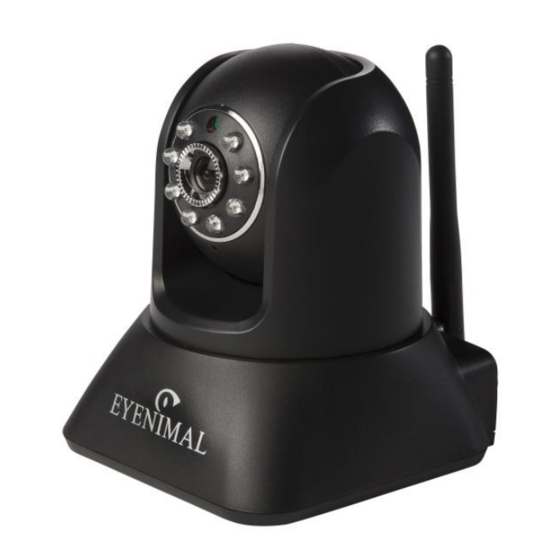
Seite 1
All manuals and user guides at all-guides.com VISION LIVE CAMERA DE SURVEILLANCE D’ANIMAUX DE COMPAGNIE FR - Guide d’utilisation EN - User’s guide SP - Manual de instrucciones D - Gebrauchsanleitung IT - Manuale d’uso...
Seite 2
NUM’AXES declares that the equipment below: EYENIMAL PET VISION LIVE complies to all dispositions of the part 15 of the FCC rules This device complies with part 15 of the FCC. Operation is subject to the following conditions: (1) this device may not cause harmful interference, and (2) this device must accept any interference received including interferences that may cause undesired operation.
Seite 3
All manuals and user guides at all-guides.com Guide d’utilisation Reliez votre caméra à la box ADSL grâce au câble Ethernet. Reliez le bloc d’alimentation secteur au réseau électrique, puis connectez la fiche d'alimentation à l’arrière de la caméra. ...
Seite 4
All manuals and user guides at all-guides.com Le lien de téléchargement : http://f3.eyenimal.fr Cliquer sur « PC », puis télécharger le dossier Zip « Pet-Vision Setup » Décompresser le fichier : Installer le programme « Pet-Vision.exe » et suivre les instructions jusqu’à l’installation complète du logiciel.
Seite 5
All manuals and user guides at all-guides.com Cliquer « Système », puis sur « Liste des appareils » Cliquer « Ajouter »...
Seite 6
All manuals and user guides at all-guides.com Remplir le formulaire d’ajout de la caméra comme ci-dessous : Nom de l’appareil: donner un nom à votre caméra IP Appareil:Laisser blanc Port Appareil: Pas besoin de modifier Nom d’utilisateur:taper “admin” ...
Seite 7
All manuals and user guides at all-guides.com Cliquer Ok après avoir rempli le formulaire. La caméra apparaît alors dans la liste des appareils et ainsi qu’à gauche de l’écran (cf. image ci- dessous, encadrés en rouge). Cliquer sur la caméra, maintenir et faire glisser dans l’un des encadrés disponibles :...
Seite 8
All manuals and user guides at all-guides.com Icônes de haut en bas de droite à gauche : Pavé de direction : o Flèches directives o Bouton central : un tour horizontal et vertical complet Surveillance verticale Surveillance horizontale ...
Seite 9
All manuals and user guides at all-guides.com User’s guide...
Seite 10
All manuals and user guides at all-guides.com Download link: http://f3.eyenimal.fr Click « PC », then download Zip File « Pet-Vision Setup » Unzip this file: Install the program « Pet-Vision.exe » by following the instructions until complete installation ...
Seite 11
All manuals and user guides at all-guides.com Click « System », enter into « Device List » Click « Add »...
Seite 12
All manuals and user guides at all-guides.com Complete and accurate fill in as below shows: Device Name: assigned a name to the camera Device IP: leave it blank Device Port: no need to modify User Name: type “admin” ...
Seite 13
All manuals and user guides at all-guides.com Click OK after completing the form. The camera will appear in the “Device list” and thus to the left of the screen (cf. image below). Select the Camera from the device list on the left, and drag it to a display box. It shows the video.
Seite 14
All manuals and user guides at all-guides.com From the left to the right, the upper icon is: Direction key pad o Arrows o Central button: complete pan & tilt Vertical patrol Horizontal patrol OSD: name of the camera + date + time display ...
Seite 15
All manuals and user guides at all-guides.com Manual de instrucciones Conecte la cámara al router ADSL con el cable Ethernet. Conecte el adaptador de red a la toma de corriente y enchufe el cable de alimentación a la parte posterior de la cámara.
Seite 16
All manuals and user guides at all-guides.com Enlace de descarga: http://f3.eyenimal.fr Haga clic en "PC", a continuación, descargue la carpeta zip « Pet-Vision Setup » Descomprima el archivo: Instale el programa "Pet-Vision.exe" y siga las instrucciones hasta completar la instalación del software.
Seite 17
All manuals and user guides at all-guides.com Haga clic en "Sistema" y luego "Lista de dispositivos" Haga clic en "Agregar"...
Seite 18
All manuals and user guides at all-guides.com Complete el siguiente formulario de adición de la cámara: Nombre del dispositivo: dele un nombre a su cámara IP del dispositivodeje en blanco Puerto del dispositivo: no hay necesidad de cambiar ...
Seite 19
All manuals and user guides at all-guides.com Haga clic en “Aceptar” después de completar el formulario. La cámara aparece en la lista de dispositivos y también a la izquierda de la pantalla (ver imagen de abajo, recuadros en rojo). Haga clic en la cámara, mantenga y arrastre a uno de los recuadros disponibles:...
Seite 20
All manuals and user guides at all-guides.com Iconos de arriba abajo y de derecha a izquierda: Pad de dirección: o Flechas de dirección o Botón central: una vuelta horizontal y vertical completa Vigilancia vertical Vigilancia horizontal OSD: muestra el nombre de la cámara + fecha + hora ...
Seite 21
All manuals and user guides at all-guides.com Bedienungsanleitung Verbinden Sie Ihre Kamera über das Ethernet-Kabel mit dem ADSL-Modem. Verbinden Sie das Netzteil mit dem Stromnetz und stecken Sie dann den Verbindungsstecker hinten in die Kamera. Die grüne Lampe hinten an der Kamera beginnt zu blinkten. Das Gerät beginnt eine automatische 360°-Drehung.
Seite 22
All manuals and user guides at all-guides.com Link zum Download: http://f3.eyenimal.fr Klicken Sie auf „PC“ und laden Sie dann den Zip-Ordner „Pet-Vision Setup“ herunter. Entpacken Sie den Ordner: Installieren Sie das Programm „Pet-Vision.exe“ und folgen Sie den Anweisungen bis zur vollständigen Installation der Software.
Seite 23
All manuals and user guides at all-guides.com Klicken Sie auf „Système“ („System“) und dann auf „Liste Appareils“ („Geräteliste“) Klicken Sie auf „Ajouter“ („hinzufügen“)
Seite 24
All manuals and user guides at all-guides.com Füllen Sie das Formular für das Hinzufügen einer Kamera wie nachstehend beschrieben aus: Nom de l’appareil (Gerätename): Geben Sie Ihrer Kamera einen Namen IP Appareil (Geräte-IP): Hier nichts eintragen Port Appareil (Geräte-Port): Keine Veränderung nötig ...
Seite 25
All manuals and user guides at all-guides.com Nachdem Sie das Formular ausgefüllt haben, klicken Sie auf Ok. Die Kamera erscheint nun in der Geräteliste sowie auf der linken Bildschirmseite (siehe Abbildung unten, rote Umrandungen). Klicken Sie auf die Kamera, halten Sie die Taste gedrückt und ziehen Sie sie in eine der freien Flächen:...
Seite 26
All manuals and user guides at all-guides.com Icons, von oben nach unten und von links nach rechts: Richtungsbedienung: o Richtungspfeile o Feld in der Mitte: komplette vertikale und horizontale Umdrehung Vertikale Kontrolle Horizontale Kontrolle OSD: Anzeige des Kameranamens + Uhrzeit + Datum ...
Seite 27
All manuals and user guides at all-guides.com Manuale d’uso Collegare la videocamera al modem ADSL utilizzando il cavo Ethernet. Collegare l'alimentatore alla rete elettrica, quindi inserire la presa di alimentazione sul retro della videocamera. La spia verde sul retro della videocamera inizierà a lampeggiare. Il dispositivo eseguirà una rotazione panoramica automatica.
Seite 28
All manuals and user guides at all-guides.com Link per il download: http://f3.eyenimal.fr Fare clic su “PC”, quindi scaricare la cartella zip “Pet-Vision Setup” Decomprimere il file: Installare il programma “Pet-Vision.exe” e seguire le istruzioni fino alla completa installazione del software.
Seite 29
All manuals and user guides at all-guides.com Fare clic su “Sistema”, quindi selezionare “Elenco dispositivi” Fare clic su “Aggiungi”...
Seite 30
All manuals and user guides at all-guides.com Compilare il modulo di aggiunta della videocamera come segue: Nome dispositivo: assegnare un nome alla videocamera IP dispositivo: lasciare vuoto Porta dispositivo: non modificare Nome utente: digitare “admin” Password: per impostazione predefinita, non è...
Seite 31
All manuals and user guides at all-guides.com Una volta completato il modulo, fare clic su Ok. La videocamera comparirà quindi sia nell'elenco dei dispositivi che a sinistra dello schermo (cfr. immagine sottostante, riquadri in rosso). Fare clic sulla videocamera e tenere premuto, quindi trascinarla in uno dei riquadri disponibili:...
Seite 32
All manuals and user guides at all-guides.com Icone dall'alto in basso, da destra a sinistra: Tastierino direzionale: o Frecce di direzione o Pulsante centrale: una rotazione orizzontale e verticale completa Sorveglianza verticale Sorveglianza orizzontale OSD: visualizzazione del nome della videocamera + ora + data ...
Seite 33
All manuals and user guides at all-guides.com contact@eyenimal.com www.eyenimal.com Indice A...