
Verwandte Anleitungen für Bresser DST-1028 5.1MP


Inhaltszusammenfassung für Bresser DST-1028 5.1MP
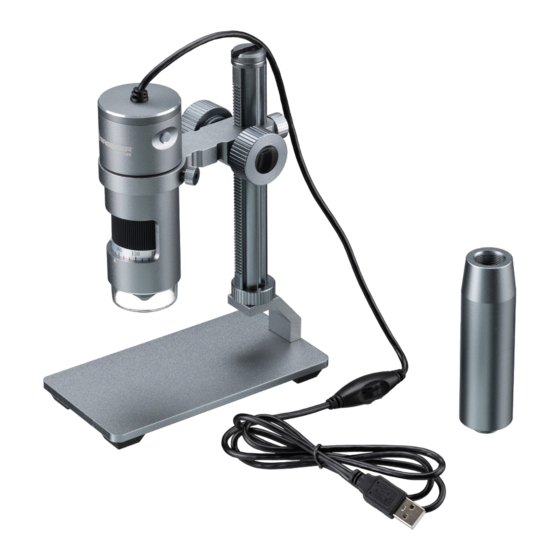
- Seite 1 USB Digitalmikroskop DST-1028 5.1MP Art. No. 5808600 Bedienungsanleitung für die Software CamLabLite Ver. 2021 Operating instructions for the CamLabLite Ver. 2021 software...
- Seite 2 Verbinden sie das MikrOkular mit ihrem Windows Computer. Dazu verwenden sie das beigelegte Kabel um das Kameramodul mit einem USB Port (USB 2.0) zu verbinden. Die Kamera setzen sie an ihrem Mikroskop an einem Kameratubus oder anstelle eines Okulars ein. Für die Verbindung mit manchen Modellen ist es nötig, zusätzlich einen Adapterring zu verwenden.
- Seite 3 Abbildung 2: Defi nieren des Speicherpfades für Video Aufnahmen und Schnellspeicherungen (blaue Pfeile). Zwischenablage Tab durch Schnappschuss (roter Pfeil). Der dritte Menüpunkt beinhaltet die Möglichkeit zur Einstellung der „Belichtung & Empfi ndlichkeit“. Hier können Sie entscheiden ob Sie die Belichtungszeit automatisch regeln lassen oder manuell vornehmen möchten. Zur automatischen Belichtung Ihrer Probe setzen sie das Häkchen links neben „Auto Belichtung“ (Abb. 3). Das Programm ermittelt automatisch die optimale Belichtung und Verstärkung. Sie können die Einstellungen auch manuell vornehmen. Dazu entfernen Sie den Haken bei „Auto Belichtung“. Nun können Sie mithilfe der Regler die Belichtungszeit und Verstärkung manuell verstellen. Bitte beachten Sie, dass je nach Kameramodell nur bestimmte Werte auswählbar sind.
- Seite 4 „Farb Abgleich“ ist der vierte Menüpunkt und ermöglicht die manuelle Veränderung des aufgenommenen Livebildes. Hier können der Farbton, die Sättigung, die Helligkeit, der Kontrast und die Gammaeinstellung durch Verschieben der Regler (Abb. 4) geändert werden. Abbildung 4: Verstellbare Regler für den Farb Abgleich Der letzte Menüpunkt „Frequenz (Anti-fl icker)“ ermöglicht die Anpassung der Kamera an die Frequenz der Beleuchtung. Bei bestimmten Leuchtmitteln bzw. durch die Netzfrequenz von 50Hz kann das Licht fl...
- Seite 5 Die obere Menüleiste dient zur Vermessung der Probe. Dort gibt es verschiedene Messwerkzeuge zur genaueren Untersuchung der Probe. Im Folgenden werden die einzelnen Werkzeuge kurz erläutert (Abb. 6). Figure 6: Measuring tools for closer examination and analysis of the sample. Grundeinstellung zur Bedienung der Software Pfeil zum Anzeigen von Besonderheiten der Probe Dieses Werkzeug dient der Vermessung von Winkel in Ihrer Probe...
- Seite 6 Connect the MikrOkular to your Windows computer. Use the included cable to connect the camera module to a USB port (USB 2.0). Insert the USB camera into the camera port of the microscope, or into the eyepiece tube. For some models, it is necessary to use one of the adapter rings. The rings can be secured on the camera with the integrated headless screw.
- Seite 7 Figure 2: Defi ning the save path for video recordings and quick saves (blue arrows). Clipboard tab by snapshot (red arrow). The third menu item is the option to set the "Exposure & Sensitivity". Here you can decide whether you want to regulate the exposure time automatically or manually. For automatic exposure of your sample, set the check mark to the left of "Auto Exposure" (Fig. 3). The program automatically determines the optimal exposure and gain. You can also make the settings manually. To do this, remove the checkmark from "Auto Exposure". Now you can use the sliders to manually adjust the exposure time and gain. Please note that depending on the camera model and other settings, only certain values can be selected.
- Seite 8 "Color Adjustment" is the fourth menu item and allows manual modifi cation of the captured live image. Here, the hue, saturation, brightness, contrast and gamma settings can be changed by moving the sliders (Fig. Figure 4: Adjustable controls for color matching. The last menu item "Frequency (Anti-fl icker)" allows you to adjust the camera to the frequency of the lighting. With certain illuminants or by the mains frequency of 50Hz the light can fl icker, which can lead to fl ickering and stripes in the picture. If your live image is disturbed, you can suppress the fl ickering by changing the input frequency to match your local standard (Fig. 5). With LED illumination, this function is of no signifi cance.
- Seite 9 The upper menu bar is used to measure the sample. There are various measuring tools for a more detailed examination of the specimen. The individual tools are briefl y explained below (Fig. 6). Abbildung 6: Messwerkzeuge zur genaueren Untersuchung und Analyse der Probe. Basic setting for operating software Arrow to indicate special features of the sample This tool is used to measure angles in your sample Distance Measurement Measurement of 2 parallel lines Measurement perpendicular to an auxiliary line (orthogonal) Circle via three-point method for measuring an area Freehand line Square over two points to narrow down features...
-
Seite 10: Notizen | Notes
Notizen | Notes... - Seite 11 Expand your horizon...
- Seite 12 (bij voorkeur per e-mail). preferably by e-mail. E-Mail: info@bresserbenelux.nl E-Mail: service@bresseruk.com Telefoon*: +31 528 23 24 76 Telephone*: +44 1342 837 098 BRESSER Benelux BRESSER UK Ltd. Smirnoffstraat 8 Suite 3G, Eden House 7903 AX Hoogeveen Enterprise Way The Netherlands Edenbridge, Kent TN8 6HF *Het telefoonnummer wordt in het Nederland tegen lokaal tarief United Kingdom in rekening gebracht. Het bedrag dat u per gesprek in rekening...