Herunterladen Inhalt Inhalt Diese Seite drucken

Werbung

Verfügbare Sprachen
  • DE

Verfügbare Sprachen

  • DEUTSCH, seite 1
6 in 1 Laminator Kit A4
Bedienungsanleitung
Operating instructions
Mode d'emploi
Manuale di istruzioni
Manual de instrucciones
Návod k obsluze
Návod na používanie
Instrukcja obsługi

Werbung

Inhaltsverzeichnis
loading

Inhaltszusammenfassung für Peach PBP350

  • Seite 1 6 in 1 Laminator Kit A4 Bedienungsanleitung Operating instructions Mode d‘emploi Manuale di istruzioni Manual de instrucciones Návod k obsluze Návod na používanie Instrukcja obsługi...
  • Seite 2 6 in 1 Laminator Kit A4...
  • Seite 3 Bedienungsanleitung WICHTIGE SICHERHEITSHINWEISE - Beschreibung FÜR DEN ZUKÜNFTIGEN GEBRAUCH A Netzschalter (EIN/AUS) AUFBEWAHREN B Wahlsschalter „Heiss- / Kalt- Laminieren“ C Betriebsanzeige (rot) Die Maschine ist nur für den Innenbereich bestimmt. D Anzeige „Bereit“ (grün) Schließen Sie die Maschine an eine leicht zugängliche E Folienzufuhröffnung (Vorderseite) Steckdose an.
  • Seite 4 2. Schieben Sie den Antiblockierschalter G zur Seite und sie ausgetauscht werden. Neue Schneidköpfe, komplett halten Sie in dieser Position. montiert mit drei Klingen, erhalten Sie bei Ihrem Peach- 3. Ziehen Sie die Laminierfolie von Hand aus dem Gerät Händler oder unter www.peachstore.com heraus.
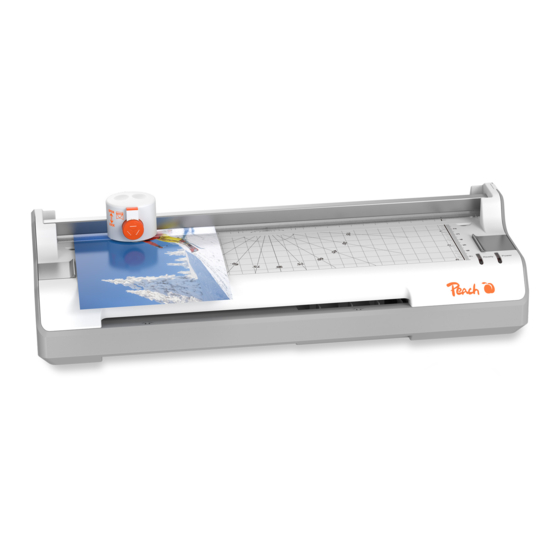
  • Seite 5: Bedienung Des Eckenrunders

    extrem scharf! Entsorgung an eine entsprechend ausgestattete Sammelstelle übergeben werden muss. Bedienung des Eckenrunders Richtlinien Der Eckenrunder K ist im Geräteboden untergebracht, so dass er immer griffbereit ist. Er produziert eine Wir erklären, dass dieses Gerät in saubere, abgerundete Ecke gleichzeitig an bis zu 3 Übereinstimmung mit den geltenden Blättern (80g/m ) oder an einem laminierten Dokument.
  • Seite 6: Installation

    Instruction Manual IMPORTANT SAFETY INSTRUCTIONS - E Slot for pouch input (front) F Pouch outlet (rear) KEEP FOR FUTURE USE G Anti-blocking switch (ABS) The machine is for indoor use only. Plug the machine into H Cutter head (trimmer) an easily accessible outlet. I Setting lock J Blade selector wheel To avoid electric shocks, the laminator must not be...
  • Seite 7 If the pouch has been pulled in at an angle or is jammed be replaced. New cutting heads, fully assembled with in the device, please proceed as follows. three blades, are available from your Peach dealer or at 1. Switch off the device by setting the power switch A www.peachstore.com to position "0".
  • Seite 8: Maintenance And Cleaning

    The cutting waste is collected in the corner rounder. To empty, turn the corner rounder upside down and remove the transparent cover. Maintenance and cleaning Unplug the appliance from the wall outlet. Allow the unit to cool down. The outside of the unit can be cleaned with a damp cloth.
  • Seite 9: Mise En Service

    Mode d'emploi CONSIGNES DE SÉCURITÉ IMPORTANTES C Témoin de fonctionnement (rouge) D Témoin "Prêt" (vert) - À CONSERVER POUR UNE UTILISATION E Ouverture de chargement de la pochette (à l'avant) ULTÉRIEURE F Ouverture d'éjection de la pochette (côté arrière) G Interrupteur antiblocage (ABS) L'appareil est destiné...
  • Seite 10 être remplacées. Les nouvelles têtes de plus loin. coupe, entièrement assemblées avec trois lames, sont disponibles chez votre revendeur Peach ou à l'adresse 2. Faites glisser l'interrupteur anti-blocage G sur le côté www.peachstore.com. et maintenez-le dans cette position.
  • Seite 11: Entretien Et Nettoyage

    Il produit un coin net et arrondi simultanément sur un Lignes directrices maximum de 3 feuilles (80g/m ) ou sur un document Nous déclarons que cet appareil plastifié. a été fabriqué conformément à la 1. Retirez l'arrondisseur des coins de la machine et réglementation en vigueur.
  • Seite 12: Messa In Servizio

    Istruzioni d'uso IMPORTANTI ISTRUZIONI DI SICUREZZA - F Apertura di espulsione della busta di plastificazione (posteriore) CONSERVARE PER L'USO FUTUR G Interruttore antibloccaggio (ABS) L'apparecchio è destinato esclusivamente ad uso H Testa di taglio (trimmer) interno. Collegare la macchina ad una presa di corrente I Dispositivo di arresto facilmente accessibile.
  • Seite 13 2. Far scorrere l'interruttore antibloccaggio G sul lato e presso il vostro rivenditore Peach o all'indirizzo www. tenerlo in questa posizione. peachstore.com. 3. Estrarre la busta di plastificazione dalla macchina a 1.
  • Seite 14: Manutenzione E Pulizia

    1. Rimuovere il arrotondatore per angoli dalla macchina e posizionarlo su un piano di lavoro stabile. 2. Posizionare il documento nell'angolo d'argento. 3. Premere con decisione il pulsante sollevato verso il basso. I ritagli di scarto vengono raccolti nel arrotondatore per angoli.
  • Seite 15: Instrucciones De Servicio

    Instrucciones de servicio INSTRUCCIONES IMPORTANTES DE C Indicador de funcionamiento (rojo) D Indicador de listo (verde) SEGURIDAD - CONSÉRVELAS PARA USO E Abertura de alimentación de bolsas a plastificar (parte FUTURO anterior) F Abertura de expulsión de bolsas a plastificar (parte La máquina está...
  • Seite 16 Los nuevos cabezales de corte, completamente ensamblados con tres cuchillas, 2. Deslice el interruptor antibloqueo G hacia el lado y están disponibles en su distribuidor de Peach o en www. manténgalo en esta posición. peachstore.com. 3. Saque la la bolsa de plastificación de la máquina a 1.
  • Seite 17: Mantenimiento Y Limpieza

    parte inferior de la unidad, para que siempre esté Pautas a mano. Produce una esquina limpia y redondeada Declaramos que este dispositivo ha sido simultáneamente en hasta 3 hojas (80g/m ) o en un fabricado de acuerdo con las regulaciones documento laminado.
  • Seite 18: Návod K Obsluze

    Návod k obsluze DŮLEŽITÉ BEZPEČNOSTNÍ POKYNY – G Protiblokovací spínač (ABS) H Řezací hlava USCHOVEJTE PRO BUDOUCÍ POUŽITÍ I Zámek Stroj je určen pouze pro vnitřní prostory. Připojte stroj J Kolečko pro volbu typu řezu do snadno přístupné zásuvky. Aby se zabránilo úrazům K Vodící...
  • Seite 19 1. Přístroj vypněte tak, že nastavíte síťový spínač A prodejce Peach nebo na www.peachstore.com do polohy “0“. Provozní kontrolka C (POWER) zhasne. 1. Sejměte krytku O posunutím nahoru Laminovací fólie se dále nevtahuje.
  • Seite 20: Údržba A Čištění

    Řezný odpad se shromažďuje v rohovém zaoblovači. Chcete-li rohový zaoblovač vyprázdnit, otočte rohovou zaoblenou část vzhůru nohama a odstraňte průhledné víko. Údržba a čištění Síťovou zástrčku vytáhněte ze zásuvky. Nechte přístroj ochladit. Vnější stranu přístroje můžete čistit vlhkým hadříkem. Nepoužívejte pro čištění rozpouštědla ani hořlavé...
  • Seite 21: Návod Na Obsluhu

    Návod na obsluhu DÔLEŽITÉ BEZPEČNOSTNÉ POKYNY – B Tlačidlo voľby studené laminovanie/horúce laminovanie USCHOVAJTE SI ICH PRE POTREBU V C Indikátor prevádzky (červená) BUDÚCNOSTI D Indikátor „pripravený“ (zelená) E Otvor na vkladanie fólií (predná strana) Prístroj je určený len na používanie vo vnútorných F Výstupný...
  • Seite 22 V prípade vtiahnutia fólie našikmo alebo jej vzpriečenia v Nové rezné hlavy, kompletne spojené s tromi nožmi, prístroji postupujte, prosím, nasledujúcim spôsobom. sú k dispozícii u vášho predajcu Peach alebo na www. 1. Prepnutím sieťového vypínača A do polohy „0“ peachstore.com prístroj vypnete.
  • Seite 23: Údržba A Čistenie

    Rezný odpad sa hromadí v zaobľovači rohov. Keď chcete zaobľovač rohov vyprázdniť, otočte ho hore dnom a odstráňte priehľadné veko. Údržba a čistenie Vytiahnite zástrčku z elektrickej zásuvky. Nechajte prístroj vychladnúť. Vonkajšiu stranu prístroja môžete očistiť vlhkou handrou. Na čistenie nepoužívajte rozpúšťadlá...
  • Seite 24: Instrukcja Obsługi

    Instrukcja obsługi WAŻNE WSKAZÓWKI BEZPIECZEŃSTWA - F Otwór wyprowadzania folii (tył) G Przełącznik przeciwblokujący (ABS) ZACHOWAĆ DO PÓŹNIEJSZEGO UŻYCIA H Głowica tnąca (trymer) Urządzenie jest przeznaczone wyłącznie do użytku I Urządzenie blokujące w pomieszczeniach. Urządzenie podłączyć do łatwo J Koło selekcyjne do trybu cięcia dostępnego gniazdka.
  • Seite 25 co najmniej dwa mm od krawędzi folii do laminowania. krawędź materiału z optyczną siatką pozycjonującą M 5. Teraz powoli wsadzić folię do laminowania zgrzaną Uwaga: Można ciąć jednocześnie maksymalnie 3 stroną do otworu wprowadzania folii E z przodu. arkusze (80g/m Wsunąć...
  • Seite 26: Konserwacja I Czyszczenie

    Ścinki są zbierane w zaokrąglarce narożników. W celu opróżnienia zaokrąglarki narożników należy ją odwrócić i zdjąć przezroczystą pokrywę. Konserwacja i czyszczenie Wyciągnąć wtyczkę z gniazdka. Należy poczekać do ostygnięcia urządzenia. Zewnętrzną stronę urządzenia można czyścić wilgotną szmatką. Nie czyścić przy użyciu rozpuszczalnika lub materiałów palnych.
  • Seite 27: Specifications

    Max. cutting lenght: 250 mm Corner rounder Max. 3 sheets (80g/m Cutting capacity : Max. 1 laminated sheet 3T Supplies AG, Peach Division Chaltenbodenstrasse 6D CH-8834 Schindellegi (Switzerland) Tel: +41 44 787 68 30 Fax: +41 44 787 68 50 e-mail: support@peach.info Stand der Informationen ·...

Inhaltsverzeichnis