Amewi F15 EAGLE Aufbauanleitung
Inhaltsverzeichnis
Quicklinks
Bevor Sie mit der Montage beginnen, lesen Sie bitte die Anweisungen sorgfältig durch
Before commencing assembly, please read instructions thoroughly
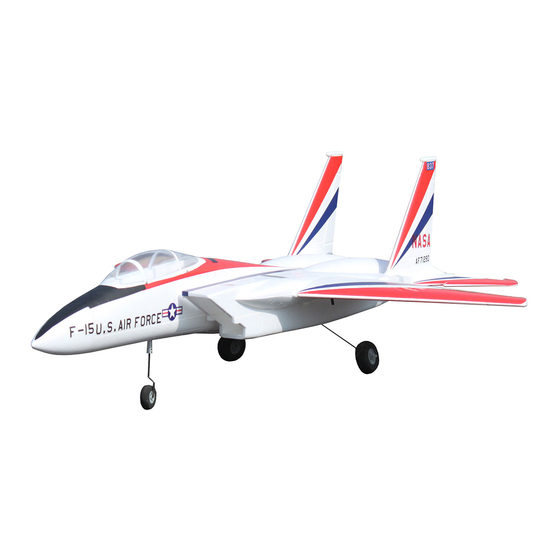
Spezifikation / Specification:
Spannweite / Wingspan: 740mm
Länge / Lenght: 1100mm/43.3in
Abfluggewicht / Take off weight: 700g
Dieses ferngesteuerte Modell ist kein Spielzeug. Es stellt einige technischen Anforderungen. Achten Sie auf die
Umgebung und korrekten Betrieb. Kinder dürfen nur unter Anleitung einer Aufsichtsperson fliegen. Anfänger
sollten nur unter Anleitung eines erfahrenen Piloten fliegen.
This radio control model is not a toy! It has some technical requirement, you must pay attention to the flying
environment and correct operation.Teenagers must fly under the guardians guide. Beginner must fly under the
experienced pilot's guide
Aufbauanleitung
Assembly Instructions
F 1 5 E A G L E
Konfiguration / Configuration:
Motor: 2810 BL,KV4300
ESC: 30A Brushless
Servo: 9g x 5
Propeller: 64mm Impeller / ducted fan
Inhaltsverzeichnis

Verwandte Anleitungen für Amewi F15 EAGLE


Inhaltszusammenfassung für Amewi F15 EAGLE
- Seite 1 Aufbauanleitung Assembly Instructions F 1 5 E A G L E Bevor Sie mit der Montage beginnen, lesen Sie bitte die Anweisungen sorgfältig durch Before commencing assembly, please read instructions thoroughly Spezifikation / Specification: Konfiguration / Configuration: Spannweite / Wingspan: 740mm Motor: 2810 BL,KV4300 Länge / Lenght: 1100mm/43.3in ESC: 30A Brushless...
- Seite 2 Our distribution network contains over 600 specialist dealers and online shops. AMEWI Trade e.K. is an Wholesale Company. We only distribute our goods to retailers. If you are an End-Customer who is buying AMEWI-Products , you contract with your retailer. In case of warranty please always contact your retailer.
- Seite 4 Supermärkten an der Kasse) entsorgen. Sie dürfen nicht in den Rest- bzw. Hausmüll. Die Firma AMEWI Trade e.K. beteiligt sich am Dualen System für Verkaufsverpackungen über die Firma Landbell AG. Die verwendeten Verpackungen werden von Partner-Unternehmen (Entsorgern) bei den privaten Endverbrauchern (Haushalten, „Gelber Sack“, „Gelbe Tonne“) abgeholt, sor ert und ordnungsgemäß...
-
Seite 5: Declaration Of Conformity
They are not allowed to be put into local household garbage. AMEWI Trade e.K. is involved in the dual system for boxing over the company Firma Landbell AG. All used boxes are collected from partner companies (waste disposal contractor) at private customers (local household), sorted and properly u . -
Seite 6: Komponenten / Components
Komponenten / Components Rumpf, Tragflächen, Höhenleitwerk, Seitenleitwerk, Kabinenhaube, 64mm Impeller Landegestell, Brushlessmotor, ESC, Servos, Kleinteile Fuselage, main wing, Rudder, Elevator, Canopy, 64mm ducted fan, battery, landing gear, balancer, adapter, brushless motor, ECS, servo, radio, accessory bag Schwerpunkt / Center of Gravity Der Schwerpunkt sollte sich innerhalb der eingezeichneten Linien befinden. -
Seite 7: Anschließen Der Servos
Aufbauanleitung / Assembly Instructions Montage der Tragflächen: Tragen Sie Epoxidharz auf die Klebekanten der Tragflächen auf und fixieren Sie sie an- schließend mit Klebeband wie auf den Bildern gezeigt. Alternativ können Sie die Teile auch 5 Minuten lang festhalten, bis das Harz angetrocknet ist. Main wing assembly: Apply epoxy to the interface of the main wing and fuselage, then fix them together with tape as pictures(or you can hold the plane around 5 minutes till the epoxy dry) - Seite 8 Montage des Höhenleitwerks Tragen Sie Epoxidharz an den Klebekanten des Leitwerks und Rumpfes auf und fixieren es mit einem Klebeband (siehe Bilder). Alternativ können Sie die Teile auch 5 Minuten lang festhalten, bis das Harz angetrocknet ist. Elevator assembly: Apply epoxy to the interface of elevator and fuselage, then fix them together with tape as pictures (or hold it for 5minutes until the epoxy dry) Montage der Seitenruder Tragen Sie Epoxidharz an den Klebekanten der Ruder und Rumpfes auf und fixieren...
- Seite 9 Befestigung des Servos für das vordere Fahrwerk Kleben Sie das Servo, wie auf den Bildern gezeigt mit Epoxidharz ein. Front landing gear servo assembly: Apply epoxy to interface of the fuselage and servo, then fix the servo as pictures Anbriengen des Servoarms Platzieren Sie den Servoarm so wie auf dem Bild gezeigt und befestigen Sie ihn mit der mitgelieferten Schraube.
-
Seite 10: Receiver Installation
Montage des Hauptfahrwerks Main landing gear assembly Apply epoxy to the interface of the place appointed in the fuse lage and landing gear, fix them togeter with tape as pictures(or hold the landing gear till until the glue dry) Montage der Nase Befestigen Sie die Nase wie auf den Bildern gezeigt mit Epoxidharz und fixieren Sie es mit Klebeband. -
Seite 11: Battery Installation
Montage der Kabinenhaube Kleben Sie die Kabinenhaube wie auf den Bildern gezeigt mit Epoxidharz auf die entsprechende Canopy assembly Apply epoxy to the edge of the place appionted as pictures, and put the cockpit into and fix the canopy as pictures Einsetzen des Akkus Setzen Sie den Akku in den Akkuhalter und verschließen Sie diesen wie auf den Bildern gezeigt. -
Seite 12: Anschlussdiagramm / Circuit Connection Graph
Anschlussdiagramm / Circuit connection graph... -
Seite 13: Ersatzteile / Spare Parts
Ersatzteile / Spare Parts 043-07401 043-07402 043-07403 Rumpf / Fuselage Tragflächen / Mainwing Seitenruder / Rudder 043-07404 043-07405 043-203 Höhenleitwerk / Elevator Fahrwerk / Landing gear Brushless Regler 30A / ESC 043-07409 043-07410 64mm Impeller / ducted fan 2810 brushless Motor... - Seite 14 Aufkleber / Decals...
- Seite 15 Aufkleber / Decals...
- Seite 16 AMEWI Trade e.K. Nikolaus-Otto-Str. 6 33178 Borchen Germany www.amewi.com service@amewi.com httpp://www.facebook.com/amewicom...