Herunterladen Inhalt Inhalt Diese Seite drucken

Werbung

Verfügbare Sprachen

Verfügbare Sprachen

Owner's Manual
Manual del Propietario
Manuel d'utilisatio
Benutzerhandbuch
select language
KSS269 Components
Altavoz Componentes KS
KS Komponenten-System
Haut-parleurs Composants KS
seleccione
el idioma
choisir la
langue
sprache
auswählen
48kss269-f

Werbung

Inhaltsverzeichnis
loading

Inhaltszusammenfassung für Kicker KSS269

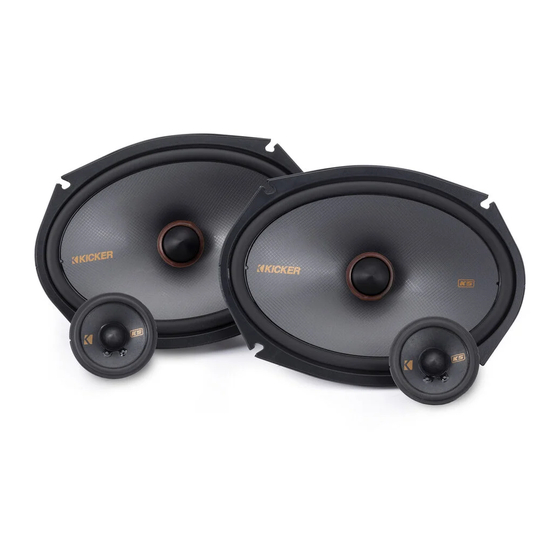
  • Seite 1 Owner’s Manual Manual del Propietario Manuel d’utilisatio Benutzerhandbuch KSS269 Components Altavoz Componentes KS KS Komponenten-System Haut-parleurs Composants KS select language seleccione el idioma choisir la langue sprache auswählen 48kss269-f...
  • Seite 2: Inhaltsverzeichnis

    Contents Overview ......3 Specifications ......4 Installation ......5 Crossover & Wiring Configuration ......5 Crossover Mounting ....7 Speaker Mounting ...... 8 Midrange/Tweeter Mounting ..11 Warranty ......12 Int. Warranty ....44 English...
  • Seite 3: Overview

    VENTILATION. SUBWOOFERS SHOULD BE MOUNTED WITH AT LEAST 1 INCH (2.5CM) CLEARANCE BETWEEN THE FRONT OF THE SPEAKER AND ANY SURFACE. KICKER PRODUCTS ARE CAPABLE OF PRODUCING SOUND LEVELS THAT CAN PERMANENTLY DAMAGE YOUR HEARING! TURNING UP A SYSTEM TO A LEVEL THAT HAS AUDIBLE DISTORTION IS MORE DAMAGING TO YOUR EARS THAN LISTENING TO AN UNDISTORTED SYSTEM AT THE SAME VOLUME LEVEL.
  • Seite 4: Specifications

    Midrange/Tweeter Bottom Mount Depth [in, mm] 1-3/8, 35 Note: All specifications and performance figures are subject to change. Please visit www.kicker. com for the most current information. To get the best performance from your new KICKER speakers, we recommend using genuine KICKER accessories and wiring.
  • Seite 5: Installation

    Installation Crossover & Wiring Configuration We recommend using 16 gauge (or larger) wire. The KS Speakers are rated at 4 ohms and work with any source unit or amplifier designed to operate at a 4 ohm load. Make sure your source unit or amplifier is rated for 4 ohm operation.
  • Seite 6 (only one channel is shown) Requires two complete KSS systems (four woofers, four tweeters, four crossovers) Pro Tip: You’re a KICKER KX amplifier and a few cables away from a full system upgrade that will dominate any factory system! KICKER line of amplifiers make it easy to upgrade to solid bass with your existing or stock source unit.
  • Seite 7: Crossover Mounting

    Crossover Mounting Mount the crossover in a location that is easy to access for wiring. Make sure that the crossover will not be exposed to water. The bottom of the car door is not a good location. If you must mount the crossover in the car door, exercise caution as water can accumulate in the bottom of the door.
  • Seite 8: Speaker Mounting

    Speaker Mounting The KICKER KS Speakers are designed for free-air applications and do not require a sealed enclosure for optimum performance. It is important to isolate the sound coming from the front of the speaker from the sound radiating from the back of the speaker.
  • Seite 9 The multi-bracket adapter will help accommodate the KSS speakers in factory or custom locations. You may need to cut off parts or otherwise modify the adapter to fit your vehicle or application. Trimable parts are best seen from the reverse side (hilighted below).
  • Seite 10 Secure speaker to desired location rear gasket (optional) door door panel speaker cut-out KS Speaker English...
  • Seite 11: Midrange/Tweeter Mounting

    Midrange/Tweeter Mounting The midrange/tweeter is flush-mounted and may be installed using one of the included adapter assemblies: Toyota/Subaru, Chrysler/Jeep, GM/Mopar. Choose a flat location on the panel with space behind the panel to allow room for the motor structure, and tweeter. After checking the clearances, cut a 1-3/4”...
  • Seite 12: Warranty

    Should service be necessary under this warranty for any reason due to manufacturing defect or malfunction during the warranty period, KICKER will repair or replace (at its discretion) the defective merchandise with equivalent merchandise. Warranty replacements may have cosmetic scratches and blemishes.
  • Seite 13 Service performed by anyone other than KICKER HOW LONG WILL IT TAKE? KICKER strives to maintain a goal of one-week service for all acoustics (subwoofers, midrange drivers, tweeters, crossovers, etc) returns. Delays may be incurred if lack of replacement inventory or parts is encountered.
  • Seite 14 Descripción general ..15 Especificaciones ...... 16 Instalación ...... 17 Configuración del crossover y del cableado ......17 Montaje del crossover ....19 Montaje del altavoz ....20 Montaje de Midrange/Tweeter ... 23 Garantía | Garantie ..44 Español...
  • Seite 15: Descripción General

    Diseñado para todo tipo de aplicaciones sin sacrificar la calidad del sonido ni la estética, esperamos que tenga la oportunidad de combinar estos nuevos y mejorados componentes audiófilos con los novedosos amplificadores inteligentes KEY y un sub KICKER ¡para una experiencia de audio inolvidable! Español...
  • Seite 16: Especificaciones

    Visite www. kicker.com para encontrar la información más reciente. Para obtener el mejor desempeño de sus nuevos altavoces KICKER, le recomendamos usar accesorios y cables KICKER. Espere dos semanas para que los altavoces se adapten y alcancen su desempeño óptimo. Español...
  • Seite 17: Instalación

    Instalación Configuración del crossover y del cableado Recomendamos usar cable calibre 16 (o mayor). Los altavoces KS tienen una clasificación de 4 ohmios y funcionan con cualquier unidad fuente o amplificador diseñado para operar a una carga de 4 ohmios. Asegúrese de que su unidad fuente o amplificador esté...
  • Seite 18 Requiere dos sistemas KSS completos (cuatro woofers, cuatro tweeters, cuatro crossovers) Consejo de profesionales: ¡Está a solo un amplificador KICKER KX y unos cuantos cables de tener una actualización completa de sistema que controlará cualquier equipo de fábrica! La línea de amplificadores KICKER facilita la actualización para...
  • Seite 19: Montaje Del Crossover

    Montaje del crossover Instale el crossover en una ubicación que sea de fácil acceso para su conexión. Asegúrese de que el crossover no esté expuesto al agua. La parte inferior del automóvil no es una buena ubicación. Si debe instalar el crossover en la puerta del automóvil, tenga cuidado ya que el agua puede acumularse en la parte inferior de la puerta.
  • Seite 20: Montaje Del Altavoz

    Montaje del altavoz Los altavoces KS KICKER están diseñados para aplicaciones con aire libre y no requieren de una carcasa sellada para su óptimo desempeño. Es importante aislar el sonido que proviene de la parte frontal del altavoz del sonido que irradia la parte trasera del altavoz.
  • Seite 21 El adaptador con multisoporte ayudará a acomodar los altavoces KSS en las ubicaciones de fábrica o personalizadas. Es posible que deba recortar piezas o modificar de alguna otra forma el adaptador para adaptarlo a su vehículo o aplicación. Las piezas a recortar se ven mejor desde el lado posterior (se señalan a continuación).
  • Seite 22 Fije el altavoz en la ubicación deseada junta trasera (opcional) puerta panel de la puerta abertura del altavoz Altavoz KS Español...
  • Seite 23: Montaje De Midrange/Tweeter

    Montaje de Midrange/Tweeter El midrange/tweeter se monta al ras y puede ser instalado utilizando uno de los siguientes ensambles adaptadores incluidos: Toyota/Subaru, Chrysler/ Jeep, GM/Mopar. Elija una ubicación en el tablero con espacio detrás del tablero donde quede lugar para la estructura del motor y el tweeter. Después de verificar los espacios, corte un orificio de montaje de 1-3/4”...
  • Seite 24 Présentation ....25 Spécifications ......26 Installation ...... 27 Configuration du câble croisé et du câblage ....27 Montage du câble croisé ..29 Montage des haut-parleurs ..30 Montage du HP de médium/aigus ......33 Garantía | Garantie ..44 Français...
  • Seite 25: Présentation

    (4 POUCES). LES CAISSONS DE GRAVES DOIVENT ÊTRE MONTÉS AVEC AU MOINS 2,5 CM (1 POUCE) D'ÉCART ENTRE L'AVANT DU HAUT-PARLEUR ET TOUTE SURFACE. LES PRODUITS KICKER SONT CAPABLES DE PRODUIRE DES NIVEAUX SONORES POUVANT ENDOMMAGER VOTRE AUDITION DE MANIÈRE IRRÉVERSIBLE ! LE RÉGLAGE D'UN SYSTÈME À UN NIVEAU PRODUISANT UNE DISTORSION AUDIBLE ENDOMMAGE DAVANTAGE L'AUDITION QUE L'ÉCOUTE D'UN SYSTÈME SANS DISTORSION AU MÊME...
  • Seite 26: Spécifications

    Pour tirer les meilleures performances de vos nouveaux haut- parleurs KICKER, nous vous recommandons d'utiliser des accessoires et du câblage KICKER authentiques. Veuillez laisser deux semaines de rodage aux haut- parleurs afin de leur permettre d'atteindre leurs performances optimales.
  • Seite 27: Installation

    Installation Configuration du câble croisé et du câblage Nous vous recommandons d'utiliser un câble de calibre 16 (ou plus). Les enceintes KS ont une impédance nominale de 4 ohms et fonctionnent avec tous types de sources ou d'amplificateurs conçus pour fonctionner à une charge de 4 ohms. Assurez-vous que l'impédance de votre source ou amplificateur soit compatible avec le fonctionnement sous 4 ohms.
  • Seite 28 Nécessite deux systèmes KSS complets (quatre HP de graves, quatre HP d'aigus, quatre câbles croisés) Astuce de pro : il ne vous manque plus qu'un amplificateur KICKER KX et quelques câbles pour bénéficier d'une mise à niveau totale de votre installation, qui surpassera tout système d'origine !
  • Seite 29: Montage Du Câble Croisé

    Montage du câble croisé Mettez en place le câble croisé à un emplacement facilitant l'accès au câblage. Assurez-vous que le câble croisé ne soit pas exposé à l'eau. Évitez de le placer dans la partie inférieure de la portière. Si vous devez installer le câble croisé...
  • Seite 30: Montage Des Haut-Parleurs

    Montage des haut-parleurs Les haut-parleurs KICKER KS sont conçus pour les applications à l'air libre et ils ne nécessitent pas d'enceinte étanche pour délivrer des performances optimales. Il est important que le son provenant de l'avant de l'enceinte soit isolé...
  • Seite 31 L'adaptateur multi-supports permet d'installer les haut-parleurs KSS aux emplacements d'origine ou à des emplacements personnalisés. Il se peut que vous deviez découper des composants ou modifier l'adaptateur en fonction de votre véhicule ou application. Les pièces découpables sont mieux visibles depuis l'arrière (en surbrillance ci-dessous). Pour certaines applications, l'adaptateur se fixe sur le panneau de montage d'un seul côté.
  • Seite 32 Fixez l'enceinte à l'emplacement souhaité joint d'étanchéité arrière (optionnel) portière garniture de portière découpe du haut-parleur Haut-parleur Français...
  • Seite 33: Montage Du Hp De Médium/Aigus

    Montage du HP de médium/aigus Le haut-parleur de médium/aigus est encastré et peut être installé à l'aide de l'un des adaptateurs inclus : Toyota/Subaru, Chrysler/Jeep, GM/Mopar. Choisissez un emplacement plane muni d'un espace à l'arrière de la garniture afin d'accueillir la structure du moteur et le HP d'aigus.
  • Seite 34 Übersicht ....... 35 Spezifikationen ......36 Installation ...... 37 Konfiguration der Frequenzweiche und Verkabelung ...... 37 Frequenzweichen-Montage ..39 Montage der Lautsprecher ..40 Montage Mitteltöner/Hochtöner . 43 Garantía | Garantie ..44 Deutsch...
  • Seite 35: Übersicht

    SUBWOOFER SOLLTEN MIT EINEM ABSTAND VON MINDESTENS 2,5 CM (1 ZOLL) ZWISCHEN DER VORDERSEITE DES LAUTSPRECHERS UND EINER OBERFLÄCHE MONTIERT WERDEN. KICKER-PRODUKTE SIND IN DER LAGE, SCHALLPEGEL ZU ERZEUGEN, DIE IHR GEHÖR DAUERHAFT SCHÄDIGEN KÖNNEN! WENN SIE EIN SYSTEM AUF EINEN PEGEL AUFDREHEN, DER HÖRBARE VERZERRUNGEN AUFWEIST, SCHADET DIES IHREN OHREN MEHR...
  • Seite 36: Spezifikationen

    Tiefe der Mitteltöner-/Hochtöner-Montage unten [Zoll, 1-3/8, 35 Hinweis: Alle Spezifikationen und Leistungsangaben können sich ändern. Die aktuellsten Informationen finden Sie auf www.kicker.com. Um die beste Leistung aus Ihren neuen KICKER-Lautsprechern herauszuholen, empfehlen wir die Verwendung von Original-KICKER-Zubehör und -Kabeln. Damit die Lautsprecher ihre optimale Leistung erreichen, sollten Sie eine Einspielzeit von zwei Wochen einplanen.
  • Seite 37: Installation

    Installation Konfiguration der Frequenzweiche und Verkabelung Wir empfehlen die Verwendung von Draht mit einer Stärke von 16 (oder mehr). Die KS-Lautsprecher sind für 4 Ohm ausgelegt und funktionieren mit jedem Quellgerät oder Verstärker, der für den Betrieb an einer 4-Ohm-Last ausgelegt ist. Vergewissern Sie sich, dass Ihr Quellgerät oder Verstärker für den 4-Ohm-Betrieb ausgelegt ist.
  • Seite 38 Profi-Tipp: Ein KICKER KX-Verstärker und ein paar Kabel genügen, um ein komplettes System- Upgrade zu realisieren, das jedes Werkssystem in den Schatten stellt! Mit den Verstärkern der KICKER- Produktreihe können Sie Ihr vorhandenes oder serienmäßiges Quellgerät problemlos auf solide Bässe aufrüsten. Fragen Sie Ihren Händler auch nach KICKER Subwoofer-Upgrades.
  • Seite 39: Frequenzweichen-Montage

    Frequenzweichen-Montage Montieren Sie die Frequenzweiche an einem Ort, der für die Verkabelung leicht zugänglich ist. Achten Sie darauf, dass die Frequenzweiche nicht mit Wasser in Berührung kommt. Der untere Bereich der Autotür ist dafür nicht geeignet. Wenn Sie die Frequenzweiche in der Autotür montieren müssen, sollten Sie vorsichtig sein, da sich unten in der Tür Wasser ansammeln kann.
  • Seite 40: Montage Der Lautsprecher

    Montage der Lautsprecher Die KICKER KS-Lautsprecher sind für Freiluftanwendungen konzipiert und benötigen daher kein geschlossenes Gehäuse, um optimale Leistungen zu erbringen. Es ist wichtig, den Sound, der von der Vorderseite des Lautsprechers kommt, von dem Sound zu isolieren, der von der Rückseite des Lautsprechers abgestrahlt wird.
  • Seite 41 Der Multi-Bracket-Adapter hilft bei der Unterbringung der KSS-Lautsprecher an werkseitigen oder maßgefertigten Stellen. Möglicherweise müssen Sie Teile abschneiden oder den Adapter anderweitig modifizieren, um ihn an Ihr Fahrzeug oder Ihre Anwendung anzupassen. Die trimmbaren Teile sind am besten von der Rückseite aus zu sehen (unten hervorgehoben).
  • Seite 42 Befestigen Sie den Lautsprecher am gewünschten Ort. hintere Dichtung (optional) Tür Türverkleidung Lautsprecher- ausschnitt KS-Laut- sprecher Deutsch...
  • Seite 43: Montage Mitteltöner/Hochtöner

    Montage Mitteltöner/Hochtöner Der Mitteltöner/Hochtöner ist bündig eingebaut und kann mit einem der mitgelieferten Adapter montiert werden: Toyota/Subaru, Chrysler/Jeep, GM/Mopar. Wählen Sie eine flache Stelle auf der Platte mit Platz hinter der Platte, um Raum für die Motorstruktur und den Hochtöner zu schaffen. Nachdem Sie die Abstände überprüft haben, schneiden Sie ein Montageloch mit einem Durchmesser von 44 mm (1-3/4 Zoll) in die Platte.
  • Seite 44: Int. Warranty

    (“a todo volumen”) en todo sentido. La línea de altavoces y amplificadores KICKER es la mejor del mercado de audio de automóviles y por lo tanto representa el “combustible” para vivir a todo volumen en el área de “estéreos de automóvil” de la vida de nuestros clientes.

Inhaltsverzeichnis