MK Digital XP1000 Bedienungsanleitung
Hd satellite stb
Inhaltsverzeichnis
Verfügbare Sprachen
Verfügbare Sprachen
Quicklinks
Kapitel
Inhaltsverzeichnis
Fehlerbehebung

Inhaltszusammenfassung für MK Digital XP1000
- Seite 1 User’s Guide HD Satellite STB...
- Seite 35 1.7.1 Grundlegendemerkmale..........5.3 Information................1.7.2 Grundfuktionen............5.3.1 Serviceinformation..........5.3.2 Überprüfen H/W & S/W Informationen... 2. INBETRIEBNAHME DES XP1000........2.1 Anschließen am TV..............6. FERNBEDIENUNG EINRICHTEN........2.1.1 Anschluß am Fernsehgerät über HDMI....6.1 Unterstützte TV-Marken Liste........2.1.2 Anschluß am Fernsehgerät über Scart-Kabel...
-
Seite 36: Einführung
1. EINFÜHRUNG 1.1 Sicherheitshinweise XP1000 wurde gemäß den Anforderungen der Europäischen Union für Verbrauchersicherheit entworfen und gefertigt. Bitte lesen Sie die folgenden Sicherheitshinweise sorgfältig durch. 1. Anschließen der Stromversorgung • Dieses Produkt arbeitet ausschließlich im Bereich von AC 100V ~ 250V und 50Hz/60Hz. Bitte überprüfen Sie zuerst Ihre Stromversorgung ob es in diesem Bereich passt. -
Seite 37: Verpackungsinhalt
Achten Sie darauf, dass die leeren Batterien der Fernbedienung sowie Elektronikschrott nicht in den Hausmüll gelangen, sondern sachgerecht entsorgt werden (Rücknahme durch den Fachhandel, Sondermüll). 1.2 Verpackungsinhalt Bitte überprüfen Sie die Lieferung auf Vollständigkeit, bevor Sie Ihr Produkt in betrieb nehmen. Receiver XP1000 Fembedienung & Batterien(2X AAA 1.5 V) Bedienungsanleitung HDMI Kabel... -
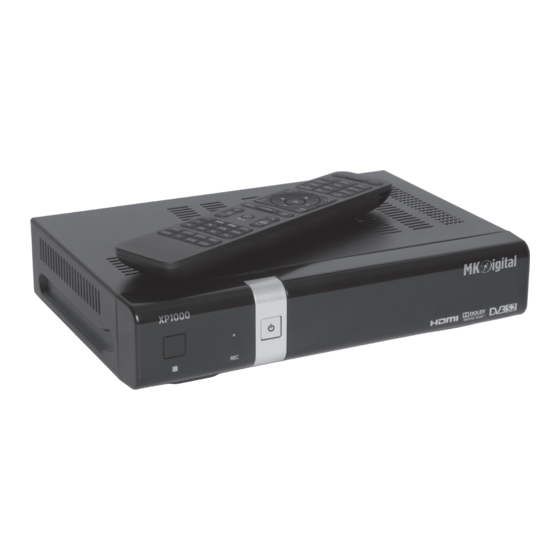
Seite 38: Produktbeschreibungen
1.3 Produktbeschreibungen Vorder Ansicht 1. IR-Empfänger: Empfang der IR-Signal von der Fernbedienung. 2. Recording-Anzeige: Zeigt den aktuellen Aufnahmestatus STB. 3. On / Off-Taste und Anzeige: Zeigt den aktuellen Status der Stromversorgung des Recseiver an. Mit dieser Taste können Sie Ihren Recseiver ein-und ausschalten.. -
Seite 39: Ci-Slot Für Common Interface Module
1.4 CI Slot: für Common Interface Module. Mit dem XP1000 können Kanäle nur mit der entsprechenden Smart Card und / oder CAM (Conditional Access Module) angesehen warden. XP1000 bietet zwei Kartenleser -Steckplätze und einen Conditional Interface Slot. Benutzer müssen diese Smartcards und CAMs die für die Abo-basierten Dienste erforderlich sind erwerben. -
Seite 40: Fernbedienung
1.5 Fernbedienung Power Standby-Taste schaltet Ihre XP1000 ein bzw. Drücken sie diese Taste um die Fernbedi- aus. enung einzuschalten, um den recseiver zu kontrollieren. Schaltet Ihre Fernbedienung in den TV- Fernbedienungs-Modus, um Ihren einprogrammi- Next erten Fernseher bedienen zu können schaltet zwischen den letzten 20 gesehenen Kanälen um... -
Seite 41: Hauptmerkmale
1.6 Hauptmerkmale • MIPS Processor 3300 class • 1 x USB 2.0 • Linux Operating System • HDMI • Media Player • 1 x SCART • Downloadable Plug-ins unterstüzung • SPDIF for digital bit stream out (optical) • 2 x Smartcard Readers •... -
Seite 42: Grundfuktionen
Zubehör Fernbedienung HDMI Kabel SCART Kabel Nein Netzwerkkabel AC Adaptor (+12V/2.5A) Batterien (AAAx2) Verpackung Karton Papierkarton, farbig bedruckt 1.7.2 Basic Grundfunktionen Solution MIPS 3300 class 512MB SPI-NOR 4MB NAND 128MB Linux version > 3.5.0 Audio Decoder Dolby Digital (AC3) MPEG-1 L1/L2/L3 MPEG-2 AAC MPEG-4 HE-AAC Digital multi-lingual... -
Seite 43: Inbetriebnahme Des Xp1000
Volume & Mute Control Photo viewer 2. INBETRIEBNAHME DES XP1000 Dieses Kapitel wird Sie durch die gesamte Installation von XP1000 führen. Bitte lesen Sie jeden Abschnitt sorgfältig um sicherzustellen dass das System ordnungsgemäß ausgeführt wird. 2.1 Anschließen am TV XP1000 bietet eine Vielzahl von Audio / Video-Verbindungs Methoden. -
Seite 44: Anschluss Am Fernsehgerät Über Hdmi-Kabel
Zweck zur Verfügung gestellt. Verbinden Sie Ihren Fernseher und den XP1000 mit einem HDMI-Kabel wie folgt. HDMI Cable HDMI 2.1.2 Anschluss am Fernsehgerät über SCART-Kabel Falls Ihr Fernseher analog ist , dann ist SCART-Kabel die gängigste Methode. Verbinden Sie Ihren Fernseher und den XP1000 mit SCART-Kabel wie folgt. SCART Cable SCART 2.2 Anschließen an die Stromversorgung... -
Seite 45: Ein/Aus
Energie effizienten sein und den Stromverbrauch von unter 1W zu gewährleisten , er befindet sich im tiefen Standby-Modus. 3. STARTASSISTENT Wenn Sie den XP1000 zum ersten Mal nach dem Kauf in betrieb nehmen wird ein Installationsassistent Sie Schritt für Schritt durch die Installation führen. -
Seite 46: Grundlegendebedienung
4.1 Programmwahl : drücken ▲/▼ , Kanal +/- Tasten ◀/▶ um zum nächsten Kanälen zu wechseln] XP1000 bietet verschiedene Zapping Methoden. Sie können den aktuellen Kanal durch Drücken von • Kanal hoch/runter Wenn Sie die UP oder DOWN-Tasten drücken, erscheint Kanalauswahl-Menü. -
Seite 47: Änderung Der Audiosprache
4.3 Änderung der Audiosprache : drücken Sie die AUDIO Taste] Durch drücken der Audio Taste können Sie überprüfen, welche Audio-Signale verfügbar sind. Durch die Verwendung von UP / DOWN-Taste und den Farbe- Tasten , können Sie eine andere Sprache oder Stereo-Sound wählen. -
Seite 48: Programminfomationen
4.6 Programminformationen : drücken Sie INFO ] Wenn Sie den Kanal wechseln, wird die Infobar immer für 5 Sekunden (Standardeinstellung) angezeigt. Die Infobar ist so konzipiert, um Ihnen umfassende Informationen über den Kanal zugeben den Sie gerade ansehen. 4.7 Info Bar •... - Seite 49 - Name Zeigt den Programmnamen an. - Beschreibung Zeigt eine kurze Beschreibung des ausgewählten Programms. - Timer Art • Wählen umschalten für Kanal wechsel. • Wählen Sie aufnehmen für die Aufnahme. - Art der Wiederholung • Wählen Sie einmal für eine Zeit des Umschaltens oder der Aufnahme . •...
-
Seite 50: Time Shift ( Zeitversetztes Fernshen)
Die Zeitversetzt Aufnahme wird nur solage auf der Festplatte gespeichert solang die Aufnahme läuft. Nach beenden der Timeshift Funktion werden die Daten sofort gelöscht. Ein wiederholtes abspielen ist nicht möglich 4.10 Aufnahme XP1000 ist ein Personal Video Recorder mit integriertem DVB-S2-Tuner. Es gibt zwei Möglichkeiten, um Aufnahmen durch zuführen und zu verwalten. 1. Sofortige Aufnahme : drücken Sie REC ]... -
Seite 51: Aufzeichnung Abspielen
Diese Option wird verwendet, um fertige Aufnahmen aus der Timerliste zu entfernen. HINWEIS: Stellen Sie sicher, dass die Festplatte an Ihrem XP1000 genügend freier Speicherplatz für Aufnahmen zur Verfügung hat. Wenn der freie Speicherplatz auf der Festplatte nicht ausreicht, kann die Aufnahme vor dem definierten Endzeitpunkt stoppen. -
Seite 52: Hauptaufnahme Dateien
“löschen” und bestätigen Sie dieses mit OK. 4.13 Media Player : MENU > Plugins > Media Player] XP1000 ist ein Multimedia-Receiver der in der Lage ist Medieninhalte abzuspielen . Unter Verwendung des Media Player, können Sie Musik, Fotos und Video-Inhalte auf der externen Festplatte und / oder einem USB-Memory-Stick speichern. -
Seite 53: Sleep Timer
- Information Hat zwei Untermenüs für Service / Info. Das Service-Menü bietet die detaillierten Informationen des aktuellen Kanals an.. Über Info erfahren Sie alles über die Hardware und Software ihres XP1000 . Weitere Informationen entnehmen Sie bitte dem Abschnitt Informationen. -
Seite 54: Setup
Unter den Parameter in diesem Menü sind die folgenden Einstellmöglichkeiten gegeben. Welche Sie für die Audio-und Video Einstellungen treffen müssen. 1 Videoausgabe Hier müssen Sie entscheiden, welche Video-Ausgang Sie zwischen Ihrem Fernsehgerät und dem XP1000 verwenden möchten. Die verfügbaren Optionen sind wie folgt. • HDMI •... -
Seite 55: Netzwerkeinstellungen
5.2.1.5 Zeitzone : MENU > Setup > Systemeinstellung > Sprache] : MENU > Setup > Systemeinstellung > Zeitzone] Eine Vielzahl von Sprachen ist für den XP1000 zur verfügung Sie können Ihre Zeitzone in diesem Menü eingestellen. gestellt. Mit den LINKS / RECHTS-Tasten können Sie eine Zeitzone wählen die Sie für Ihren XP 1000 verwenden möchten. -
Seite 56: Festplatten Einstellung
5.2.1.6 Festplatten Einstellung : MENU > Setup > Systemeinstellung > Festplatte > Festplatten Einstellung] Sie haben nun die Möglichkeit einzustellen, nach wieviel Minuten Aktivität der Festplatte, sich diese in den Standby- Modus schalten soll. Als Optionen stehen zur Verfügung: • Kein Standby •... -
Seite 57: Schneller Suchlauf
7 Netzwerk Scan Hier haben Sie zwei Optionen JA und NEIN. NEIN wird verwendet, um den Transponder (TP) mit den Daten die der XP1000 derzeit kennt zu scannen. JA wird verwendet, um die TP nicht nur auf den bestehenden TP-Daten, sondern auch mit neuen TP Daten zu scannen, sofern neue TP-Daten verfügbar sind. -
Seite 58: Überprüfen Cam
U m C A S K a n ä l e z u s e h e n b e n ö t i g e n S i e e i n e ordnungsgemäße CAM und eSmartcard . XP1000 ist mit einem Common Interface Slot und zwei Smartcard-Slots ausgerüstet. -
Seite 59: Werkseinstellungen
Sat-Parameter und so weiter gelöscht. 5.2.6 Software Update XP1000 kann auf zwei Arten aktualisiert werden. Erstens können Sie beim XP1000 die Software aktualisieren, indem Sie in Menü> Einstellungen> Software Update gehen. Sie können auch ein Update über USB-Update durchführen wie in den folgenden Schritt beschrieben. -
Seite 60: Information
5.3.2 Überprüfen H / W & S / W Informationen : MENU > Information > Über] Dieses Menü ist für Sie damit sie die aktuelle Systemversion des XP1000 überprüfen können. Sie können die folgenden Informationen sehen: 1 S/W Version 2 Erkannte Tuner 3 Erkannte Festplatte 6. -
Seite 61: Copyright-Gnu Gpl
7. COPYRIGHT – GNU GPL GNU General Public License Deutsche Übersetzung der Version 2, Juni 1991 Copyright © 1989, 1991 Free Software Foundation, Inc. 51 Franklin St, Fifth Floor, Boston, MA 02110, USA Es ist jedermann gestattet, diese Lizenzurkunde zu vervielfältigen und unveränderte Kopien zu verbreiten; Änderungen sind jedoch nicht erlaubt. - Seite 62 §1. Sie dürfen auf beliebigen Medien unveränderte Kopien des Quelltextes des Programms, wie sie ihn erhalten haben, anfertigen und verbreiten. Voraussetzung hierfür ist, daß Sie mit jeder Kopie einen entsprechenden Copyright-Vermerk sowie einen Haftungsausschluß veröffentlichen, alle Vermerke, die sich auf diese Lizenz und das Fehlen einer Garantie beziehen, unverändert lassen und desweiteren allen anderen Empfängern des Programms zusammen mit dem Programm eine Kopie dieser Lizenz zukommen lassen.
- Seite 63 3. Liefern Sie das Programm zusammen mit dem schriftlichen Angebot der Zurverfügungstellung des Quelltextes aus, das Sie selbst erhalten haben. (Diese Alternative ist nur für nicht-kommerzielle Verbreitung zulässig und nur, wenn Sie das Programm als Objectcode oder in ausführbarer Form mit einem entsprechenden Angebot gemäß Absatz b erhalten haben.) Unter dem Quelltext eines Werkes wird diejenige Form des Werkes verstanden, die für Bearbeitungen vorzugsweise verwendet wird.
- Seite 64 geleistet; es liegt am Autor/Geber, zu entscheiden, ob er die Software mittels irgendeines anderen Systems verbreiten will; ein Lizenznehmer hat auf diese Entscheidung keinen Einfluß. Dieser Paragraph ist dazu gedacht, deutlich klarzustellen, was als Konsequenz aus dem Rest dieser Lizenz betrachtet wird. §8.
-
Seite 65: Fehlerbehebung
8. FEHLERBEHEBUNG Problem Lösung Keine Anzeige auf dem • Prüfen Sie das Stromanschlusskabel des Receivers auf Beschädigungen. Display des Receivers Prüfen Sie, ob das Kabel in eine Steck-dose eingesteckt ist, die unter Spannung steht. • Prüfen Sie, ob der Hauptschalter auf der Rückseite des Receivers auf ‘ON’ steht. Kein Bild •... -
Seite 66: Anhang
APPENDIX/ANHANG Hersteller Codes 4523 4648 A.R. Systems 8644 7213 6896 5090 7014 Apollo 4659 Accent Arcam 7647 8644 6896 3637 4469 Acer Arc en Ciel 3857 7430 Action Ardem 4523 5510 3637 4648 2590 8060 8644 5613 6896 Adcom Aristona 4884 6896 8644 4648 ART Tech... - Seite 69 Fisher Gradiente 6812 7910 7287 3350 5605 3802 4638 4849 8644 6896 Flint Gradin 8644 6896 2696 4016 7014 3488 4648 3637 4648 Graetz Force 7660 8060 3350 4530 5605 8644 6559 6896 Forgestone 6127 5319 Formenti 5605 8644 6896 2590 4469 4648 Granada 8644 6896 3001 5620 4659 3270 3847 Formenti-...
- Seite 71 Kobic Luma 3637 8644 2438 5605 2620 6896 5090 7647 Kobra 2519 8377 3637 4648 Kolster 8644 6896 5531 4016 4648 Lumatron 2438 8644 6896 8377 5605 3350 3488 Konichi 7647 3637 5301 Konka 8644 6896 4530 8060 5553 4016 8485 Lux May 4648 8644 7647 6896 8299 3491 4706...
- Seite 72 Merritt Netsat 4783 3350 5605 8644 6896 Neufunk Metz 2769 6975 5313 2410 8644 6896 8299 8644 7647 6896 2696 4016 5896 8060 5355 5319 5265 6640 3518 3840 7324 8644 7647 6896 6982 3637 4648 New World 4016 5393 8644 6896 4016 Nicamagic Micromaxx 4469...
- Seite 73 Merritt Netsat 4783 3350 5605 8644 6896 Neufunk Metz 2769 6975 5313 2410 8644 6896 8299 8644 7647 6896 2696 4016 5896 8060 8644 7647 6896 6982 3637 4648 5355 5319 5265 6640 3518 3840 7324 New World 4016 5393 8644 6896 4016 Nicamagic Micromaxx 4469...
- Seite 75 Revox/Studer 4648 Scotland 5605 Scott 2438 2620 5531 5605 3488 4485 5393 4523 3802 5874 Sears 7287 3488 8644 6896 2590 5393 Rhapsody 4469 Seaway 5295 Rice Club 5510 Seelver 6896 3840 8644 Ricoh 8644 6896 8644 6896 3840 4917 8377 4469 5319 Rinex 2335 5553 4016 5355 6230 7647 5605 2499 3634...