
Verwandte Anleitungen für Fantini Rubinetti MILANO 3/4


Inhaltszusammenfassung für Fantini Rubinetti MILANO 3/4
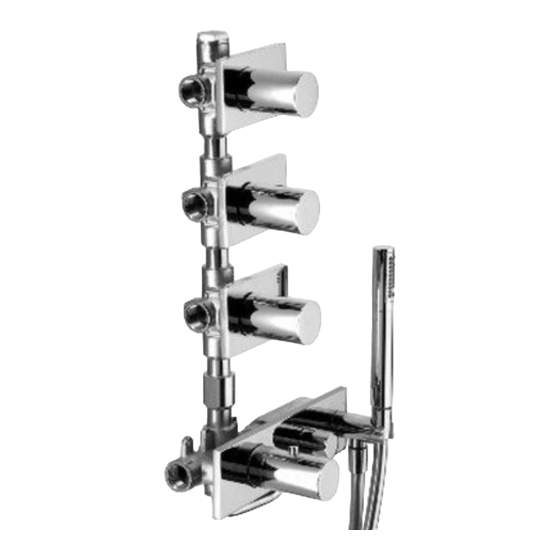
- Seite 1 MILANO 3/4” Istruzioni / Instructions / Instructions De Montage / Bedienungsanleitung / Instrucciones 4711A 4712A 4713A ART. ART. ART. 4714A ART.
-
Seite 2: Utensili Necessari
Installazione / Installation. Utensili necessari / Tools needed / Outils nécessaires / Werkzeuge benötigt / Instrumentos necesarias TEFLON 30 mm Indice / Index / Index / Übersicht / Índice 4711A Parte incasso / Built-in pieces / Parties à encastrer / Eingebaute Stüke / Pedazos incorporados Specifihe per profondità... - Seite 3 MILANO 3/4” 4713A Parte incasso / Built-in pieces / Parties à encastrer / Eingebaute Stüke / Pedazos incorporados Esempi schemi di installazione / Sample installation diagrams / Exemple de schémas de câblage / Anschlussbeispiele / Diagramas de caleado de ejemplo Specifihe per profondità...
- Seite 4 Installazione / Installation. 4711A Parte incasso / Built-in pieces / Partier à encastrer / Eingebaute Stüke / ART. Pedazos incorporados...
- Seite 5 MILANO 3/4” •Localizzazione entrata ed uscita acqua (utilizzare del teflon sui filetti delle tubazioni): •Position input and water outlet (use Teflon on the pipe threads): •Localisation de l’entrée et de la sortie de l’eau (utiliser du téflon sur les filets des tuyaux) : •Lokalisierung des Wasserein- und austritts (hierzu Teflon auf den Rohrgewinden verwenden):...
- Seite 6 Installazione / Installation.
- Seite 7 MILANO 3/4” •Localizzazione dell’etichetta: •Position of the label: •Localisation de l’étiquette: •Etikettenlokalisierung: •Localización de la etiqueta: profondità minima / minimum depth / profondità massima / maximum depth / profondeur minimale / minimale tiefe / profondeur maximale / maximale tiefe / profundidad mínima...
- Seite 8 Installazione / Installation. •Tagliare le piastrelle a filo della protezione considerando le dimensioni delle piastra che verrà installata riportata in fig. 5. In figura 6 sono riportate le misure minime per il taglio delle piastrelle e interassi per pre-forare il rivestimento. •Cut the tiles along the protective cover, considering the size of the plaque which will be installed as shown in Fig.
- Seite 9 MILANO 3/4” •Siliconare uniformemente su tutto il perimetro il corpo incasso fino al rivestimento esterno della parete. E’ possibile utilizzare anche altri tipi di isolante a seconda delle necessità. •Place some silicon uniformly around the edge of the built-in body until the outer wall. Other types of insulation may be used as needed.
- Seite 10 Installazione / Installation. 4712A Parte incasso / Built-in pieces / Partier à encastrer / Eingebaute Stüke / ART. Pedazos incorporados Esempi schemi di installazione / Sample installation diagrams / Exemple de schémas de câblage / Anschlussbeispiele / Diagramas de cableado de ejemplo •E’...
- Seite 11 MILANO 3/4” •L’uscita superiore NON E’ UTILIZZABILE. Non rimuovere per nessun motivo il tappo posto nella parte superiore dell’incasso, come indicato nella figura 2 pag. 6. •The upper exit IS NOT TO BE USED. Never remove the plug inserted in the upper part of the inset, as shown in Figure 2 on pages 6.
-
Seite 12: Installazione
Installazione / Installation. •Non rimuovere per nessun motivo il tappo posto nella parte superiore dell’incasso. •Never remove the plug inserted in the upper part of the inset. •Ne retirer pour aucune raison le bouchon situé dans la partie supérieure de l’encastrement. •Den Stopfen vom oberen Teil des Einbaus niemals entfernen. - Seite 13 MILANO 3/4” •Esempi installazione entrata ed uscita acqua (utilizzare del teflon sui filetti delle tubazioni): •Sample installation and water outlet (use Teflon on the pipe threads): •Exemple de câblage de l’entrée et de la sortie de l’eau (utiliser du téflon sur les filets des tuyaux) : •Beispiele Installation des Wasserein- und austritts (hierzu Teflon auf den Rohrgewinden verwenden):...
- Seite 14 Installazione / Installation.
- Seite 15 MILANO 3/4” •Localizzazione dell’etichetta: •Position of the label: •Localisation de l’étiquette: •Etikettenlokalisierung: •Localización de la etiqueta: profondità minima / minimum depth / profondità massima / maximum depth / profondeur minimale / minimale tiefe / profondeur maximale / maximale tiefe / profundidad mínima...
- Seite 16 Installazione / Installation. •Tagliare le piastrelle a filo della protezione considerando le dimensioni delle piastra che verrà installata riportata in fig. 9. In figura 10 sono riportate le misure minime per il taglio delle piastrelle e interassi per pre-forare il rivestimento. •Cut the tiles along the protective cover, considering the size of the plaque which will be installed as shown in Fig.
- Seite 17 MILANO 3/4” •Siliconare uniformemente su tutto il perimetro il corpo incasso fino al rivestimento esterno della parete. E’ possibile utilizzare anche altri tipi di isolante a seconda delle necessità. •Place some silicon uniformly around the edge of the built-in body until the outer wall. Other types of insulation may be used as needed.
- Seite 18 Installazione / Installation. 4713A Parte incasso / Built-in pieces / Partier à encastrer / Eingebaute Stüke / ART. Pedazos incorporados Esempi schemi di installazione / Sample installation diagrams / Exemple de schémas de câblage / Anschlussbeispiele / Diagramas de cableado de ejemplo •E’...
- Seite 19 MILANO 3/4” •L’uscita superiore NON E’ UTILIZZABILE. Non rimuovere per nessun motivo il tappo posto nella parte superiore dell’incasso, come indicato nella figura 2 pag. 15 •The upper exit IS NOT TO BE USED. Never remove the plug inserted in the upper part of the inset, as shown in Figure 2 on pages 15.
- Seite 20 Installazione / Installation.