Herunterladen Inhalt Inhalt Diese Seite drucken
Blackmagic Design HyperDeck Installations- Und Bedienungsanleitung

Blackmagic Design HyperDeck Installations- Und Bedienungsanleitung

Dıgitalrekorder
Vorschau ausblenden Andere Handbücher für HyperDeck:
Inhaltsverzeichnis

Werbung

Verfügbare Sprachen
  • DE

Verfügbare Sprachen

  • DEUTSCH, seite 216
July 2021
Installation and Operation Manual
HyperDeck
Dısk Recorders
HyperDeck Disk Recorders

Werbung

Inhaltsverzeichnis
loading

Inhaltszusammenfassung für Blackmagic Design HyperDeck

  • Seite 1 July 2021 Installation and Operation Manual HyperDeck Dısk Recorders HyperDeck Disk Recorders...
  • Seite 2 Languages To go directly to your preferred language, simply click on the hyperlinks listed in the contents below. English 日本語 Français Deutsch Español 中文 한국어 Русский Italiano Português Türkçe...
  • Seite 3 They even include a front headphone connection and speaker so you can quickly check your audio directly from your HyperDeck, plus many more features! We hope you get years of use from your HyperDeck disk recorder and that it will serve you well with your productions! Please check the support page at www.blackmagicdesign.com...
  • Seite 4: Inhaltsverzeichnis

    Contents Introducing HyperDeck Disk Recorders Preparing Media on a Computer Using your HyperDeck as a Webcam Getting Started Setting the Webcam Source Plugging in Power Setting up Open Broadcaster Connecting Video and Audio Blackmagic HyperDeck Setup Checking Audio Using HyperDeck Setup...
  • Seite 5: Introducing Hyperdeck Disk Recorders

    Introducing HyperDeck Disk Recorders Your Blackmagic HyperDeck disk recorder is part of a family of HD and 4K disk recorders designed to fit your own production workflow. HyperDeck Studio HD Pro and HyperDeck Studio 4K Pro are built to fit inside a single rack unit and are large enough to record and play back files on both SD cards and 9.5mm SSDs.
  • Seite 6: Getting Started

    All models also include a 12V DC input, which lets you connect power from an external 12V battery. HyperDeck Studio HD Mini can also be powered via an AC plug pack. If your power supply has a locking ring, secure the connection to HyperDeck Studio HD Mini by tightening the connector to the unit.
  • Seite 7: Checking Audio

    LCD. Checking Audio If your HyperDeck features a speaker and headphone port on the front panel, you can quickly check your audio using the built in speaker or by plugging in headphones. To listen, press and hold the speaker button and rotate the search dial to adjust the volume. A volume indicator will appear on the LCD home screen.
  • Seite 8 Your HyperDeck Studio will verify the SD card. This is shown by an illuminated green indicator above the SD card slot. When the indicator turns off and the stop button is illuminated, your HyperDeck Studio is ready to record. Getting Started...
  • Seite 9: Recording Video

    LCD home screen. When recording to an SSD, the dynamic media indicator will illuminate red. While HyperDeck Studio is recording, the storage indicator on the LCD will alternate between displaying the active slot and record time remaining on the media.
  • Seite 10: Playback

    When more than one media is connected to HyperDeck Studio, the recording will spill from one disk or drive to the next. This will be shown in the upper right corner of the home screen.
  • Seite 11: Loop Playback

    Loop Playback If you want playback to continue indefinitely, you can set your HyperDeck to loop by pressing the play button again during playback. When loop playback is enabled, you will see the loop icon appear on the LCD. There are two loop modes available.
  • Seite 12 Search dial modes include Jog, Shuttle and Scroll. Plays forwards or backwards through the clip frame by frame allowing precise control. Shuttle Plays forwards or backwards at a faster rate. The playback will vary based on how far you turn the dial. Scroll Even faster playback depending on how far you turn the dial.
  • Seite 13: Using The Front Panel

    Media Slot Indicators When you first power on HyperDeck, or any time you insert an SSD or SD card, the slot indicator will illuminate green while checking the media and then switch off. If the disk has not been formatted correctly, or fails to work, the slot will illuminate solid orange until the disk is removed.
  • Seite 14: Using The Lcd Menu

    Using the LCD Menu Press the ‘menu’ button on the front panel to open the menu settings. Turn the search dial or press the skip buttons to navigate between the menu options and press ‘set’ to select a submenu. Turn the search dial to move through the menu settings With the menu item selected, press the ‘set’...
  • Seite 15: Settings

    All broadcast decks can normally use a reference input to lock the video output during playback. This means the output of the HyperDeck playback will be locked to the reference input so it won’t need to be resynchronized when connected to a large broadcast system.
  • Seite 16 What this means is you can connect a non-sync source to the HyperDeck and it will retime the video input to the video reference and then record it.
  • Seite 17: Monitor Menu

    Turning clean feed to on will remove the status text from appearing on displays connected to the monitor out on the rear of HyperDeck Studio. For more information on the monitor out display, including what information is displayed, refer to the monitor out section later in this manual.
  • Seite 18: Audio Menu

    Audio Menu Recorded Audio Channels HyperDeck Studio can record up to 16 channels of PCM audio at a time. To select the number of channels to record, expand the recorded audio channels list and select 2, 4, 8 or 16 channels.
  • Seite 19: Setup Menu

    SD Cards, SSDs and media connected via the rear ext disk connection can be formatted directly on the unit or via a Mac or Windows computer. Preparing Media on HyperDeck Studio: Using the search dial and set button, select format media.
  • Seite 20 Name When more than one HyperDeck Studio is on the network, you may wish to give them discrete names. This can be done via Blackmagic HyperDeck Setup or Blackmagic HyperDeck Ethernet Protocol using a terminal application. Language HyperDeck Studio supports 13 languages, including English, Chinese, Japanese, Korean, Spanish, German, French, Russian, Italian, Portuguese, Turkish, Ukrainian and Polish.
  • Seite 21 However, the default video standard is only a guide. It won’t override anything. So if you had a media disk with only 1 type of video file on it and you press play, the HyperDeck Studio will switch to that video standard and play. It will ignore the default video standard because it’s obvious you just want to play the files on the disk.
  • Seite 22: Network Settings

    Network Settings Protocol Blackmagic HyperDeck is shipped set to DHCP, so once connected, your network server will automatically assign an IP address and no other network settings will need to be adjusted. If you need to set a manual address, you can connect via a static IP.
  • Seite 23 Selecting video input will take the embedded timecode from SDI and HDMI sources with SMPTE RP 188 metadata. This will maintain sync between your SDI or HDMI source and the file recorded on the HyperDeck Studio. External Click this option when using the timecode in connection on the rear panel.
  • Seite 24 Blackmagic Sync Generator, connected via the ‘ref in’ connector on the rear panel. External Reference Indicator – A ‘ref’ indicator will be displayed on the built in LCD when your HyperDeck Studio is successfully locked to an external reference source. Reference Timing Reference timing can be adjusted if you are archiving from analog tape decks and you need frame synchronization.
  • Seite 25 To do this, set the ‘HDR format override’ setting to an SDR option, such as Rec.2020 SDR. The available HDR playback and record settings are: Auto Auto is the default setting that will let HyperDeck automatically select the output format that conforms to the clip’s HDR metadata. Rec.709 For high definition video using standard dynamic range.
  • Seite 26 For example, when you press the ‘record’ button on the master HyperDeck, all the additional HyperDecks connected will begin recording simultaneously. It’s worth noting that while you cannot use HyperDeck Studio HD Mini as a controller, it can be controlled by a HyperDeck Pro or Plus model.
  • Seite 27: Rear Panel

    HyperDeck Ethernet Protocol. File transfers speeds are supported via 1GbE on HD models and 10GbE on HyperDeck Studio 4K Pro. For more details on transferring files via an FTP client, see the ‘transferring files over a network’...
  • Seite 28 You can also override the HDR flag using the settings menu. For more information, refer to the ‘settings’ section earlier in this manual. HyperDeck Studio HD Mini models feature a single 3G SDI for signals up to 1080p60. HyperDeck Studio HD Plus and HyperDeck Studio HD Pro models features 6G-SDI allowing for signals from SD up to 2160p30.
  • Seite 29: Using The Monitor Output

    Displays the currently selected SDI or HDMI source. If ‘no signal’ appears, it means a valid signal is not detected. Name Shows the name of your HyperDeck disk recorder. For information on how to change the name, see ‘Blackmagic HyperDeck Setup’ later in this manual. Using the Monitor Output...
  • Seite 30 On all HyperDeck models, the third indicator displays the USB drive. If you are using a USB hub, or a dock such as Blackmagic MultiDock 10G, the active drive will be displayed. Disk or Drive Indicator The text above the progress bar indicates the SD card slot or SSD slot.
  • Seite 31 Media Bar The media bar icon will be either blue, white or red depending on its current status and will display the used space on the card. The blue drive icon indicates the active drive. This is the drive that will be used for playback and recording. A white drive icon indicates there is media present, but not active.
  • Seite 32: Storage Media

    It’s worth regularly checking the latest version of this manual for more up to date information and can always be downloaded from the Blackmagic Design website at www.blackmagicdesign.com/support What SD cards should I use with HyperDeck Studio 4K Pro? The following SD Cards are recommended for recording 2160p up to 60 fps Brand...
  • Seite 33 What SD cards should I use with HyperDeck Studio HD Pro? The following SD Cards are recommended for recording 2160p up to 30 fps Brand Model Capacity Angelbird AV Pro MK2 V90 SDXC 64GB Angelbird AV Pro MK2 V90 SDXC...
  • Seite 34: Ssd

    In our testing, we have found larger newer models of SSD and larger capacity SSDs are generally faster. SSDs recommended for use include: What SSDs should I use with HyperDeck Studio 4K Pro? The following USB-C drives are recommended for recording 2160p up to 60 fps...
  • Seite 35: Ext Disk

    To connect your Blackmagic MultiDock 10G or USB-C flash disk, connect a cable from your USB-C connected device to the ‘ext disk’ port on the rear panel of your HyperDeck. What USB-C drives should I use with HyperDeck Studio 4K Pro?
  • Seite 36 What USB-C drives should I use with HyperDeck Studio HD Plus? The following USB-C drives are recommended for recording 2160p up to 30 fps Brand Model Capacity Angelbird SSD2GO PKT MK2 512GB Angelbird SSD2GO PKT MK2 DelKinDevices Juggler DelKinDevices Juggler...
  • Seite 37: Formatting Media

    From the contextual menu, choose format. Set the file system to exFAT and the allocation unit size to 128 kilobytes. Type a volume label, select quick format and click Start. Your media will quickly be formatted and made ready for use with HyperDeck. Formatting Media...
  • Seite 38: Using Your Hyperdeck As A Webcam

    With your Skype settings set correctly, perhaps try out a Skype call with a friend as a quick test to check your webcam setup is working. That’s all you need to do, your HyperDeck Studio is now ready to broadcast your video to the world live!
  • Seite 39: Setting Up Open Broadcaster

    Open Broadcaster is an open source application that works as a streaming platform between your HyperDeck Studio and your favorite streaming software like YouTube, Twitch, Facebook Live and others. Broadcaster compresses your video to a bit rate that is easily managed by your streaming app.
  • Seite 40 YouTube and click ‘OK’. Copy the stream key that you will now paste into Open Broadcaster. You will now see the video from your HyperDeck in the Open Broadcaster streaming preview window. To connect Open Broadcaster’s broadcast Go back to YouTube Live and you will see the link to YouTube, click ‘start streaming’...
  • Seite 41: Blackmagic Hyperdeck Setup

    Click on the circular ‘setup’ icon or the image of your HyperDeck to open the setup page. Setup Page If you have more than one HyperDeck Studio, you may wish to give each unit a discrete name to make them easy to identify. You can do this via the ‘name’ option. Blackmagic HyperDeck Setup...
  • Seite 42: Luts Page

    If you want to apply the same LUT to your image in DaVinci Resolve, you can simply import the exact same LUT .cube file used on your HyperDeck Studio into DaVinci Resolve and apply it to your grade.
  • Seite 43: Updating The Internal Software

    LCD menu. Updating the Internal Software The setup utility lets you update your HyperDeck disk recorder’s internal software in addition to configuring the streaming settings, network settings and streaming quality. To update the internal software: Download the newest Blackmagic HyperDeck Setup installer from www.blackmagicdesign.com/support.
  • Seite 44: Teranex Mini Rack Shelf

    Teranex Mini Rack Shelf Teranex Mini Rack Shelf is a 1 RU shelf that lets you install Blackmagic HyperDeck Studio HD Mini and HyperDeck Studio HD Plus models into a broadcast rack or road case. Blackmagic HyperDeck Studio HD Mini is so small, you can install it next to other Blackmagic Design equipment that shares a similar form factor, such as Teranex Mini converters, Blackmagic MultiView 4 and Blackmagic Web Presenter.
  • Seite 45: Rs-422 Control

    LCD menu in HyperDeck Studio Mini, to allow remote deck control. You can now remotely start and stop recording and playback of your HyperDeck as well as performing other common jog and shuttle functions. The full list of supported RS-422 commands is in the following section named ‘supported RS-422 commands’.
  • Seite 46 Make sure your HyperDeck has remote set to ‘on’ in the LCD menu, or via the front panel remote button, to enable RS-422 deck control All HyperDeck models support remote control via the RS-422 port on the rear panel Supported RS-422 Commands...
  • Seite 47 Command Reply No Remote Notes Treated as N=1; 0x22 0x22 VarRev2 Acknowledge Disabled Same as VarRev1 0x21 0x23 ShuttleRev1 Acknowledge Disabled Treated as N=1; 0x22 0x23 ShuttleRev2 Acknowledge Disabled Same as ShuttleRev1 0x20 0x30 Preroll Acknowledge Disabled 0x24 0x31 CueData Acknowledge Disabled 0x20...
  • Seite 48 Command Reply No Remote Notes 6 - Sense Request 0x61 0x0A TimeCodeGenSense — — 0x61 0x0C CurrentTimeSense — — 0x60 0x10 InDataSense InData Enabled 0x60 0x11 OutDataSense OutData Enabled 0x60 0x12 AInDataSense AInData Enabled 0x60 0x13 AOutDataSense AOutData Enabled 0x61 0x20 StatusSense StatusData...
  • Seite 49 Command Reply No Remote Notes A - Advanced Media Protocol 8-bit signed number of 0xA1 0x01 AutoSkip Acknowledge Disabled clips to skip from current clip when x = 0 single clip request when x = 1, # 0xAX 0x15 ListNextID IDListing Enabled clips can be specified in...
  • Seite 50: Transferring Files Over A Network

    HyperDeck unit based at another location for digital signage. Connecting to HyperDeck Studio With your computer and HyperDeck Studio on the same network, all you’ll need is an ftp client and your HyperDeck Studio’s IP address.
  • Seite 51 Most ftp applications have a drag and drop interface but check your particular application for the appropriate method. You can transfer any file to and from your HyperDeck, but it’s worth noting that any files you intend to play back from HyperDeck Studio will need to conform to your HyperDeck’s supported codecs and resolutions.
  • Seite 52: Connecting To An Atem Switcher

    Connecting to an ATEM Switcher If you’re using an ATEM switcher, you can plug in up to 4 Blackmagic HyperDeck disk recorders and control them using the ATEM software or hardware panel. This is a very powerful feature that effectively gives you an entire videotape department at your fingertips. You can also...
  • Seite 53: Understanding Post Production Workflows

    Make sure your HyperDeck has remote set to ‘on’ in the LCD menu, or via the control panel remote button, to enable Ethernet control with an ATEM switcher Understanding Post Production Workflows Accessing Your Clips To access your clips, simply plug the SD card or SSD into your computer via an SD card slot, external reader, or SSD dock.
  • Seite 54: Developer Information

    The Blackmagic HyperDeck Ethernet Protocol is a text based protocol accessed by connecting to TCP port 9993 on HyperDeck Studio models that have a built in Ethernet connection. If you are a software developer, you can use the protocol to construct devices that integrate with our products.
  • Seite 55 Command Command Description spill current recording to specified slot record: spill: slot id: {n} use current id to spill to same slot stop stop playback or recording clips count query number of clips on timeline clips get query all timeline clips clips get: clip id: {n} query a timeline clip info clips get: clip id: {n} count: {m}...
  • Seite 56 Command Command Description notify: timeline position: {true/false} set playback timeline position notifications notify: playrange: {true/false} set playrange notifications notify: cache: {true/false} set cache notifications notify: dynamic range: {true/false} set dynamic range settings notifications notify: slate: {true/false} set digital slate notifications goto: clip id: {start/end} goto first clip or last clip goto: clip id: {n}...
  • Seite 57 2 video format: NTSC Using XML While you can use the Terminal to talk to HyperDeck, if you are writing software, you can use XML to confirm the existence of a specific command based on the firmware of the HyperDeck you are communicating with.
  • Seite 58: Protocol Details

    The HyperDeck Ethernet server listens on TCP port 9993. Basic syntax The HyperDeck protocol is a line oriented text protocol. Lines from the server will be separated by an ascii CR LF sequence. Messages from the client may be separated by LF or CR LF.
  • Seite 59 Failure response codes Failure responses to commands are indicated with response codes in the range of 100 to 199: 100 syntax error 101 unsupported parameter 102 invalid value 103 unsupported 104 disk full 105 no disk 106 disk error 107 timeline empty 108 internal error 109 out of range 110 no input...
  • Seite 60 Timecode syntax Timecodes are expressed as non-drop-frame timecode in the format: HH:MM:SS:FF Handling of deck "remote" state The “remote” command may be used to enable or disable the remote control of the deck. Any attempt to change the deck state over ethernet while remote access is disabled will generate an error: 111 remote control disabled↵...
  • Seite 61 Switching to preview mode The "preview" command instructs the deck to switch between preview mode and output mode: preview: enable: {"true", "false"}↵ Playback will be stopped when the deck is switched to preview mode. Capturing will be stopped when the deck is switched to output mode.
  • Seite 62 Changing timeline position The "goto" command instructs the deck to switch to playback mode and change its position within the timeline. To go to the start of a specific clip: goto: clip id: {Clip ID}↵ To move forward/back {count} clips from the current clip on the current timeline: goto: clip id: +/-{count}↵...
  • Seite 63 Controlling asynchronous notifications The “notify” command may be used to enable or disable asynchronous notifications from the server. To enable or disable transport notifications: notify: transport: {“true”, “false”}↵ To enable or disable slot notifications: notify: slot: {“true”, “false”}↵ To enable or disable remote notifications: notify: remote: {“true”, “false”}↵...
  • Seite 64 Retrieving slot information The "slot info" command returns information about a slot. Without parameters, the command returns information for the currently selected slot: slot info↵ If a slot id is specified, that slot will be queried: slot info: slot id: {Slot ID}↵ The server will respond with slot specific information: 202 slot info:↵...
  • Seite 65 Retrieving timeline information The "clips get" command returns information for each available clip on the current timeline. Without parameters, the command returns information for all clips on timeline: clips get↵ The server responds with a list of clip IDs, names and timecodes: 205 clips info:↵...
  • Seite 66 1080i50, 1080i5994, 1080i60 HyperDeck Studio Pro and Plus models support these 4k formats: 4Kp23976, 4Kp24, 4Kp25, 4Kp2997, 4Kp30 HyperDeck Studio 4K Pro adds support for the following 4k formats: 4Kp50, 4Kp5994, 4Kp60 Video format support may vary between models and software releases.
  • Seite 67 Querying and updating configuration information The "configuration" command may be used to query the current configuration of the deck: configuration↵ The server returns the configuration of the deck: 211 configuration:↵ audio input: {“embedded”, “XLR”, “RCA”}↵ audio mapping: {n}↵ video input: {“SDI”, “HDMI”, “component”, “composite”}↵ file format: {format}↵...
  • Seite 68 Clearing the current timeline The "clips clear" command instructs the deck to empty the current timeline: clips clear↵ The server responds with 200 ok↵ Adding a clip to the current timeline The "clips add:" command instructs the deck to add a clip to the current timeline: clips add: name: {"clip name"}↵...
  • Seite 69: Help

    Help Getting Help The fastest way to obtain help is to go to the Blackmagic Design online support pages and check the latest support material available for your Blackmagic HyperDeck disk recorder. Blackmagic Design Online Support Pages The latest manual, software and support notes can be found at the Blackmagic Design support center at www.blackmagicdesign.com/support.
  • Seite 70: Regulatory Notices

    Regulatory Notices Disposal of Waste of Electrical and Electronic Equipment Within the European Union. The symbol on the product indicates that this equipment must not be disposed of with other waste materials. In order to dispose of your waste equipment, it must be handed over to a designated collection point for recycling.
  • Seite 71: Safety Information

    Ensure that adequate ventilation is provided around the product and that it is not restricted. When rack mounting, ensure that the ventilation is not restricted by adjacent equipment. No operator serviceable parts inside product. Refer servicing to your local Blackmagic Design service center.
  • Seite 72: Warranty

    Blackmagic Design parts or supplies, or d) to service a product that has been modified or integrated with other products when the effect of such a modification or integration increases the time or difficulty of servicing the product.
  • Seite 73 年 月 2021 インストール/オペレーションマニュアル HyperDeck ディスクレコーダー HyperDeckディスクレコーダー...
  • Seite 74 ようこそ Blackmagic HyperDeck ディスクレコーダーをお買い上げいただき誠にありがとうございます。 2011 年に、 Blackmagic HyperDeck ディスクレコーダーのオリジナルモデルを設計した際、 2 . 5 イ ンチのリムーバブル SSD でプロ仕様のビデオの収録・再生を簡単かつ低価格に行える製品を開発 したいと考えました。 このたび、 HyperDeck ディスクレコーダーの新しいラインナッ プをご紹介できることを大変喜ばしく 思っ ています。 新機種は SD カードと SSD に加え、 新たに USB フラッシュディスクに HD および Ultra HD を収録できます。 Blackmagic MultiDock 10G を接続して、 ファイルの収録・再生を外付けハードド...
  • Seite 75   Developer Information 設定   Blackmagic HyperDeck   リアパネル   Ethernet Protocol   モニター出力の使用   Protocol Commands   ストレージメディア   Protocol Details ヘルプ   カード   規制に関する警告     外付けディスク   安全情報   メディアをフォーマット   保証   Blackmagic HyperDeck Studi...
  • Seite 76: Hyperdeckディスクレコーダーについて

    ディスクレコーダーについて HyperDeck ディスクレコーダーは、 制作ワークフローにおいて および 収録に対応した Blackmagic HyperDeck ディスクレコーダーシリーズの一部です。 および HyperDeck Studio HD Pro HyperDeck Studio 4K Pro は、 ラック内に収まるように設計されており、 カードおよび での収録・再生に対応し 5mm SSD ています。 および はコンパクトなディスクレコーダーで、 HyperDeck Studio HD Mini HyperDeck Studio HD Plus デスクトップでも邪魔にならずに使用でき、 オプションの を用いて、 ラック Teranex Mini Rack Shelf に設置することも可能です。...
  • Seite 77: はじめに

    つ目の入力を連続電力供給が可能な に接続すると、 メインの電源に問題が生じた場合、 瞬時に切 り替わります。 全モデルで 入力も搭載しているため、 外付け バッテリーからも給電できます。 12V DC は、 プラグパックからも給電できます。 電源にロックリングが付いてい HyperDeck Studio HD Mini る場合は、 コネクターを締めて、 の接続を固定します。 これにより、 電源ケ HyperDeck Studio HD Mini ーブルが所定の位置にロックされるため、 誤って接続が外れることを防ぎます。 電源を入れると、 ディスプレイに言語選択の画面が表示されます。 サーチダイヤルで表示言語を選 択し、 点滅している 「 」 ボタンを押します。 ホームスクリーンが表示されます。 ホームスクリーンおよ び...
  • Seite 78: オーディオのチェック

    用して、 またはヘッドフォンを接続してオーディオをチェックできます。 オーディオを聞くには、 スピーカ ーボタンを長押しします。 ボタンを押しながらサーチダイヤルを回すと、 音量を調整できます。 音量イン ジケーターが のホームスクリーンに表示されます。 スピーカーボタンを 回押すと、 スピーカーがオンの状態になります。 再びボタンを 回押すとオフにな ります。 メディアの接続 シリーズは、 すぐに収録できる状態で発送されており、 設定を変更する必要はありま HyperDeck Studio せん。必要な作業は、 または カードのフォーマットだけです。 メディアのフォーマットは、 メニュー設 定を使 用して簡単に実行できます。 または、 コンピューター でもフォーマットできます。 メディアのフォーマット方法の詳細は 「メディアをフォーマット」 セクション を参照してください。 ビデオの収録に適したメディアの種類、 および推奨ドライブとカードのリストも同 セクションに記載されています。 SSDを挿入する:...
  • Seite 79 を取り外すには、 の端を持ってユニットからゆっくりと引き離します。 がスロットから外れ ると、 その感触が得られるはずです。 接続ピンを下に向け、 のドライブベイと一直線になるように を持ち、 HyperDeck Studio スロットにしっかりと収まるまでゆっくりと押します。 SDカードを挿入する: 金のコネクターが の の方を向くように カードを持ち、 メディアスロット HyperDeck Studio と一直線になるようにします。 カードをスロットに差し込み、 固定されるまでゆっくりと押します。 が カードを検証します。 検証中は、 カードスロットの上部の緑のインジ HyperDeck Studio ケーターが点灯します。 インジケーターが消え、 停止ボタンが点灯すると、 で収録する準備が完了したことを意味します。 HyperDeck Studio はじめに...
  • Seite 80: ビデオの収録

    ボタンが赤に点灯します。 また、 再生ボタンが点灯して、 ホームスクリーンに収録アイコンが表示さ れます。 に収録する場合は、 ダイナミック・ メディアインジケーターが赤に点灯します。 の収録中、 上のストレージインジケーターは、 HyperDeck Studio アクティブなスロットとメディアの収録可能時間を交互に表示します。 収録を停止するには、 停止ボタンを押します。 再生ボタンを押すと、 再生を開始します。 作業のこつ 使用しているコーデックを変更したい場合、 でコーデッ HyperDeck Setup Utility クを変更できます。詳細は、 このマニュアルの 「 」 セクション Blackmagic HyperDeck Setup を参照してください。 複数のメディアへの収録 カードや の収録可能時間が残り 分を切った場合、 の のタイムコードカ HyperDeck Studio ウンターは赤くなり、 停止ボタンがゆっくりと点滅します。...
  • Seite 81: Hyperdeck でビデオを再生

    に複数のメディアが接続されたら、 収録が現在のディスクまたはドライブから次へと HyperDeck Studio 引き継がれます。 これは、 ホームスクリーンの右上で確認できます。 収録中にメディアを交換する 収録するディスクを変更したい場 合で つ目のディスクに空きスペースがあれば、 収録ボタンを長押し することにより、 現在収録しているディスクから次のディスクに収録先が変わります。 この機能は、 収録 を停止せずに からディスクを取り出したい場合に非常に便利です。 例えば、 ライブイベント HyperDeck の最中に重要なコンテンツを別のロケーション用に取り出す必要がある時に、 イベントすべてを収録し たい場合や、 収録を停止したくない場合などに役立ちます。 収録中に収録ボタンが点滅する場合、 メディアに問題があり、 コマ落ちが生じている可能性があります。 これは、 低速のメディアで を収録する際に起こることがあります。 例えば、 の Ultra HD 2160p30 ProRes で収録する場 合、 より高いデータレートを使 用するので、...
  • Seite 82: サーチダイヤルの使用

    作業のこつ  でビデオファイルを再生するには、 マッチするコーデックに設定する必 HyperDeck 要があります。 これは、 メニューで実行できます。詳細は、 「 メニューの使 用」 および 「設定」 セクションを参照してください。 ループ再生 半永久的に再生を継続したい場合は、 再生中に再生ボタンをもう一度押すことで、 をループ HyperDeck に設定できます。 ループ再生が有効になっていると、 にループアイコンが表示されます。 ループには つのモードがあります。 現在再生しているクリッ プをルー プします。 クリップループ メディアに収録されている全クリッ プを すべてをループ ルー プします。 ダイナミック 再生中、 ドライブベイを囲む枠が緑に点灯し、 ドライブベイの周囲を回るので、 再生 速 度と方向を確認 できます。...
  • Seite 83 サーチダイヤルのモードには、 ジョグ ( ) 、 シャトル ( ) 、 スクロール ( ) があります。 クリッ プをフレームごとに前方/後方に再生できるため、 精度の高いコントロ ジョグ ールが可能です。 より高速にクリッ プを前方/後方に再生します。 ダイヤルを回した程度によっ シャトル て、 再生速度が変わります。 ダイヤルを回転させた程度に基づき、 さらに高速に再生します。 このモード スクロール は、 長尺のクリッ プで特定の瞬間を探している際に、 クリッ プ内をすばやく移 動できるので便利です。 大型のモデルはサーチモードボタンを搭載しており、 クラッチ機構を内蔵したサーチダイヤルでは使用 中に触覚的なフィードバックが得られます。 これにより、 テレビやモニターを見ながら、 手の感触でクリ ップ内を移動することができます。...
  • Seite 84: フロントパネルの使用

    フロントパネルの使用 でビデオを収録・再生する際、 必要な情報は本体のメディアスロットの インジケーター HyperDeck と内蔵 に表示されます。 HyperDeck Studioホームスクリーン 録画可能時間およびメディアインジケーター– 収録中、 アイコンはディスクへの録画可能時間 と現在使用中のドライブを一定間隔で表示しま す。 再生中は、 使用中のメディアのアイコンが表 示されます。 フォーマットインジケーター –入力または再 生に使用するファイルのフォーマットを表示し ます。 の一部の機種では HyperDeck Studio 「 」 ボタンで切り替えた入力ソースも表示 INPUT します。 フロントパネルのボタンとサーチダイヤル を用いて、 スピーカーとヘッドフォンの音量を調整 する際は、 現在の音量が表示されます。 ステータスインジケーター –現在の再 生モードなど、 デッキの現在のステータ スを表示します。 オーディオメーター–ソースま...
  • Seite 85: Lcd メニューの使用

    メニューの使用 フロントパネルの 「 」 ボタンを押してメニュー設定を開きます。 MENU サーチダイヤルを回すか、 「 」 ボタンを押して、 メニューのオプション間を移動し、 「 」 を押して SKIP サブメニューを選択します。 サーチダイヤルを回して、 メニュー設定を移動 メニューアイテムを選択したら、 「 」 ボタンを押します。 サーチダイヤルか、 順方向/逆方向の 「 」 ボタンを使用して設定を調整し、 「 」 ボタンで確定します。 SKIP オプションを遡ってホームスクリーンに戻るには 「 」 ボタンを使用します。 MENU フロントパネルの使用...
  • Seite 86 の全モデルは、 、 、 コーデックで圧縮ビデオを収録しま HyperDeck Studio Apple ProRes DNxHD す。 では、 メディアを収録する際に および を使用できます。 HyperDeck Studio 4K Pro DNxHR トリガー収録 「ビデオ開始/停止」 と 「タイムコードトリガー」 の 種類のトリガー収録から選択できます。 などの一部のカメラは、 外部レコーダーの収録開始/停止をコントロールする信号を 経由 URSA Mini で送信します。 「ビデオ開始/停止」 をタップすると、 カメラの録画ボタンが押された際に、 HyperDeck で収録を開始/停止します。 「タイムコードトリガー」 では、 入力を介して有効なタイムコード信号を受信すると、 で収録を...
  • Seite 87 は、 個別収録が簡単に実行できる独自の機能を搭載しています。 この機能では、 上記 HyperDeck Studio の過程を逆転させ、 ビデオ入力をリファレンス入力に再同期します。 つまり、 非同期のソースを HyperDeck に接続すると、 ビデオ入力をビデオリファレンスにリタイムして収録します。 非同期ソースとは、 コンピューターや民生用カメラなど、 リファレンスを接続できないビデオ機器のこと を意味します。 別のスタジオや外部からの入力ビデオフィードも使用できます。 個別収録において、 非同 期ソースは、 すべての収録ビデオで完璧にタイムコードを一致させる必要があるので問題となり得ます。 非同期ソースは他のソースと速度が異なり、 収録を始めてからすぐに、 タイムコードにずれが生じ始める ことになります。 つまり、 ソースのタイムコードが一致しないため、 マルチカム編集で困難が生じます。 「入力再同期」 をオンにすると、 のビデオ入力が遅れている場合、 フレームが繰り返されま HyperDeck す。 リファレンスより早過ぎる場合は、 フレームが除去されます。 これは再同期と呼ばれ、 入力に対する 処理はフレーム再同期と呼ばれます。 これにより、 すべてのデッキで収録されるクリップは、 各ソースから...
  • Seite 88 をフィールドレコーダーとして使用している際に特に便利です。 HyperDeck Studio ディスプレイ は、 ディスプレイに出力するカラーおよび輝度を指定します。 これは、 意図的に彩度の 低いフラットな見た目にしてある”フィルム”ダイナミックレンジを使用している際に役立ちます。 ディスプ レイ を適用することで、 グレーディング後のビデオのルックを想定できます。 ディスプレイ は で選択でき、 モニター出力に適用できます。 Blackmagic HyperDeck Setup 3D LUTのオン/オフを切り替える: 「 」 ボタンを押し、 サーチダイヤルを使用して、 「モニタリング」 メニューに進みます。 MENU 「 」 ボタンを押します。 サーチダイヤルを使用して、 「 」 が青でハイライトされるようにナビゲートします。 3D LUT 「 」 ボタンを押して、...
  • Seite 89 オーディオメニュー 収録オーディオチャンネル は同時に最大 チャンネルの オーディオを収録できます。収録するオーディオ HyperDeck Studio チャンネル数を設定するには 「収録オーディオチャンネル」 に進み、 、 、 、 から選択しま 16ch す。 コーデックが または に設 定されている場 合、 チャンネルの オーディオを選択で きるため、 直接 にアップロードできます。 この設定は、 モニター出力に表示されるチャンネル数 YouTube も選択します。 モニタリングチャンネル チャンネルを超える数のチャンネル数を収録している場 合、 フロントパネルに表示するチャンネルを 選択できます。 これは 「モニタリングチャンネル」 のオプションで設定できます。 フロントパネルを搭載 した...
  • Seite 90 ストレージメニュー メディアをフォーマット リアパネルの (外付けディスク) コネクターに カード、 、 メディアを接続している場合、 EXT DISK 直接ユニットで、 あるいは または コンピューターでフォーマットを実行できます。 Windows HyperDeck Studioでメディアを準備する: サーチダイヤルと 「 」 ボタンを使用して 「メディアをフォーマット」 を選択します。 リストから初期化するメディアを選択して 「 」 ボタンを押します。 フォーマットを選択して 「 」 ボタンを押します。 初期化されるカードと、 選択したフォーマットを確認するメッセージが表示されます。 「フォーマ ット」 を選択して確定します。 フォーマット中であることを示すメッセージが表示され、 完了のメッセージが表示されたら 「 」...
  • Seite 91 名前 ネットワークで複 数の を使 用している場 合、 個別の名前を付けると便利な場 合が HyperDeck Studio あります。 これは、 、 またはターミナルアプリを使 用して Blackmagic HyperDeck Setup Blackmagic で実行できます。 HyperDeck Ethernet Protocol 言語 は ヶ国語をサポートしています。 対応言語は、 日本語、 英語、 中国語、 韓国語、 ス HyperDeck Studio ペイン語、 ドイツ語、 フランス語、 ロシア語、 イタリア語、 ポルトガル語、 トルコ語、 ウクライナ語、 ポーラ...
  • Seite 92 で複数のカメラから個別収録ファイルを収録し、 のマルチカ HyperDeck DaVinci Resolve ムタイムラインで編集する際に便利です。 各カメラの識別文字がファイルのメタデータに記録されるため、 同期ビン機能を使用する際に DaVinci が各アングルを簡単に識別できます。 Resolve カメラの識別文字にはA〜Zまたは1〜9が使用できます。 デフォルトフォーマット が、 使用するビデオフォーマットを検出できない場合に、 この設定を用いて、 メイン HyperDeck Studio で 使用するビデオフォーマットを設定します。 例えば、 ビデオ入力を接続していない状態で をオンにし、 つの異なるビデオフォー HyperDeck Studio マットのファイルが存在するディスクを挿入した場合、 再生に使用するビデオフォーマットを HyperDeck で指定する必要があります。 「デフォルトフォーマット」 では、 で 使用するビデオフォーマット HyperDeck を設定でき、 フォーマットを切り替えて、 これらのファイルを再生します。 この機能は、...
  • Seite 93 ネットワーク設定 プロトコル はデフォルトで に設定されて出荷されます。 そのため、 ネットワークに接続す Blackmagic HyperDeck DHCP るとネットワークサーバーは自動的に アドレスを割り当てるので、 その他のネットワーク設定を調整する必 要はありません。 マニュアルでアドレスを設定する必要がある場合、 静的 アドレス経由で接続できます。 「プロトコル」 を選択した状態で、 点滅している 「 」 ボタンを押してメニューに進み、 「静的 アドレ ス」 を選択し 「 」 ボタンを押します。 IPアドレス、 サブネットマスク、 ゲートウェイ 「静的 アドレス」 を選択すると、 ネットワークの詳細をマニュアルで入力できます。 IPアドレスを変更する: サーチダイヤルを使用して 「 アドレス」 をハイライトし、...
  • Seite 94 タイムコード設定 入力 収録中、 つのタイムコード入力オプションを使用できます。 「ビデオ入力」 を選択すると、 SMPTE RP 188メタデータの付いたSDIおよびHDMIソース ビデオ入力 のエンベデッドタイムコードを使用します。 これにより、 SDIまたはHDMIソースと、 HyperDeck Studioで収録されるファイルの同期が維持されます。 リアパネルのコネクターに接続したタイムコードを使用する場合に、 このオプションを選 外部 択します。 内蔵のタイムコードジェネレーターを介して、 時刻タイムコードを収録する場合に、 内部 このオプションを選択します。 タイムコード入力に 「前のクリッ プから生成」 を選択すると、 各ファイルは、 前のクリ 前のクリップ ッ プの最終フレームの1つ後のフレームから開始されます。 例えば、 最初のクリッ プが から生成 10:28:30:10で終わる場合、 次のクリッ プは10:28:30:11から開始します。 タイムコードをマニュアルで設定したい場合は 「プリセット」 オプションを選択しま...
  • Seite 95 合、 外部ソースをデフォルトで使用します。 リファレンスが接続されていない場合、 入力SDI またはHDMIソースがデフォルトとして使用されます。 SDIまたはHDMIソースにリファレンスがエンベッドされており、 このリファレンスに同期させ 入力 たい場合は 「入力」 を選択します。 例えば、 アナログデッキに直接ゲンロックソースが接続 されている場合などです。 Blackmagicのシンクジェネレーターなどの外部リファレンス機器が、 リアパネルの 「REF 外部 IN (リファレンス入力) 」 に接続されている場合に選択します。 外部リファレンスインジケーター– が外部リファレ HyperDeck Studio ンスソースにロックされると 「 」 インジケーターが内蔵 に表示 されます。 リファレンスタイミング リファレンスタイミングは、 アナログデッキからアーカイブしており、 フレーム同期が必要な場合に調整 できます。 リファレンスはサンプル単位で調整できるので、 サンプルレベルで正確にタイミングを調整可 能です。...
  • Seite 96 年 HyperDeck_2105061438_0001 月 HyperDeck_2105061438_0001 日 HyperDeck_2105061438_0001 時 HyperDeck_2105061438_0001 分 HyperDeck_2105061438_0001 クリップ番号 HyperDeck_2105061438_0001 フォーマットオーバーライド は、 ビデオ信号またはファイルにエンベッドされた メタデータを自動 HyperDeck Studio 4K Pro 的に検出し、 出力を介して表示します。 信号またはファイルのタグが適切ではない場合や、 ディス HDMI プレイが に対応していない場合、 フォーマットをオーバーライドできます。 オーバーライドするには、 「 フォーマットオーバーライド」 設定を などの オプシ 2020 SDR ョンに設定します。 再生および収録設定は以下から選択できます: 自動 デフォルトの設定です。...
  • Seite 97 追 加接続していきます。 追 加したユニットすべてのリモート設定がオンになると、 マスターとなるユニット で行ったトランスポートコントロールは、 追 加ユニットでも実行されます。 例えば、 マスターとなる で収録ボタンを押すと、 デイジーチェーンされた すべて HyperDeck HyperDeck が同時に収録を開始します。 はコントローラーとして使用することはできませんが、 または シリ HyperDeck Studio HD Mini Plus ーズからは操作が可能です。 リセット 出荷時設定にリセット 「セットアップ」 メニューで 「出荷時設定にリセット」 をハイライトすると、 を出荷時の設定に HyperDeck 戻せます。 「 」 ボタンを押すと、 操作を実行するか 確認する画面が表示されます。 設定...
  • Seite 98: リアパネル

    リアパネル HyperDeck Studio HD Mini HyperDeck Studio HD Mini の電源コネクターは、 ロックリン およびPlusモデルは、 タイ ムコ グを搭載しているため、 誤ってコ ード入出力用のBNCコネクタ ネクターが外れることを防止 ーを搭載 電源 の全モデルは 主電源に接続できる 電源入力を搭載しています。 HyperDeck HyperDeck には つ搭載されているため、 電源の冗長性が得られます。 入力には の外 Studio 4K Pro 付けバッテリー電源を接続できるので、 冗長性を確保できます。 接続する 電源は、 入力コ ネクターの下に記載されている入力ボルテージと定格電流に必ず互換している必要があります。 ETHERNET (イーサネット)...
  • Seite 99 HDMI HDMI は、 適切なメタデータが信号にフラグ付けされている場合、 と ビデオフォー HyperDeck マットを自動的に検出します。 設定メニューで フラグをオーバーライドすることも可能です。 詳細は、 後述の 「設定」 セクションを参照してください。 は、 までの単一の 信号をサポートしています。 HyperDeck Studio HD Mini 1080p60 および は、 から までの HyperDeck Studio HD Plus HyperDeck Studio HD Pro 2160p30 信号に対応しています。 は、 までの解像度の HyperDeck Studio 4K Pro 2160p60 入出力をサポートしています。...
  • Seite 100: モニター出力の使用

    イル名、 トランスポートコントロールステータス、 ストレージメディアステータス、 オーディオレベルなど の重要な情報が表示されます。 以下は、 それぞれに表示される情報です。 コーデック メニューで選択されたコーデックを表示します。 フォーマット 再生モードで、 現在のクリップの解像度とフレームレートを表示します。収録モードでは、 現在選択され ているソースのビデオの解像度とフレームレートが表示されます。 タイムコード 再生しているビデオクリップのタイムコードを表示します。 あるいは、 ビデオまたはタイムコード入力を介 して収録されているタイムコードを表示します。表示は、 クリップタイムコードまたはタイムラインのタイ ムカウンターから選択できます。 ソース 現在選択されている または 入力ソースを表示します。 「信号なし」 と表示された場合、 有効な信 HDMI 号が検出されなかったことを意味します。 名前 ディスクレコーダーの名前を表示します。 名前の変更方法は、 後述の 「 HyperDeck Blackmagic HyperDeck 」 を参照してください。 Setup モニター出力の使用...
  • Seite 101 ステータス クリップの再生や収録を行うと、 このインジケーターにトランスポートコントロールのステータスと、 現在 使用されているコントロールが表示されます。 それぞれ以下を意味します: 現在選択されているビデオフォー HyperDeckがスタンバイ状態です。 マットで収録されたクリッ プすべて がルー プ再生されます。 ビデオが再生中です。 単一のクリッ プがルー プ再生され ます。 ビデオを収録中です。 収録が行わ シャトルモードがオンになっていま れているとインジケーターが赤に変 すが、 スタンバイ状態です。 わります。 再生または巻き戻し中に表示され HyperDeckがジョグモードになっ ます。 数値は速度を意味します。 ています。 HyperDeckがスクロールモードに なっています。 ストレージメディアのステータス 以下の つのインジケーターは、 カード、 、 アクティブな ドライブの名前とステータスを表示 します。表示方法は、 の機種により若干異なります。...
  • Seite 102 メディアバー メディアバーアイコンは、 現在の状況によって、 青、 白、 赤で表示され、 カードの残量を示します。 青のアイコンはアクティブなドライブであることを意味します。 このドライブが再生および収録に使用されます。 白のアイコンはメディアが存在するが、 アクティブではないことを意 味します。 アイコンが白単色になっている場合、 メディアがフルです。 収録が行われているとバーが赤に変わります。 メディアバーの下には、 録画可能時間またはスロットのステータスが表示されます。 収録可能時間 カードまたは に容量が 残っている場合、 現在のソースフォーマット、 選択したコーデッ クおよび品質設定に基づく残り収録可能時間が、 時間:分:秒で 表示されます。 残り収録可能 時間が 時間未満の場合は、 分:秒のみが表示されます。 スロットステータス 該当のメディアスロットにメディアが接続されていない場合は、 「カードなし」 または 「ドライブ なし」 と表示されます。 カード、 、 ドライブがフルになると、 アイコンは 「フル」 と表示するので、 ストレージ メディアを交換する必要があることが把握できます。...
  • Seite 103: ストレージメディア

    Ultra HD 2160p60 収録には、 以 上の書き込み速 度に対応しているカードを使 用する必要があります。 低ビット 220MB レートで高い圧縮率を用いて収録する場合、 低速のカードも使用可能ですが、 一般的には、 高速である ほど良い品質が得られます。 定期的にこのマニュアルの最新バージョンを確認し、 常に新しい情報を入手することをお勧めします。 マニュアルは ウェブサイト ( ) でダウン www.blackmagicdesign.com/jp/support Blackmagic Design ロードできます。 で使用が推奨される カードは? HyperDeck Studio 2160p (60fpsまで) の収録には、 以下のSDカードを推奨します。 メーカー モデル 容量 Angelbird AV Pro MK2 V90 SDXC...
  • Seite 104 で使用が推奨される カードは? HyperDeck Studio 2160p (30fpsまで) の収録には、 以下のSDカードを推奨します。 メーカー モデル 容量 Angelbird AV Pro MK2 V90 SDXC 64GB Angelbird AV Pro MK2 V90 SDXC 128GB Angelbird AV Pro MK2 V90 SDXC 256GB ProGrade Digital SDXC UHS-II V90 300R 64GB ProGrade Digital...
  • Seite 105: Ssd

    の中には、 製 造業 者が公 表する書き込み速 度と比較して、 実際の速 度が半分程度しかない製品もあります。 つまり、 ディ スクの仕様書に十分に映 像を扱えるスピードが記載されていても、 実際にリアルタイムのビデオ撮影で は書き込み速度が追いつかないことがあります。 隠れたデータ圧縮は主に収録に影響し、 リアルタイム再生は普通に実行できる場合もあります。 弊社によるテストでは、 新しくてサイズが大きい や大容量の が概して高速であるという結果が 出ています。 以下の の使用が推奨されます: で使用が推奨される は? HyperDeck Studio 2160p (60fpsまで) の収録には、 以下のSSDを推奨します。 メーカー モデル 容量 Samsung 860 PRO 512GB Samsung 860 PRO Samsung...
  • Seite 106: 外付けディスク

    外付けディスク の全モデルは、 直接 フラッシュディスクに収録できます。 これらのドライブは高速で HyperDeck 大容量なため、 ビデオを長時間収録できます。収録に使用したフラッシュディスクは、 コンピューターに 接続して直接編集を行えます。 さらに大きな容量が必要な場合は、 ドックや外付けハードドライブを接続できます。 Blackmagic または フラッシュディスクに接続するには、 機材に接続した からのケーブル MultiDock 10G を のリアパネルの 「 (外付けディスク) 」 ポートに接続します。 HyperDeck EXT DISK で使用が推奨される ドライブは? HyperDeck Studio 2160p (60fpsまで) の収録には、 以下のUSB-Cドライブを推奨します。 メーカー モデル 容量 Angelbird...
  • Seite 107 で使用が推奨される ドライブは? HyperDeck Studio Plus 2160p (30fpsまで) の収録には、 以下のUSB-Cドライブを推奨します。 メーカー モデル 容量 Angelbird SSD2GO PKT MK2 512GB Angelbird SSD2GO PKT MK2 DelKinDevices Juggler DelKinDevices Juggler LaCie Rugged SSD STHR2000800 LaCie Rugged SSD Pro STHZ1000800 Wise PTS-512 Portable SSD 512GB Wise PTS-1024 Portable SSD で使用が推奨される...
  • Seite 108: メディアをフォーマット

    CFast Erase 「 」 を 「 )」 または 「 」 に設定します。 Format Mac OS Extended Journaled exFAT ボリューム名を入力し、 「 」 をクリックします。 メディアがフォーマットされ、 で Erase HyperDeck 使用できる状態になります。 Windowsコンピューターでメディアをフォーマット では、 ダイアログボックスでドライブを でフォーマットできます。 や カー Windows Format exFAT ドをフォーマットするとすべての情報が消去されるため、 重要な情報は必ずバックアップしてください。 外付けドックやケーブルアダプターを使用して、 とコンピューターを接続します。 カード...
  • Seite 109: Hyperdeck をウェブカメラとして使用する

    HyperDeck ます。 つまり、 からの再生・収録クリップを などの配信ソフトウェアを使 HyperDeck Open Broadcaster 用して放 送できます。 ウェブカムソースの設定 多くの場合、 配信ソフトウェアは自動的に をウェブカメラとして設定するので、 配信ソフトウェ HyperDeck アを起動すると からの映像がすぐに表示されます。 ソフトウェアが を自動的 HyperDeck Studio HyperDeck に選択しない場合、 ソフトウェアが をウェブカメラとマイクとして使用するように設定します。 HyperDeck 以下は、 でウェブカメラを設定する方法です。 Skype のメニューバーで、 「 & 」 を開きます。 Skype Audio Video Settings 「...
  • Seite 110: Open  Broadcaster のセットアップ

    Open Broadcaster を起動し、 「 Sources 」 ボックスの 「 Video Capture Device 」 を選択します。 プラスボタンを押します。 新しいソースに名前を付けて 「 OK 」 をクリックします。 「 Device 」 メニューで使用している HyperDeck Studio の機種を選択して 「 OK 」 をクリックします。 YouTube のアカウントへ行きます。 「 Go live 」 ボタン YouTube の 「 Stream 」 オプションで、 配信の詳細を入...
  • Seite 111 します。 コピーしたストリームキーは、 次のステップで Open Broadcaster にペーストします。 Open Broadcaster の配信プレビューウィンドウに HyperDeck の映像が表示されます。 Open Broadcaster の放送リンクを YouTube に接続す YouTube Live に戻ると、 HyperDeck のウェブカム るには、 スクリーン右下で 「 Start Streaming 」 をクリ プログラム出力がバックグラウンドに表示されます。 ックします。 これで、 Open Broadcaster から YouTube 「 DONE 」 をクリックします。 へのリンクが構築されました。 ここからは、 すべてが...
  • Seite 112: Blackmagic Hyperdeck Setup

    Blackmagic HyperDeck Setup を使用する HyperDeck Setup では、 の設定変更や内部ソフトウェアのアップデートが行 Blackmagic HyperDeck Setup HyperDeck えます。 HyperDeck Setupを使用する: とコンピューターを またはイーサネットで接続します。 HyperDeck を起動します。 のホームページに、 使用している の HyperDeck Setup Setup Utility HyperDeck モデルが表示されます。 丸いセットアップアイコンまたは の画像をクリックして 「 」 ページを開きます。 HyperDeck Setup 「 (セットアップ) 」 ページ Setup 複数の...
  • Seite 113: Luts 」 ページ

    てリモートコントロールする場合は、 を他の機器と同じネットワーク上に接 HyperDeck Studio 続する必要があります。 これは、 を使 用するか、 固定 アドレスをマニュアルで追 加して DHCP 実行できます。 HyperDeck Studioの出荷時のデフォルト設定はDHCPです。 DHCP (ダイナミ ック ・ ホスト ・ コンフィギュレーション・ プロトコル) は、 ネットワークサーバー 上のサービスで、 HyperDeck Studioを自動的に検出してIPアドレスを割り当 DHCP てます。 DHCPは、 イーサネット経由で機材を簡単に接続でき、 IPアドレスの競 合が生じないようにできる非常に優れたサービスです。 コンピューターやネッ トワークスイッチの多くは、 DHCPをサポートしています。 ネットワークの詳細をマニュアルで入力する場合は 「静的IPアドレス」 を選択し...
  • Seite 114 のオン/オフは、 メニューの 「モニタ リング」 設定で切り替えられるようになりました。 内部ソフトウェアのアップデート では、 ディスクレコーダーの内部ソフトウェアをアップデートでき、 配信、 ネット Setup Utility HyperDeck ワーク、 配信品質の設定も行えます。 内部ソフトウェアのアップデート : 最新の インストーラーを Blackmagic HyperDeck Setup www.blackmagicdesign.com/jp/support からダウンロードします。 インストーラーをコンピューターで起動し、 画面に表示される Blackmagic HyperDeck Setup 指示に従います。 インストールが完了したら、 をリアパネルの 経由またはイーサネットコネ HyperDeck Studio クター経由でコンピューターに接続します。 を起動し、 スクリーンの指示に従って内部ソフトウェアをアッ Blackmagic HyperDeck Setup プデートします。...
  • Seite 115: Teranex Mini Rack Shelf

    Design サポートセンター ( ) でダウンロード可能。 www.blackmagicdesign.com/jp/support Teranex Mini Rack Shelf は ラックの棚で、 および Teranex Mini Rack Shelf Blackmagic HyperDeck Studio HD Mini HyperDeck を放送用ラックやロードケースに設置できます。 Studio HD Plus Blackmagic HyperDeck Studio HD Mini は非常に小型なので、 同じ形状の他の 機器 ( コンバーターや Blackmagic Design Teranex Mini Blackmagic 、...
  • Seite 116: コントロール

    できます。 操作できる機能は、 再生リストへのクリップの追 加、 次のクリップのファイル名の決定、 単一の クリップまたはタイムラインのループ、 再生リストのクリアなどです。 外部 コントローラーの使用 現行の の全モデルは、 業界 標準の ™互換 デッキコントロールポートを搭載し HyperDeck Sony ており、 など、 あらゆる リモートコントローラーに適切なピンで HyperDeck Extreme Control 接続できます。 市販の ピンケーブルを使用可能ですが、 ケーブル両端で同じピン番号同士がそれぞれ接続されている 必要があります。 カスタムケーブルを作成する場合は、 同梱される接続図を参照してください。 のボタンを直接押さなくても、 からリモートコントロールでき HyperDeck HyperDeck Extreme Control ます。 のビデオ入力にビデオ信号を接続します。 HyperDeck の...
  • Seite 117 のリモートを メニューで 「 」 にするか、 フロントパネルの HyperDeck リモートボタンで有効にして、 デッキコントロールを有効化します。 の全モデルは、 リアパネルの ポートを介したリモートコントロールに対応しています。 HyperDeck 対応 コマンド Command Reply No Remote Notes 0 - System Control NTSC: 0xF0E0 0x00 0x11 DeviceTypeRequest PAL: 0xF1E0 Enabled 24P: 0xF2E0 1 - Slave Response 0x20 0x00...
  • Seite 118 Command Reply No Remote Notes Treated as N=1; 0x22 0x22 VarRev2 Acknowledge Disabled Same as VarRev1 0x21 0x23 ShuttleRev1 Acknowledge Disabled Treated as N=1; 0x22 0x23 ShuttleRev2 Acknowledge Disabled Same as ShuttleRev1 0x20 0x30 Preroll Acknowledge Disabled 0x24 0x31 CueData Acknowledge Disabled 0x20...
  • Seite 119 Command Reply No Remote Notes 6 - Sense Request 0x61 0x0A TimeCodeGenSense — — 0x61 0x0C CurrentTimeSense — — 0x60 0x10 InDataSense InData Enabled 0x60 0x11 OutDataSense OutData Enabled 0x60 0x12 AInDataSense AInData Enabled 0x60 0x13 AOutDataSense AOutData Enabled 0x61 0x20 StatusSense StatusData...
  • Seite 120 Command Reply No Remote Notes A - Advanced Media Protocol 8-bit signed number of 0xA1 0x01 AutoSkip Acknowledge Disabled clips to skip from current clip when x = 0 single clip request when x = 1, # 0xAX 0x15 ListNextID IDListing Enabled clips can be specified in...
  • Seite 121: ネットワークでファイルを転送

    Set if total space left on available SSDs is less than 30 seconds Others Always 1 : Cue requests are always instantaneous Cue Complete ( byte 2 , bit 0 ) HyperDeck Serial RS - 422 Protocol Based on Sony 9 - pin protocol Protocol 38 . 4 Kbps...
  • Seite 122 アドレスを入力し、 「匿名 ログイン」 のチェックボックスがある場合はチェックを入れるだけです。 ファイルの転送 を接続したら、 通常の プログラムでのファイル転送と同様に作業が行えます。 アプリ HyperDeck ケーションの多くは、 インターフェースでドラッグ&ドロップが使えますが、 使用しているアプリケーショ ンに対して適切な方法を確認することを推奨します。 であらゆるファイルの送 受 信が 可能ですが、 でファイルを再生するに HyperDeck HyperDeck Studio は、 が対応しているコーデックと解像度である必要があります。 対応コーデックのリストは、 HyperDeck このマニュアルの 「 」 セクションに記載されています。 Blackmagic HyperDeck Setup 作業のこつ  で収録中でもネットワークでファイルの転送が可能です。収録に影響 HyperDeck を与えないように、 は自動的に転送 速度を調整します。 HyperDeck ネットワークでファイルを転送...
  • Seite 123: Atem スイッチャーに接続

    の アドレスはフロントパネルの メニューで確認できます。 「 」 に進み、 HyperDeck Setup メインメニューから 「 ( イーサネット) 」 メニューに行くとアドレスが表示されます。 Ethernet 別の方法としては、 または の の 「 」 タブ Blackmagic HyperDeck Setup Utility Configure で の アドレスを確認できます。 HyperDeck の または 出力を、 スイッチャーの または ソース入力に接続 HyperDeck HDMI ATEM HDMI します。...
  • Seite 124: ポストプロダクションワークフローについて

    のリモートを メニューで 「 」 にするか、 コントロールパネルのリモートボタンで HyperDeck 有効にして、 イーサネットを介した スイッチャーからのコントロールを有効化します。 ATEM ポストプロダクションワークフローについて クリップへのアクセス クリップにアクセスするには、 カードまたは をコンピューターの カードスロット、 外付けカー ドリーダー、 ドックのいずれかに差し込みます。 または カードのファイルは、 ローカルハード ドライブにドラッグして使 用するか、 または カードから直接 使 用できます。 とコンピュータ ーの接続には インチの ― ケーブルアダプターも使 用できますが、 この方法は からフ eSATA ァイルを直接 使用する場合に速 度が十分でないため、 出先で...
  • Seite 125: Developer Information

    Developer Information Blackmagic HyperDeck Ethernet Protocol The Blackmagic HyperDeck Ethernet Protocol is a text based protocol accessed by connecting to TCP port 9993 on HyperDeck Studio models that have a built in Ethernet connection If you are a software developer...
  • Seite 126 Command Command Description spill current recording to specified slot record: spill: slot id: {n} use current id to spill to same slot stop stop playback or recording clips count query number of clips on timeline clips get query all timeline clips clips get: clip id: {n} query a timeline clip info clips get: clip id: {n} count: {m}...
  • Seite 127 Command Command Description notify: timeline position: {true/false} set playback timeline position notifications notify: playrange: {true/false} set playrange notifications notify: cache: {true/false} set cache notifications notify: dynamic range: {true/false} set dynamic range settings notifications notify: slate: {true/false} set digital slate notifications goto: clip id: {start/end} goto first clip or last clip goto: clip id: {n}...
  • Seite 128 2 video format: NTSC Using XML While you can use the Terminal to talk to HyperDeck, if you are writing software, you can use XML to confirm the existence of a specific command based on the firmware of the HyperDeck you are communicating with.
  • Seite 129 The HyperDeck Ethernet server listens on TCP port 9993. Basic syntax The HyperDeck protocol is a line oriented text protocol. Lines from the server will be separated by an ascii CR LF sequence. Messages from the client may be separated by LF or CR LF.
  • Seite 130 Failure response codes Failure responses to commands are indicated with response codes in the range of 100 to 199: 100 syntax error 101 unsupported parameter 102 invalid value 103 unsupported 104 disk full 105 no disk 106 disk error 107 timeline empty 108 internal error 109 out of range 110 no input...
  • Seite 131 Timecode syntax Timecodes are expressed as non-drop-frame timecode in the format: HH:MM:SS:FF Handling of deck "remote" state The “remote” command may be used to enable or disable the remote control of the deck. Any attempt to change the deck state over ethernet while remote access is disabled will generate an error: 111 remote control disabled↵...
  • Seite 132 Switching to preview mode The "preview" command instructs the deck to switch between preview mode and output mode: preview: enable: {"true", "false"}↵ Playback will be stopped when the deck is switched to preview mode. Capturing will be stopped when the deck is switched to output mode.
  • Seite 133 Changing timeline position The "goto" command instructs the deck to switch to playback mode and change its position within the timeline. To go to the start of a specific clip: goto: clip id: {Clip ID}↵ To move forward/back {count} clips from the current clip on the current timeline: goto: clip id: +/-{count}↵...
  • Seite 134 Controlling asynchronous notifications The “notify” command may be used to enable or disable asynchronous notifications from the server. To enable or disable transport notifications: notify: transport: {“true”, “false”}↵ To enable or disable slot notifications: notify: slot: {“true”, “false”}↵ To enable or disable remote notifications: notify: remote: {“true”, “false”}↵...
  • Seite 135 Retrieving slot information The "slot info" command returns information about a slot. Without parameters, the command returns information for the currently selected slot: slot info↵ If a slot id is specified, that slot will be queried: slot info: slot id: {Slot ID}↵ The server will respond with slot specific information: 202 slot info:↵...
  • Seite 136 Retrieving timeline information The "clips get" command returns information for each available clip on the current timeline. Without parameters, the command returns information for all clips on timeline: clips get↵ The server responds with a list of clip IDs, names and timecodes: 205 clips info:↵...
  • Seite 137 1080i50, 1080i5994, 1080i60 HyperDeck Studio Pro and Plus models support these 4k formats: 4Kp23976, 4Kp24, 4Kp25, 4Kp2997, 4Kp30 HyperDeck Studio 4K Pro adds support for the following 4k formats: 4Kp50, 4Kp5994, 4Kp60 Video format support may vary between models and software releases.
  • Seite 138 Querying and updating configuration information The "configuration" command may be used to query the current configuration of the deck: configuration↵ The server returns the configuration of the deck: 211 configuration:↵ audio input: {“embedded”, “XLR”, “RCA”}↵ audio mapping: {n}↵ video input: {“SDI”, “HDMI”, “component”, “composite”}↵ file format: {format}↵...
  • Seite 139 Clearing the current timeline The "clips clear" command instructs the deck to empty the current timeline: clips clear↵ The server responds with 200 ok↵ Adding a clip to the current timeline The "clips add:" command instructs the deck to add a clip to the current timeline: clips add: name: {"clip name"}↵...
  • Seite 140: ヘルプ

    まいの地域のサポートオフィス」 をクリックして、 お住まいの地域の サポートオフィス Blackmagic Design に電話でお問い合わせください。 現在インストールされているソフトウェアのバージョンを確認する コンピューターにインストールされている ソフトウェアのバージョンを確 Blackmagic HyperDeck Utility 認するには、 「 」 ウィンドウを開きます。 About Blackmagic HyperDeck Setup では、 アプリケーションフォルダーから 「 」 を開きます。 Mac OS Blackmagic HyperDeck Setup ‚ アプリケーションメニューから 「 」 を選択し、 バージョン About Blackmagic HyperDeck Setup を確認します。...
  • Seite 141 規制に関する警告 欧州連合内での電気機器および電子機器の廃棄処分 製品に記載されている記号は、 当該の機器を他の廃棄 物と共に処分してはならないことを示 しています。 機器を廃棄するには、 必ずリサイクルのために指定の回収場所に引き渡してくださ い。 機器の廃棄において個別回収とリサイクルが行われることで、 天然資源の保護につながり、 健 康と環境を守る方法でリサイクルが確実に行われるようになります。廃棄する機器のリサイ クルのための回収場所に関しては、 お住まいの地方自治 体のリサイクル部門、 または製品を購 入した販売業者にご連絡ください。 この機器は、 規定の第 部に準拠し、 クラス デジタル機器の制限に適合していることが確 認されています。 これらの制限は、 商用環境で機器を使用している場合に有害な干渉に対する 妥当な保護を提供するためのものです。 この機器は無線周波エネルギーを生成、 使用、 放出す る可能性があります。 また、 指示に従ってインストールおよび使用しない場合、 無線 通信に有害 な干渉を引き起こす恐れがあります。 住宅地域で当製品を使用すると有害な干渉を引き起こす 可能性があり、 その場合はユーザーが自己責任で干渉に対処する必要があります。 動作は次の つを条件とします:...
  • Seite 142: 安全情報

    安全情報 感電を避けるため、 必ず保護接地のあるコンセントに接続してください。 不明な場合は、 資格のある電 気技師に連絡してください。 感電のリスクを減らすため、 水が跳ねたり、 滴るような場所には置かないでください。 この製品は、 周囲温 度が最高 度までの熱帯地区での使用に対応しています。 通気が妨げられないように、 この製品の周囲は通気に十分なスペースを開けるようにしてください。 ラックマウントする場合は、 隣接する機器により通気が妨げられないようにしてください。 この製品の内部には、 ユーザーが保守できる部品はありません。 サービスに関しては、 お近くの Blackmagic のサービスセンターにお問い合わせください。 Design 海抜 以上では使用しないでください。 2000m カリフォルニア州ステートメント この製品のユーザーは、 プラスチック部品内の微量の多臭素化ビフェニルなどの化学物質にさらされる 可能性があります。 カリフォルニア州は、 多臭素化ビフェニルは発がん性があり、 先天異常や生殖機能へ 危害を及ぼす物質であると認識しています。 詳細は、 以下のウェブサイトをご確認ください。 www.P65Warnings.ca.gov 正規サービススタッフへの注意 サービス前に、 電源を電源インレットから外してください。 安全情報...
  • Seite 143 あらゆる損害に対して責任を負いません。 使用者は自己の責任において本製品を使用するものとします。 © Copyright 2021 Blackmagic Design 著作権所有、 無断複写 ・ 転載を禁じます。 「 Blackmagic Design」 、 「 DeckLink」 、 「 HDLink」 、 「Workgroup Videohub」 、 「 Multibridge Pro」 、 「 Multibridge Extreme」 、 「 Intensity」 、 「 Leading the creative video revolution」 は、 米国な...
  • Seite 144 Juillet 2021 Manuel d'installation et d’utilisation Enregistreurs à disque HyperDeck Enregistreurs à disque HyperDeck...
  • Seite 145 Aujourd’hui, nous sommes heureux de vous présenter notre nouvelle gamme d’enregistreurs à disque HyperDeck qui vous permet d’enregistrer de la vidéo HD et Ultra HD à l’aide de cartes SD, de SSD et aussi de disques flash USB. Vous pouvez même connecter un Blackmagic MultiDock 10G et enregistrer ou lire des fichiers sur des disques durs externes.
  • Seite 146 Mise à jour du logiciel interne Enregistrer sur des supports multiples Teranex Mini Rack Shelf Lecture Contrôle RS-422 Lire de la vidéo avec l'HyperDeck Transférer des fichiers sur un réseau Utiliser la molette Connecter un mélangeur ATEM Utiliser le panneau avant...
  • Seite 147: Présentation Des Enregistreurs À Disque Hyperdeck

    Votre enregistreur à disque Blackmagic HyperDeck fait partie de la famille des enregistreurs à disque HD et 4K conçus pour s’adapter à votre workflow de production. L’HyperDeck Studio HD Pro et l’HyperDeck Studio 4K Pro tiennent sur un seul rack et sont suffisamment grands pour enregistrer et lire des fichiers à...
  • Seite 148: Mise En Route

    SSD ou cartes SD. Brancher l'alimentation Il suffit de brancher un câble CEI standard au connecteur d'alimentation de l'Hyperdeck situé sur la face arrière. Si votre modèle d’HyperDeck est doté d’une entrée d’alimentation IEC supplémentaire, vous pouvez vous connecter à...
  • Seite 149: Vérifer L'audio

    Vous pouvez vérifier les niveaux audio en obervant les vumètres à coté de l’image vidéo sur l’écran. Vérifer l’audio Si le panneau avant de votre HyperDeck comprend un haut-parleur ou un port pour casque, vous pouvez rapidement vérifier l’audio à l’aide du haut-parleur intégré ou en branchant un casque. Pour écouter, maintenez le bouton du haut-parleur enfoncé...
  • Seite 150 L'HyperDeck Studio vérifie la carte SD. Le voyant situé au-dessus du logement de la carte SD s'allume en vert. Lorsque le voyant s’éteint et que le bouton Stop s’allume, l'HyperDeck Studio est prêt à enregistrer. Mise en route...
  • Seite 151: Enregistrer De La Vidéo

    Enregistrer sur des supports multiples Lorsqu'il ne reste que 3 minutes de temps d'enregistrement sur la carte SD ou sur le disque SSD, le timecode affiché sur l'écran LCD de l'HyperDeck Studio devient rouge et le bouton Stop clignote lentement.
  • Seite 152: Lecture

    Appuyez sur le bouton Lecture du panneau de contrôle de l'HyperDeck pour lire un clip, et appuyez sur les boutons Avance ou Retour pour recommencer la lecture du clip en cours ou pour passer à un autre clip.
  • Seite 153: Lecture En Boucle

    CONSEIL Si le bouton de lecture clignote sur un HyperDeck qui enregistre sur un SSD, cela indique que le disque n'est pas assez rapide pour assurer la lecture. Nous vous recommandons alors d'utiliser un format d'enregistrement plus compressé tel que H.264, ou d'utiliser un SSD ou un disque externe recommandé...
  • Seite 154 Les modes de recherche incluent Jog, Shuttle et Défilement. Lit le clip en avant ou en arrière image par image, permettant un contrôle précis. Shuttle Lit en avant ou en arrière plus rapidement. La vitesse variera selon la façon de tourner la molette. Défilement Une lecture encore plus rapide selon la façon de tourner la molette.
  • Seite 155: Utiliser Le Panneau Avant

    Voyants des logements Lorsque vous allumez l'HyperDeck, ou lorsque vous insérez un SSD ou une carte SD, le voyant du logement s'allume en vert pendant la vérification du support, puis s'éteint. Si le disque n'a pas été...
  • Seite 156: Utiliser Les Menus À L'écran

    Utiliser les menus à l'écran Appuyez sur le bouton Menu sur le panneau avant pour ouvrir le menu à l’écran. Tournez la molette ou appuyez sur les boutons Skip pour passer en revue les différentes options. Appuyez sur Set pour sélectionner un sous-menu. Tournez la molette pour passer en revue les paramètres du menu.
  • Seite 157: Paramètres

    Tous les enregistreurs broadcast peuvent normalement utiliser une entrée de référence pour verrouiller la sortie vidéo durant la lecture. La sortie de lecture de l’HyperDeck peut ainsi être verrouillée sur l’entrée de référence afin qu’elle n’ait pas à être synchronisée une fois connectée à un grand système de diffusion.
  • Seite 158 Vous pouvez ainsi connecter la sortie SDI de l’HyperDeck à une caméra pour verrouiller la caméra au signal de référence via le flux de retour programme. La Blackmagic Studio Camera 4K Pro avec sa capacité à régler son signal de référence sur la vidéo externe en est un bon exemple.
  • Seite 159 Menu Moniteur Le menu Moniteur est inclus sur les modèles HyperDeck Studio avec la sortie moniteur située sur la face arrière. Clean Feed Activer le clean feed supprimera les infos d’état sur les écrans connectés à la sortie moniteur à l’arrière de l’HyperDeck Studio. Pour plus d’informations sur l’affichage de la sortie moniteur, y compris les informations affichées, consultez la section « Sortie moniteur »...
  • Seite 160: Menu Audio

    Si vous enregistrez plus de deux canaux, vous pouvez sélectionner les canaux que vous voulez voir sur l’écran LCD via l’option Monitoring des canaux. Avec les modèles HyperDeck Studio intégrant un haut-parleur sur le panneau avant, ce paramètre permet également de sélectionner les canaux audio qui seront diffusés via le haut-parleur et la connexion pour casque.
  • Seite 161: Menu Réglages

    Les cartes SD, les SSD et les supports connectés via le port ext disk à l’arrière peuvent être formatés directement sur l’appareil ou via un ordinateur Mac ou Windows. Préparer les supports sur l’HyperDeck Studio : À l’aide de la molette et du bouton Set, sélectionnez Formater le support.
  • Seite 162 Lorsqu’il y a plusieurs HyperDeck Studio sur le réseau, il peut être utile de leur donner un nom. Pour ce faire, utilisez le Blackmagic HyperDeck Setup ou le Blackmagic HyperDeck Ethernet Protocol et un émulateur de terminal. Langue L’HyperDeck Studio prend en charge 13 langues dont l’anglais, le chinois, le japonais, le coréen, l’espagnol, le français, le russe, l’italien, le portugais, le turc, le polonais et l’ukrainien.
  • Seite 163 La norme vidéo par défaut est aussi utile quand vous allumez un HyperDeck pour la première fois et qu’il n’a aucune entrée vidéo et qu’aucun disque n’a été inséré. Dans ce cas, l’HyperDeck Studio ne sait pas quelle norme vidéo utiliser pour la sortie de monitoring.
  • Seite 164 Paramètres du réseau Protocole Le Blackmagic HyperDeck est réglé sur DHCP. Une fois connecté, le serveur de votre réseau assignera automatiquement une adresse IP et aucun autre paramètre réseau n’aura besoin d’être ajusté. Si vous avez besoin d’une adresse manuelle, vous pouvez vous connecter via une IP statique.
  • Seite 165 Sélectionne le timecode intégré aux sources SDI et HDMI intégrant des métadonnées SMPTE RP 188. Grâce à cette opération, la source SDI ou HDMI et le fichier enregistré sur l’HyperDeck Studio restent sychronisés. Externe Choisissez cette option si vous utilisez l'entrée timecode sur la face arrière.
  • Seite 166 Indicateur de référence externe – Un indicateur de référence s’affiche sur l’écran LCD intégré quand votre HyperDeck Studio est verrouillé sur une source de référence externe. Timing de référence Le timing de référence peut être ajusté pour l’archivage depuis des enregistreurs à bande analogiques si vous avez besoin de la synchronisation d’image.
  • Seite 167 Numéro de clip Ignorer le format HDR L’HyperDeck Studio 4K Pro détectera automatiquement les métadonnées HDR intégrées à un signal ou fichier vidéo 4K et les affichera via la sortie HDMI. Si le signal ou le fichier est identifié de façon incorrecte ou si votre affichage n’est pas compatible avec le HDR, vous pouvez ignorer le format HDR.
  • Seite 168 Par exemple, quand vous appuyez sur Rec sur l’HyperDeck master, les autres HyperDecks connectés enregistreront simultanément. Il est important de noter que l’HyperDeck Studio HD Mini ne peut pas être utilisé comme contrôleur. Il peut, en revanche, être contrôlé par un HyperDeck Pro ou Plus.
  • Seite 169: Face Arrière

    également être contrôlé à l’aide de ce dernier ou d’un panneau matériel ATEM. Réglage à distance Certains modèles HyperDeck Studio comprennent deux connecteurs DE-9 RS-422 pour offrir une entrée et une sortie à distance. L’HyperDeck Studio HD Mini n’offre qu’une entrée Remote. Disque externe Connectez un disque flash au connecteur USB-C pour enregistrer sur des disques externes jusqu’à...
  • Seite 170 Timecode Recevez le timecode externe via les entrées timecode ou reliez le timecode de l’HyperDeck via la sortie timecode. Sur certains modèles, le timecode est connecté via les connecteurs BNC. L’HyperDeck Studio 4K Pro comprend des connecteurs timecode XLR. Pour plus d'informations concernant la sélection des options du timecode, consultez la section « Paramètres »...
  • Seite 171: Utiliser La Sortie De Monitoring

    Affiche la source SDI ou HDMI sélectionnée. Si la mention Aucun signal apparaît, aucun signal valide n’est détecté. Affiche le nom de l’enregistreur à disque HyperDeck. Pour des informations sur la façon de changer de nom, consultez la section « Blackmagic HyperDeck Setup » de ce manuel.
  • Seite 172 SD ou SSD suivant dans l’ordre Sur tous les modèles HyperDeck, le 3e indicateur affiche le disque USB. Si vous utilisez un hub USB ou une station d’accueil, telle que le Blackmagic MultiDock 10G, le disque actif sera affiché. Indicateur du disque Le texte au-dessus de la barre de progression indique le logement pour carte SD ou SSD.
  • Seite 173 Barre du support La barre du support s’affichera en bleu, en blanc ou en rouge selon son état. Elle affichera également l’espace utilisé sur la carte. La couleur bleue indique le disque actif. Ce dernier sera utilisé pour la lecture et l’enregistrement. La couleur blanche indique un support présent, mais inactif.
  • Seite 174: Supports De Stockage

    N'hésitez pas à vérifier les dernières versions du manuel pour obtenir les informations les plus récentes. Il peut être téléchargé sur le site Internet de Blackmagic Design www.blackmagicdesign.com/fr/support. Quelles cartes SD dois-je utiliser avec l’HyperDeck Studio 4K Pro ? Les cartes SD suivantes sont recommandées pour enregistrer en 2160p jusqu’à...
  • Seite 175 Quelles cartes SD dois-je utiliser avec l’HyperDeck Studio HD Pro ? Les cartes SD suivantes sont recommandées pour enregistrer en 2160p jusqu’à 30 im/s. Marque Modèle Capacité Angelbird AV Pro MK2 V90 SDXC 64GB Angelbird AV Pro MK2 V90 SDXC...
  • Seite 176: Ssd

    Lors de nos tests, nous avons remarqué que les modèles de SSD les plus récents et dont la capacité de stockage est plus importante sont en général plus rapides. Les SSD recommandés comprennent Quels SSD dois-je utiliser avec l’HyperDeck Studio 4K Pro ? Les SSD suivants sont recommandés pour enregistrer en 2160p jusqu’à 60 im/s.
  • Seite 177: Disque Externe

    Disque externe Tous les modèles HyperDeck peuvent enregistrer directement sur des disques flash USB-C. Grâce à ces disques rapides et à leur capacité de stockage élevée, vous pouvez enregistrer sur de longues périodes. Il suffit de connecter le disque flash à votre ordinateur et de monter directement sur celui-ci ! Pour des capacités de stockage encore plus élevées, vous pouvez également connecter une station...
  • Seite 178 Quels disques USB-C dois-je utiliser avec l’HyperDeck Studio HD Plus ? Les disques USB-C suivants sont recommandés pour enregistrer en 2160p jusqu’à 30 im/s. Marque Modèle Capacité Angelbird SSD2GO PKT MK2 512GB Angelbird SSD2GO PKT MK2 DelKinDevices Juggler DelKinDevices Juggler...
  • Seite 179: Formater Les Supports

    Choisissez le format Mac OS étendu ( journalisé) ou exFAT. Saisissez le nom du nouveau volume, puis cliquez sur Effacer. Le support est alors rapidement formaté et est prêt à être utilisé avec l'HyperDeck. Formater un support sur un ordinateur Windows La boîte de dialogue Formater permet de formater un support en exFAT sur un ordinateur Windows.
  • Seite 180: Utiliser L'hyperdeck Comme Une Webcam

    Le support est alors rapidement formaté et est prêt à être utilisé avec l'HyperDeck. Utiliser l’HyperDeck comme une webcam Lorsqu’il est connecté à un ordinateur via USB, votre enregistreur à disque HyperDeck est détecté comme une webcam. Vous pouvez donc diffuser la lecture ou l'enregistrement à partir de votre HyperDeck à...
  • Seite 181: Configurer Open Broadcaster

    Open Broadcaster est une application open source qui fait office de plateforme de streaming entre votre HyperDeck Studio et votre logiciel de streaming favori, tel que YouTube, Twitch ou encore Facebook. Open Broadcaster compresse la vidéo en un débit binaire facilement gérable par votre application de streaming.
  • Seite 182 Copiez la clé de stream pour la coller et cliquez sur OK. dans Open Broadcaster. La vidéo de l’HyperDeck apparaît dans la fenêtre de prévisualisation du streaming d’Open Broadcaster. Pour connecter le lien de diffusion d’Open Retournez sur YouTube Live. Vous verrez la sortie Broadcaster à...
  • Seite 183: Blackmagic Hyperdeck Setup

    Pour ouvrir la page des réglages, cliquez sur l'icône Setup ou sur l'image de l’HyperDeck. Page Setup (Réglages) Si vous possédez plus d’un HyperDeck Studio, vous pouvez donner un nom à chaque appareil pour faciliter leur identification dans l’option Name.
  • Seite 184: Page Luts

    IP de l’appareil. Page LUTs Les modèles HyperDeck dotés de sorties Monitor à l’arrière peuvent afficher les entrées vidéo avec des LUTs 3D. Les fichiers LUT .cube à 17, 33 et 65 points sont supportés.
  • Seite 185: Mise À Jour Du Logiciel Interne

    à l’écran. Mise à jour du logiciel interne L’utilitaire HyperDeck Setup vous permet de mettre à jour le logiciel interne de votre enregistreur à disque HyperDeck, mais également de configurer les paramètres de streaming, les paramètres réseau et la qualité...
  • Seite 186: Teranex Mini Rack Shelf

    Blackmagic HyperDeck Studio HD Mini et HyperDeck Studio HD Plus dans un rack broadcast ou une caisse de transport. Le Blackmagic HyperDeck Studio HD Mini est si petit qu’il peut être installé aux côtés d'autres appareils Blackmagic Design de la même taille, tels que les convertisseurs Teranex Mini, le Blackmagic MultiView 4 et le Blackmagic Web Presenter.
  • Seite 187: Contrôle Rs

    L’HyperDeck Studio prend également en charge les commandes de l’Advanced Media Protocol via RS-422. Vous pouvez ainsi contrôler votre HyperDeck avec un appareil externe à l’aide des commandes AMP, notamment ajouter des clips à une liste de lecture, déterminer le nom de fichier du clip suivant, lire un clip ou une timeline en boucle et effacer une liste de lecture.
  • Seite 188 Assurez-vous que le contrôle à distance de l'HyperDeck est réglé sur On dans le menu à l'écran, ou utilisez le bouton Rem du panneau avant. Tous les modèles HyperDeck supportent le contrôle à distance via le port RS-422 du panneau arrière. Commandes RS-422 prises en charge...
  • Seite 189 Command Reply No Remote Notes Treated as N=1; 0x22 0x22 VarRev2 Acknowledge Disabled Same as VarRev1 0x21 0x23 ShuttleRev1 Acknowledge Disabled Treated as N=1; 0x22 0x23 ShuttleRev2 Acknowledge Disabled Same as ShuttleRev1 0x20 0x30 Preroll Acknowledge Disabled 0x24 0x31 CueData Acknowledge Disabled 0x20...
  • Seite 190 Command Reply No Remote Notes 6 - Sense Request 0x61 0x0A TimeCodeGenSense — — 0x61 0x0C CurrentTimeSense — — 0x60 0x10 InDataSense InData Enabled 0x60 0x11 OutDataSense OutData Enabled 0x60 0x12 AInDataSense AInData Enabled 0x60 0x13 AOutDataSense AOutData Enabled 0x61 0x20 StatusSense StatusData...
  • Seite 191 Command Reply No Remote Notes A - Advanced Media Protocol 8-bit signed number of 0xA1 0x01 AutoSkip Acknowledge Disabled clips to skip from current clip when x = 0 single clip request when x = 1, # 0xAX 0x15 ListNextID IDListing Enabled clips can be specified in...
  • Seite 192: Transférer Des Fichiers Sur Un Réseau

    FTP. Cette fonction permet de copier des fichiers directement de votre ordinateur à votre HyperDeck via un réseau, à la vitesse fournie par le réseau local. Vous pouvez par exemple copier de nouveaux fichiers sur un HyperDeck installé dans un endroit différent pour l’affichage numérique.
  • Seite 193 Connectez l'HyperDeck Studio au réseau à l’aide d’un câble Ethernet et notez son adresse IP. Pour accéder à l’adresse IP, appuyez sur le bouton Menu et tournez la molette jusqu’à ce que vous arriviez sur l’écran Réseau. L’adresse IP de l’HyperDeck Studio se trouve au bas de cet écran.
  • Seite 194: Connecter Un Mélangeur Atem

    Studio Mini, vous pouvez y accéder via le menu à l'écran. Enfin, copiez la source et l'adresse IP de l'HyperDeck dans le logiciel ATEM ou sur l'ATEM Broadcast Panel. Cette opération très simple est expliquée en détail dans le manuel ATEM.
  • Seite 195: Comprendre Les Workflows De Post-Production

    QuickTime est intégré à Mac OS. Les fichiers .mov QuickTime Apple ProRes, Avid DNxHD et DNxHR enregistrés avec l'HyperDeck peuvent être ouverts sur la plupart des logiciels vidéo sur Mac OS. Les fichiers MXF DNxHD et DNxHR enregistrés par l’HyperDeck peuvent être ouverts avec Avid Media Composer et DaVinci Resolve sous Mac.
  • Seite 196: Information Pour Les Développeurs

    Information pour les développeurs Blackmagic HyperDeck Ethernet Protocol Le port Ethernet intégré aux modèles HyperDeck Studio peut être connecté à l'ordinateur à l'aide du protocole de transport TCP 9993. Si vous êtes développeur logiciel, vous pouvez utiliser ce protocole pour élaborer du matériel qui puisse être utilisé avec nos produits. Notre approche chez Blackmagic Design est de laisser nos protocoles ouverts et nous nous réjouissons de voir ce que...
  • Seite 197 Command Command Description spill current recording to specified slot record: spill: slot id: {n} use current id to spill to same slot stop stop playback or recording clips count query number of clips on timeline clips get query all timeline clips clips get: clip id: {n} query a timeline clip info clips get: clip id: {n} count: {m}...
  • Seite 198 Command Command Description notify: timeline position: {true/false} set playback timeline position notifications notify: playrange: {true/false} set playrange notifications notify: cache: {true/false} set cache notifications notify: dynamic range: {true/false} set dynamic range settings notifications notify: slate: {true/false} set digital slate notifications goto: clip id: {start/end} goto first clip or last clip goto: clip id: {n}...
  • Seite 199 2 video format: NTSC Using XML While you can use the Terminal to talk to HyperDeck, if you are writing software, you can use XML to confirm the existence of a specific command based on the firmware of the HyperDeck you are communicating with.
  • Seite 200: Protocol Details

    The HyperDeck Ethernet server listens on TCP port 9993. Basic syntax The HyperDeck protocol is a line oriented text protocol. Lines from the server will be separated by an ascii CR LF sequence. Messages from the client may be separated by LF or CR LF.
  • Seite 201 Failure response codes Failure responses to commands are indicated with response codes in the range of 100 to 199: 100 syntax error 101 unsupported parameter 102 invalid value 103 unsupported 104 disk full 105 no disk 106 disk error 107 timeline empty 108 internal error 109 out of range 110 no input...
  • Seite 202 Timecode syntax Timecodes are expressed as non-drop-frame timecode in the format: HH:MM:SS:FF Handling of deck "remote" state The “remote” command may be used to enable or disable the remote control of the deck. Any attempt to change the deck state over ethernet while remote access is disabled will generate an error: 111 remote control disabled↵...
  • Seite 203 Switching to preview mode The "preview" command instructs the deck to switch between preview mode and output mode: preview: enable: {"true", "false"}↵ Playback will be stopped when the deck is switched to preview mode. Capturing will be stopped when the deck is switched to output mode.
  • Seite 204 Changing timeline position The "goto" command instructs the deck to switch to playback mode and change its position within the timeline. To go to the start of a specific clip: goto: clip id: {Clip ID}↵ To move forward/back {count} clips from the current clip on the current timeline: goto: clip id: +/-{count}↵...
  • Seite 205 Controlling asynchronous notifications The “notify” command may be used to enable or disable asynchronous notifications from the server. To enable or disable transport notifications: notify: transport: {“true”, “false”}↵ To enable or disable slot notifications: notify: slot: {“true”, “false”}↵ To enable or disable remote notifications: notify: remote: {“true”, “false”}↵...
  • Seite 206 Retrieving slot information The "slot info" command returns information about a slot. Without parameters, the command returns information for the currently selected slot: slot info↵ If a slot id is specified, that slot will be queried: slot info: slot id: {Slot ID}↵ The server will respond with slot specific information: 202 slot info:↵...
  • Seite 207 Retrieving timeline information The "clips get" command returns information for each available clip on the current timeline. Without parameters, the command returns information for all clips on timeline: clips get↵ The server responds with a list of clip IDs, names and timecodes: 205 clips info:↵...
  • Seite 208 1080i50, 1080i5994, 1080i60 HyperDeck Studio Pro and Plus models support these 4k formats: 4Kp23976, 4Kp24, 4Kp25, 4Kp2997, 4Kp30 HyperDeck Studio 4K Pro adds support for the following 4k formats: 4Kp50, 4Kp5994, 4Kp60 Video format support may vary between models and software releases.
  • Seite 209 Querying and updating configuration information The "configuration" command may be used to query the current configuration of the deck: configuration↵ The server returns the configuration of the deck: 211 configuration:↵ audio input: {“embedded”, “XLR”, “RCA”}↵ audio mapping: {n}↵ video input: {“SDI”, “HDMI”, “component”, “composite”}↵ file format: {format}↵...
  • Seite 210 Clearing the current timeline The "clips clear" command instructs the deck to empty the current timeline: clips clear↵ The server responds with 200 ok↵ Adding a clip to the current timeline The "clips add:" command instructs the deck to add a clip to the current timeline: clips add: name: {"clip name"}↵...
  • Seite 211: Assistance

    Blackmagic Design : www.blackmagicdesign.com/fr/support. Forum Blackmagic Design Le forum Blackmagic Design est une source d'information utile qui offre des idées innovantes pour vos productions. Cette plateforme d’aide vous permettra également d’obtenir des réponses rapides à vos questions, car un grand nombre de sujets peuvent avoir déjà été abordés par d'autres utilisateurs.
  • Seite 212: Avertissements

    Avertissements Élimination des déchets d'équipements électriques et électroniques au sein de l'Union européenne. Le symbole imprimé sur ce produit indique qu'il ne doit pas être jeté avec les autres déchets. Cet appareil doit être déposé dans un point de collecte agréé pour être recyclé. La collecte individuelle et le recyclage de votre équipement permettra de préserver les ressources naturelles et garantit un recyclage approprié...
  • Seite 213: Informations De Sécurité

    équipements. Les pièces de cet appareil ne sont pas réparables par l'opérateur. Toute opération d'entretien doit être effectuée par un centre de service Blackmagic Design. Cet appareil ne peut être utilisé qu'à une altitude inférieure à 2000 mètres.
  • Seite 214: Garantie

    Garantie Garantie limitée à 12 mois Par la présente, Blackmagic Design garantit que ce produit sera exempt de défauts matériels et de fabrication pendant une durée d’un an à compter de la date d'achat. Si un produit s’avère défectueux pendant la période de garantie, Blackmagic Design peut, à sa seule discrétion, réparer le produit défectueux sans frais pour les pièces et la main-d’œuvre, ou le remplacer.
  • Seite 215 Juli 2021 Installations - und Bedienungsanleitung HyperDeck Dıgitalrekorder HyperDeck Dıgitalrekorder...
  • Seite 216: Willkommen

    Front sogar mit einer Kopfhörerbuchse und Lautsprechern für schnelle Tonchecks direkt von Ihrem HyperDeck ausgestattet, und bieten insgesamt noch viel mehr Features. Wir hoffen, dass Ihr HyperDeck Ihnen über viele Jahre hinaus größtmöglichen Nutzen für Ihre Produktionen bringt! Bitte sehen Sie auf der Support-Seite unter www.blackmagicdesign.com/de...
  • Seite 217 Inhaltsverzeichnis Einführung HyperDeck Digitalrekorder Datenträger auf einem Computer vorbereiten Erste Schritte Ihren HyperDeck als Webcam An den Strom anschließen verwenden Anschließen von Video- und Einrichten der Webcam-Quelle Audiogeräten Einrichten von Open Broadcaster Audio kontrollieren Blackmagic HyperDeck Setup Datenträger einführen Mit HyperDeck Setup arbeiten...
  • Seite 218: Einführung Hyperdeck Digitalrekorder

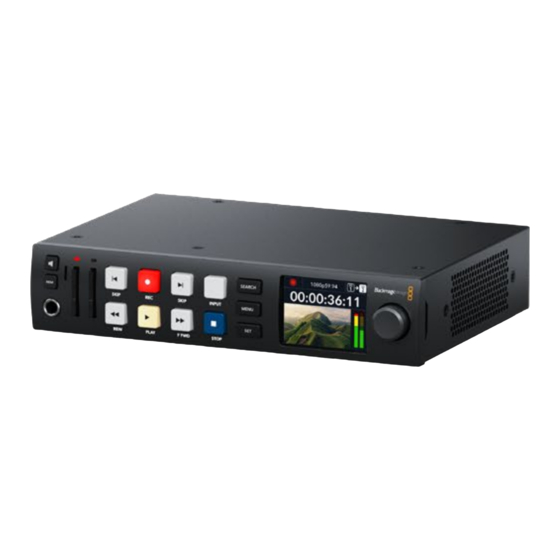
    Ihr Blackmagic HyperDeck Digitalrekorder gehört zu einer HD- und 4K-Rekorderfamilie, die für die unterschiedlichsten Produktionsworkflows konzipiert ist. Die Modelle HyperDeck Studio HD Pro und HyperDeck Studio 4K Pro passen in ein Rack von Standardbreite. Sie sind groß genug zum Aufzeichnen auf und Wiedergeben von Dateien auf bzw. von SD-Karten und 9,5mm-SSDs.
  • Seite 219: Erste Schritte

    Strom, schließen Sie Ihre Videoquellen und Zielgeräte an und legen Sie SSDs oder SD-Karten ein. An den Strom anschließen Schließen Sie Ihren HyperDeck über die Strombuchse an der Rückseite mit einem Standard-IEC- Kabel ans Stromnetz an. Ein HyperDeck Modell mit einer zusätzlichen IEC-Strombuchse können Sie für Redundanz an eine weitere Stromquelle anschließen.
  • Seite 220: Audio Kontrollieren

    Ihres HyperDecks aus. Schieben Sie die SSD behutsam in den Laufwerksschacht, bis sie einrastet. Die SSD wird nun von Ihrem HyperDeck Studio geprüft. Der Vorgang wird mit einer grünen Lichtumrandung um den Schacht herum angezeigt. Der HyperDeck ist aufnahmebereit, sobald die grüne Lichtumrandung erlischt.
  • Seite 221 Schacht, bis sie in der richtigen Position einrastet. Die SD-Karte wird nun von Ihrem HyperDeck Studio geprüft. Der Vorgang wird durch einen grün leuchtenden Indikator über dem SD-Kartenschacht angezeigt. Wenn der Indikator erlischt und die Stopptaste an der Frontblende aufleuchtet, ist Ihr HyperDeck aufnahmebereit Erste Schritte...
  • Seite 222: Aufzeichnen Von Video

    Führen Sie in diesem Fall einfach ein neues Medium ein, um die Aufnahme fortzusetzen. Sobald ein leeres Medium in einen unbesetzten Schacht eingeführt oder ein externes Laufwerk angeschlossen wird, hört das Blinken auf und der Timecode wird wieder in Weiß angezeigt. Der HyperDeck kann Aufzeichnen von Video...
  • Seite 223: Wechseln Von Datenträgern Beim Aufzeichnen

    Medium als okay befunden wurde und über freien Speicherplatz verfügt. Wenn der HyperDeck Studio über mehr als ein Medium verfügt, wird nach Füllen eines Datenträgers jeweils auf dem nächsten weiter aufgezeichnet. Dies zeigen die Symbole oben rechts auf der Startseite an.
  • Seite 224: Wiedergabe In Schleife

    „Die LCD-Menüs verwenden“ und „Einstellungen“ in diesem Handbuch. Wiedergabe in Schleife Für eine endlose Wiedergabe in Schleife aktivieren Sie auf Ihrem HyperDeck die Loop-Wiedergabe, indem Sie während der Wiedergabe erneut die PLAY-Taste drücken. Bei aktivierter Endloswiedergabe wird auf dem LCD ein Loop-Icon angezeigt. Es sind zwei Modi für die Loop- Wiedergabe verfügbar.
  • Seite 225 Die Modi des Suchreglers sind Jog, Shuttle und Scrollen. Spielt Clips von einem Frame zum nächsten vor- oder rückwärts ab. Shuttle Spielt mit höherer Geschwindigkeit vor- oder rückwärts ab. Die Wiedergabe richtet sich danach, wie weit Sie den Suchregler drehen. Scrollen Noch schnellere Wiedergabe, je nachdem wie weit Sie den Suchregler drehen.
  • Seite 226: Mit Der Frontblende Arbeiten

    Datei bei der Wiedergabe an. Medienschacht-Indikatoren Wenn Sie Ihren HyperDeck erstmalig mit Strom versorgen oder immer dann, wenn Sie eine SSD oder SD-Karte einlegen, leuchtet der Indikator des Medienschachts beim Verifizieren des Datenträgers grün und erlischt anschließend. Bei fehlerhafter Formatierung oder Versagen des Datenträgers leuchtet die Umrandung des Schachts kontinuierlich orange, bis das Medium entfernt...
  • Seite 227: Die Lcd-Menüs Verwenden

    Die LCD-Menüs verwenden Drücken Sie die MENU-Taste an der Frontblende, um die Menüeinstellungen aufzurufen. Drehen Sie den Suchlaufregler oder drücken Sie die SKIP-Taste, um durch die Menüoptionen zu navigieren. Drücken Sie auf SET, um ein Untermenü zu wählen. Drehen Sie den Suchregler, um durch die Menüeinstellungen zu navigieren Drücken Sie nach Auswahl der Menüoption die SET-Taste.
  • Seite 228: Einstellungen

    Einzelbilder vom eingehenden Video hinzugefügt oder gelöscht werden. Die meisten Broadcastdecks verkoppeln Videoausgaben während der Wiedergabe normalerweise anhand einer Referenzquelle. Bei der Wiedergabe wird die Ausgabe auf dem HyperDeck mit der Referenzquelle verkoppelt. Bei der Einbindung in ein großes Broadcastsystem bedarf es also keiner Resynchronisierung.
  • Seite 229 Die Eingabe-Resynchronisierung setzt nur dann ein, wenn die Videoeingabe nicht mit derselben Referenzquelle verkoppelt ist wie der HyperDeck. In dem zuvor beschriebenen Beispiel dient jedoch die Ausgabe des HyperDecks als Referenzquelle für die Kamera und der HyperDeck wird über den Videoreferenzeingang synchronisiert. Wenn Sie mehrere miteinander verkoppelte HyperDecks verwenden, die über Ihre Referenz-Anschlüsse in Reihe geschaltet sind, werden alle...
  • Seite 230 Durch Anwenden einer Display-LUT verschaffen Sie sich einen Eindruck über das Aussehen Ihres Videos nach der Farbkorrektur. LUTs für die Anzeige können über Blackmagic HyperDeck Setup ausgewählt und über den SDI- Monitorausgang angewendet werden.
  • Seite 231 Wenn mehr als zwei Kanäle aufgezeichnet werden, können Sie vorgeben, welche Kanäle auf dem Frontblenden-LCD angezeigt werden sollen. Dies erfolgt über die Option „Monitoring-Kanäle“. Bei HyperDeck Studio Modellen mit einem Lautsprecher an der Frontblende wählt man über diese Option auch die Kanäle aus, die über den Lautsprecher und die Kopfhörerbuchse ausgegeben werden sollen.
  • Seite 232 SD-Karten, SSDs und an den rückwärtigen „EXT DISK“-Port angeschlossene Laufwerke können direkt mit dem Rekorder oder mit einem Mac- oder Windows-Computer formatiert werden. So bereiten Sie Datenträger auf dem HyperDeck Studio vor: Wählen Sie unter Einsatz von Suchlaufregler und SET-Taste die Option „Medium formatieren“.
  • Seite 233 Name Wenn mehr als HyperDeck Studio in ein Netzwerk eingebunden ist, empfiehlt sich es sich, die Rekorder individuell zu benennen. Das geht über Blackmagic HyperDeck Setup oder Blackmagic HyperDeck Ethernet Protocol mithilfe eines Terminalprogramms. Sprache HyperDeck Studios unterstützen 13 verbreitete Sprachen. Neben Deutsch und Englisch sind das Chinesisch, Französisch, Italienisch, Japanisch, Koreanisch, Polnisch, Portugiesisch, Russisch,...
  • Seite 234 Mit der Aufzeichnung verhält es sich ähnlich. Drücken Sie die Aufnahmetaste, wird im Videoformat der angeschlossenen Videoquelle aufgezeichnet. Nach abgeschlossener Aufzeichnung spielt der HyperDeck Studio die Dateien auf dem Datenträger in derselben Videonorm ab. Dies gilt auch, wenn andere Dateien auf dem Datenträger dem Standard-Videoformat entsprechen. Es wird angenommen, dass Sie Dateien im gleichen Videoformat abspielen wollen, in dem sie aufgezeichnet wurden.
  • Seite 235 Menü „Netzwerkeinstellungen“ Protokoll Blackmagic HyperDecks werden auf DHCP voreingestellt ausgeliefert. Wird Ihr Rekorder in ein Netzwerk eingebunden, bekommt er vom Netzwerkserver automatisch eine IP-Adresse zugewiesen. Es müssen keine weiteren Netzwerkeinstellungen angepasst werden. Wenn Sie eine Adresse manuell einrichten müssen, können Sie die Verbindung über ein statisches IP erstellen. Um auf das Menü...
  • Seite 236 Diese Option übernimmt den in die SDI- und HDMI-Signale eingebetteten Timecode mit SMPTE RP-188 Metadaten. Das sorgt für die Synchronisierung Ihrer SDI- oder HDMI-Quellen mit der auf dem HyperDeck Studio aufgezeichneten Datei. Extern Aktivieren Sie diese Option, wenn der „TIMECODE IN“-Anschluss an der Rückseite benutzt wird.
  • Seite 237 „REF IN“-Anschluss an der Rückseite angeschlossen, wählen Sie „Extern“. Indikator für externe Referenzsignale – Auf dem internen LCD erscheint das Kürzel REF, wenn Ihr HyperDeck Studio erfolgreich mit einer externen Referenzquelle verkoppelt ist. Referenzzeit Die Referenzzeit lässt sich anpassen, wenn framegenau synchronisiert werden soll, bspw. beim Archivieren von analogen MAZen.
  • Seite 238 Clipnummer Menü „HDR-Format ignorieren für“ Der HyperDeck Studio 4K Pro erkennt in ein 4K-Videosignal oder in eine Datei eingebettete HDR-Metadaten automatisch und zeigt diese über die HDMI-Ausgabe an. Wenn das Signal oder die Datei nicht korrekt getaggt ist, oder Ihr Bildschirm nicht HDR-kompatibel ist, kann das HDR- Format deaktiviert werden.
  • Seite 239 Drücken Sie bspw. auf dem Master HyperDeck die REC-Taste, startet die Aufzeichnung gleichzeitig auf allen anderen angeschlossenen HyperDecks. Bitte beachten: Der HyperDeck Studio HD Mini ist zwar nicht als Steuergerät einsetzbar, lässt sich aber von einem HyperDeck Pro- oder Plus-Modell steuern.
  • Seite 240: Rückseite

    Ports oder zum Gebrauch einer oder mehrerer SSDs an eine Blackmagic MultiDock 10G anschließen. Wenn Ihr HyperDeck per USB mit Ihrem Computer verbunden ist, können Sie den Rekorder bei Verwendung von Softwares wie Open Broadcaster oder Skype als Ihre Webcam-Quelle einsetzen.
  • Seite 241 Alle HyperDeck Modelle sind mit einem internen Taktgenerator zur Ausgabe von stabilisierten Black-Burst- und Tri-Level-Sync-Videoreferenzsignalen ausgestattet. Dies ermöglicht es, Ihren als Master dienenden HyperDeck über seinen REF-Ausgang mit dem Referenzeingang anderer Videogeräte zu verbinden und diese zum Synchronisieren mit dem von diesem HyperDeck generierten Referenzsignal zu verkoppeln.
  • Seite 242: Mit Der Monitorausgabe Arbeiten

    Zeigt die ausgewählte SDI- oder HDMI-Eingabequelle an. „Kein Signal“ bedeutet, dass kein gültiges Signal erkannt wurde. NAME Zeigt den Namen Ihres HyperDeck Rekorders an. Näheres zum Ändern des Namens finden Sie im Abschnitt „Blackmagic Hyperdeck Setup“ weiter hinten im Handbuch. Mit der Monitorausgabe arbeiten...
  • Seite 243 SSD-Schacht in Laufwerk Gebrauch Folge Der dritte Indikator zeigt bei allen HyperDeck Modellen das USB-Laufwerk an. Bei Einsatz eines USB-Hubs oder einer Dockingstation wie einer Blackmagic MultiDock 10G wird hier das aktive Laufwerk angezeigt. Datenträger-Indikator Der Text über dem Fortschrittsbalken gibt den jeweiligen SD- oder SSD-Schacht an.
  • Seite 244 Datenträgerbalken Je nach aktuellem Status werden die Balken entweder in blau, weiß oder rot angezeigt. Sie stellen auch den Füllstand des Datenträgers dar. Der blaue Balken zeigt den aktiven Datenträger an, der für die Wiedergabe und Aufzeichnung benutzt wird. Ein weißer Balken bedeutet, dass zwar ein Datenträger vorhanden aber nicht aktiv ist.
  • Seite 245: Datenträger

    Sehen Sie in der aktuellsten Ausgabe dieses Handbuchs regelmäßig nach den neuesten Infos. Sie steht jederzeit zum Download auf unserer Firmenwebsite www.blackmagicdesign.com/de/support bereit. Welche SD-Karten sollte ich mit dem HyperDeck Studio 4K Pro verwenden? Für Aufzeichnungen in 2160p mit bis zu 60 fps werden folgende SD-Karten empfohlen: Marke Modell Kapazität...
  • Seite 246 Welche SD-Karten sollte ich mit dem HyperDeck Studio HD Pro verwenden? Für Aufzeichnungen in 2160p mit bis zu 30 fps werden folgende SD-Karten empfohlen: Marke Modell Kapazität Angelbird AV Pro MK2 V90 SDXC 64GB Angelbird AV Pro MK2 V90 SDXC...
  • Seite 247: Ssds

    Von Blackmagic ausgeführte Tests haben ergeben, dass neuere, größere SSD-Modelle und SSDs mit höheren Kapazitäten in der Regel schneller sind. Empfohlen werden u. a. folgende SSDs: Welche SSDs sollte ich mit dem HyperDeck Studio 4K Pro verwenden? Für Aufzeichnungen in 2160p mit bis zu 60 fps werden folgende SSDs empfohlen:...
  • Seite 248: Externe Laufwerke

    Externe Laufwerke Alle HyperDeck Modelle können direkt auf USB-C-Laufwerke aufzeichnen. Diese schnellen leistungsfähigen Laufwerke ermöglichen Ihnen Langzeit-Videoaufzeichnungen. Anschließend können Sie die Laufwerke an Ihren Computer anschließen und direkt darauf schneiden. Noch mehr Speicherkapazität bieten Ihnen USB-C-Dockingstationen oder externe Festplatten. Verbinden Sie Ihre Blackmagic MultiDock 10G oder Ihr USB-C-Laufwerk über ein Kabel mit dem „EXT DISK“-Port an der Rückseite Ihres HyperDecks.
  • Seite 249 Welche USB-C-Laufwerke sollte ich mit dem HyperDeck Studio HD Plus verwenden? Für Aufzeichnungen in 2160p mit bis zu 30 fps werden folgende USB-C-Laufwerke empfohlen: Marke Modell Kapazität Angelbird SSD2GO PKT MK2 512GB Angelbird SSD2GO PKT MK2 DelKinDevices Juggler DelKinDevices Juggler...
  • Seite 250: Datenträger Formatieren

    Geben Sie als Format „Mac OS Extended (Journaled)“ oder „exFAT“ vor. Geben Sie einen Namen für das neue Volumen ein und klicken Sie auf „Löschen“. Ihr Datenträger wird schnell formatiert und ist dann mit einem HyperDeck einsatzbereit. Datenträger auf einem Windows-Computer formatieren Auf einem Windows-PC erfolgt die Formatierung eines Laufwerks in exFAT über das Dialogfeld...
  • Seite 251: Ihren Hyperdeck Als Webcam Verwenden

    Öffnen Sie in der Skype-Menüleiste unter Einstellungen „Audio und Video“. Klicken Sie auf das Kamera-Drop-down-Menü unter „Kamera“ und wählen Sie Ihren HyperDeck aus der Liste aus. Nun ist das Video aus dem HyperDeck im Vorschaufenster zu sehen. Wählen Sie dann im Mikrofon-Drop-down-Menü „HyperDeck“ als Ihre Audioquelle.
  • Seite 252: Einrichten Von Open Broadcaster

    Einrichten von Open Broadcaster Open Broadcaster ist eine quelloffene Anwendung, die als Streaming-Plattform zwischen Ihrem HyperDeck Studio und Ihrer bevorzugten Streaming-Software fungiert. Das könnten bspw. YouTube, Twitch, Facebook Live oder andere sein. Open Broadcaster komprimiert Ihr Video auf eine Bitrate, die Ihre Streaming-Anwendung problemlos bewältigt.
  • Seite 253 „OBS/Einstellungen“ klicken. Wählen Sie „Stream“. Fügen Sie jetzt den Streamschlüssel für Ihr Klicken Sie auf den „Kopieren“-Button neben dem HyperDeck in Open Broadcaster in das Streaming- Streamschlüssel. Kopieren Sie den Streamschlüssel, Vorschaufenster ein. den Sie als nächstes in Open Broadcaster einfügen.
  • Seite 254: Blackmagic Hyperdeck Setup

    Klicken Sie auf das runde Setup-Symbol oder auf das Bild Ihres HyperDecks, um die Einstellungen einzublenden. Setup Beim Gebrauch von mehr als einem HyperDeck Studio ist es ratsam, jedem Gerät zur leichteren Identifizierung einen eindeutigen Namen zu geben. Dies erfolgt mit der Option „Name“. Blackmagic HyperDeck Setup...
  • Seite 255: Luts

    Es besteht also keine Gefahr, dass ein Look dauerhaft auf Ihr Bild angewendet wird. Wenn Sie die gleiche LUT auf ein Bild in DaVinci Resolve anwenden möchten, können Sie einfach die LUT-.cube-Datei vom HyperDeck Studio in DaVinci Resolve importieren und sie dort für die Farbkorrektur verwenden.
  • Seite 256: Aktualisieren Der Produktsoftware

    Führen Sie das Installationsprogramm Blackmagic HyperDeck Setup auf Ihrem Computer aus und folgen Sie den Anweisungen auf dem Bildschirm. Verbinden Sie Ihren HyperDeck Studio nach abgeschlossener Installation über den USB- oder Ethernet-Anschluss an der Rückseite mit dem Computer. Starten Sie Blackmagic HyperDeck Setup und folgen Sie etwaigen Aufforderungen auf Ihrem Bildschirm, die Produktsoftware zu aktualisieren.
  • Seite 257: Teranex Mini Rack Shelf

    Studio HD Mini aufgezeichnet wird. Dank dieses Modulardesigns können Sie sich eigene portable Videolösungen zusammenstellen, die noch dazu bedienfreundlich sind. Mit dem Teranex Mini Rack Shelf können Sie Ihren Blackmagic HyperDeck Studio HD Mini und HyperDeck Studio HD Plus zusammen mit weiteren Blackmagic Design Geräten derselben Größe in einem Rack montieren Entfernen Sie zur Installation des Blackmagic HyperDeck in einem Teranex Mini Rack Shelf die Gummifüße – falls vorhanden –...
  • Seite 258: Rs-422-Steuerung

    Modelle unterstützen diesen Standard, d. h. er lässt sich in automatisierte Sendeanlagen, ferngesteuerte Systeme und Schnittsysteme sowie in beliebige selbstgebaute Steuerlösungen integrieren. Der HyperDeck Studio unterstützt auch mit dem Advanced Media Protocol via RS-422 übermittelte dateibasierte Befehle. Sie können Ihren HyperDeck somit über ein externes Gerät mit AMP-Befehlen steuern.
  • Seite 259: Unterstützte Rs-422-Befehle (Englisch)

    Vergewissern Sie sich, dass die Fernsteuerung Ihres HyperDeck im LCD-Menü oder über die REM-Taste an der Frontblende aktiviert ist, um die RS-422-Decksteuerung zu ermöglichen Alle HyperDeck Modelle unterstützen die Fernsteuerung über den RS-422-Port an der Rückseite Unterstützte RS-422-Befehle (Englisch) Command...
  • Seite 260 Command Reply No Remote Notes Treated as N=1; 0x22 0x22 VarRev2 Acknowledge Disabled Same as VarRev1 0x21 0x23 ShuttleRev1 Acknowledge Disabled Treated as N=1; 0x22 0x23 ShuttleRev2 Acknowledge Disabled Same as ShuttleRev1 0x20 0x30 Preroll Acknowledge Disabled 0x24 0x31 CueData Acknowledge Disabled 0x20...
  • Seite 261 Command Reply No Remote Notes 6 - Sense Request 0x61 0x0A TimeCodeGenSense — — 0x61 0x0C CurrentTimeSense — — 0x60 0x10 InDataSense InData Enabled 0x60 0x11 OutDataSense OutData Enabled 0x60 0x12 AInDataSense AInData Enabled 0x60 0x13 AOutDataSense AOutData Enabled 0x61 0x20 StatusSense StatusData...
  • Seite 262 Command Reply No Remote Notes A - Advanced Media Protocol 8-bit signed number of 0xA1 0x01 AutoSkip Acknowledge Disabled clips to skip from current clip when x = 0 single clip request when x = 1, # 0xAX 0x15 ListNextID IDListing Enabled clips can be specified in...
  • Seite 263: Dateien Per Netzwerk Übertragen

    Ihr HyperDeck Rekorder unterstützt die Übertragung von Dateien über das Dateiübertragungsprotokoll FTP. Mit dieser leistungsstarken Funktion können Sie Dateien mit den schnellen Geschwindigkeiten eines lokalen Netzwerks direkt von Ihrem Computer auf Ihren HyperDeck kopieren. Kopieren Sie bspw. neue Dateien für Digital Signage auf einen ferngesteuerten HyperDeck Rekorder an einem anderen Standort.
  • Seite 264: Dateien Übertragen

    Methode für Ihre Anwendung verfügbar ist. Sie können den Datenaustausch mit Ihrem HyperDeck in beliebigen Formaten vornehmen. Beachten Sie jedoch, dass Dateien, die Sie von Ihrem HyperDeck Studio wiedergeben möchten, mit den von Ihrem HyperDeck unterstützen Codecs und Auflösungen kompatibel sein müssen. Eine Liste mit unterstützten Codecs finden Sie im Abschnitt „Blackmagic HyperDeck Setup“...
  • Seite 265: Anschließen An Einen Atem Mischer

    Anschließen an einen ATEM Mischer Wenn Sie einen ATEM Mischer verwenden, lassen sich bis zu vier Blackmagic HyperDeck Rekorder anschließen und über ein ATEM Hardware-Bedienpanel oder ATEM Software Control steuern. Diese sagenhaft starke Feature stellt Ihnen faktisch eine ganze Videobandabteilung zur Verfügung. Über den ATEM Mischer können Sie zudem die Aufzeichnung auf Ihrem HyperDeck auslösen.
  • Seite 266: Postproduktions-Workflows Verstehen

    Windows Um Video zu öffnen, das mit einem HyperDeck in Apple ProRes in QuickTime aufgezeichnet wurde, muss QuickTime auf Ihrem PC installiert sein. Nahezu jede Videosoftware auf Windows, die QuickTime unterstützt, kann mit dem HyperDeck aufgezeichnetes Video öffnen. QuickTime für Windows kann kostenlos unter http://www.apple.com/quicktime/download/...
  • Seite 267: Informationen Für Entwickler (Englisch)

    Modellen mit internem Ethernet-Anschluss erfolgt der Zugriff über die Verbindung mit dem TCP- Port-9993 der Rekorder. Als Software-Entwickler können Sie das Protokoll verwenden, um Geräte zu entwickeln, die mit unseren Produkten integrierbar sind. Hier bei Blackmagic Design legen wir unsere Protokolle offen und freuen uns auf Ihre Ideen!
  • Seite 268 Command Command Description spill current recording to specified slot record: spill: slot id: {n} use current id to spill to same slot stop stop playback or recording clips count query number of clips on timeline clips get query all timeline clips clips get: clip id: {n} query a timeline clip info clips get: clip id: {n} count: {m}...
  • Seite 269 Command Command Description notify: timeline position: {true/false} set playback timeline position notifications notify: playrange: {true/false} set playrange notifications notify: cache: {true/false} set cache notifications notify: dynamic range: {true/false} set dynamic range settings notifications notify: slate: {true/false} set digital slate notifications goto: clip id: {start/end} goto first clip or last clip goto: clip id: {n}...
  • Seite 270 2 video format: NTSC Using XML While you can use the Terminal to talk to HyperDeck, if you are writing software, you can use XML to confirm the existence of a specific command based on the firmware of the HyperDeck you are communicating with.
  • Seite 271: Protocol Details

    The HyperDeck Ethernet server listens on TCP port 9993. Basic syntax The HyperDeck protocol is a line oriented text protocol. Lines from the server will be separated by an ascii CR LF sequence. Messages from the client may be separated by LF or CR LF.
  • Seite 272 Failure response codes Failure responses to commands are indicated with response codes in the range of 100 to 199: 100 syntax error 101 unsupported parameter 102 invalid value 103 unsupported 104 disk full 105 no disk 106 disk error 107 timeline empty 108 internal error 109 out of range 110 no input...
  • Seite 273 Timecode syntax Timecodes are expressed as non-drop-frame timecode in the format: HH:MM:SS:FF Handling of deck "remote" state The “remote” command may be used to enable or disable the remote control of the deck. Any attempt to change the deck state over ethernet while remote access is disabled will generate an error: 111 remote control disabled↵...
  • Seite 274 Switching to preview mode The "preview" command instructs the deck to switch between preview mode and output mode: preview: enable: {"true", "false"}↵ Playback will be stopped when the deck is switched to preview mode. Capturing will be stopped when the deck is switched to output mode.
  • Seite 275 Changing timeline position The "goto" command instructs the deck to switch to playback mode and change its position within the timeline. To go to the start of a specific clip: goto: clip id: {Clip ID}↵ To move forward/back {count} clips from the current clip on the current timeline: goto: clip id: +/-{count}↵...
  • Seite 276 Controlling asynchronous notifications The “notify” command may be used to enable or disable asynchronous notifications from the server. To enable or disable transport notifications: notify: transport: {“true”, “false”}↵ To enable or disable slot notifications: notify: slot: {“true”, “false”}↵ To enable or disable remote notifications: notify: remote: {“true”, “false”}↵...
  • Seite 277 Retrieving slot information The "slot info" command returns information about a slot. Without parameters, the command returns information for the currently selected slot: slot info↵ If a slot id is specified, that slot will be queried: slot info: slot id: {Slot ID}↵ The server will respond with slot specific information: 202 slot info:↵...
  • Seite 278 Retrieving timeline information The "clips get" command returns information for each available clip on the current timeline. Without parameters, the command returns information for all clips on timeline: clips get↵ The server responds with a list of clip IDs, names and timecodes: 205 clips info:↵...
  • Seite 279 1080i50, 1080i5994, 1080i60 HyperDeck Studio Pro and Plus models support these 4k formats: 4Kp23976, 4Kp24, 4Kp25, 4Kp2997, 4Kp30 HyperDeck Studio 4K Pro adds support for the following 4k formats: 4Kp50, 4Kp5994, 4Kp60 Video format support may vary between models and software releases.
  • Seite 280 Querying and updating configuration information The "configuration" command may be used to query the current configuration of the deck: configuration↵ The server returns the configuration of the deck: 211 configuration:↵ audio input: {“embedded”, “XLR”, “RCA”}↵ audio mapping: {n}↵ video input: {“SDI”, “HDMI”, “component”, “composite”}↵ file format: {format}↵...
  • Seite 281 Clearing the current timeline The "clips clear" command instructs the deck to empty the current timeline: clips clear↵ The server responds with 200 ok↵ Adding a clip to the current timeline The "clips add:" command instructs the deck to add a clip to the current timeline: clips add: name: {"clip name"}↵...
  • Seite 282: Hilfe

    Wählen Sie im Anwendungsmenü „About Blackmagic HyperDeck Setup“, um die Versionsnummer anzuzeigen. ‚ Öffnen Sie Blackmagic HyperDeck Setup auf Windows über das Startmenü oder den Startbildschirm. Klicken Sie auf das Menü „Help“ (Hilfe) und wählen Sie „About Blackmagic HyperDeck Setup“ aus, um die Versionsnummer anzuzeigen.
  • Seite 283: Gesetzliche Vorschriften

    Gesetzliche Vorschriften Entsorgung von elektrischen und elektronischen Geräten innerhalb der Europäischen Union. Das auf dem Produkt abgebildete Symbol weist darauf hin, dass dieses Gerät nicht zusammen mit anderen Abfallstoffen entsorgt werden darf. Altgeräte müssen daher zur Wiederverwertung an eine dafür vorgesehene Sammelstelle übergeben werden. Mülltrennung und Wiederverwertung von Altgeräten tragen zum nachhaltigen Umgang mit natürlichen Ressourcen bei.
  • Seite 284: Sicherheitshinweise

    Es befinden sich keine durch den Anwender zu wartenden Teile im Inneren des Gehäuses. Wenden Sie sich für die Wartung an ein Blackmagic Design Service-Center in Ihrer Nähe. Nicht in Höhen von über 2000 m über dem Meeresspiegel einsetzen.
  • Seite 285: Garantie

    Garantie 12 Monate eingeschränkte Garantie Für dieses Produkt gewährt die Firma Blackmagic Design eine Garantie auf Material- und Verarbeitungsfehler von 12 Monaten ab Kaufdatum. Sollte sich ein Produkt innerhalb dieser Garantiezeit als fehlerhaft erweisen, wird die Firma Blackmagic Design nach ihrem Ermessen das defekte Produkt entweder ohne Kostenerhebung für Teile und Arbeitszeit reparieren oder Ihnen das defekte Produkt ersetzen.
  • Seite 286 Julio 2021 Manual de instalación y funcionamiento Grabadores HyperDeck Grabadores HyperDeck...
  • Seite 287 2.5 pulgadas. Ahora, nos complace presentar la nueva línea HyperDeck, que permite grabar en HD y UHD mediante tarjetas SD y unidades SSD o USB. Además, es posible conectar discos duros externos a través de un dispositivo Blackmagic MultiDock 10G.
  • Seite 288 Conexión de fuentes audiovisuales Configuración de Open Broadcaster Comprobación del audio Configuración del dispositivo Conexión de soportes de grabación Uso del programa HyperDeck Setup Grabación Tablas de conversión (LUT) Grabación en múltiples soportes Actualización del dispositivo Reproducción Reproducción en los modelos...
  • Seite 289 Estos productos forman parte de una familia de grabadores HD y 4K que han sido diseñados para adaptarse a las necesidades de cada producción. Los modelos HyperDeck Studio HD Pro y HyperDeck Studio 4K caben en una unidad de bastidor y permiten grabar archivos en tarjetas SD o unidades SSD de 9.5 mm.
  • Seite 290: Primeros Pasos

    (por ejemplo, un televisor HDMI o un monitor SDI). Todos los modelos admiten una resolución de 1080p60. Por su parte, la versión HyperDeck 4K Pro incluye conectores SDI 12G que permiten recibir o transmitir señales UHD con una resolución máxima de 2160p60 mediante un solo cable BNC.
  • Seite 291 Conexión de soportes de grabación Todos los modelos HyperDeck Studio pueden grabar contenidos en forma inmediata sin necesidad de realizar ningún tipo de ajuste o configuración. Para ello, solo es necesario una tarjeta SD o una unidad SSD formateadas.
  • Seite 292 Para quitar la unidad SSD, tire del borde externo suavemente hacia afuera hasta desconectarla. Sostenga la unidad SSD con los contactos hacia abajo, insértela en el compartimiento y empújela con cuidado hasta que calce en su lugar. Para insertar una tarjeta SD: Sostenga la unidad con los contactos dorados orientados hacia la pantalla, de forma que coincida con una de las ranuras correspondientes en el dispositivo.
  • Seite 293 SUGERENCIA: Es posible cambiar el códec utilizado mediante el programa utilitario Blackmagic HyperDeck Setup. Consulte el apartado correspondiente para obtener más información al respecto. Grabación en múltiples soportes Cuando hay menos de tres minutos disponibles en la tarjeta SD o la unidad SSD, el código de tiempo en la pantalla se destacará...
  • Seite 294 Los botones de avance y retroceso funcionan de la misma manera que aquellos para avanzar a la secuencia siguiente o retroceder a la anterior. Reproducción en los modelos HyperDeck Presione el botón de reproducción para ver las imágenes en la pantalla del dispositivo o cualquier monitor conectado a una de sus salidas.
  • Seite 295 SUGERENCIA: Para reproducir una secuencia en el dispositivo, es necesario configurar el códec mediante el menú en pantalla a fin de que coincida. Consulte el apartado Uso de los menús para obtener más información al respecto. Reproducción continua Presione el botón de reproducción al reproducir una secuencia para activar esta función. Verá el ícono correspondiente en la pantalla del dispositivo.
  • Seite 296 Los modos de búsqueda disponibles son los siguientes: Desplazamiento El modo jog permite reproducir la secuencia fotograma por fotograma para brindar mayor precisión. Avance y El modo shuttle permite avanzar o retroceder las imágenes a una retroceso mayor velocidad, según cuánto se gira el mando de búsqueda. Avance y El modo scroll permite avanzar o retroceder las imágenes aún retroceso rápido...
  • Seite 297: Pantalla Principal

    Uso del panel frontal Al grabar o reproducir clips con los distintos modelos HyperDeck, la pantalla frontal y los indicadores luminosos brindan toda la información necesaria. Pantalla principal Tiempo restante y unidad activa – Durante la grabación, se indica de forma alternada el tiempo de grabación...
  • Seite 298: Uso De Los Menús En Pantalla

    Uso de los menús en pantalla Presione el botón MENU en el panel frontal para acceder al menú de ajustes. Gire el mando de búsqueda o presione los botones de avance y retroceso para acceder a las distintas opciones, y oprima SET a fin de seleccionarlas. Gire el mando de búsqueda para acceder a las distintas opciones en cada menú.
  • Seite 299: Menú Grabación

    INPUT en el panel frontal. Códec Todos los modelos HyperDeck Studio permiten grabar con compresión en formato H.264, ProRes y DNxHD. A su vez, la versión HyperDeck Studio 4K Pro admite códecs H.265 y DNxHR al grabar en 4K. Inicio automático Hay dos modos disponibles para iniciar la grabación automáticamente: Cámara y CT...
  • Seite 300 El modelo HyperDeck Studio cuenta con una función única que facilita la grabación de señales individuales. Esto permite revertir por completo el proceso y volver a sincronizar la fuente con la señal de referencia, a fin de poder conectar fuentes no sincronizadas al dispositivo, el cual resincronizará...
  • Seite 301 Gire el mando de búsqueda hasta ver la opción 3D LUT destacada en azul. Presione el botón SET para activar o desactivar la tabla. Consulte el apartado Blackmagic HyperDeck Setup para obtener más información al respecto. SUGERENCIA: Consulte el apartado Monitorización para obtener más información sobre esta función.
  • Seite 302: Menú Audio

    Menú Audio Canales grabados Los modelos HyperDeck Studio permiten grabar hasta 16 canales de audio PCM simultáneamente. Para ello, seleccione una de las opciones disponibles en este menú. Al usar el códec H.264 o H.265, también es posible elegir dos canales de audio AAC, a fin de compartir la grabación directamente por YouTube.
  • Seite 303: Menú Ajustes

    Menú Almacenamiento Formatear unidad Las tarjetas SD, unidades SSD y los discos externos conectados a través del puerto en la parte trasera del grabador pueden formatearse directamente en la unidad o mediante equipos Mac y Windows. Preparación de unidades: Gire el mando de búsqueda para seleccionar el menú Formatear unidad. Elija la unidad deseada y presione el botón SET.
  • Seite 304 Nombre Al contar con varias unidades HyperDeck Studio en una red, es posible asignarles distintos nombres mediante el programa Blackmagic HyperDeck Setup o el protocolo de Ethernet para estos grabadores, a través de una terminal. El nombre asignado aparecerá junto a la opción Nombre.
  • Seite 305 Por ejemplo, si se cuenta con un modelo HyperDeck Studio sin un equipo conectado a la entrada y se inserta un disco con archivos de dos formatos distintos, ¿qué formato debe reproducir el grabador? El formato predeterminado permite que el dispositivo conozca las prioridades del usuario.
  • Seite 306: Ajustes De Red

    Ajustes de red Protocolo Los grabadores HyperDeck utilizan el protocolo DHCP de forma predeterminada, por lo cual, al conectarlos, el servidor de la red les asignará una dirección IP automáticamente, y no será necesario configurar otros ajustes. Para introducir una dirección particular, seleccione Protocolo, presione el botón SET, elija la opción IP estática y oprima SET nuevamente.
  • Seite 307 Ajustes para el código de tiempo Fuente Existen cinco opciones disponibles al grabar. Señal Al seleccionar esta opción, se utiliza el código de tiempo de la señal SDI o HDMI con los metadatos SMPTE RP 188. Esto permite mantener la sincronización entre la fuente y el material grabado con el dispositivo.
  • Seite 308 Salida SDI 3G Algunos equipos solo son capaces de recibir señales SDI 3G nivel A o B. A fin de mantener la compatibilidad con otros equipos, seleccione la opción Nivel A para transmisiones directas o Nivel B en el caso de señales multiplexadas. Sincronización Referencia Seleccione el tipo de fuente que utilizará...
  • Seite 309 Número de clip Rango dinámico El modelo HyperDeck Studio 4K detecta automáticamente metadatos HDR en señales 4K y aplica el respectivo rango dinámico a la imagen transmitida a través de la salida HDMI. Sin embargo, es posible seleccionar otro distinto en caso de que los archivos o las imágenes hayan sido etiquetados incorrectamente, o si el monitor conectado no admite este tipo de contenidos.
  • Seite 310: Control Remoto

    Cuando se controla a distancia un grabador, es posible reflejar las acciones que se realizan en una unidad en otras conectadas. De esta manera, es posible conectar unidades HyperDeck en serie al equipo principal a través del puerto RS-422. Una vez que las unidades adicionales tienen la función de control a distancia activada, las acciones realizadas en el equipo principal se reflejarán...
  • Seite 311: Panel Trasero

    HyperDeck. Es posible transferir archivos mediante las conexiones de 1 Gb en los modelos HD o de 10 Gb en el caso de la versión HyperDeck Studio 4K Pro. Consulte el apartado Transferencia de archivos a través de una red para obtener más información al respecto.
  • Seite 312 HyperDeck Studio HD Pro incluyen conexiones SDI 6G que admiten una resolución máxima de 2160p a 30 f/s. Por su parte, el modelo HyperDeck Studio 4K Pro cuenta con entradas y salidas SDI 12G que admiten una resolución máxima de 2160p a 60 f/s.
  • Seite 313 Esta opción brinda información sobre la fuente SDI o HDMI seleccionada. Si el mensaje Sin señal aparece junto al mismo, significa que no se ha detectado una señal válida. Nombre Indica el nombre de la unidad. Consulte el apartado Blackmagic HyperDeck Setup para saber cómo cambiarlo. Uso de la salida de monitorización...
  • Seite 314 SSD en uso SSD que se usará a continuación En todos los modelos HyperDeck, el tercer indicador corresponde a la unidad USB. En caso de haber varias conectadas, indica la unidad activa. Indicadores de disco o unidad El texto arriba de la barra de progreso permite identificar claramente la unidad utilizada para la grabación y la que se usará...
  • Seite 315 Barra Esta barra indica el espacio disponible en la unidad. Azul: Indica que la unidad está activa. La unidad activa se emplea para grabar y reproducir secuencias. Blanco: Indica que hay una unidad insertada, pero no está activa. Si la barra está llena, significa que no hay espacio disponible. Rojo: Indica que la unidad está...
  • Seite 316 No obstante, es aconsejable consultar la versión más reciente de este manual en nuestra página de soporte técnico para obtener información actualizada al respecto. ¿Qué tarjetas SD pueden usarse con el modelo HyperDeck Studio 4K Pro? Recomendamos las siguientes para grabar en resolución 2160p a una frecuencia máxima de 60 f/s.
  • Seite 317 ¿Qué tarjetas SD pueden usarse con el modelo HyperDeck Studio HD Pro? Recomendamos las siguientes para grabar en resolución 2160p a una frecuencia máxima de 30 f/s. Marca Modelo Capacidad Angelbird AV Pro MK2 V90 SDXC 64GB Angelbird AV Pro MK2 V90 SDXC...
  • Seite 318 Las unidades SSD recomendadas incluyen las siguientes: ¿Qué unidades SSD pueden usarse con el modelo HyperDeck Studio 4K Pro? Recomendamos las siguientes para grabar en resolución 2160p a una frecuencia máxima de 60 f/s.
  • Seite 319 Discos externos Todos los modelos HyperDeck permiten guardar el material digitalizado directamente en discos USB-C. Estas unidades de gran capacidad son rápidas y brindan la posibilidad de grabar durante períodos prolongados. Además, facilitan la edición de los contenidos al instante conectándolas a un equipo informático.
  • Seite 320 ¿Qué unidades USB-C pueden usarse con el modelo HyperDeck Studio HD Plus? Recomendamos las siguientes para grabar en resolución 2160p a una frecuencia máxima de 30 f/s. Marca Modelo Capacidad Angelbird SSD2GO PKT MK2 512GB Angelbird SSD2GO PKT MK2 DelKinDevices...
  • Seite 321 Formatear soportes de almacenamiento Preparación de soportes en equipos informáticos Preparación de soportes en Mac La aplicación Utilidad de Discos, incluida en el sistema operativo macOS, permite formatear unidades de almacenamiento mediante el sistema HFS+ o exFAT. Asegúrese de respaldar cualquier información importante que contenga el soporte de grabación, puesto que, al iniciar este procedimiento, se borrarán todos los datos.
  • Seite 322 Elija la opción exFAT para el sistema de archivos y 128 kilobytes para el tamaño de la unidad de asignación. Ingrese un nombre para la unidad, marque la casilla Formato rápido y haga clic en Iniciar. Se dará formato a la unidad rápidamente y quedará lista para usarla en el dispositivo. Uso del grabador como una cámara web Al conectar el dispositivo a un equipo informático mediante el puerto USB, este lo detectará...
  • Seite 323 Seleccione la opción Video Capture Device. +, en el recuadro Sources. Asigne un nombre a la fuente y haga clic en OK. En el menú de dispositivos, seleccione HyperDeck Studio y haga clic en OK. A continuación, acceda a su cuenta de YouTube.
  • Seite 324 Como resultado, YouTube genera un nombre y En Open Broadcaster, haga clic en el menú OBS/ una clave para la transmisión que vincula Open Preferences en la barra superior para acceder a las preferencias del programa. Seleccione la Broadcaster con su cuenta de YouTube. opción Stream.
  • Seite 325: Configuración Del Dispositivo

    Haga clic en el ícono circular o en la imagen del dispositivo para acceder a la ventana de configuración. Ventana de configuración Si cuenta con más de una unidad HyperDeck Studio, recomendamos cambiarle el nombre a fin de idetificarlas fácilmente. Es posible realizar esto mediante la opción Name. Configuración del dispositivo...
  • Seite 326 Protocolo Para emplear el modelo HyperDeck Studio junto con mezcladores ATEM, o a fin de controlarlo remotamente a través del protocolo de Ethernet para HyperDeck, la unidad debe estar conectada a la misma red que el resto de los equipos, bien usando el protocolo DHCP o añadiendo de forma manual una dirección IP fija.
  • Seite 327 Una vez que la instalación se ha completado, conecte el grabador al equipo informático mediante el puerto USB o Ethernet situado en la parte trasera. Ejecute el programa HyperDeck Setup y siga las instrucciones que aparecen en la pantalla para actualizar el sistema operativo interno. Si no aparece ningún aviso, el procedimiento ha finalizado con éxito.
  • Seite 328 El estante para bastidores Teranex Mini Rack Shelf mide 1 U y permite instalar los modelos Blackmagic HyperDeck Studio HD Mini y HyperDeck Studio HD Plus en un bastidor o una caja de transporte. Gracias al tamaño compacto de la versión HyperDeck Studio HD Mini, es posible colocarlo junto a otros productos de dimensiones similares, tales como el MultiView 4, el Blackmagic Web Presenter o los conversores Teranex Mini.
  • Seite 329 Dado que los modelos de la línea HyperDeck son compatibles con dicho protocolo, pueden integrarse a cualquier sistema de edición, automatización o control remoto, así como otras soluciones diseñadas por el usuario.
  • Seite 330 Active la función de control remoto presionando el botón REM en el panel frontal del dispositivo, o desde el menú en pantalla, para activar el protocolo de control RS-422. Todos los modelos HyperDeck pueden ser controlados remotamente a través del puerto RS-422, situado en el panel trasero de los dispositivos.
  • Seite 331 Command Reply No Remote Notes Treated as N=1; 0x22 0x22 VarRev2 Acknowledge Disabled Same as VarRev1 0x21 0x23 ShuttleRev1 Acknowledge Disabled Treated as N=1; 0x22 0x23 ShuttleRev2 Acknowledge Disabled Same as ShuttleRev1 0x20 0x30 Preroll Acknowledge Disabled 0x24 0x31 CueData Acknowledge Disabled 0x20...
  • Seite 332 Command Reply No Remote Notes 6 - Sense Request 0x61 0x0A TimeCodeGenSense — — 0x61 0x0C CurrentTimeSense — — 0x60 0x10 InDataSense InData Enabled 0x60 0x11 OutDataSense OutData Enabled 0x60 0x12 AInDataSense AInData Enabled 0x60 0x13 AOutDataSense AOutData Enabled 0x61 0x20 StatusSense StatusData...
  • Seite 333 Command Reply No Remote Notes A - Advanced Media Protocol 8-bit signed number of 0xA1 0x01 AutoSkip Acknowledge Disabled clips to skip from current clip when x = 0 single clip request when x = 1, # 0xAX 0x15 ListNextID IDListing Enabled clips can be specified in...
  • Seite 334 Transferencia de archivos a través de una red El modelo HyperDeck permite transferir archivos mediante el protocolo FTP. De este modo, es posible copiarlos directamente de un equipo informático al dispositivo, a través de una red local de gran velocidad. Por ejemplo, con el propósito de crear carteles digitales, es posible copiar archivos nuevos de manera remota a otra unidad HyperDeck situada en una ubicación distinta.
  • Seite 335: Transferencia De Archivos

    «servidor» o «host». Compruebe que la casilla Anonymous Login esté marcada, si el programa incluye esta opción. Al conectar una unidad HyperDeck, no es necesario introducir un nombre de usuario ni una clave. Basta con ingresar la dirección IP del dispositivo en el cliente TCP y marcar la casilla Anonymous login, si dicha opción está...
  • Seite 336 Asimismo, es posible iniciar la grabación en un HyperDeck desde un mezclador, lo que permite crear una copia de archivo de la transmisión en directo, así como capturar planos complementarios durante una producción en directo que serán ajustados posteriormente.
  • Seite 337 Windows Para abrir archivos ProRes o QuickTime grabados con un dispositivo HyperDeck, es necesario instalar QuickTime en el equipo informático. Cualquier programa de video para Windows compatible con estos formatos permite ver las secuencias grabadas con el dispositivo. La versión de QuickTime para Windows puede descargarse en forma gratuita del sitio http://www.apple.com/quicktime/download/.
  • Seite 338: Información Para Desarrolladores

    Este protocolo está basado en texto y se accede al mismo mediante el puerto TCP 9993 en los modelos HyperDeck Studio con conexión Ethernet. El protocolo de control integrado para dispositivos de video facilita la integración de nuestros productos con otros dispositivos. Nuestra filosofía en Blackmagic Design es mantener los protocolos abiertos para facilitar la colaboración...
  • Seite 339 Command Command Description spill current recording to specified slot record: spill: slot id: {n} use current id to spill to same slot stop stop playback or recording clips count query number of clips on timeline clips get query all timeline clips clips get: clip id: {n} query a timeline clip info clips get: clip id: {n} count: {m}...
  • Seite 340 Command Command Description notify: timeline position: {true/false} set playback timeline position notifications notify: playrange: {true/false} set playrange notifications notify: cache: {true/false} set cache notifications notify: dynamic range: {true/false} set dynamic range settings notifications notify: slate: {true/false} set digital slate notifications goto: clip id: {start/end} goto first clip or last clip goto: clip id: {n}...
  • Seite 341 2 video format: NTSC Using XML While you can use the Terminal to talk to HyperDeck, if you are writing software, you can use XML to confirm the existence of a specific command based on the firmware of the HyperDeck you are communicating with.
  • Seite 342 The HyperDeck Ethernet server listens on TCP port 9993. Basic syntax The HyperDeck protocol is a line oriented text protocol. Lines from the server will be separated by an ascii CR LF sequence. Messages from the client may be separated by LF or CR LF.
  • Seite 343 Failure response codes Failure responses to commands are indicated with response codes in the range of 100 to 199: 100 syntax error 101 unsupported parameter 102 invalid value 103 unsupported 104 disk full 105 no disk 106 disk error 107 timeline empty 108 internal error 109 out of range 110 no input...
  • Seite 344 Timecode syntax Timecodes are expressed as non-drop-frame timecode in the format: HH:MM:SS:FF Handling of deck "remote" state The “remote” command may be used to enable or disable the remote control of the deck. Any attempt to change the deck state over ethernet while remote access is disabled will generate an error: 111 remote control disabled↵...
  • Seite 345 Switching to preview mode The "preview" command instructs the deck to switch between preview mode and output mode: preview: enable: {"true", "false"}↵ Playback will be stopped when the deck is switched to preview mode. Capturing will be stopped when the deck is switched to output mode.
  • Seite 346 Changing timeline position The "goto" command instructs the deck to switch to playback mode and change its position within the timeline. To go to the start of a specific clip: goto: clip id: {Clip ID}↵ To move forward/back {count} clips from the current clip on the current timeline: goto: clip id: +/-{count}↵...
  • Seite 347 Controlling asynchronous notifications The “notify” command may be used to enable or disable asynchronous notifications from the server. To enable or disable transport notifications: notify: transport: {“true”, “false”}↵ To enable or disable slot notifications: notify: slot: {“true”, “false”}↵ To enable or disable remote notifications: notify: remote: {“true”, “false”}↵...
  • Seite 348 Retrieving slot information The "slot info" command returns information about a slot. Without parameters, the command returns information for the currently selected slot: slot info↵ If a slot id is specified, that slot will be queried: slot info: slot id: {Slot ID}↵ The server will respond with slot specific information: 202 slot info:↵...
  • Seite 349 Retrieving timeline information The "clips get" command returns information for each available clip on the current timeline. Without parameters, the command returns information for all clips on timeline: clips get↵ The server responds with a list of clip IDs, names and timecodes: 205 clips info:↵...
  • Seite 350 1080i50, 1080i5994, 1080i60 HyperDeck Studio Pro and Plus models support these 4k formats: 4Kp23976, 4Kp24, 4Kp25, 4Kp2997, 4Kp30 HyperDeck Studio 4K Pro adds support for the following 4k formats: 4Kp50, 4Kp5994, 4Kp60 Video format support may vary between models and software releases.
  • Seite 351 Querying and updating configuration information The "configuration" command may be used to query the current configuration of the deck: configuration↵ The server returns the configuration of the deck: 211 configuration:↵ audio input: {“embedded”, “XLR”, “RCA”}↵ audio mapping: {n}↵ video input: {“SDI”, “HDMI”, “component”, “composite”}↵ file format: {format}↵...
  • Seite 352 Clearing the current timeline The "clips clear" command instructs the deck to empty the current timeline: clips clear↵ The server responds with 200 ok↵ Adding a clip to the current timeline The "clips add:" command instructs the deck to add a clip to the current timeline: clips add: name: {"clip name"}↵...
  • Seite 353: Cómo Obtener Ayuda

    ‚ En macOS, ejecute el programa desde la carpeta de aplicaciones. Seleccione el menú About HyperDeck Setup en la barra superior de la ventana para ver el número de versión. ‚ En Windows, ejecute el programa Blackmagic HyperDeck Setup haciendo clic en el ícono situado en el menú...
  • Seite 354 Normativas Tratamiento de residuos de equipos eléctricos y electrónicos en la Unión Europea: Este símbolo en el producto indica que el dispositivo no debe desecharse con otros residuos domésticos. Por lo tanto, es su responsabilidad entregarlo a un centro de recolección para su posterior reciclado.
  • Seite 355: Seguridad

    Seguridad Para evitar el riesgo de descarga eléctrica, este equipo debe enchufarse a una toma de corriente que disponga de un cable a tierra. Ante cualquier duda, póngase en contacto con un electricista capacitado. A fin de reducir el riesgo de descarga eléctrica, evite exponer el equipo a goteras o salpicaduras. Este equipo puede utilizarse en climas tropicales, a una temperatura ambiente máxima de 40 ºC.
  • Seite 356 Garantía 12 meses de garantía limitada Blackmagic Design ofrece una garantía de 12 meses a partir de la fecha de compra de este producto por defectos relativos a los materiales o la fabricación. Si el producto resulta defectuoso durante el período de validez de la garantía, Blackmagic Design podrá...
  • Seite 357 2021 年 月 安装操作手册 HyperDeck 硬盘录机系列 硬盘录机系列 HyperDeck硬盘录机系列...
  • Seite 358 如今, 我们非常高兴地向您呈现新一系列 硬盘录机, 这些型号可以在 卡、 , Ultra HD Blackmagic MultiDock 10G 以及 硬盘上记录 和 视频。 您甚至可以将其连接到 , 在外部硬盘上记录或播放文件! HyperDeck Studio Plus 及 型号搭载了熟悉的广播式录机控制, 设有快速、 慢速和极速搜索 片段的旋钮操控。 搜索旋钮采用离合机制质感非凡, 因此搜索片段时您的目光无需离开监视器就 HyperDeck 可以感受到其播放效果。 其前面板还设有耳机插孔和扬声器, 方便您从 直接检查音 频, 此外还包含更多功能! HyperDeck 我们希望 硬盘录机可以供您多年使用, 它定能为您的制作提供优质服务! blackmagicdesign 请登陆公司网站...
  • Seite 359 目录 HyperDeck 硬盘录机系列简介 在计算机上准备存储介质 开始使用 将 作为网络摄像头使用 HyperDeck 连接电源 设置网络摄像头信号源 连接视频和音频 设置 Open Broadcaster 检查音频 Blackmagic HyperDeck Setup 连接媒体 使用 HyperDeck Setup 记录视频 选项卡 在多个存储介质上记录 更新内部软件 播放 Teranex Mini Rack Shelf 使用 HyperDeck 播放视频 控制 使用搜索旋钮 通过网络传输文件 使用前面板 连接到 切换台 ATEM 存储介质插槽提示...
  • Seite 360 HyperDeck 硬盘录机系列简介 Blackmagic HyperDeck 硬盘录机是 和 硬盘录机系列的一部分, 其设计适合您自己的制作流 HyperDeck Studio HD Pro HyperDeck Studio 4K Pro 程。 和 型号采用 机架设计, 足够在 卡和 5mm SSD 上记录并播放文件。 HyperDeck Studio HD Mini HyperDeck Studio HD Plus 和 型号是更小型的录机, 可灵活地摆放在工 作台上或选购 Teranex Mini Rack Shelf 安装于机架内。...
  • Seite 361 如果您的 型号设有额外 电源输入, 可连接另一个电源以备冗余用途。 例如, 将第二个输入 连接至不间断电源, 或 , 那么当主电源中断时, 它可立即启用。 12V DC 所有型号还设有一个 输入, 可让连接外部 伏电池获得电源。 HyperDeck Studio HD Mini 还可以通过 插座连接电源。 如果您的电源供应设有锁定环, 可通过拧紧连 HyperDeck Studio HD Mini 接至设备的接口来确保与 的连接。 该步骤可以将线缆锁紧, 防止意外拔开。 一旦连接电源后, 显示屏会弹出提示让您选择语言。 通过搜索旋钮, 滚动到您想要使用的语言上, 然后按闪烁的“ ”按钮。 此步骤将带您回到屏幕主页面。 更多关于主页面和...
  • Seite 362 HDMI 信号中, 因此不用再考虑连接音频的问题。 观察 屏上视频图像旁的音频表, 可查看音频电平。 检查音频 HyperDeck 如果您的 的前面板上设有扬声器和耳机插孔, 那么可以通过内置扬声器或连接耳机来快速检查 音频。 要听取音频, 您可以长按扬声器按钮同时旋转搜索旋钮来调整音量。 主页面上将出现音量提示。 按两次扬声器按钮可启用扬声器。 再按两次该按钮可禁用该功能。 连接媒体 HyperDeck Studio 所有 型号拆封后便可立即开始记录, 无需进行任何配置或设置。 您需要准备的只有 一个经过格式化的 硬盘或 卡。 您可以通过 屏幕中的菜单设置, 轻松地对存储介质进行格式化。 您也可使用计算机进行格式化。 更多 关于如何格式化存储介质的信息, 请参考本手册中“格式化存储介质”部分的内容。 此外, 还有关于适用于视 频记录的存储介质以及推荐使用的影片和存储卡列表等内容。 插入 步骤如下: HyperDeck 手持一块...
  • Seite 363 , 抓住其外部边缘, 轻轻拉出设备。 您会感觉到 从插槽中断开连接。 手持 硬盘, 将引脚接触点朝下并对准 HyperDeck Studio 的硬盘插槽, 将 轻轻推入硬盘插槽内, 直至完全插入到位。 插入 卡步骤如下: 手持 卡, 将卡的金色接触点面向 HyperDeck Studio 的 屏幕, 并对准 卡槽。 下面, 将 存储卡轻轻推入卡槽, 直至您认为插入到位。 HyperDeck Studio 您的 将验证插入的 卡。 卡槽上方的绿灯将会亮起。 当提示灯熄灭, STOP 按钮提示灯亮起时, 表示 HyperDeck Studio 已准备就绪并可以开始记录。...
  • Seite 364 按钮会亮起, 并且 主页面上会出现记录图标。 当连接了 时, 动态存储介质的指示灯会亮起红色。 当 HyperDeck Studio 记录时, 屏上的存储介质提示将在所使用卡槽和媒体所剩余记录时间这两者间交替显示 PLAY 要结束记录, 请按停止按钮。 按下“ ” 播放按钮可立即开始片段播放。 提示  如果您想要更改所使用的编解码器, 可通过 Blackmagic HyperDeck Setup 实用程序更 改编解码设置。 更多信息请参考本手册中“ Blackmagic HyperDeck 设置”部分的内容。 在多个存储介质上记录 HyperDeck Studio LCD 当 卡或 的剩余记录时间少于 分钟时, 屏幕上的时间码计数器会变红, 停止按钮也会缓慢闪烁。 这意味着设备并没有另一块硬盘可供记录。 遇到该类情况时, 只需插入拥有足够记录空间的硬盘即可继续...
  • Seite 365 HyperDeck Studio 当 连接一个以上的存储介质时, 记录将从一个硬盘跳至下一个硬盘, 并且主页面的 右上角会显示相应信息。 记录时更换硬盘 如果您在任何时候想要更改用于记录的硬盘, 并且已准备了第二块具有足够空间的硬盘, 那么只需长按记 录按钮就可将记录活动从当前硬盘转移到下一块硬盘上。 当您想要取出 HyperDeck 正在记录的硬盘并不 间断记录工作时, 这一功能非常有用。 当您从事现场活动制作时, 可能会需要将一段重要的录像用于另一 地点, 但同时又不想错过任何内容或中断记录, 此时就可以使用这一功能。 如果记录过程中记录按钮开始闪烁, 这可能是因为存储介质出现问题而导致了丢帧。 当使用较慢的存储介 Ultra HD ProRes Proxy 2160p30 质记录 文件时可能会发生这种情况, 例如, 使用比 更高数据速率记录 ProRes HQ 时, 卡或 需要是最快的那种。 更多测试批准存储介质列表的信息, 请阅读本手册中...
  • Seite 366 提示  HyperDeck 要在 上播放视频文件, 需要设置相匹配的编解码。 您可以使用 屏幕菜单 来操作。 详情请参考“使用 菜单”和“设置”部分的内容。 循环播放 如果您想要继续不断地播放, 可以将 HyperDeck 设为循环模式, 只要在播放时再次按“ PLAY ”按钮即可。 当启用循环播放后, 可以在 上看到循环图标。 一共有两种循环模式。 循环片段 循环播放当前片段。 循环所有片段 循环播放存储介质上所有记录片段。 动态 播放时, 硬盘槽外围会亮起绿色环形动态灯, 提示播放速度和方向。 提示  如果使用 记录的 HyperDeck 上的播放按钮闪烁, 这表示硬盘读写速度不够快, 播放 跟不上速度。 我们建议您改成 等更高压缩的记录格式或使用所推荐的更快速...
  • Seite 367 搜索旋钮模式包括慢速搜索、 快速搜索和极速搜索三种。 慢速 通过片段逐帧向前或向后播放, 从而实现精准控制。 快速 以更快的速率向前或向后播放。 根据您转动旋钮的情况来决定播放。 极速 比上两种更快的播放模式, 取决于您转动旋钮的情况。 当搜索某个特定画面, 需要快速在一段很长的片段中移动时, 这一模式很有帮助。 更大的型号还设有专门的搜索模式按钮, 还配有内置离合机制的搜索旋钮在使用时为您提供了具有触感 的反馈。 这让您可以通过手感在片段里搜索, 同时还可以在电视机或监视器上观看。 按下专设的“ ”、 “ ”和“ ”按钮来选择慢速、 快速和极速搜索模式 PLAY STOP 提示  要回到正常播放, 按“ ”或“ ”按钮。 播放...
  • Seite 368 使用前面板 HyperDeck 当使用 记录或播放视频时, 您所需的任何信息都会通过存储介质插槽的 指示灯, 以及内 置 屏幕显示出来。 HyperDeck   Studio 主页面 剩余时间和存储介质提示–记录时, 该图标会一直在硬盘剩余时间和当前 所使用硬盘这两种提示间切换。 播放 时, 将显示正在使用的存储介质图标。 格式提示–显示了输入或播放文件 的格式。 在有些 HyperDeck Studio 型号上按下“ INPUT ”按钮时, 它还会 提示相应的输入信号源, 并且会在您 使用前面板按钮和搜索旋钮调整扬 声器和耳机音量时显示当前音量。 状态提示–显示当前录机状 态, 包括当前播放模式。 音频表–显示了播放时信 号源或文件的音频电平。 存储介质插槽提示 HyperDeck 当您开启...
  • Seite 369 使用 菜单 MENU 按下前面板上的“ ” (菜单) 按钮, 打开菜单设置。 SKIP 转动搜索旋钮或按下“ ”按钮可在菜单选项间导航, 按“ ”选择子菜单。 转动搜索旋钮在菜单设置间移动 菜单条目选中后, 按“ ”按钮。 使用搜索旋钮或向前和向后跳转按钮调整设置, 按下“ ”按钮确认设置。 按“ MENU ”退出选项并返回主页面。 使用前面板...
  • Seite 370 信号源。 您还可以通过前面板上的“ INPUT ”按钮更改您的输入源。 编解码 所有 HyperDeck Studio 型号都可使用 、 Apple ProRes 和 DNxID 编解码记录压缩视频。 当记录 媒体时, HyperDeck Studio 4K Pro 型号还可以使用 和 DNxHR 编解码。 触发记录 共有两种触发记录模式, “视频开始/停止”和“时间码运行”。 URSA Mini 等有些摄影机, 通过 发送信号来开始和停止在外接录机上的记录。 当在摄影机上按记录 HyperDeck 按钮时, 点按“视频开始/停止”将触发 开始或停止记录。 使用“时间码运行”选项, 设备通过输入接口收到有效时间码信号时触发开始记录。 当信号停止时, 记录也...
  • Seite 371 HyperDeck Studio 设有一项独特的功能, 可以辅助 记录。 该功能可以将这一过程完全反过来, 将视 HyperDeck 频输入和同步输入信号进行再同步。 这意味着您可以将非同步信号连接到 , 设备会将这一视 频输入信号和视频同步信号进行同步, 然后开始记录。 非同步信号源可以来自计算机、 消费级摄像机或者任何无法连接同步信号的视频设备。 它可以是来自另一 个演播室或外部播出机构的视频输入信号。 非同步信号源会导致 记录出现问题, 因为所有记录上的时 间码都需要全程精准匹配。 记录时, 非同步信号的运行会快于或慢于其他信号源, 并且很快就会和时间码 失去同步。 一旦信号源的时间码不一致, 多机位剪辑就会变得非常棘手。 开启输入再同步功能后, HyperDeck 将会对视频输入进行分析, 并且会在信号较慢时重复一帧, 或者在 信号较快时移除一帧。 这一过程叫做“再同步”, 而设备对于输入信号的处理方式叫做“帧再同步”。 它表示 记录到所有录机上的片段时间码都会在相同的时间码显示相同的画面内容, 从而为多机位剪辑提供便利。 这样处理的缺点是, 记录前输入上会添加或移除一些帧。 因此, 建议您平时将这一功能保持在关闭状态,...
  • Seite 372 启用纯画面将移除所有状态信息, 在连接到 后面板监看输出上的屏幕上只显示图像。 更多关于监看输出显示的信息, 包括哪些信息显示等内容, 参考本手册后面关于监看输出部分的内容。   HyperDeck Studio 将 作为现场录机时, 显示 非常实用。 它们能告诉设备向显示器输出什么色彩和亮 Film 度。 当您在摄影机上使用“ ”动态范围, 通常会呈现出低饱和度的平淡画面, 此时该功能就十分实用。 通过应用显示 , 您可以对视频调色后的画面有个大致的把握。 Blackmagic HyperDeck Setup 通过 软件选中显示 可应用到 监看输出上。 启用或禁用   : MENU 按“ ”按钮, 使用搜索旋钮找到“监看”菜单。 按“ ”按钮。 3D LUT 转动搜索旋钮,...
  • Seite 373 音频菜单 录音通道 HyperDeck Studio 可一次记录多达 声道的 音频。 要选择记录通道的数量, 请扩展录音频通道列 表, 选择 、 、 或 声道。 如果编解码被设为 或 , 那么您可以选择 声道 音频, 从而直 接将记录内容上传到 YouTube 。 此设置还可以选择通过监看输出连接所显示的声道数量。 监看通道 当记录两条以上音频通道时, 可以在前面板 上选择监看哪个通道。 该操作可通过监看通道选项完成。 对 于带有前面板扬声器的 HyperDeck Studio 型号, 该设置还可以设定扬声器和耳机接口播放哪个音频通道。 音频表类型 其内置 显示了嵌入式音频声道音频表。 您可选择显示...
  • Seite 374 存储菜单 格式化存储介质 EXT DISK Windows 通过“ ”接口连接的 卡、 及存储介质可直接在设备上或通过 或 计算机格式化。 为 HyperDeck   Studio 准备存储介质: 使用搜索旋钮和“ ”按钮, 选择“格式化存储介质”。 从列表中选择要格式化的存储介质, 并按“ ”按钮。 选定格式后, 按“ ”按钮。 随后会出现确认窗口, 显示即将被格式化的存储介质以及选定的格式化选项, 选择“格式化”。 格式化完毕后会出现一个提示窗口, 选择“确定”。 Mac OS X +也被称为 扩展格式, 因为它支持“日志功能”, 所以被广为推荐。 一旦发生存储介质损坏的 情况, 具有日志功能的存储介质更易恢复数据。...
  • Seite 375 名称 HyperDeck Studio Blackmagic 当网络上出现超过一台以上的 时, 您可以分别对其命名。 该操作可通过 HyperDeck Setup Blackmagic HyperDeck Ethernet Protocol 或 终端程序操作完成。 语言 HyperDeck Studio 支持 种语言界面, 包括英语、 中文、 日语、 韩语、 西班牙语、 德语、 法语、 俄语、 意大 利语、 葡萄牙语、 土耳其语、 乌克兰语以及波兰语。 选择语言步骤如下: 当设置菜单高光显示时, 按 。 向下滚动搜索旋钮选择语言并按 。...
  • Seite 376 记录多台摄影机的 单独文件, 然后要将其在 中作为多机位时间 线剪辑时, 该设置就非常有用。 每台单独的摄影机的识别性字符都将显示在文件的元数据中, 从而 DaVinci Resolve 在使用同步媒体夹 功能时可以轻松识别每个角度。 通过 或者 来指派摄影机 默认格式 有时, HyperDeck Studio 无法判断您想要使用什么视频格式。 这一设置可以让 HyperDeck 明确大多数 情况下您想要使用的视频格式。 一个很好的例子就是, 如果您开启了 HyperDeck Studio , 设备上并未连接视频输入, 此时您插入一块硬 HyperDeck 盘, 硬盘中含有两种不同视频格式的文件, 那么 会播放哪种视频格式? 默认视频格式功能会 提示设备您所偏好的视频格式, 让设备切换到这一格式来播放这些文件。 HyperDeck 另外,...
  • Seite 377 网络设置 协议 Blackmagic HyperDeck 出厂设置为 DHCP , 因此连接后, 您的网服务器会自动指派一个 地址, 无需 调整其他网络设置。 如果需要手动设置地址, 可通过静态 连接。 选中“协议”后, 按下闪烁“ ”按钮, 滚动到菜单中的“静态 ”然后按“ ”。 地址、 子网掩码及网关 选中静态 后, 您可以手动键入网络信息。 要更改 地址: HyperDeck 通过搜索旋钮将“ 地址”高光选中, 在 前面板按下闪烁的“ ”按钮。 通过搜索旋钮, 调整 地址、 转动搜索旋钮可调整 地址, 在调整下一个值前按“...
  • Seite 378 时间码设置 输入 记录时共有五个时间码输入选项。 视频输入 选择“视频输入 ”将从带有 SMPTE RP 188 元数据的 和 HDMI 信号源提取其嵌入式时间 码。 该操作将保存 或 HDMI 信号源和 HyperDeck Studio 所记录文件之间的同步。 外部 当使用后面板所连接的时间码时, 点击此选项。 内部 使用此选项可记录通过内置时间码发生器所产生的当日时间码。 从上个片段生成 为时间码输入选择“从上个片段生成”选项时, 每个文件将从上一个片段尾帧的下一帧开始。 例如, 如果首个片段以 结束, 那么下一个片段时间码将从 开始。 预设 如果想要手动设置时间码, 选择预设选项。 所记录片段将从本手册后面介绍的预设选项 所设置的时间码开始。 丢帧...
  • Seite 379 如果您想要与 或 HDMI 信号源中嵌入的同步信号进行同步, 请选择“输入 ”。 举例来说, 您的模 拟录机可能直接连有同步锁相信号源。 外部 如果 Blackmagic Sync Generator 等外部同步设备连接至设备后面板上的“ REF IN ”接口, 请选择“外部”。 外部同步提示–当 HyperDeck Studio 成功锁定到外部同 步信号源时, 其内置 屏 幕上会显示“ ”字样。 同步时间校准 如果您从模拟磁带录机进行存档, 需要帧同步, 那么可以调整同步时间校准。 这一同步调整基于采样, 因 此您可以获得精确到采样级别的准确同步调整。 调整时间校准设置: 在设置菜单中, 使用搜索旋钮将“时间同步扫描线”高光, 并按下闪烁的“ ”按钮。...
  • Seite 380 2105061438 0001 时 HyperDeck 2105061438 0001 分 HyperDeck 2105061438 0001 片段编号 HyperDeck 2105061438 0001 格式覆盖 HyperDeck Studio 4K Pro 会自动检测 视频信号或文件中的嵌入式 元数据并通过 HDMI 输出将 其显示。 如果该信号或文件标签不正确, 或者您的显示不兼容 , 那么可以覆盖 格式。 要完成以上操作, 将“ 格式覆盖”设置为某个 选项, 例如 2020 SDR 。 可用的 播放和记录设置有:...
  • Seite 381 设备上。 从主 HyperDeck 设备的远程输出接口连接到第二台设备的远程输入接口, 菊链连接多台设备, 然后继续操 作, 完成其他设备的 菊链连接。 所有其他设备都启用远程设置后, 主设备上的播放控制就可以控 制其他设备了 。 HyperDeck HyperDeck 例如, 当您按下主 上的 记录按钮时, 所有连接的其他 都将同时开始记录。 HyperDeck Studio HD Mini HyperDeck Pro Plus 需要注意的是, 不能作为控制器使用, 或 型号可以。 重置 恢复出厂设置 HyperDeck 在设置菜单中高光“恢复出厂设置”可将 恢复到出厂时的设置。 按下“ ”时, 您将看到出现...
  • Seite 382 HyperDeck Studio Mini HyperDeck Studio Mini 设有一个带锁定环的电源接口, 和 Plus 型号设有 接口用于 以防意外断开 时间码输入和输出 电源 HyperDeck HyperDeck Studio 4K Pro 所有 都设有 电源输入作为 主要电源供应。 设有 两个电源作为冗余方案。 输入可连接外部 伏电池电源, 还可以作为冗余电源使用。 请务必确 DC IN 保 电源符合本设备的“ ” ( 输入) 接口 下面标注的输入电压和电流要求。 以太网 您可以使用这一以太网端口直接连接网络, 实现快速...
  • Seite 383 HDMI HDMI 将 输出口连接到 电视机和监视器。 HyperDeck 将自动检测 和 视频格式, 当信号标有正确元数据时适用。 您还可以通过设 HDR Flag 置菜单覆盖 。 更多内容, 请参阅本手册前面“设置”部分的内容。 HyperDeck Studio HD Mini 型号设有单个 3G SDI , 支持上至 1080p60 的信号。 HyperDeck Studio HD Plus 和 HyperDeck Studio HD Pro 型号设有 , 支持从...
  • Seite 384 频和信号格式、 帧率、 时间码、 文件名、 播放控制状态、 存储介质状态和音频电平等。 以下逐一介绍了显示信息。 编解码 通过 菜单显示了所选的编解码。 格式 播放模式下, 显示了当前片段分辨率和帧率。 如果在记录模式时, 将显示连接到当前所选信号源视频的分 辨率和帧率。 时间码 播放时显示您视频片段中呈现的时间码, 或者是当前通过视频或时间码输入所记录的。 您还可以在显示片 段时间码或时间线计数器之间进行选择。 信号源 HDMI 显示当前所选的 或 信号源。 如果显示“无信号”, 意味着未检测到信号。 名称 HyperDeck 显示了 硬盘录机名称。 更多关于如何更改摄影机名称的信息, 请参考本手册后面关 Blackmagic HyperDeck Setup 于“ ”部分的介绍。 使用监看输出...
  • Seite 385 状态 播放或记录片段时, 该提示将显示播放控制状态和当前所使用的控制信息。 具体包括: 提示了播放已设为“循环”所有共享当 HyperDeck 处于待机模式。 前所选视频格式的记录片段。 视频正在播放。 提示了播放设为循环单个片段。 视频正在记录。 提示了快速搜索模式已开启, 记录时该提示会亮起红色。 但位于待机中。 快进或倒回时显示。 HyperDeck 位于慢速搜索模式。 该数字提示了速度。 HyperDeck 位于极速搜索模式。 存储介质状态 这三个提示显示了 卡、 以及使用 硬盘的名称及状态, 不同 HyperDeck 型号信息也略有不同。 HyperDeck    Studio     Plus 所使用的外接存储盘 卡插槽 卡插槽 HyperDeck    Studio  ...
  • Seite 386 存储条 根据当前状态, 存储条图标有红白蓝三种颜色显示, 还将显示卡上所使用的空间。 蓝色硬盘图标代表正在使用的存储盘。 该硬盘将被用于播放和记录。 白色硬盘图标表示存储介质已连接, 但尚未被使用。 实心的白色图标表示 存储介质已满。 红色的图标表示记录中。 存储条下面的文字显示了剩余记录时间或者插槽状态。 剩余时间 当您的 卡或 硬盘有剩余空间时, 根据当前的源格式和已选的编解码及画质设置, 可用的 记录时长会以“时:分:秒”的格式显示。 如果剩余时间少于一小时, 就会显示分:秒。 插槽状态 如果插槽没有连接任何存储介质, 将显示“无存储卡”和“无存储盘”。 当 卡、 或 硬盘已满时, 该图标会显示“存储卡已满”或“存储盘已满”, 提示您需要替换 存储介质。 如果插入另一张 卡或 , 系统会自动开始在这张 或 上记录。 如果您连接 了外部存储盘, 当所有 卡和...
  • Seite 387 卡 Ultra HD 220MB 为获得高质量 记录, 我们建议使用高速 型 卡。 这些卡需要具备超过 的写入 Ultra HD 2160p60 速度, 可记录高达 的影像。 但是, 如果您以低比特率记录更高压缩格式, 那么或许能 使用更低速的存储卡。 通常来讲, 卡的速度越快越好。 请定期关注本操作手册是否已有更新版本, 以便获得最新信息。 请到 Blackmagic Design 网站 blackmagicdesign support 进行下载。 HyperDeck Studio 应使用哪些 卡? 建议您使用以下几款 卡记录最高 60fps 的...
  • Seite 388 HyperDeck Studio 应使用哪些 卡? 建议您使用以下几款 卡记录最高 30fps 的 2160p 影像: 品牌 型号 容量 Angelbird AV Pro MK2 V90 SDXC 64GB Angelbird AV Pro MK2 V90 SDXC 128GB Angelbird AV Pro MK2 V90 SDXC 256GB ProGrade Digital SDXC UHS-II V90 300R...
  • Seite 389 如果您的摄制工作涉及到数据速率较高的视频, 请谨慎挑选您使用的 硬盘。 因为有些 硬盘的录 入速度可比其生产商所描述的速度低 %之多, 因此即使硬盘规格标明该 硬盘的速度足以处理视 频文件, 实际上并无法胜任实时视频录制。 隐藏数据压缩大多会影响记录, 而这类硬盘却依然可以用于实时播放。 我们通过测试后发现型号更新、 尺寸更大的 和容量更大的 硬盘通常具备更快的读写速度。 推荐 使用的 将在下文给出。 HyperDeck Studio 应使用哪些 ? 建议您使用以下几款 记录最高 60fps 的 2160p 影像: 品牌 型号 容量 Samsung 860 PRO 512GB Samsung 860 PRO...
  • Seite 390 外接硬盘 HyperDeck 所有 型号都可以直接记录到 硬盘上。 这类存储盘速度快, 容量大, 可进行长时间视频 记录。 您可以将硬盘连接到计算机, 直接在硬盘上进行剪辑! 如要获得更大的存储空间, 可以连接 硬盘坞或外置硬盘。 如要连接 Blackmagic MultiDock 10G 或 硬盘, 用线缆将 设备连接到 HyperDeck 后方的“ EXT DISK ”端口。 HyperDeck Studio 应使用哪些 硬盘? 建议您使用以下几款 硬盘记录最高 60fps 的 2160p 影像: 品牌 型号 容量...
  • Seite 391 HyperDeck Studio Plus 应使用哪些 硬盘? 建议您使用以下几款 硬盘记录最高 30fps 的 2160p 影像: 品牌 型号 容量 Angelbird SSD2GO PKT MK2 512GB Angelbird SSD2GO PKT MK2 DelKinDevices Juggler DelKinDevices Juggler LaCie Rugged SSD STHR2000800 LaCie Rugged SSD Pro STHZ1000800 Wise PTS-512 Portable SSD...
  • Seite 392 选择的信息。 CFast 卡可通过外部读卡器连接到您的计算机。 进入 “应用程序/实用工具”界面, 运行“磁盘工具”程序。 CFast 点击 或 卡图标, 再点击“抹掉”选项卡。 Mac OS exFAT 将格式设置为“ 扩展 (日志式) ”或“ ”。 输入新增分区的名字, 点击“抹掉”。 您的存储介质会迅速格式化, 以备 HyperDeck 使用。 在 Windows 计算机上格式化存储介质 Windows PC exFAT 使用 的格式化对话框可将硬盘格式化为 。 由于格式化后 硬盘或 卡内所有文 件都会被清除, 因此请务必在格式化前备份硬盘上的所有重要文件。 CFast 通过外接硬盘座或数据线将...
  • Seite 393 作为网络摄像头使用 HyperDeck Open 通过 连接计算机时, 您的 硬盘录机会被识别为网络摄像头。 这表示您可以使用 Broadcaster HyperDeck 等流媒体软件播出来自 的播放内容或记录影像。 设置网络摄像头信号源  HyperDeck 大部分情况下, 流媒体软件会自动将 设置为网络摄像头, 因此当您运行流媒体软件时, 就能立 即从 HyperDeck Studio 上看到图像。 如果您的软件没有自动选择 HyperDeck , 只要将软件设置为使用 HyperDeck 作为网络摄像头和麦克风即可。 以下举例说明如何在 Skype 上设定网络摄像头设置。 Skype 在 菜单栏中, 打开“音频和视频设置”。 HyperDeck HyperDeck 点击“摄像头”菜单, 从列表中选择“...
  • Seite 394 Open Broadcaster 设置   Open Broadcaster HyperDeck Studio YouTube Twitch Facebook Live 是一个开源程序, 是 与 、 、 等常 Open Broadcaster 用流媒体软件之间的流媒体平台。 会把视频压缩到流媒体程序易于管理的比特率。 Open Broadcaster YouTube Live HyperDeck 以下示例演示了如何设置 , 从而使用 流媒体程序直播来自 Studio 的网络摄像头输出内容。 打开 , 点击“ ”窗口中的加号 选择“ ”。 Open Broadcaster...
  • Seite 395 YouTube 会生成视频流密钥, 以便将 Open Broadcaster 回到 Open Broadcaster , 在菜单栏中点击“ 导向您的 YouTube 账户。 preferences ”打开偏好设置。 选择“ Stream ”。 将 HyperDeck 的视频流密钥粘贴到 Open Broadcaster 点击视频流密钥一侧的“复制”按钮。 复制将要粘贴到 的流媒体预览窗口中。 Open Broadcaster 的视频流密钥。 要把 Open Broadcaster 的播出链接与 YouTube 相连, 回到 YouTube Live , 您会看到背景中显示来自...
  • Seite 396 Blackmagic HyperDeck Setup     HyperDeck Setup 使用   Blackmagic HyperDeck Setup HyperDeck 实用程序可用于更改 的各项设置并更新其内部软件。 使用 HyperDeck   Setup : HyperDeck 将 通过 或以太网连接到您的计算机。 运行 HyperDeck Setup 。 您可在该实用程序的主页上为您的 HyperDeck 型号命名。 点击圆形的设置图标或 HyperDeck 图像打开设置页面。 设置选项卡 HyperDeck Studio Name 如果您拥有多台 , 建议为每台设备单独命名, 以便加以区分。 具体可通过“...
  • Seite 397 网络 协议 HyperDeck Studio ATEM HyperDeck Ethernet Protocol 如果要将 和 切换台结合使用, 或者通过 HyperDeck Studio HyperDeck Studio 以太网协议对 进行远程控制, 那么 就需要和其他使用 DHCP 的设备位于同一网络下, 或者您也可以手动添加固定的 地址。 HyperDeck Studio 硬盘录机默认使用 DHCP 设置。 动态主机配置协议也叫 DHCP , 这个网络服务器可以自动寻找您的 HyperDeck Studio 并为其指派一个 地 DHCP 址。 DHCP 方便易用,...
  • Seite 398 后, 将“ ”选项切换到“ ” (开启) 状态, 然后点击“ ”按钮保存。 所选的显示 会出现在监看输出显示器上。 现在, 您可以通过 菜单中的监看设置来开启或关闭 。 更新内部软件 这一实用程序可用来更新 HyperDeck 硬盘录机的内部软件并配置流媒体设置、 网络设置以及流媒体质量。 更新内部软件步骤如下: Blackmagic HyperDeck Setup 最新版 安装程序下载链接: blackmagicdesign support Blackmagic HyperDeck Setup 运行 安装程序, 根据屏幕提示完成安装。 安装完成后, 将 HyperDeck Studio 通过后面板的 或以太网端口连接到计算机。 运行...
  • Seite 399 Rack Shelf       Teranex Mini Rack Shelf Blackmagic HyperDeck Studio 是一款采用 设计的机架, 可用来将您 HD Mini HyperDeck Studio HD Plus Blackmagic HyperDeck 和 型号安装到广播级机架或航空箱中。 Studio HD Mini Teranex Mini Converter Blackmagic MultiView 4 设计非常小巧, 可与 系列、 以及 Blackmagic Web Presenter 等其他大小相近的...
  • Seite 400 的文件命令。 您可以使用 命令通过外部设备控制 HyperDeck , 比如为播放列表添加素材片段, 决定下一个片段的文件名, 循环 播放单个片段或时间线, 或者清空播放列表。 使用外部 控制器 所有当前 HyperDeck 型号均配备工业标准的索尼™兼容 录机控制端口, 该端口配有正确的引脚 HyperDeck Extreme Control 连接, 可直接连接到任何 远程控制, 比如 。 您可以使用预加工的 针线缆, 只要确保线缆两端均采用“引脚到引脚”的连线, 且两端相同号码的引脚连 接在一起即可。 如果您想要定制线缆, 请参考附带的引脚配线图。 HyperDeck Extreme Control HyperDeck 您可以从 来远程控制 , 这样就无需亲自过去按按钮。...
  • Seite 401 请确保通过 屏幕菜单将 HyperDeck 的远程功能设置为“开启”状态, 或通过前面板上的远程控制按钮来启用 录机控制 所有 HyperDeck 型号均可通过设备后面板的 端口支持远程控制 支持的 命令 Command Reply No Remote Notes 0 - System Control NTSC: 0xF0E0 0x00 0x11 DeviceTypeRequest PAL: 0xF1E0 Enabled 24P: 0xF2E0 1 - Slave Response 0x20 0x00 Stop Acknowledge Disabled...
  • Seite 402 Command Reply No Remote Notes Treated as N=1; 0x22 0x22 VarRev2 Acknowledge Disabled Same as VarRev1 0x21 0x23 ShuttleRev1 Acknowledge Disabled Treated as N=1; 0x22 0x23 ShuttleRev2 Acknowledge Disabled Same as ShuttleRev1 0x20 0x30 Preroll Acknowledge Disabled 0x24 0x31 CueData Acknowledge Disabled 0x20...
  • Seite 403 Command Reply No Remote Notes 6 - Sense Request 0x61 0x0A TimeCodeGenSense — — 0x61 0x0C CurrentTimeSense — — 0x60 0x10 InDataSense InData Enabled 0x60 0x11 OutDataSense OutData Enabled 0x60 0x12 AInDataSense AInData Enabled 0x60 0x13 AOutDataSense AOutData Enabled 0x61 0x20 StatusSense StatusData...
  • Seite 404 Command Reply No Remote Notes A - Advanced Media Protocol 8-bit signed number of 0xA1 0x01 AutoSkip Acknowledge Disabled clips to skip from current clip when x = 0 single clip request when x = 1, # 0xAX 0x15 ListNextID IDListing Enabled clips can be specified in...
  • Seite 405 通过网络传输文件  HyperDeck 硬盘录机支持通过文件传输协议, 即“ ”来传输文件。 这个强大功能可让您通过本地网 HyperDeck 络可提供的快速网络, 直接从电脑上复制文件到 。 例如, 您可以将新文件复制到位于异地的 HyperDeck 远程设备上, 用于数字标牌。 连接 HyperDeck Studio HyperDeck Studio HyperDeck Studio 由于计算机和 位于一个网络里, 您只需要一个 客户端和 的 地址即可。 在用来连接 HyperDeck 的计算机上下载安装 客户端。 我们推荐 Cyberduck 、 FileZilla 或...
  • Seite 406 HyperDeck Studio 通过以太网线将 连接到网络, 并记下它的 地址。 要查询 地址, 按“菜单” HyperDeck Studio 按钮, 旋转旋钮进入 “网络”设置即可。 屏幕下方会显示 的 地址。 HyperDeck Studio 的 地址可以在智能 面板的“网络”屏幕菜单中找到。 HyperDeck 将 的 地址输入 应用程序的连接对话框。 对话框的名字和位置会根据应用程 序的不同而发生变化, 但通常会标为“服务器”或“主机”。 如果您的 程序包含“匿名登录”复选 框, 请务必勾选该复选框。 连接 HyperDeck Studio 时, 不需要输入用户名或密码。 只需在...
  • Seite 407 硬盘录机 将 HyperDeck 连接到 ATEM 切换台: 将您的 HyperDeck 连接到和 ATEM 切换台相同的网络下, 并记下其 地址。 HyperDeck 的 地址可通过前面板和 屏幕菜单找到, 只要从主菜单进入 “设置”和“以太网” 菜单即可。 Blackmagic HyperDeck Setup 或者, 您可以通过 实用程序的“配置”选项卡从 或 上获 HyperDeck 取 的 地址。 HyperDeck HDMI ATEM HDMI 将 其中一个 或 输出接口连接到...
  • Seite 408 请确保通过 屏幕菜单将 HyperDeck 的远程功能设置为“开启”状态, 或通过控制 面板上的远程控制按钮来启用通过 切换台实现以太网控制的功能 ATEM 了解后期制作工作流程 如何获取录制的片段 要获取片段, 请将使用 卡槽、 外部读卡器或 硬盘座将 卡或 硬盘插入计算机。 您可直接将 或 卡上的文件拖放到本地硬盘上, 也可直接从 或 卡上进行操作。 您还可以使用 英寸 eSATA 转 适配线缆将 连接到计算机上, 但是此类连接方式的传输速度不足以直接在 上工 作, 因此仅可作为将视频文件从 转到笔记本电脑上的便携方案。 Mac OS 系统自带 QuickTime 。 使用...
  • Seite 409 开发人员信息 Blackmagic HyperDeck Ethernet Protocol       以太网协议 Blackmagic HyperDeck Ethernet Protocol HyperDeck Studio 是一项基于文本的协议, 自带以太网 9993 接口, 连接该型号的 端口 即可使用这一协议。 如果您是软件开发人员, 可使用这一协议将各类设 Blackmagic Design 备和我们的产品进行整合。 对广大用户公开各类协议, 并期待您的创意! Protocol Commands   Command Command Description help or ? Provides help text on all commands and parameters...
  • Seite 410 Command Command Description spill current recording to specified slot record: spill: slot id: {n} use current id to spill to same slot stop stop playback or recording clips count query number of clips on timeline clips get query all timeline clips clips get: clip id: {n} query a timeline clip info clips get: clip id: {n} count: {m}...
  • Seite 411 Command Command Description notify: timeline position: {true/false} set playback timeline position notifications notify: playrange: {true/false} set playrange notifications notify: cache: {true/false} set cache notifications notify: dynamic range: {true/false} set dynamic range settings notifications notify: slate: {true/false} set digital slate notifications goto: clip id: {start/end} goto first clip or last clip goto: clip id: {n}...
  • Seite 412 While you can use the Terminal to talk to HyperDeck if you are writing software you can use XML to confirm the existence of a specific command based on the firmware of the HyperDeck you are communicating with This helps your software user interface adjust to the capabilities of the specific HyperDeck model and software version 开发人员信息...
  • Seite 413 The HyperDeck Ethernet server listens on TCP port 9993. Basic syntax The HyperDeck protocol is a line oriented text protocol. Lines from the server will be separated by an ascii CR LF sequence. Messages from the client may be separated by LF or CR LF.
  • Seite 414 Failure response codes Failure responses to commands are indicated with response codes in the range of 100 to 199: 100 syntax error 101 unsupported parameter 102 invalid value 103 unsupported 104 disk full 105 no disk 106 disk error 107 timeline empty 108 internal error 109 out of range 110 no input...
  • Seite 415 Timecode syntax Timecodes are expressed as non-drop-frame timecode in the format: HH:MM:SS:FF Handling of deck "remote" state The “remote” command may be used to enable or disable the remote control of the deck. Any attempt to change the deck state over ethernet while remote access is disabled will generate an error: 111 remote control disabled↵...
  • Seite 416 Switching to preview mode The "preview" command instructs the deck to switch between preview mode and output mode: preview: enable: {"true", "false"}↵ Playback will be stopped when the deck is switched to preview mode. Capturing will be stopped when the deck is switched to output mode.
  • Seite 417 Changing timeline position The "goto" command instructs the deck to switch to playback mode and change its position within the timeline. To go to the start of a specific clip: goto: clip id: {Clip ID}↵ To move forward/back {count} clips from the current clip on the current timeline: goto: clip id: +/-{count}↵...
  • Seite 418 Controlling asynchronous notifications The “notify” command may be used to enable or disable asynchronous notifications from the server. To enable or disable transport notifications: notify: transport: {“true”, “false”}↵ To enable or disable slot notifications: notify: slot: {“true”, “false”}↵ To enable or disable remote notifications: notify: remote: {“true”, “false”}↵...
  • Seite 419 Retrieving slot information The "slot info" command returns information about a slot. Without parameters, the command returns information for the currently selected slot: slot info↵ If a slot id is specified, that slot will be queried: slot info: slot id: {Slot ID}↵ The server will respond with slot specific information: 202 slot info:↵...
  • Seite 420 Retrieving timeline information The "clips get" command returns information for each available clip on the current timeline. Without parameters, the command returns information for all clips on timeline: clips get↵ The server responds with a list of clip IDs, names and timecodes: 205 clips info:↵...
  • Seite 421 1080i50, 1080i5994, 1080i60 HyperDeck Studio Pro and Plus models support these 4k formats: 4Kp23976, 4Kp24, 4Kp25, 4Kp2997, 4Kp30 HyperDeck Studio 4K Pro adds support for the following 4k formats: 4Kp50, 4Kp5994, 4Kp60 Video format support may vary between models and software releases.
  • Seite 422 Querying and updating configuration information The "configuration" command may be used to query the current configuration of the deck: configuration↵ The server returns the configuration of the deck: 211 configuration:↵ audio input: {“embedded”, “XLR”, “RCA”}↵ audio mapping: {n}↵ video input: {“SDI”, “HDMI”, “component”, “composite”}↵ file format: {format}↵...
  • Seite 423 Clearing the current timeline The "clips clear" command instructs the deck to empty the current timeline: clips clear↵ The server responds with 200 ok↵ Adding a clip to the current timeline The "clips add:" command instructs the deck to add a clip to the current timeline: clips add: name: {"clip name"}↵...
  • Seite 424 Blackmagic HyperDeck 软件版本, 请打开 About Blackmagic HyperDeck Setup 窗口查看。 ‚ 在 Mac OS 系统下, 请到“应用程序”文件夹下打开 Blackmagic HyperDeck Setup 。 到程序菜 About Blackmagic HyperDeck Setup 单中点击“ ”即可查看版本号。 Windows Blackmagic HyperDeck Setup ‚ 在 系统下, 请到开始菜单或开始界面打开 实用程序。 Help About Blackmagic HyperDeck Setup 点击“...
  • Seite 425 监管声明 在欧盟范围内处置电子垃圾和电子设备的注意事项。 根据产品所附的提示标志, 本设备不得与其它废弃材料共同处置。 处置废弃设备时, 必须交给 指定收集点进行回收。 对废弃设备进行单独收集并回收能够节省自然资源, 且回收方式不会损 害环境和人体健康。 获取更多关于废弃设备回收点的信息, 请联系您所在城市的回收站, 或当时 购买设备的经销商。 本设备经过测试, 符合 规则的第 部分对 类数字设备的限制。 这些限制旨在为运行于商业 环境中的设备提供合理保护, 使其免受有害干扰的影响。 本设备可生成、 使用且辐射射频能量, 如 果未按照安装手册来安装和使用本设备, 则可能导致对无线电通信的有害干扰。 在住宅区运行本 产品可能会产生有害干扰, 在这种情况下将由用户自行承担消除干扰的费用。 必须满足以下条件后方可操作: 设备不会造成有害干扰。 设备必须能够承受任何干扰, 包括可能导致意外操作的干扰。 20210202002 20210202003 20201201003 20210301001 加拿大 认证声明 ISED 本设备符合加拿大...
  • Seite 426 安全信息 为避免触电, 设备必须连接在配有保护地线的电源插座。 如有疑问, 请与具有相关资质的电工进行确认。 为了降低触电风险, 请勿将设备放在会滴水或溅水的地方。 本产品适合在环境温度低于 的热带地区使用。 º 确保设备四周留有足够的空间, 不受阻碍。 安装在机架上时, 确保相邻设备不会影响通风。 设备内部没有操作人员可维护的零件。 维修服务请联系当地 Blackmagic Design 服务中心。 2000 请在海拔高度 米以下的地区使用。 加利福尼亚安全声明 该产品可能会让您暴露在塑料部件中所含的微量多溴化联苯等化学物质下, 此类物质已被加州政府认定 为可能导致癌症、 先天畸形或其他遗传危害的物质。 P65Warnings 详情请访问网址 。 授权维修人员警告 请确保电源从插座拔出后方可进行维护。 安全信息...
  • Seite 427 保。 负责为消费者提供缺陷产品的维修或更换服务是完整和排他性补救措施, BLACKMAGIC DESIGN 不论 或其供应商是否事先获悉发生间接、 特殊、 偶然或必然损坏等损坏的可 BLACKMAGIC DESIGN 能性。 若消费者对本设备进行非法使用, 概不负责。 对因使用本产品造成的损 BLACKMAGIC DESIGN 失, 概不负责。 本产品的操作风险由用户自行承担。 Copyright 2021 Blackmagic Design Blackmagic Design DeckLink HDLink Workgroup © 。 保留一切权利。 “ ”、 “ ”、 “ ”、 “ Videohub Multibridge Pro...
  • Seite 428 2021 년 월 설치 및 사용 설명서 HyperDeck 디스크 레코더 HyperDeck 디스크 레코더...
  • Seite 429 Blackmagic MultiDock 10G 를 연결하여 외장 하드 드라이브에 영상을 녹화하거나 녹화된 파일을 재생할 수도 있습니다. HyperDeck Studio Plus 및 Pro 모델은 친숙한 방송용 데크 컨트롤과 조그/셔틀/스크롤 재생이 가능한 검색 다이얼을 탑재했습니다. 검색 다이얼의 클러치 방식을 통해 재생 모드를 구별할 수 있기...
  • Seite 430 HyperDeck 시작하기 을 웹캠으로 사용하기 전원 연결하기 웹캠 소스 설정하기 비디오 및 오디오 연결하기 Open Broadcaster 설정하기 오디오 확인하기 Blackmagic HyperDeck Setup 미디어 연결하기 HyperDeck Setup 사용하기 비디오 녹화하기 페이지 여러 개의 미디어에 녹화하기 내부 소프트웨어 업데이트 재생 Teranex Mini Rack Shelf HyperDeck 으로...
  • Seite 431: Hyperdeck 디스크 레코더 소개

    HyperDeck 디스크 레코더 소개 Blackmagic HyperDeck 디스크 레코더는 및 디스크 레코더 제품군의 일부이며, 자신만의 HyperDeck Studio HD Pro HyperDeck Studio 4K 워크플로에 활용할 수 있도록 설계되었습니다. 와 5mm SSD 는 장비랙에 설치할 수 있는 크기로 제작되었으며, 카드 및 를 사용해 영상을...
  • Seite 432: 시작하기

    주전원에 문제 발생 시 바로 두 번째 전원으로 변경됩니다. 12V DC 모든 모델에는 입력도 포함되어 있어 외장 배터리 전원을 연결할 수 있습니다. HyperDeck Studio HD Mini 는 플러그팩을 통한 전원 연결도 가능합니다. 전원 장치에 잠금링이 HyperDeck Studio HD Mini 있는 경우, 잠금링을 완전히 조여 커넥터가...
  • Seite 433: 오디오 확인하기

    누른 상태에서 검색 다이얼을 돌려 볼륨을 조절하세요. 볼륨 정보 표시가 스피커 버튼을 두 번 누르면 스피커가 활성화된 상태로 유지됩니다. 버튼을 다시 두 번 누르면 비활성화됩니다. 미디어 연결하기 HyperDeck Studio 모든 모델은 설정 변경 없이 바로 녹화할 수 있는 상태로 출고됩니다. 포맷된 또는...
  • Seite 434 를 제거하려면, 끝부분을 잡고 부드럽게 꺼내세요. 그러면 가 슬롯에서 분리됩니다. HyperDeck Studio 의 연결핀이 아래쪽을 향하도록 잡고 의 드라이브 베이에 잘 맞춘 뒤, 제대로 장착될 때까지 를 드라이브 베이에 부드럽게 밀어 넣으세요. 카드 장착하기 HyperDeck 카드의 금색 접촉부가 의 화면 방향으로 향하도록 잡고 미디어 슬롯에 잘...
  • Seite 435: 비디오 녹화하기

    슬롯과 해당 미디어의 잔여 녹화 시간이 번갈아 표시됩니다. STOP PLAY 녹화를 마치려면 버튼을 누르세요. 버튼을 누르면 재생이 시작됩니다. Blackmagic HyperDeck Setup 정보 사용 중인 코덱을 변경하려면 유틸리티를 사용해 코덱 Blackmagic Hyperdeck Setup 설정을 변경하세요. 자세한 정보는 본 설명서의 뒷편의 [ 부분을...
  • Seite 436: Hyperdeck 으로 비디오 재생하기

    HyperDeck Studio 에 두 개 이상의 미디어가 연결된 경우, 한 미디어가 가득 차면 다음 디스크나 드라이브로 녹화가 이어집니다. 해당 정보는 시작 화면의 우측 상단에 표시됩니다. 녹화 중 디스크 교체하기 저장 공간이 남아있는 두 번째 디스크가 준비된 상태에서 녹화 디스크를 교체하려는 경우, 녹화 버튼을...
  • Seite 437: 검색 다이얼 사용하기

    HyperDeck 정보 에서 비디오 파일을 재생하려면, 파일에 맞는 코덱을 설정해야 합니다. 이 설정은 메뉴에서 할 수 있습니다. 더 자세한 정보는 본 설명서의 [ 메뉴 사용하기] 부분을 참고하세요. 루프 재생 HyperDeck 에서 파일을 무한 반복 재생하려면, 영상 재생 중에 재생 버튼을 한 번 더 누르세요. 루프...
  • Seite 438 검색 다이얼 모드에는 조그( ), 셔틀( ), 스크롤( )이 있습니다. 조그 클립 전체를 정방향 또는 역방향으로 재생해 프레임 단위로 정확하게 컨트롤할 수 있습니다. 셔틀 클립을 앞/뒤로 빠르게 재생합니다. 다이얼을 돌리는 정도에 따라 재생 속도가 달라집니다. 스크롤 다이얼을 돌리는 정도에 따라 더욱 빠르게 재생됩니다. 길이가 긴 클립에서 특정 장면을...
  • Seite 439: 전면 패널 사용하기

    HyperDeck 로 녹화하거나 재생할 경우, 필요한 모든 정보가 각 미디어 슬롯의 표시 장치와 내장 를 통해 표시됩니다. HyperDeck Studio 시작 화면 잔여 시간 미및 미디어 표시 - 녹화 중에는 디스크 및 현재 사용 중인 드라이브의 잔여 시간이 서로 번갈아 표시됩니다. 재생 중에는...
  • Seite 440: Lcd 메뉴 사용하기

    메뉴 사용하기 MENU 전면 패널에 있는 버튼을 누르면 메뉴 설정이 나타납니다. SKIP 검색 다이얼을 돌리거나 뒤로 가기/건너뛰기 버튼을 눌러 메뉴 옵션을 검색한 다음 버튼을 눌러 하위 메뉴를 선택하세요. 검색 다이얼을 돌려 메뉴 설정을 검색할 수 있습니다. 메뉴 항목을 선택한 다음 버튼을...
  • Seite 441 변경할 수도 있습니다. 코덱 HyperDeck Studio Apple ProRes DNxHD 모든 모델은 및 코덱을 사용해 압축 비디오로 HyperDeck Studio 4K Pro DNxHR 녹화합니다. 에서는 미디어 녹화 시 및 코덱을 사용할 수도 있습니다. 트리거 녹화 ‘비디오 시작/정지’와 ‘타임코드 런’의 두 가지 모드 중 선택할 수 있습니다.
  • Seite 442 HyperDeck Studio 하지만 에는 개별 녹화에 도움이 되는 독특한 기능이 있습니다. 이를 통해 위의 과정을 완전히 반대로 하여 비디오 입력을 레퍼런스 입력으로 재동기화할 수 있습니다. 즉, 동기화되지 HyperDeck HyperDeck Studio 않은 소스를 에 연결할 수 있는데, 이 경우 에서 이 소스를 비디오...
  • Seite 443 다이나믹 레인지를 사용하는 경우에는 의도적으로 채도를 낮춰 명암 대비를 낮추기 때문에 이 기능을 유용하게 사용할 수 있습니다. 디스플레이 를 적용하면 색보정 작업 후 영상룩에 대한 아이디어를 얻을 수 있습니다. Blackmagic HyperDeck Setup 유틸리티를 통해 선택한 디스플레이 를 모니터 출력에 적용할...
  • Seite 444 오디오 메뉴 녹음된 오디오 채널 HyperDeck Studio 를 사용하여 한 번에 최대 개의 오디오 채널을 녹음할 수 있습니다. 녹화할 채널 수를 선택하기 위해서는 녹음된 오디오 채널 목록을 확장하여 채널 중에서 선택하세요. 코덱이 또는 로 설정된 경우, 채널의 오디오를 선택하면 유튜브에 바로 업로드할 수...
  • Seite 445 미디어 포맷 EXT Disk 카드, 그리고 뒷면 단자에 연결된 미디어는 장치에서 바로 포맷하거나, Windows 컴퓨터에서 포맷할 수 있습니다. HyperDeck Studio 에서 미디어 사용 준비하기 검색 다이얼과 버튼으로 포맷할 미디어를 선택하세요. 해당 목록에서 포맷하려는 미디어를 선택하고 버튼을 누르세요. 포맷을 선택하고 버튼을 누르세요.
  • Seite 446 이름 HyperDeck Studio 한 대 이상의 가 네트워크에 연결된 경우, 장비를 구분할 수 있도록 이름을 설정할 수 Blackmagic HyperDeck Setup Blackmagic HyperDeck 있습니다. 이는 또는 이더넷 프로토콜을 통한 터미널 응용 프로그램 사용으로 설정할 수 있습니다. 언어 HyperDeck Studio 는 한국어, 영어, 중국어, 일본어, 스페인어, 독일어, 불어, 러시아어, 이탈리아어, 포르투갈어, 터키어, 우크라이나어, 폴란드어를...
  • Seite 447 각각의 카메라 앵글을 쉽게 확인할 수 있습니다. 또는 를 사용해 카메라를 지정하세요. 기본 비디오 표준 HyperDeck Studio 는 때때로 사용자가 사용하길 원하는 비디오 표준이 무엇인지 알지 못합니다. HyperDeck 이 설정을 통해 이 사용자가 가장 선호하는 비디오 표준을 알 수 있습니다.
  • Seite 448 네트워크 설정 프로토콜 Blackmagic HyperDeck DHCP 은 로 기본 설정되어 있으므로, 장치를 연결하면 사용하는 네트워크 서버가 자동으로 주소를 지정하여 다른 네트워크 설정을 변경하지 않아도 됩니다. 수동으로 주소를 입력해야 하는 경우, 고정 주소를 통해 연결하세요. ‘프로토콜’을 선택한 상태에서 깜빡이는 버튼을 눌러 메뉴에 접속한 뒤, ‘고정...
  • Seite 449 개의 타임코드 입력 옵션에서 선택할 수 있습니다. 비디오 입력 비디오 입력을 선택하면 SMPTE RP 188 메타데이터가 있는 SDI나 HDMI 소스에 임베디드된 타임코드를 가져와 사용합니다. 그러면 SDI 또는 HDMI 소스와 HyperDeck Studio 녹화 파일 간에 동기화가 유지됩니다. 외부 장치 뒷면 패널 단자의 연결에서 타임코드를 가져와 사용할 시 이 옵션을 선택하세요.
  • Seite 450 선택하세요. 예를 들어, 사용자의 아날로그 데크에 젠록 소스가 연결되어 있는 경우 이 옵션을 선택할 수 있습니다. 뒷면 패널의 REF IN 단자에 Blackmagic Sync Generator와 같은 외부 레퍼런스 장치가 외부 장치 연결된 경우 '외부'를 선택하세요 . HyperDeck 외부 레퍼런스 표시 – Studio 가 외부 레퍼런스 소스에 성공적으로 잠겼을 때 내장...
  • Seite 451 일 HyperDeck_2105061438_0001 시 HyperDeck_2105061438_0001 분 HyperDeck_2105061438_0001 클립 번호 HDR 포맷 재설정하기 HyperDeck Studio 4K Pro 는 비디오 신호 또는 파일에 포함된 메타데이터를 자동으로 HDMI 감지하여 출력을 통해 표시합니다. 만약 신호 또는 파일에 태그가 잘못 지정되었거나 사용자의 디스플레이가 과 호환되지 않는 경우, 포맷을...
  • Seite 452 컨트롤을 통해 추가 기기도 제어 가능합니다. HyperDeck HyperDeck 예를 들어, 마스터 에서 '녹화' 버튼을 누르면 연결된 모든 추가 이 동시에 녹화를 시작합니다. HyperDeck Studio HD Mini HyperDeck Pro Plus 참고로 를 컨트롤러로 사용할 수는 없지만, 또는 모델에서는 이를 제어할 수 있습니다.
  • Seite 453: 뒷면 패널

    뒷면 패널 HyperDeck Studio HD Mini에는 HyperDeck Studio HD Mini Plus 실수로 전원 연결이 분리되는 와 모델은 타임코드 입/ 일을 방지하기 위한 잠금링이 출력을 위한 커넥터가 전원 커넥터와 함께 제공됩니다. 탑재되어 있습니다. 전원 HyperDeck HyperDeck Studio 모든 에는 주 전원을 위한...
  • Seite 454 타임코드 입력 단자를 통해 외부 타임코드를 수신하거나 에서 타임코드 출력 단자를 통해 타임코드를 루프할 수 있습니다. 일부 모델에서 타임코드는 커넥터를 통해 연결되며 HyperDeck Studio 4K Pro 는 타임코드 단자를 사용합니다. 타임코드 설정에 관한 자세한 사항은 본 사용 설명서 앞부분의 [설정] 부분을 참고하세요.
  • Seite 455: 모니터링 출력 사용하기

    중인 클립의 타임코드를 표시합니다. 클립 타임 코드와 타임라인의 타임코드 측정기 중에서 선택할 수 있습니다. 소스 HDMI 현재 선택된 또는 소스를 표시합니다. 유효한 신호가 감지되지 않을 경우에는 ‘입력 신호 없음’ 이 표시됩니다. 이름 HyperDeck Blackmagic HyperDeck 디스크 레코더명이 나타납니다. 이름 변경에 관한 자세한 정보는 [ Setup ] 부분을 참고하세요. 모니터링 출력 사용하기...
  • Seite 456 상태 클립을 재생 또는 녹화하는 동안 상태 표시에는 트랜스포트 컨트롤 상태와 현재 사용 중인 컨트롤이 나타납니다. 디스플레이 옵션은 다음과 같습니다. HyperDeck이 대기 상태에 현재 선택된 비디오 포맷의 녹화 있습니다. 클립 전체가 루프 재생으로 설정되어 있습니다. 비디오가 현재 재생 중입니다. 단일 클립의 재생이 루프로 설정되어...
  • Seite 457 미디어 바 미디어 바는 현재 미디어의 상태에 따라 파란색, 흰색, 또는 빨간색으로 나타나며, 카드 사용 공간이 나타납니다. 파란색 드라이브 아이콘은 현재 활성화된 드라이브입니다. 이 드라이브는 재생과 녹화에 사용됩니다. 흰색 드라이브 아이콘은 현재 미디어가 있지만, 사용 중이지 않은 상태를 나타냅니다. 전체가 흰색으로 표시되는 경우, 해당 미디어가 꽉 찼다는...
  • Seite 458: 저장 미디어

    Blackmagic Design 최신 버전의 설명서를 통해 주기적으로 최신 정보를 확인하는 것이 좋으며, 설명서는 blackmagicdesign support 웹사이트 에서 다운로드할 수 있습니다. HyperDeck Studio 4K Pro 에는 어떤 SD 카드를 사용해야 하나요? 60 fps 2160p 다음은 최대 의 녹화에 권장되는 카드 목록입니다.
  • Seite 459 HyperDeck Studio HD Pro 에는 어떤 SD 카드를 사용해야 하나요? 30fps 2160p 다음은 최대 의 녹화에 권장되는 카드 목록입니다. 제조사 모델 용량 Angelbird AV Pro MK2 V90 SDXC 64GB Angelbird AV Pro MK2 V90 SDXC 128GB Angelbird AV Pro MK2 V90 SDXC...
  • Seite 460: Ssd

    명시되지 않은 데이터 압축 방식은 대부분 녹화에 영향을 끼치지만, 이런 종류의 디스크는 여전히 실시간 재생에 사용 가능합니다. 테스트 결과 일반적으로 용량이 크고 새로운 모델일수록 속도가 빠른 것으로 나타났습니다. 사용이 권장되는 는 다음과 같습니다. HyperDeck Studio 4K Pro 에는 어떤 SSD 를 사용해야 하나요? 60 fps 2160p 다음은 최대 의 녹화에 권장되는...
  • Seite 461: 외장 디스크

    또는 플래시 디스크를 연결하려면 해당 장비와 HyperDeck EXT Disk 후면의 ‘ ’ 단자를 케이블로 연결하세요. HyperDeck Studio 4K Pro 로 녹화 시, 어떤 USB - C 드라이브를 사용해야 하나요? 60 fps 2160p 다음은 최대 의 녹화에 권장되는 드라이브 목록입니다. 제조사...
  • Seite 462 LaCie Rugged SSD Pro STHZ1000800 Wise PTS-512 Portable SSD 512GB Wise PTS-1024 Portable SSD HyperDeck Studio HD Mini 로 녹화 시, 어떤 USB - C 드라이브를 사용해야 하나요? 60fps 1080p ProRes 422 HQ 다음은 최대 의 녹화에 권장되는 드라이브 목록입니다.
  • Seite 463: 미디어 포맷하기

    미디어 포맷하기 컴퓨터에서 미디어 준비하기 컴퓨터를 이용하여 미디어 포맷하기 exFAT 에 있는 디스크 유틸리티 앱을 사용하여 드라이브를 + 또는 형식으로 포맷할 수 있습니다. 포맷이 진행되면 디스크의 모든 정보가 삭제되므로 중요한 정보는 포맷 전에 반드시 백업해 두어야 합니다. 외장 도크 또는 케이블 어댑터를 사용해 를...
  • Seite 464: Hyperdeck 을 웹캠으로 사용하기

    의 영상이 나타납니다. 이제 '마이크' 메뉴에서 소스를 ‘마이크’로 선택하세요. Skype Skype 환경 설정을 마치면 친구에게 로 전화를 걸어 웹캠 설정이 제대로 작동하는지 간단히 테스트해 보세요. HyperDeck Studio 이로써 를 사용하여 전 세계에 영상을 생중계할 준비가 모두 끝났습니다. HyperDeck을 웹캠으로 사용하기...
  • Seite 465: Open Broadcaster 설정하기

    를 설정하는 방법에 대해 소개합니다. Open Broadcaster를 실행한 다음, ‘Source’ 박스에서 ‘Video Capture Device’를 선택하세요. ‘+’ 를 클릭하세요. Device 메뉴에서 사용 중인 HyperDeck Studio 모델을 새로운 소스의 이름을 지정한 다음, ‘OK’ 버튼을 클릭하세요. 선택한 뒤 ‘OK’를 클릭하세요. 사용자의 유튜브 계정으로 들어가세요. ‘실시간 스트리밍...
  • Seite 466 Broadcaster에 붙여넣기 할 스트림 키를 복사하세요. 미리보기 창에서 확인할 수 있습니다. 화면 우측 하단에서 ‘Start Streaming’을 클릭하여 Open 유튜브 라이브로 돌아가 보면 HyperDeck의 웹캠 프로그램 Broadcaster의 방송 링크를 유튜브에 연결하세요. Open 출력이 배경 영상으로 들어오고 있는 것을 확인할 수 Broadcaster에서 유튜브로 연결이 생성되며, 연결과 함께...
  • Seite 467: Blackmagic Hyperdeck Setup

    Blackmagic HyperDeck Setup HyperDeck Setup 사용하기 Blackmagic HyperDeck Setup HyperDeck 은 설정을 변경하고 내부 소프트웨어를 업데이트하는 데 사용됩니다. HyperDeck 셋업: HyperDeck 또는 이더넷을 사용해 와 컴퓨터를 연결하세요. HyperDeck Setup HyperDeck Setup 을 실행하세요. 연결된 모델명이 유틸리티 초기 화면에 나타납니다. HyperDeck 동그라미...
  • Seite 468: Lut 페이지

    주소를 추가하는 방식으로 HyperDeck Studio 를 다른 장비에서 사용하는 네트워크에 연결해야 합니다. HyperDeck Studio 디스크 레코더는 DHCP로 기본 설정되어 있습니다. DHCP (동적 호스트 구성 프로토콜)는 자동으로 사용자의 HyperDeck Studio를 찾아 IP 주소를 지정하는 네트워크 서버 및 라우터의 서비스를 의미합니다. DHCP DHCP 는...
  • Seite 469: 내부 소프트웨어 업데이트

    네트워크 설정, 스트리밍 품질을 변경할 수 있습니다. 내부 소프트웨어 업데이트하기 blackmagicdesign support HyperDeck Setup 에서 최신 설치 프로그램을 다운로드하세요. Blackmagic HyperDeck Setup 컴퓨터에 설치된 설치 프로그램을 실행하고 화면에 나타나는 지시 사항을 따르세요. HyperDeck Studio 설치가 완료되면 뒷면 패널에 있는 이더넷 단자 또는 를 통해 컴퓨터에...
  • Seite 470: Teranex Mini Rack Shelf

    Blackmagic Web 는 컨버터 및 Presenter Blackmagic Design 같은 비슷한 크기의 다른 장비와 함께 설치할 수 있습니다. 예를 들어, Blackmagic HyperDeck Studio HD Mini ATEM Television Studio HD 를 와 함께 설치하면 개의 HyperDeck Studio HD Mini 비디오 입력을 전환하고...
  • Seite 471: 컨트롤

    Sony 현재 모든 모델에는 ™와 호환하는 산업 표준 데크 컨트롤 포트가 탑재되어 HyperDeck Extreme Control 있습니다. 이 포트에는 표준 규격 핀 연결부가 있어 같은 를 가진 모든 원격 컨트롤러에 바로 연결할 수 있습니다. 케이블 양쪽 끝의 핀 번호가 서로 일치하도록 제작된...
  • Seite 472 HyperDeck 의 메뉴에 있는 원격 설정을 ‘ ’으로 설정하거나, 제어 패널의 버튼을 눌러 데크 제어 기능을 활성화하세요. HyperDeck 모든 모델은 뒷면 패널의 포트를 통해 원격 제어 기능을 지원합니다. 지원되는 RS - 422 명령어 Command Reply No Remote Notes 0 - System Control...
  • Seite 473 Command Reply No Remote Notes Treated as N=1; 0x22 0x22 VarRev2 Acknowledge Disabled Same as VarRev1 0x21 0x23 ShuttleRev1 Acknowledge Disabled Treated as N=1; 0x22 0x23 ShuttleRev2 Acknowledge Disabled Same as ShuttleRev1 0x20 0x30 Preroll Acknowledge Disabled 0x24 0x31 CueData Acknowledge Disabled 0x20...
  • Seite 474 Command Reply No Remote Notes 6 - Sense Request 0x61 0x0A TimeCodeGenSense — — 0x61 0x0C CurrentTimeSense — — 0x60 0x10 InDataSense InData Enabled 0x60 0x11 OutDataSense OutData Enabled 0x60 0x12 AInDataSense AInData Enabled 0x60 0x13 AOutDataSense AOutData Enabled 0x61 0x20 StatusSense StatusData...
  • Seite 475 Command Reply No Remote Notes A - Advanced Media Protocol 8-bit signed number of 0xA1 0x01 AutoSkip Acknowledge Disabled clips to skip from current clip when x = 0 single clip request when x = 1, # 0xAX 0x15 ListNextID IDListing Enabled clips can be specified in...
  • Seite 476: 네트워크를 통해 파일 전송하기

    Set if total space left on available SSDs is less than 30 seconds Others Cue Complete (byte 2, bit 0) Always 1: Cue requests are always instantaneous HyperDeck Serial RS-422 Protocol Protocol Based on Sony 9-pin protocol Interface Baud rate 38.4 Kbps...
  • Seite 477 HyperDeck Studio 이더넷 케이블을 사용해 를 네트워크에 연결한 뒤, 주소를 적어두세요. MENU 버튼을 누른 다음 검색 다이얼을 돌려 ‘네트워크’ 화면에 들어가면 주소를 확인할 수 HyperDeck Studio 있습니다. 의 주소는 스크린 하단에 나타납니다. HyperDeck Studio 의 주소는 ‘네트워크’ 화면에서 확인할 수 있습니다.
  • Seite 478: Atem 스위처에 연결하기

    을 스위처와 같은 네트워크에 연결하고 주소를 적어두세요. HyperDeck 의 주소는 전면 패널 메뉴에서 ‘설정’으로 이동한 뒤, 메인 메뉴의 ‘이더넷’ 으로 들어가 확인할 수 있습니다. Blackmagic HyperDeck Setup Configure 또는 에서는 유틸리티의 ‘ ’ 탭에서 HyperDeck 의 주소를 확인할 수 있습니다.
  • Seite 479: 후반 제작 워크플로 이해하기

    HyperDeck 의 메뉴에 있는 원격 설정을 ‘ ’으로 설정하거나, 제어 패널의 ATEM 버튼을 눌러 스위처를 통한 이더넷 제어 기능을 활성화하세요. 후반 제작 워크플로 이해하기 클립 사용하기 카드 슬롯, 외부 리더기, 또는 도크를 통해 카드나 를 컴퓨터에 연결하기만 하면 클립을 쉽게 사용할 수 있습니다.
  • Seite 480: Developer Information

    Developer Information Blackmagic HyperDeck 이더넷 프로토콜 Blackmagic HyperDeck HyperDeck Studio 이더넷 프로토콜은 이더넷 연결이 내장된 모델에서 9993 포트 에 연결하여 액세스하는 텍스트 기반 프로토콜입니다. 소프트웨어 개발자들은 프로토콜을 Blackmagic Design Blackmagic Design 사용하여 장비들을 제품과 통합시킬 수 있습니다. 저희 은 자사의 프로토콜을 공개하여 고객들이 새로운 방안을 고안해 낼 수 있기를 기대하고 있습니다! 프로토콜...
  • Seite 481 Command Command Description spill current recording to specified slot record: spill: slot id: {n} use current id to spill to same slot stop stop playback or recording clips count query number of clips on timeline clips get query all timeline clips clips get: clip id: {n} query a timeline clip info clips get: clip id: {n} count: {m}...
  • Seite 482 Command Command Description notify: timeline position: {true/false} set playback timeline position notifications notify: playrange: {true/false} set playrange notifications notify: cache: {true/false} set cache notifications notify: dynamic range: {true/false} set dynamic range settings notifications notify: slate: {true/false} set digital slate notifications goto: clip id: {start/end} goto first clip or last clip goto: clip id: {n}...
  • Seite 483 While you can use the Terminal to talk to HyperDeck if you are writing software you can use XML to confirm the existence of a specific command based on the firmware of the HyperDeck you are communicating with This helps your software user interface adjust to the capabilities...
  • Seite 484: Protocol Details

    The HyperDeck Ethernet server listens on TCP port 9993. Basic syntax The HyperDeck protocol is a line oriented text protocol. Lines from the server will be separated by an ascii CR LF sequence. Messages from the client may be separated by LF or CR LF.
  • Seite 485 Failure response codes Failure responses to commands are indicated with response codes in the range of 100 to 199: 100 syntax error 101 unsupported parameter 102 invalid value 103 unsupported 104 disk full 105 no disk 106 disk error 107 timeline empty 108 internal error 109 out of range 110 no input...
  • Seite 486 Timecode syntax Timecodes are expressed as non-drop-frame timecode in the format: HH:MM:SS:FF Handling of deck "remote" state The “remote” command may be used to enable or disable the remote control of the deck. Any attempt to change the deck state over ethernet while remote access is disabled will generate an error: 111 remote control disabled↵...
  • Seite 487 Switching to preview mode The "preview" command instructs the deck to switch between preview mode and output mode: preview: enable: {"true", "false"}↵ Playback will be stopped when the deck is switched to preview mode. Capturing will be stopped when the deck is switched to output mode.
  • Seite 488 Changing timeline position The "goto" command instructs the deck to switch to playback mode and change its position within the timeline. To go to the start of a specific clip: goto: clip id: {Clip ID}↵ To move forward/back {count} clips from the current clip on the current timeline: goto: clip id: +/-{count}↵...
  • Seite 489 Controlling asynchronous notifications The “notify” command may be used to enable or disable asynchronous notifications from the server. To enable or disable transport notifications: notify: transport: {“true”, “false”}↵ To enable or disable slot notifications: notify: slot: {“true”, “false”}↵ To enable or disable remote notifications: notify: remote: {“true”, “false”}↵...
  • Seite 490 Retrieving slot information The "slot info" command returns information about a slot. Without parameters, the command returns information for the currently selected slot: slot info↵ If a slot id is specified, that slot will be queried: slot info: slot id: {Slot ID}↵ The server will respond with slot specific information: 202 slot info:↵...
  • Seite 491 Retrieving timeline information The "clips get" command returns information for each available clip on the current timeline. Without parameters, the command returns information for all clips on timeline: clips get↵ The server responds with a list of clip IDs, names and timecodes: 205 clips info:↵...
  • Seite 492 1080i50, 1080i5994, 1080i60 HyperDeck Studio Pro and Plus models support these 4k formats: 4Kp23976, 4Kp24, 4Kp25, 4Kp2997, 4Kp30 HyperDeck Studio 4K Pro adds support for the following 4k formats: 4Kp50, 4Kp5994, 4Kp60 Video format support may vary between models and software releases.
  • Seite 493 Querying and updating configuration information The "configuration" command may be used to query the current configuration of the deck: configuration↵ The server returns the configuration of the deck: 211 configuration:↵ audio input: {“embedded”, “XLR”, “RCA”}↵ audio mapping: {n}↵ video input: {“SDI”, “HDMI”, “component”, “composite”}↵ file format: {format}↵...
  • Seite 494 Clearing the current timeline The "clips clear" command instructs the deck to empty the current timeline: clips clear↵ The server responds with 200 ok↵ Adding a clip to the current timeline The "clips add:" command instructs the deck to add a clip to the current timeline: clips add: name: {"clip name"}↵...
  • Seite 495: 도움말

    지원 받기 Blackmagic Design 가장 빠르게 지원 받을 수 있는 방법은 온라인 고객지원 페이지에 접속하여 Blackmagic HyperDeck 디스크 레코더 관련 최신 지원 정보를 이용하는 것입니다. Blackmagic Design 온라인 고객 지원 페이지 Blackmagic blackmagicdesign support 고객 지원 센터( )에서 최신 사용 설명서와...
  • Seite 496: 규제 사항

    규제 사항 유럽 연합 국가 내의 전기전자제품 폐기물 처리기준 제품에 부착된 기호는 해당 제품을 다른 폐기물과는 별도로 처리되어야 함을 나타냅니다. 제품을 폐기하려면 반드시 재활용 지정 수거 장소에 폐기해야 합니다. 폐기물 제품을 분리수거 및 재활용으로 처리하는 것은 자연 자원을 보전하고 인간의 건강과 환경을 보호할 수 있도록 폐기물을...
  • Seite 497: 안전 정보

    인 열대 지역에서 사용하기 적합합니다. 공기가 잘 통할 수 있도록 제품을 통풍이 잘되는 곳에 둡니다. 장비랙에 제품을 설치할 시, 주변 장비가 제품 통풍에 방해가 되지 않도록 주의하세요. Blackmagic Design 제품 내부에는 사용자가 수리 가능한 부품이 없습니다. 제품 수리는 해당 지역 서비스 센터에 문의하세요.
  • Seite 498 은 장비의 불법적 사용과 관련하여 어떤 법적 Blackmagic Design 책임도 지지 않습니다. 은 본 제품의 사용으로 인해 발생하는 손해에 대해서는 어떤 법적 책임도 지지 않습니다. 제품 사용으로 인해 발생할 수 있는 위험에 대한 책임은 본인에게 있습니다. Copyright 2021 Blackmagic Design Blackmagic Design Blackmagic Design DeckLink ©...
  • Seite 499 Июль 2021 г. Руководство по установке и эксплуатации Дисковые рекордеры HyperDeck Дисковые рекордеры HyperDeck...
  • Seite 500 Надеемся, что HyperDeck послужит вам много лет и станет важным компонентом производственной инфраструктуры. Последнюю версию руководства и обновления ПО для HyperDeck можно найти в разделе поддержки на веб-сайте www.blackmagicdesign.com/ru. Использование актуальной версии ПО гарантирует доступ ко всем имеющимся функциям. Чтобы узнавать о выходе обновлений, зарегистрируйтесь...
  • Seite 501 веб-камеры Подключение источника Настройка приложения Open видео- и аудиосигнала Broadcaster Проверка звука Blackmagic HyperDeck Setup Подключение накопителей Работа с утилитой HyperDeck Setup Запись видео Вкладка LUTs Запись на несколько накопителей Обновление встроенного Воспроизведение программного обеспечения Воспроизведение видео на Teranex Mini Rack Shelf HyperDeck Управление...
  • Seite 502: Обзор Дисковых Рекордеров Hyperdeck

    Новые модели Blackmagic HyperDeck, входящие в линейку HD- и 4K-рекордеров, легко подходят для самых разных производственных систем. HyperDeck Studio HD Pro и HyperDeck Studio 4K Pro умещаются на одно место в стойке, а также позволяют записывать и воспроизводить файлы с помощью SD-карт и SSD-накопителей размером 9,5 мм.
  • Seite 503: Подготовка К Работе

    Кроме того, на всех моделях имеется вход 12 В постоянного тока, который позволяет подключать питание от внешней батареи 12 В. К устройству HyperDeck Studio HD Mini также можно подсоединить блок питания переменного тока. При наличии фиксирующего кольца используйте его, чтобы затянуть разъем как можно...
  • Seite 504: Проверка Звука

    дисплее рядом с видеоизображением. Проверка звука Если на передней панели рекордера HyperDeck есть динамик и гнездо для наушников, с их помощью можно быстро прослушать имеющуюся фонограмму. Для этого нажмите кнопку динамика и, удерживая ее, регулируйте громкость поворотом круглой ручки. На начальной...
  • Seite 505 Возьмите SD-карту так, чтобы позолоченные контакты были обращены к ЖК-дисплею рекордера, и установите ее в SD-слот. Осторожно надавите на карту, чтобы она вошла в слот до конца. HyperDeck Studio выполнит проверку SD-карты. В это время индикатор SD-слота будет гореть зеленым цветом. Когда индикатор выключится и загорится кнопка остановки, это...
  • Seite 506: Запись Видео

    Чтобы вынуть карту, осторожно надавите на нее до щелчка и отпустите. Край карты выйдет из слота, после чего накопитель можно полностью извлечь. Рекордер HyperDeck Studio готов к записи и воспроизведению. Запись видео Прежде всего убедитесь, что на ЖК-дисплее отображается видео с нужного источника.
  • Seite 507: Воспроизведение

    Когда к модели HyperDeck Studio подключено несколько накопителей, при заполнении одного из них сохранение автоматически выполняется на другом. Это будет показано в правом верхнем углу начальной страницы. Замена дисков во время записи Если необходимо заменить диск во время работы, нажмите и удерживайте кнопку записи.
  • Seite 508: Круглая Ручка Поиска

    СОВЕТ. Для обеспечения правильного воспроизведения видеофайлов на рекордере требуется выбрать надлежащий кодек. Это можно сделать с помощью меню на ЖК-дисплее. Подробнее см. разделы «Работа с меню на ЖК-дисплее» и «Настройки». Циклическое воспроизведение Для переключения воспроизведения в циклический режим при просмотре контента на рекордере...
  • Seite 509 На данном устройстве доступны режимы протяжки, перемотки и прокрутки. Протяжка Воспроизведение клипа вперед или назад на покадровом уровне. Перемотка Более быстрое воспроизведение вперед или назад. Скорость зависит от амплитуды поворота ручки. Прокрутка Еще более скоростное воспроизведение, зависящее от амплитуды поворота ручки. Данный режим применяют для быстрого перемещения...
  • Seite 510: Работа С Передней Панелью

    уровень аудиосигнала источника или воспроизводимого файла. Индикаторы слотов При включении HyperDeck и при каждой установке накопителя индикатор слота загорается зеленым цветом, а после проверки SSD-диска или SD-карты гаснет. Если носитель неправильно отформатирован или не работает, этот индикатор будет гореть оранжевым...
  • Seite 511: Работа С Меню На Жк-Дисплее

    Работа с меню на ЖК-дисплее Чтобы открыть настройки меню, нажмите кнопку MENU на передней панели. Для навигации по опциям меню используйте круглую ручку поиска или кнопки SKIP, а для выбора подменю нажмите SET. Перемещаться по настройкам можно с помощью круглой ручки Для...
  • Seite 512: Настройки

    Как правило, все рекордеры могут использовать синхровход для согласования выводимого видео во время воспроизведения. Это позволяет выполнить привязку изображения, передаваемого с HyperDeck, ко входному опорному сигналу, поэтому его не нужно повторно синхронизировать при подключении к профессиональной системе вещания. Однако при переходе рекордера в режим записи выводимое изображение синхронизируется...
  • Seite 513 синхронизации. Тем не менее в некоторых случаях функция повторной синхронизации входных данных очень удобна. Когда она включена, видеовыход на HyperDeck будет привязан к опорному сигналу даже в режиме записи. Таким образом, камеру можно подключить к SDI-выходу рекордера для того, чтобы синхронизировать сигнал через обратный программный поток. Например, модель...
  • Seite 514 Меню «Мониторинг» Данное меню предусмотрено на моделях HyperDeck Studio, у которых на задней панели есть разъем MONITOR OUT. Чистый сигнал При активировании данной настройки служебная информация не будет выводиться на дисплеи, подключенные к разъему MONITOR OUT модели HyperDeck Studio. Подробнее о функции выхода для мониторинга см. раздел «Выход для мониторинга» ниже.
  • Seite 515 При записи более двух каналов можно выбирать, какие из них будут отображаться на ЖК-дисплее передней панели. Для этого используют настройку «Мониторинг каналов». На моделях HyperDeck Studio, имеющих на передней панели динамик и гнездо для наушников, каналы для них также задают в данной секции.
  • Seite 516 Форматирование SD-карты, SSD-диски и накопители, подключенные к заднему разъему EXT DISK, можно отформатировать на рекордере или на компьютере с операционной системой Mac или Windows. Подготовка накопителя на HyperDeck Studio Перейдите к настройке «Форматирование» поворотом круглой ручки и выберите ее с помощью кнопки SET.
  • Seite 517: Выбор Языка

    круглой ручки установите день, месяц и год. Эти данные будут добавлены к имени файла в виде временных меток. Время Чтобы изменить время, выберите соответствующий параметр и нажмите SET. С помощью круглой ручки установите часы и минуты. На моделях HyperDeck Studio используется 24-часовой формат. ПО Отображает текущую версию программного обеспечения. Передняя панель...
  • Seite 518 использовать. Данная настройка поможет рекордеру выбрать формат, применяемый чаще всего. В качестве примера возьмем ситуацию, когда при включении HyperDeck Studio к нему не подключен источник видео, а на вставленном диске записаны файлы двух форматов. Какой из них следует рекордеру воспроизвести? В данном случае устройство будет использовать...
  • Seite 519 Сетевые параметры Протокол В поставляемых рекордерах Blackmagic HyperDeck по умолчанию используется протокол DHCP. При подключении устройства к сети сервер автоматически присвоит ему IP-адрес. Выполнять дополнительную настройку не потребуется. Чтобы внести адрес вручную, следует выбрать «Статический IP-адрес». Выделите настройку «Протокол» и нажмите мигающую кнопку SET. Перейдите к параметру...
  • Seite 520 Видеовход Эта опция позволяет использовать встроенный тайм-код из SDI- и HDMI-источников с метаданными SMPTE RP 188. Она обеспечивает синхронизацию SDI- или HDMI-сигнала с файлом, сохраняемым на HyperDeck Studio. Внешний Данную опцию выбирают в тех случаях, когда тайм-код поступает через разъем на задней панели.
  • Seite 521 Им может быть аналоговая дека с подключенным синхрогенератором. Внешний Эта опция позволяет использовать внешнее устройство синхронизации (например, Blackmagic Sync Generator), подключенное через разъем REF IN на задней панели. Индикатор внешнего синхросигнала. Когда рекордер HyperDeck Studio подключен ко внешнему источнику синхросигнала, на встроенном ЖК-дисплее отображается REF. Корректировка синхронизации...
  • Seite 522 HyperDeck_2105061438_0001 Номер клипа Игнорировать HDR-формат HyperDeck Studio 4K Pro автоматически обнаруживает встроенные в 4K-видеосигнал (или файл) HDR-метаданные и выводит их на дисплей через HDMI-выход. Если теги используются неправильно или дисплей несовместим с форматом HDR, можно задать другую настройку. Для этого следует выбрать режим SDR, например опцию Rec.2020 SDR.
  • Seite 523: Дистанционное Управление

    Например, при активировании записи на ведущей модели она одновременно начнется на всех подключенных рекордерах. Следует отметить, что модель HyperDeck Studio HD Mini нельзя использовать в качестве ведущей, но ею можно управлять с помощью рекордеров линейки HyperDeck Pro и Plus. Сброс Сброс до заводских настроек...
  • Seite 524: Задняя Панель

    данных по FTP и управлять рекордером в дистанционном режиме с помощью протокола HyperDeck Ethernet. На HD-моделях скорость переноса файлов достигает 1 Гбит/с, а на HyperDeck Studio 4K Pro — 10 Гбит/с. Подробнее см. раздел «Передача файлов по сети», приведенный ниже. Рекордером HyperDeck также можно управлять с помощью микшера ATEM или...
  • Seite 525 форматов вплоть до 1080p/60. На HyperDeck Studio HD Plus и HyperDeck Studio HD Pro предусмотрен интерфейс 6G-SDI, позволяющий работать с потоками в диапазоне от SD до 2160p/30. На рекордере HyperDeck Studio 4K Pro есть входы и выходы 12G-SDI для приема и передачи видео с разрешением до 2160p/60.
  • Seite 526: Применение Выхода Для Мониторинга

    для отдельных клипов или счетчик для всей временной шкалы. Источник Отображает выбранный SDI- или HDMI-источник. В случае отсутствия корректного сигнала на дисплей выводится соответствующее сообщение. Имя Показывает имя рекордера HyperDeck. Информация о том, как поменять имя, приведена в разделе «Утилита Blackmagic HyperDeck Setup» ниже. Применение выхода для мониторинга...
  • Seite 527 Активный внешний слот задействован SSD-слот готов диск На всех моделях HyperDeck третий индикатор показывает состояние USB-накопителя. При использовании USB-разветвителя или станции Blackmagic MultiDock 10G здесь отображается активный диск. Индикаторы состояния карт и дисков Данные индикаторы показывают задействованные слоты (SD или SSD). Во время...
  • Seite 528 Полоса состояния накопителя В зависимости от состояния накопителя полоса может иметь синий, белый или красный цвет, а степень заливки визуально показывает уровень заполнения. Синяя полоса обозначает активный накопитель, то есть используемый для воспроизведения и записи. Белый цвет указывает на наличие носителя, но он является неактивным.
  • Seite 529: Работа С Накопителями

    высоким сжатием можно работать с другими носителями, однако скоростные накопители обычно обеспечивают наилучший результат. Эта информация регулярно обновляется, поэтому мы рекомендуем обращаться к самой последней версии данного руководства, которую можно загрузить на сайте Blackmagic Design по адресу www.blackmagicdesign.com/ru/support. Выбор SD-карт при работе с HyperDeck Studio 4K Pro Рекомендуемые...
  • Seite 530 Выбор SD-карт при работе с HyperDeck Studio HD Pro Рекомендуемые SD-карты для записи в формате 2160p с частотой до 30 кадров/с Производитель Модель Емкость Angelbird AV Pro MK2 V90 SDXC 64 ГБ Angelbird AV Pro MK2 V90 SDXC 128 ГБ...
  • Seite 531: Ssd

    равно использовать для воспроизведения. Как правило, современные твердотельные накопители имеют более высокое быстродействие и емкость. Рекомендуемые SSD-диски приведены ниже. Выбор SDD-дисков при работе с HyperDeck Studio 4K Pro Рекомендуемые SDD-диски для записи в формате 2160p с частотой до 60 кадров/с Производитель...
  • Seite 532: Внешний Диск

    Внешний диск Все модели HyperDeck позволяют вести запись непосредственно на флеш-диски USB-C. Эти носители имеют большую емкость и обеспечивают запись в течение долгого времени. Затем их можно подключить к компьютеру и сразу приступить к монтажу. Чтобы получить еще больше места для хранения видео, можно подключить док-станцию с...
  • Seite 533 Выбор дисков USB-C при работе с HyperDeck Studio HD Plus Рекомендуемые диски USB-C для записи в формате 2160p с частотой до 30 кадров/с Производитель Модель Емкость Angelbird SSD2GO PKT MK2 512 ГБ Angelbird SSD2GO PKT MK2 2 ТБ DelKinDevices Juggler 1 ТБ...
  • Seite 534: Форматирование Накопителя

    Щелкните кнопкой мыши по значку SSD или CFast и выберите вкладку «Стереть». Выберите формат Mac OS Extended (журналируемый) или exFAT. Введите название нового тома и выберите «Стереть». По окончании форматирования носитель будет готов к использованию на HyperDeck. Форматирование накопителя на Windows На компьютере под управлением Windows форматирование диска под систему exFAT выполняется...
  • Seite 535: Использование Hyperdeck В Качестве Веб-Камеры

    Перейдите к меню «Микрофон» и выберите HyperDeck в качестве источника звука. После установки настроек рекомендуется проверить работу приложения Skype в тестовом режиме. Это все, что нужно сделать для трансляции материала с помощью рекордера HyperDeck Studio на любую аудиторию. Использование HyperDeck в качестве веб-камеры...
  • Seite 536: Настройка Приложения Open Broadcaster

    Настройка приложения Open Broadcaster Open Broadcaster — открытое приложение, которое позволяет использовать рекордер HyperDeck Studio для показа материала на таких платформах, как YouTube, Twitch и Facebook Live. Оно сжимает видео путем уменьшения скорости цифрового потока, чтобы обеспечить его онлайн-трансляцию. Ниже описан порядок настройки приложения Open Broadcaster для трансляции на YouTube Live, когда...
  • Seite 537 ключом трансляции. Скопируйте ключ, В окне просмотра приложения Open Broadcaster который нужно вставить в Open Broadcaster. будет выводиться изображение, поступающее с рекордера HyperDeck. Чтобы установить канал связи между Open Перейдите на YouTube Live. В качестве Broadcaster и YouTube, выберите «Запустить...
  • Seite 538: Blackmagic Hyperdeck Setup

    Чтобы открыть страницу настроек, щелкните мышью по круглому значку Setup или по изображению HyperDeck. Вкладка Setup При наличии нескольких рекордеров HyperDeck Studio, с ними будет легче работать по присвоенным идентификаторам. Указать имя устройства можно в поле Name. Blackmagic HyperDeck Setup...
  • Seite 539: Вкладка Luts

    конфликта настроек подключение не будет выполнено. В этом случае необходимо изменить последнее поле в IP-адресе. Вкладка LUTs Модели HyperDeck c выходами для мониторинга на задней панели позволяют выводить на дисплей поступающее видео с применением 3D LUT-таблиц на основе 17, 33 и 65 координатных точек, конвертированных в файлы с расширением .cube.
  • Seite 540: Обновление Встроенного Программного Обеспечения

    Обновление встроенного программного обеспечения Обновить встроенное ПО устройства HyperDeck, а также изменить настройки трансляции, сетевые параметры и качество записи можно с помощью утилиты HyperDeck Setup. Порядок обновления встроенного ПО Загрузите последнюю версию Blackmagic HyperDeck Setup в разделе поддержки по адресу www.blackmagicdesign.com/ru/support.
  • Seite 541: Teranex Mini Rack Shelf

    под индивидуальные требования. Дополнительная полка Teranex Mini Rack Shelf позволяет установить устройства HyperDeck Studio HD Mini и HyperDeck Studio HD Plus в стойку с другим оборудованием Blackmagic Design такого же форм-фактора. Для размещения решения HyperDeck на полке Teranex Mini Rack Shelf достаточно снять...
  • Seite 542: Управление По Протоколу Rs

    поддерживают этот стандарт, поэтому их можно интегрировать в системы автоматизации вещания, редактирования видео, дистанционного контроля и собственные решения. HyperDeck Studio также поддерживает команды в виде файлов, которые передаются по протоколу Advanced Media Protocol через порт RS-422. Они позволяют с внешнего устройства...
  • Seite 543 Убедитесь, что для настройки дистанционного управления в экранном меню выбран параметр «Вкл.» или нажата кнопка REM на передней панели рекордера Все модели HyperDeck поддерживают удаленное управление декой через порт RS-422 на задней панели Перечень поддерживаемых команд по протоколу RS-422 Command...
  • Seite 544 Command Reply No Remote Notes Treated as N=1; 0x22 0x22 VarRev2 Acknowledge Disabled Same as VarRev1 0x21 0x23 ShuttleRev1 Acknowledge Disabled Treated as N=1; 0x22 0x23 ShuttleRev2 Acknowledge Disabled Same as ShuttleRev1 0x20 0x30 Preroll Acknowledge Disabled 0x24 0x31 CueData Acknowledge Disabled 0x20...
  • Seite 545 Command Reply No Remote Notes 6 - Sense Request 0x61 0x0A TimeCodeGenSense — — 0x61 0x0C CurrentTimeSense — — 0x60 0x10 InDataSense InData Enabled 0x60 0x11 OutDataSense OutData Enabled 0x60 0x12 AInDataSense AInData Enabled 0x60 0x13 AOutDataSense AOutData Enabled 0x61 0x20 StatusSense StatusData...
  • Seite 546 Command Reply No Remote Notes A - Advanced Media Protocol 8-bit signed number of 0xA1 0x01 AutoSkip Acknowledge Disabled clips to skip from current clip when x = 0 single clip request when x = 1, # 0xAX 0x15 ListNextID IDListing Enabled clips can be specified in...
  • Seite 547: Передача Файлов По Сети

    который используется для вывода изображения на цифровые рекламно- информационные панели. Подключение к HyperDeck Studio Для обмена файлами между компьютером и HyperDeck Studio в одной локальной сети потребуются приложение для работы с FTP-протоколом и IP-адрес рекордера. Загрузите и установите приложение для работы с FTP-протоколом на компьютер, который...
  • Seite 548 используемые кодек и разрешение. Перечень кодеков содержится в разделе о работе с утилитой Blackmagic HyperDeck Setup. СОВЕТ. Передавать файлы по сети можно в то время, когда HyperDeck ведет запись. В этом случае скорость обмена данными корректируется автоматически. Передача файлов по сети...
  • Seite 549: Работа С Видеомикшером Атем

    Работа с видеомикшером АТЕМ Программная панель ATEM Software Control и аппаратная консоль ATEM позволяют подключать к видеомикшеру до четырех рекордеров HyperDeck и управлять ими. В этом случае их удобно использовать как библиотеку мультимедиа и для записи материала. Видеомикшер АТЕМ дает возможность удаленно запускать и останавливать запись на...
  • Seite 550: Процедура Постобработки

    Файлы DNxHD и DNxHR MXF, записанные с помощью HyperDeck, совместимы с приложениями Avid Media Composer и DaVinci Resolve для Windows. Кодеки DNxHD доступны для бесплатной загрузки на странице http://www.avid.com/products/avid-dnxhr-and-dnxhd. Файлы MCC, содержащие скрытые субтитры и записанные с помощью HyperDeck, можно открыть в приложении CaptionMaker для Windows (http://www.telestream.net/captioning/overview.htm). Процедура постобработки...
  • Seite 551: Информация Для Разработчиков

    Информация для разработчиков Blackmagic HyperDeck Ethernet Protocol Blackmagic HyperDeck Ethernet Protocol — текстовый протокол, доступ к которому осуществляется через TCP-порт 9993 на рекордерах HyperDeck Studio со встроенным портом Ethernet. Разработчики программного обеспечения могут использовать встроенный протокол управления для создания решений, интегрированных с нашими продуктами. С этой...
  • Seite 552 Command Command Description spill current recording to specified slot record: spill: slot id: {n} use current id to spill to same slot stop stop playback or recording clips count query number of clips on timeline clips get query all timeline clips clips get: clip id: {n} query a timeline clip info clips get: clip id: {n} count: {m}...
  • Seite 553 Command Command Description notify: timeline position: {true/false} set playback timeline position notifications notify: playrange: {true/false} set playrange notifications notify: cache: {true/false} set cache notifications notify: dynamic range: {true/false} set dynamic range settings notifications notify: slate: {true/false} set digital slate notifications goto: clip id: {start/end} goto first clip or last clip goto: clip id: {n}...
  • Seite 554 2 video format: NTSC Using XML While you can use the Terminal to talk to HyperDeck, if you are writing software, you can use XML to confirm the existence of a specific command based on the firmware of the HyperDeck you are communicating with.
  • Seite 555: Protocol Details

    The HyperDeck Ethernet server listens on TCP port 9993. Basic syntax The HyperDeck protocol is a line oriented text protocol. Lines from the server will be separated by an ascii CR LF sequence. Messages from the client may be separated by LF or CR LF.
  • Seite 556 Failure response codes Failure responses to commands are indicated with response codes in the range of 100 to 199: 100 syntax error 101 unsupported parameter 102 invalid value 103 unsupported 104 disk full 105 no disk 106 disk error 107 timeline empty 108 internal error 109 out of range 110 no input...
  • Seite 557 Timecode syntax Timecodes are expressed as non-drop-frame timecode in the format: HH:MM:SS:FF Handling of deck "remote" state The “remote” command may be used to enable or disable the remote control of the deck. Any attempt to change the deck state over ethernet while remote access is disabled will generate an error: 111 remote control disabled↵...
  • Seite 558 Switching to preview mode The "preview" command instructs the deck to switch between preview mode and output mode: preview: enable: {"true", "false"}↵ Playback will be stopped when the deck is switched to preview mode. Capturing will be stopped when the deck is switched to output mode.
  • Seite 559 Changing timeline position The "goto" command instructs the deck to switch to playback mode and change its position within the timeline. To go to the start of a specific clip: goto: clip id: {Clip ID}↵ To move forward/back {count} clips from the current clip on the current timeline: goto: clip id: +/-{count}↵...
  • Seite 560 Controlling asynchronous notifications The “notify” command may be used to enable or disable asynchronous notifications from the server. To enable or disable transport notifications: notify: transport: {“true”, “false”}↵ To enable or disable slot notifications: notify: slot: {“true”, “false”}↵ To enable or disable remote notifications: notify: remote: {“true”, “false”}↵...
  • Seite 561 Retrieving slot information The "slot info" command returns information about a slot. Without parameters, the command returns information for the currently selected slot: slot info↵ If a slot id is specified, that slot will be queried: slot info: slot id: {Slot ID}↵ The server will respond with slot specific information: 202 slot info:↵...
  • Seite 562 Retrieving timeline information The "clips get" command returns information for each available clip on the current timeline. Without parameters, the command returns information for all clips on timeline: clips get↵ The server responds with a list of clip IDs, names and timecodes: 205 clips info:↵...
  • Seite 563 1080i50, 1080i5994, 1080i60 HyperDeck Studio Pro and Plus models support these 4k formats: 4Kp23976, 4Kp24, 4Kp25, 4Kp2997, 4Kp30 HyperDeck Studio 4K Pro adds support for the following 4k formats: 4Kp50, 4Kp5994, 4Kp60 Video format support may vary between models and software releases.
  • Seite 564 Querying and updating configuration information The "configuration" command may be used to query the current configuration of the deck: configuration↵ The server returns the configuration of the deck: 211 configuration:↵ audio input: {“embedded”, “XLR”, “RCA”}↵ audio mapping: {n}↵ video input: {“SDI”, “HDMI”, “component”, “composite”}↵ file format: {format}↵...
  • Seite 565 Clearing the current timeline The "clips clear" command instructs the deck to empty the current timeline: clips clear↵ The server responds with 200 ok↵ Adding a clip to the current timeline The "clips add:" command instructs the deck to add a clip to the current timeline: clips add: name: {"clip name"}↵...
  • Seite 566: Помощь

    Чтобы узнать версию утилиты Blackmagic HyperDeck Setup, установленной на вашем компьютере, откройте окно About Blackmagic HyperDeck Setup. ‚ На компьютере с операционной системой Mac OS откройте Blackmagic HyperDeck Setup в папке «Программы». В меню выберите About Blackmagic HyperDeck Setup, чтобы узнать номер версии.
  • Seite 567: Соблюдение Нормативных Требований

    Соблюдение нормативных требований Утилизация электрооборудования и электронной аппаратуры в Европейском Союзе Изделие содержит маркировку, в соответствии с которой его запрещается утилизировать вместе с бытовыми отходами. Непригодное для эксплуатации оборудование необходимо передать в пункт вторичной переработки. Раздельный сбор отходов и их повторное использование позволяют беречь природные ресурсы, охранять...
  • Seite 568: Правила Безопасности

    При установке в стойку убедитесь в том, что не нарушен приток воздуха. Внутри корпуса не содержатся детали, подлежащие обслуживанию. Для выполнения ремонтных работ обратитесь в местный сервисный центр Blackmagic Design. Допускается эксплуатация в местах не выше 2000 метров над уровнем моря.
  • Seite 569: Гарантия

    ЗА УБЫТКИ, ВОЗНИКАЮЩИЕ ВСЛЕДСТВИЕ ИСПОЛЬЗОВАНИЯ ЭТОГО ИЗДЕЛИЯ. ПОТРЕБИТЕЛЬ ПРИНИМАЕТ НА СЕБЯ РИСКИ, СВЯЗАННЫЕ С ЕГО ЭКСПЛУАТАЦИЕЙ. © Copyright 2021 Blackmagic Design. Все права защищены. Blackmagic Design, DeckLink, HDLink, Workgroup Videohub, Multibridge Pro, Multibridge Extreme, Intensity и "Leading the creative video revolution" зарегистрированы как товарные...
  • Seite 570 Luglio 2021 Manuale di istruzioni Registratori su disco HyperDeck Registratori su disco HyperDeck...
  • Seite 571 Gentile utente, Grazie per aver acquistato un registratore su disco Blackmagic HyperDeck! Nel 2011 abbiamo progettato i primi HyperDeck per semplificare e abbattere i costi della registrazione e della riproduzione di video professionali con unità a stato solido da 2,5".
  • Seite 572 Indice Registratori su disco HyperDeck Utlizzare HyperDeck come webcam Operazioni preliminari Configurare HyperDeck come webcam Collegare l'alimentazione Configurare Open Broadcaster Collegare video e audio Blackmagic HyperDeck Setup Monitorare l’audio Utilizzare HyperDeck Setup Collegare i supporti di memoria Tab LUTs Registrare...
  • Seite 573 Registratori su disco HyperDeck Il tuo HyperDeck fa parte della linea di registratori su disco HD e 4K sviluppata per adattarsi ai diversi flussi di lavoro di produzione. HyperDeck Studio HD Pro e HyperDeck Studio 4K Pro occupano solo una unità rack e ospitano slot per schede SD e dischi SSD 9,5mm per riprodurre e registrare.
  • Seite 574: Operazioni Preliminari

    SDI o HDMI - ad esempio un televisore HDMI o un monitor SDI. Tutti gli HyperDeck supportano video HD fino al 1080p60. HyperDeck Studio 4K Pro è munito di connettori 12G-SDI in entrata e in uscita per collegare video Ultra HD fino al 2160p60 con un cavo BNC.
  • Seite 575 Monitorare l’audio Se il tuo HyperDeck dispone di speaker e presa cuffie frontali puoi sfruttarli per monitorare l’audio. Tieni premuto il pulsante dell’altoparlante e ruota la manopola per regolare il volume.
  • Seite 576 HyperDeck Studio verificherà la scheda. La spia dello slot è illuminata di verde durante la verifica. Quando la spia si spegne e il pulsante STOP si illumina, HyperDeck Studio è pronto per registrare Operazioni preliminari...
  • Seite 577 Inserendo un disco vuoto in uno slot o collegandone uno all’ingresso EXT DISK, il pulsante STOP smette di lampeggiare e il timecode sull’LCD ritorna bianco. Questo indica che HyperDeck ha verificato il nuovo disco e lo userà per continuare a registrare.
  • Seite 578 Quando HyperDeck Studio è collegato a più di un supporto, la registrazione continua dal primo disco o drive a quello successivo. Due icone in alto a destra della schermata principale confermano questa configurazione. Sostituire i supporti durante la registrazione Il supporto attivo durante la registrazione si può cambiare in qualsiasi momento. Se hai inserito un secondo supporto con spazio a sufficienza, tieni premuto il pulsante REC per continuare a registrare su quest’ultimo.
  • Seite 579 SUGGERIMENTO Per riprodurre i file video con HyperDeck è necessario impostare il codec esatto nel menù LCD. Leggi la sezione “Usare il menù LCD” per tutti i dettagli. Riproduzione continua Premi nuovamente PLAY durante la riproduzione per attivare la riproduzione continua (Loop).
  • Seite 580 È ideale per scorrere velocemente una clip lunga alla ricerca di un momento preciso. I modelli HyperDeck più grandi dispongono di appositi pulsanti per selezionare la modalità della manopola, il cui sistema di frizione fornisce una risposta tattile ideale mentre navighi il materiale seguendo le operazioni su un televisore o un monitor.
  • Seite 581 Spie degli slot Quando accendi HyperDeck e quando inserisci un SSD o una SD, la spia dello slot si illumina di verde durante la verifica del supporto e poi si spegne. Se il supporto non è formattato correttamente, o non funziona, lo slot si illumina di arancione.
  • Seite 582 Usare il menù LCD Premi MENU per aprire il menù impostazioni. Ruota la manopola o premi SKIP avanti e indietro per scorrere tra le impostazioni del menù; premi SET per confermare un sottomenù. Ruota la manopola per scorrere tra le impostazioni del menù Premi SET per confermare l’opzione selezionata.
  • Seite 583 Codec Gli HyperDeck Studio registrano video compresso con i codec H.264, Apple ProRes e DNxHD. HyperDeck Studio 4K Pro è compatibile anche con i codec H.265 e DNxHR per registrare in 4K. REC auto L’impostazione di innesco della registrazione offre due opzioni: Video Start/Stop e Timecode.
  • Seite 584 HyperDeck Studio offre una funzione che agevola la registrazione ISO perché inverte questo processo risincronizzando l’ingresso video all’ingresso di riferimento. In termini pratici, consente di collegare HyperDeck a sorgenti prive di sync e di risincronizzare l’ingresso video al video di riferimento prima di registrarlo.
  • Seite 585 Monitoraggio Questo menù è disponibile per gli HyperDeck Studio provvisti di connessione Monitor Out sul retro. Clean feed Abilita questa impostazione per nascondere le informazioni di stato dai display collegati all’uscita Monitor Out. Consulta la sezione “Uscita Monitor Out” per tutti i dettagli sulla schermata di monitoraggio e le informazioni di stato disponibili.
  • Seite 586 Audio Canali registrati HyperDeck Studio può registrare fino a 16 canali di audio PCM alla volta. Apri questa impostazione e seleziona 2, 4, 8 o 16 canali dalla lista. Se il codec è H.264 o H.265 puoi anche selezionare due canali di audio AAC per caricare le registrazioni direttamente su YouTube. Dalla tua selezione dipenderà...
  • Seite 587: Configurazione

    Le schede SD, i dischi SSD e i supporti collegati alla connessione EXT DISK si possono formattare sul deck stesso o su un computer Mac o Windows. Preparare i supporti su HyperDeck Studio Ruota la manopola fino all’impostazione Formatta e premi SET.
  • Seite 588 L’orologio è nel formato 24 ore. Software Mostra la versione attuale del software. Schermo Seleziona l’opzione Chiaro per vedere l’LCD ben illuminato; seleziona l’opzione Scuro per ridurre la luminosità dell’LCD - per esempio se sul rack ci sono tanti HyperDeck uno sopra all’altro. Impostazioni...
  • Seite 589 Lo standard video di default è solo una guida che suggerisce ad HyperDeck Studio la selezione più adatta nelle circostanze menzionate e non ne altera il funzionamento regolare.
  • Seite 590 Rete Protocollo HyperDeck è impostato su DHCP di default: una volta connesso, il server di rete gli assegna automaticamente un indirizzo IP e non c’è bisogno di configurare nessun’altra impostazione. Per impostare manualmente l’indirizzo è necessario un IP statico. Seleziona l’impostazione Protocollo e premi SET, seleziona IP statico dalla lista e premi SET.
  • Seite 591 Timecode Ingresso Le opzioni per timecode in entrata durante la registrazione sono cinque. Ingresso Usa il timecode integrato nelle sorgenti SDI e HDMI con metadati SMPTE RP 188. video Mantiene la sincronizzazione tra la sorgente SDI o HDMI e il file registrato dal deck. Esterno Usa il timecode della connessione Timecode del deck.
  • Seite 592 Adotta di default il segnale della fonte esterna collegata all’ingresso Ref In. In assenza di una fonte esterna, adotta di default il segnale della sorgente SDI o HDMI. Ingresso Sincronizza HyperDeck al segnale di riferimento integrato nella fonte SDI o HDMI (per esempio un deck analogico connesso direttamente a una sorgente genlockata). Esterna Seleziona questa opzione se all’ingresso Ref In è...
  • Seite 593 Clip Esclusione HDR HyperDeck Studio 4K Pro rileva automaticamente i metadati HDR integrati in un segnale video 4K o in un file e li mostra attraverso l’uscita HDMI. Se il segnale o il file non sono taggati correttamente, o se il display non supporta l’HDR, puoi escludere le informazioni HDR.
  • Seite 594 Collega il connettore Remote Out dell’HyperDeck principale al connettore Remote In del secondo HyperDeck e così via con il resto delle unità per creare una configurazione a cascata tramite RS-422. Abilita l’impostazione di controllo remoto su tutte le unità per far sì che i comandi impartiti dal deck principale funzionino anche sui deck secondari.
  • Seite 595: Lato Posteriore

    Connetti il deck alla rete per trasferire i file con FTP ad alta velocità o per controllarlo remotamente mediante HyperDeck Ethernet Protocol. La porta è 1GbE sui modelli HD e 10GbE su HyperDeck Studio 4K Pro. Tutti i dettagli sul trasferimento file con un client FTP si trovano nella sezione “Trasferire file in rete”.
  • Seite 596 Tutti gli HyperDeck sono provvisti di un generatore interno di timecode ora del giorno. Come il segnale di riferimento, anche il segnale di timecode si può collegare a cascata a un HyperDeck principale o a un dispositivo video per far sì che le registrazioni abbiano lo stesso timecode.
  • Seite 597 Puoi anche scegliere se visualizzare il timecode della clip o della timeline. Fonte La fonte SDI o HDMI selezionata. Nessun segnale compare in assenza di un segnale valido. Nome Il nome assegnato al dispositivo. Consulta la sezione “Blackmagic HyperDeck Setup” per tutti i dettagli. Uscita Monitor Out...
  • Seite 598 Modalità Scroll. Supporti di memoria Questi tre indicatori mostrano il nome e lo stato della scheda SD, del disco SSD e del drive USB attivo. Sono leggermente diversi a seconda del modello di HyperDeck. HyperDeck Studio HD Plus Slot scheda SD 1...
  • Seite 599 Barra di progresso La barra è blu, bianca o rossa in base allo stato del supporto di memoria, e indica lo spazio utilizzato. Il supporto di memoria attivo per la riproduzione e la registrazione. Supporto di memoria presente ma non attivo. Il supporto è pieno se la barra è...
  • Seite 600 Consigliamo di visitare regolarmente la pagina www.blackmagicdesign.com/it/support scaricare l’ultima versione del manuale con le informazioni aggiornate. Quali schede SD sono adatte per HyperDeck Studio 4K Pro? Consigliamo le seguenti schede SD per registrare a 2160p fino a 60 fps Marca Modello Capacità...
  • Seite 601 Quali schede SD sono adatte per HyperDeck Studio HD Pro? Consigliamo le seguenti schede SD per registrare a 2160p fino a 30 fps Marca Modello Capacità Angelbird AV Pro MK2 V90 SDXC 64GB Angelbird AV Pro MK2 V90 SDXC 128GB...
  • Seite 602 In fase di test abbiamo riscontrato che gli ultimi modelli di SSD e quelli ad alta capacità sono solitamente più veloci. Gli SSD consigliati sono: Quali SSD sono adatti per HyperDeck Studio 4K Pro? Consigliamo i seguenti SSD per registrare a 2160p fino a 60 fps...
  • Seite 603 Drive esterno Tutti i modelli HyperDeck sono in grado di registrare su flash disk USB-C, drive veloci e ad alta capacità che consentono registrazioni di lunga durata. Collegali al computer per montare il materiale dal drive stesso. Per una capacità di archiviazione ancora superiore puoi anche collegare un dock USB-C o un hard drive esterno.
  • Seite 604 Quali drive USB-C sono adatti per HyperDeck Studio HD Plus? Consigliamo i seguenti drive USB-C per registrare a 2160p fino a 30 fps Marca Modello Capacità Angelbird SSD2GO PKT MK2 512GB Angelbird SSD2GO PKT MK2 DelKinDevices Juggler DelKinDevices Juggler LaCie...
  • Seite 605 Formattare i supporti di memoria Preparare i supporti di memoria sul computer Formattare su Mac Per formattare in HFS+ o exFAT su un Mac, utilizza Utility disco. È consigliabile eseguire un backup del supporto di memoria perché la formattazione elimina i dati permanentemente.
  • Seite 606 Open Broadcaster. Configurare HyperDeck come webcam Nella maggior parte dei casi, il software di streaming rileva HyperDeck come webcam all’istante e ne mostra l’icona. In caso contrario, sarà necessario indicare al software di usare HyperDeck come webcam e microfono. Su Skype: Nella barra del menù...
  • Seite 607 Configurare Open Broadcaster Open Broadcaster è un’applicazione open source che funge da piattaforma di streaming tra HyperDeck Studio e i software come YouTube, Twitch e Facebook Live. Open Broadcaster comprime il video in un bit rate facilmente gestibile dall’applicazione di streaming.
  • Seite 608 YouTube e procedi con OK. Clicca Copia per copiare il codice di streaming che dovrai incollare su Open Broadcaster. Il flusso video di HyperDeck Studio apparirà nella finestra di anteprima di Open Broadcaster. Per connettere Open Broadcaster a YouTube, clicca Torna su YouTube Live.
  • Seite 609 Clicca sull’icona circolare al centro della pagina o sull’immagine di HyperDeck per aprire le impostazioni. Tab Setup Se lavori con più dispositivi HyperDeck Studio, assegna un nome a ciascuno per identificarli con facilità. Scrivi il nome nel campo Name. Blackmagic HyperDeck Setup...
  • Seite 610 IP dell’unità. Tab LUTs I modelli HyperDeck dotati di connessioni di monitoraggio permettono di visualizzare il video in entrata con le LUT 3D a 17, 33 o 65 punti nel formato .cube. Per esempio le LUT sono ideali per le immagini girate in gamma dinamica Film, piatte e a bassa saturazione.
  • Seite 611: Aggiornare Il Software Interno

    LCD. Aggiornare il software interno L’utilità consente di aggiornare il software interno di HyperDeck e configurare le impostazioni di streaming, le impostazioni di rete e la qualità dello streaming. Per aggiornare il software interno: Scarica l’installer Blackmagic HyperDeck Setup più...
  • Seite 612 Teranex Mini Rack Shelf è una mensola di una unità rack ideale per inserire Blackmagic HyperDeck Studio HD Mini e HyperDeck Studio HD Plus nel rack o in un flight case. HyperDeck Studio HD Mini ha le stesse dimensioni compatte di altri dispositivi Blackmagic Design, tra cui i convertitori Teranex Mini, MultiView 4 e Web Presenter.
  • Seite 613 Il protocollo RS-422, lo standard broadcast per il controllo seriale utilizzato dalle emittenti sin dai primi anni ottanta, è disponibile su deck, prodotti di automazione, e programmi di montaggio lineari e non lineari. Tutti i modelli esistenti di HyperDeck supportano questo standard, garantendone la perfetta integrazione alle soluzioni di automazione broadcast, di controllo remoto, di montaggio, e di controllo su misura.
  • Seite 614 Abilita il controllo deck remoto tramite RS-422 selezionando Remoto nel menù del display LCD o premendo il pulsante Rem Tutti i modelli HyperDeck supportano il controllo remoto tramite la porta RS-422 sul retro Comandi RS-422 compatibili Command Reply No Remote...
  • Seite 615 Command Reply No Remote Notes Treated as N=1; 0x22 0x22 VarRev2 Acknowledge Disabled Same as VarRev1 0x21 0x23 ShuttleRev1 Acknowledge Disabled Treated as N=1; 0x22 0x23 ShuttleRev2 Acknowledge Disabled Same as ShuttleRev1 0x20 0x30 Preroll Acknowledge Disabled 0x24 0x31 CueData Acknowledge Disabled 0x20...
  • Seite 616 Command Reply No Remote Notes 6 - Sense Request 0x61 0x0A TimeCodeGenSense — — 0x61 0x0C CurrentTimeSense — — 0x60 0x10 InDataSense InData Enabled 0x60 0x11 OutDataSense OutData Enabled 0x60 0x12 AInDataSense AInData Enabled 0x60 0x13 AOutDataSense AOutData Enabled 0x61 0x20 StatusSense StatusData...
  • Seite 617 Command Reply No Remote Notes A - Advanced Media Protocol 8-bit signed number of 0xA1 0x01 AutoSkip Acknowledge Disabled clips to skip from current clip when x = 0 single clip request when x = 1, # 0xAX 0x15 ListNextID IDListing Enabled clips can be specified in...
  • Seite 618: Trasferire I File In Rete

    HyperDeck installato a distanza per un’insegna digitale. Connettere HyperDeck Studio Quando il computer e HyperDeck Studio sono sulla stessa rete, servono solo un client FTP e l’indirizzo IP di HyperDeck Studio. Scarica e installa un client FTP sul computer a cui vuoi connettere HyperDeck.
  • Seite 619 FTP offre un’interfaccia di tipo trascina e rilascia. Puoi trasferire qualsiasi file da e su HyperDeck, ma ricorda che i file che intendi riprodurre da HyperDeck Studio devono essere compatibili con le risoluzioni e con i codec da esso supportati.
  • Seite 620 Collegare uno switcher ATEM Se usi uno switcher ATEM, puoi collegare fino a 4 HyperDeck e gestirli dal software o da un pannello ATEM. Sarà come avere un intero studio di registrazione a portata di mano. Dallo switcher ATEM puoi anche innescare la registrazione su HyperDeck, un’ottima soluzione per archiviare le trasmissioni o per catturare le riprese secondarie durante le produzioni live da utilizzare in post.
  • Seite 621 HyperDeck si aprono su qualsiasi software video su Mac OS. I file DNxHD e DNxHR MXF registrati da HyperDeck si aprono con Avid Media Composer e DaVinci Resolve per Mac. I codec DNxHD si possono scaricare gratuitamente da http://www.avid.com/products/avid-dnxhr-and-dnxhd...
  • Seite 622 Informazioni per gli sviluppatori (English) Blackmagic HyperDeck Ethernet Protocol Per accedere al protocollo di testo Blackmagic HyperDeck Ethernet Protocol collegati alla porta TCP 9993 sui modelli HyperDeck Studio con connessione ethernet integrata. Il protocollo consente di costruire dispositivi integrabili ai nostri prodotti. A Blackmagic Design crediamo fermamente nei protocolli aperti e non vediamo l’ora di scoprire cosa realizzerai.
  • Seite 623 Command Command Description spill current recording to specified slot record: spill: slot id: {n} use current id to spill to same slot stop stop playback or recording clips count query number of clips on timeline clips get query all timeline clips clips get: clip id: {n} query a timeline clip info clips get: clip id: {n} count: {m}...
  • Seite 624 Command Command Description notify: timeline position: {true/false} set playback timeline position notifications notify: playrange: {true/false} set playrange notifications notify: cache: {true/false} set cache notifications notify: dynamic range: {true/false} set dynamic range settings notifications notify: slate: {true/false} set digital slate notifications goto: clip id: {start/end} goto first clip or last clip goto: clip id: {n}...
  • Seite 625 2 video format: NTSC Using XML While you can use the Terminal to talk to HyperDeck, if you are writing software, you can use XML to confirm the existence of a specific command based on the firmware of the HyperDeck you are communicating with.
  • Seite 626 The HyperDeck Ethernet server listens on TCP port 9993. Basic syntax The HyperDeck protocol is a line oriented text protocol. Lines from the server will be separated by an ascii CR LF sequence. Messages from the client may be separated by LF or CR LF.
  • Seite 627 Failure response codes Failure responses to commands are indicated with response codes in the range of 100 to 199: 100 syntax error 101 unsupported parameter 102 invalid value 103 unsupported 104 disk full 105 no disk 106 disk error 107 timeline empty 108 internal error 109 out of range 110 no input...
  • Seite 628 Timecode syntax Timecodes are expressed as non-drop-frame timecode in the format: HH:MM:SS:FF Handling of deck "remote" state The “remote” command may be used to enable or disable the remote control of the deck. Any attempt to change the deck state over ethernet while remote access is disabled will generate an error: 111 remote control disabled↵...
  • Seite 629 Switching to preview mode The "preview" command instructs the deck to switch between preview mode and output mode: preview: enable: {"true", "false"}↵ Playback will be stopped when the deck is switched to preview mode. Capturing will be stopped when the deck is switched to output mode.
  • Seite 630 Changing timeline position The "goto" command instructs the deck to switch to playback mode and change its position within the timeline. To go to the start of a specific clip: goto: clip id: {Clip ID}↵ To move forward/back {count} clips from the current clip on the current timeline: goto: clip id: +/-{count}↵...
  • Seite 631 Controlling asynchronous notifications The “notify” command may be used to enable or disable asynchronous notifications from the server. To enable or disable transport notifications: notify: transport: {“true”, “false”}↵ To enable or disable slot notifications: notify: slot: {“true”, “false”}↵ To enable or disable remote notifications: notify: remote: {“true”, “false”}↵...
  • Seite 632 Retrieving slot information The "slot info" command returns information about a slot. Without parameters, the command returns information for the currently selected slot: slot info↵ If a slot id is specified, that slot will be queried: slot info: slot id: {Slot ID}↵ The server will respond with slot specific information: 202 slot info:↵...
  • Seite 633 Retrieving timeline information The "clips get" command returns information for each available clip on the current timeline. Without parameters, the command returns information for all clips on timeline: clips get↵ The server responds with a list of clip IDs, names and timecodes: 205 clips info:↵...
  • Seite 634 1080i50, 1080i5994, 1080i60 HyperDeck Studio Pro and Plus models support these 4k formats: 4Kp23976, 4Kp24, 4Kp25, 4Kp2997, 4Kp30 HyperDeck Studio 4K Pro adds support for the following 4k formats: 4Kp50, 4Kp5994, 4Kp60 Video format support may vary between models and software releases.
  • Seite 635 Querying and updating configuration information The "configuration" command may be used to query the current configuration of the deck: configuration↵ The server returns the configuration of the deck: 211 configuration:↵ audio input: {“embedded”, “XLR”, “RCA”}↵ audio mapping: {n}↵ video input: {“SDI”, “HDMI”, “component”, “composite”}↵ file format: {format}↵...
  • Seite 636 Clearing the current timeline The "clips clear" command instructs the deck to empty the current timeline: clips clear↵ The server responds with 200 ok↵ Adding a clip to the current timeline The "clips add:" command instructs the deck to add a clip to the current timeline: clips add: name: {"clip name"}↵...
  • Seite 637: Assistenza Clienti

    Assistenza Assistenza clienti Il modo più veloce di ottenere assistenza per HyperDeck è consultare il materiale di supporto più recente disponibile alla pagina Supporto di Blackmagic Design. Supporto online Blackmagic Design Il manuale, il software e le note di supporto più recenti sono disponibili alla pagina www.blackmagicdesign.com/it/support...
  • Seite 638 Normative Smaltimento di apparecchiature elettriche ed elettroniche nell'Unione Europea Questo simbolo indica che il dispositivo non deve essere scartato insieme agli altri rifiuti, ma consegnato a uno degli appositi centri di raccolta e riciclaggio. La raccolta e lo smaltimento differenziato corretto di questo tipo di apparecchiatura evita lo spreco di risorse e contribuisce alla sostenibilità...
  • Seite 639 Se installato su rack, assicurarsi che i dispositivi adiacenti non ostacolino la ventilazione. Le parti all'interno del dispositivo non sono riparabili dall'utente. Contattare un centro assistenza Blackmagic Design per le operazioni di manutenzione. Usare il dispositivo a un'altitudine non superiore a 2000 m sopra il livello del mare.
  • Seite 640 Il/la Cliente è responsabile del costo di imballaggio e di spedizione del prodotto al centro di assistenza indicato da Blackmagic Design, con spese di spedizione prepagate. I costi di spedizione, l’assicurazione, le tasse, la dogana e altre spese pertinenti alla resa del prodotto a Blackmagic Design sono a carico del/la cliente.
  • Seite 641 Julho 2021 Manual de Instalação e Operação Gravadores de Disco HyperDeck Gravadores de Disco HyperDeck...
  • Seite 642 áudio diretamente do seu HyperDeck, além de vários outros recursos. Esperamos que você obtenha anos de uso do seu gravador de disco HyperDeck e que ele contribua com as suas produções.
  • Seite 643 Índice Apresentando os Gravadores Formatar Mídias de Disco HyperDeck Preparar mídias em um computador Primeiros Passos Usar o HyperDeck como uma Webcam Conexão de alimentação Configurar a fonte webcam Conexão de vídeo e áudio Configurar Open Broadcaster Verificar áudio Blackmagic HyperDeck Setup Conexão de mídias...
  • Seite 644 HD e 4K, desenvolvidos para atender ao seu fluxo de trabalho de produção existente. O HyperDeck Studio HD Pro e o HyperDeck Studio 4K Pro foram projetados para caber dentro de uma única unidade de rack, porém são grandes o suficiente para gravar e reproduzir arquivos tanto em cartões SD quanto em SSDs de 9,5 mm.
  • Seite 645: Primeiros Passos

    Primeiros Passos Começar a usar o seu gravador de disco HyperDeck Studio é tão simples quanto conectar a alimentação, as fontes de vídeo, o equipamento de destino e inserir os SSDs ou os cartões SD. Conexão de alimentação Basta conectar um cabo IEC padrão à entrada de alimentação do seu HyperDeck na parte traseira do painel.
  • Seite 646 LCD. Verificar áudio Caso o seu HyperDeck possua um alto-falante e um conector de fone de ouvido no painel frontal, você pode verificar o áudio rapidamente usando o alto-falante integrado ou conectando fones de ouvido. Para ouvir, pressione e segure o botão de alto-falante e gire o seletor para ajustar o volume.
  • Seite 647 O HyperDeck Studio verificará o cartão SD. Uma luz verde acenderá acima do compartimento do cartão SD. Quando o indicador apagar e o botão “Stop” acender, o HyperDeck Studio está pronto para gravar. Primeiros Passos...
  • Seite 648: Gravação De Vídeo

    Gravação em múltiplas mídias Quando o tempo de gravação do SSD ou do cartão SD for inferior a três minutos, o contador do código de tempo no LCD do seu HyperDeck Studio ficará vermelho e o botão “Stop” piscará lentamente.
  • Seite 649 HyperDeck pode continuar a gravar, já que o segundo disco foi verificado e há espaço para continuar a gravação. Se houver mais de uma mídia conectada ao HyperDeck Studio, a gravação passará de um disco ou drive para o próximo. O HyperDeck Studio exibirá um ícone no canto superior direito da tela inicial.
  • Seite 650 Menu LCD’ e ‘Configurações’ para mais informações. Reprodução em loop Caso queira que a reprodução continue indefinidamente, você pode definir o seu HyperDeck para reprodução em loop pressionando o botão “Play” novamente durante a reprodução. Quando a reprodução em loop estiver ativada, o ícone de loop será exibido no LCD. Existem dois modos de loop disponíveis:...
  • Seite 651 Os modos de busca do seletor são: jog, shuttle e scroll. Reproduz o clipe quadro por quadro, para frente ou para trás, oferecendo controle preciso. Shuttle Reproduz para frente ou para trás a uma velocidade mais rápida. A reprodução varia de acordo com o giro do seletor. Scroll Reprodução ainda mais rápida dependendo de como você...
  • Seite 652 Indicadores dos compartimentos de mídia Quando você ligar o HyperDeck pela primeira vez, ou sempre que inserir um SSD ou cartão SD, o indicador do compartimento acenderá em verde enquanto verifica a mídia e, em seguida, desligará.
  • Seite 653 Usar o menu LCD Pressione o botão “Menu” no painel frontal para acessar o menu de configurações. Gire o seletor de busca ou pressione os botões “Skip” para navegar entre as opções do menu e pressione “Set” para selecionar um submenu. Gire o seletor de busca para navegar pelo menu de configurações.
  • Seite 654 Geralmente, todos os decks profissionais podem usar uma entrada de referência para casar a saída de vídeo durante a reprodução. Isso significa que a saída de reprodução do HyperDeck será casada à entrada de referência para que não seja necessário ressincronizá-la quando for conectada a um sistema de transmissão maior.
  • Seite 655 Isso quer dizer que você pode conectar a saída SDI do HyperDeck a uma câmera para casar a câmera com a referência através da alimentação de retorno do programa. Um bom exemplo é a Blackmagic Studio Camera 4K Pro, que pode definir sua referência como vídeo externo.
  • Seite 656 ‘Usar a Saída de Monitoramento’. LUT 3D As LUTs podem ser especialmente úteis ao usar o HyperDeck Studio como um gravador de campo. Elas informam ao dispositivo qual cor e luminância exibir. Isto pode ser útil ao usar a faixa dinâmica da câmera no modo Filme, que tem um aspecto intencionalmente “lavado”...
  • Seite 657: Menu Áudio

    Menu Áudio Canais de Áudio Gravados O HyperDeck Studio pode gravar até 16 canais de áudio PCM de cada vez. Para selecionar o número de canais a ser gravado, amplie a lista “Canais de Áudio Gravados” e selecione 2, 4, 8 ou 16 canais.
  • Seite 658: Menu Configurações

    Formatar Mídia Mídias, SSDs e cartões SD conectados à porta rotulada “Ext Disk” na parte traseira podem ser formatados diretamente no HyperDeck ou através de um computador Mac ou Windows. Como preparar mídias no HyperDeck Studio: Usando o seletor de busca e o botão “Set”, selecione “Formatar Mídia”.
  • Seite 659 Hora Para ajustar a hora, selecione “Hora” e pressione “Set". Use o seletor de busca para ajustar as horas e os minutos. O relógio do HyperDeck Studio utiliza o padrão 24 horas. Software Exibe a versão do software instalado.
  • Seite 660 O padrão principal também é útil quando você inicializa um HyperDeck pela primeira vez e não há uma entrada de vídeo ou um disco de mídias inserido. Neste caso, o HyperDeck Studio não consegue identificar qual padrão de vídeo usar para a saída de monitoramento. O padrão principal de vídeo indicará...
  • Seite 661: Configurações De Rede

    Configurações de Rede Protocolo O Blackmagic HyperDeck vem configurado de fábrica como DHCP, portanto, uma vez conectado, o servidor de rede atribuirá um endereço IP automaticamente e nenhuma outra configuração de rede precisará ser ajustada. Caso precise definir um endereço manualmente, você...
  • Seite 662 A seleção da entrada de vídeo obterá o código de tempo embutido de fontes SDI e Vídeo HDMI com metadados SMPTE RP 188. Isso manterá a sincronização entre sua fonte SDI ou HDMI e o arquivo gravado no HyperDeck Studio. Externa Clique nesta opção ao usar o código de tempo conectado ao painel traseiro.
  • Seite 663 Generator, conectado à porta “Ref In” na parte traseira, selecione “Externa”. Indicador de Referência Externa – O símbolo “REF” será exibido no LCD integrado quando o seu HyperDeck Studio estiver casado com uma fonte de referência externa. Sincronização de Referência A sincronização de referência pode ser ajustada se você...
  • Seite 664 Número do Clipe Substituição de Formato HDR O HyperDeck Studio 4K Pro automaticamente detectará metadados HDR integrados em um sinal ou arquivo de vídeo 4K e os exibirá através da saída HDMI. Caso o sinal ou arquivo esteja rotulado incorretamente, ou o seu display não seja compatível com HDR, você pode substituir o formato HDR.
  • Seite 665 HyperDeck para várias unidades HyperDeck adicionais. Monte seus HyperDecks em cascata ao plugar o conector de saída remota do HyperDeck principal ao conector de entrada remota da segunda unidade, e continue a cadeia RS-422 para as unidades adicionais. Quando todas as unidades adicionais tiverem a configuração remota habilitada, os controles de transporte da...
  • Seite 666: Painel Traseiro

    Protocol. As velocidades de transferência de arquivos são suportadas através de 1GbE nos modelos HD e 10GbE no HyperDeck Studio 4K Pro. Para mais detalhes sobre a transferência de arquivos através de um cliente de FTP, consulte a seção ‘Transferir Arquivos via Rede’...
  • Seite 667 Os modelos HyperDeck Studio HD Mini possuem um único conector 3G-SDI para sinais de até 1080p60. Os modelos HyperDeck Studio HD Plus e HyperDeck Studio HD Pro incluem 6G-SDI para sinais desde SD até 2160p30. O HyperDeck Studio 4K Pro possui entradas e saídas 12G-SDI que suportam resoluções de até 2160p60.
  • Seite 668 Exibe a fonte SDI ou HDMI conectada. Caso a mensagem “Nenhum Sinal” seja exibida, significa que um sinal válido não foi detectado. Nome Exibe o nome do seu gravador de disco HyperDeck. Para mais informações sobre como alterar o nome, consulte a seção ‘Blackmagic HyperDeck Setup’ neste manual. Usar a Saída de Monitoramento...
  • Seite 669 Em todos os modelos HyperDeck, o terceiro indicador exibe a unidade USB. Se você estiver usando um hub USB, ou uma doca com a Blackmagic MultiDock 10G, o drive ativo será exibido. Indicador de Disco ou Drive O texto acima da barra indica o compartimento de SSD ou cartão SD.
  • Seite 670 Barra de Mídia O ícone da barra será azul, branco ou vermelho, dependendo do status atual, e exibirá o espaço utilizado no cartão. O ícone azul indica a unidade ativa. Este é o drive que será usado para reprodução e gravação. Um ícone de drive branco indica que há...
  • Seite 671 É recomendável verificar regularmente a última versão deste manual, que pode ser sempre baixado no site da Blackmagic Design em www.blackmagicdesign.com/br/support para informações mais atualizadas. Quais cartões SD devo usar com o HyperDeck Studio 4K Pro? Os seguintes cartões SD são recomendados para gravar 2160p em até 60 fps: Marca Modelo Capacidade...
  • Seite 672 Quais cartões SD devo usar com o HyperDeck Studio HD Pro? Os seguintes cartões SD são recomendados para gravar 2160p em até 30 fps: Marca Modelo Capacidade Angelbird AV Pro MK2 V90 SDXC 64GB Angelbird AV Pro MK2 V90 SDXC...
  • Seite 673 Segundo os testes que realizamos, os modelos de SSDs mais novos e de maior capacidade, normalmente, são mais rápidos. Os SSDs recomendados para uso incluem: Quais SSDs devo usar com o HyperDeck Studio 4K Pro? Os seguintes SSDs são recomendados para gravar 2160p em até 60 fps:...
  • Seite 674 Unidades externas Todos os modelos HyperDeck podem gravar diretamente em unidades flash USB-C. Essas unidades rápidas e de capacidade superior possibilitam a gravação de vídeos por períodos prolongados. Depois, você pode conectar a unidade flash ao seu computador e editar diretamente dela.
  • Seite 675 Quais unidades USB-C devo usar com o HyperDeck Studio HD Plus? As seguintes unidades USB-C são recomendadas para gravar 2160p em até 30 fps: Marca Modelo Capacidade Angelbird SSD2GO PKT MK2 512GB Angelbird SSD2GO PKT MK2 DelKinDevices Juggler DelKinDevices Juggler...
  • Seite 676 Configure o formato como “Mac OS Expandido (Journaling)” ou “exFAT”. Digite um nome para o novo volume e clique em “Apagar”. A sua mídia de armazenamento será formatada rapidamente e disponibilizada para uso com o HyperDeck. Como formatar mídias em um computador Windows: A caixa de diálogo “Formatar”...
  • Seite 677 HyperDeck usando aplicativos de streaming como o Open Broadcaster. Configurar a fonte webcam Na maioria das vezes, o seu aplicativo de software definirá o HyperDeck Studio como uma webcam automaticamente, assim, ao iniciar o seu aplicativo de streaming você visualizará a imagem do seu HyperDeck Studio na hora.
  • Seite 678 O Open Broadcaster é um aplicativo de código aberto que funciona como uma plataforma de streaming entre o seu HyperDeck Studio e o seu software de streaming favorito, como YouTube, Twitch, Facebook Live, entre outros. O Open Broadcaster faz a compactação do seu vídeo para uma taxa de bit facilmente gerenciada pelo seu app de streaming.
  • Seite 679 Para conectar o link de transmissão do Open Retorne ao YouTube Live e você verá a saída Broadcaster ao YouTube, clique em “Iniciar webcam de programa do seu HyperDeck no Transmissão”, no canto inferior direito da tela. segundo plano. Clique em “Concluído”.
  • Seite 680 Execute o HyperDeck Setup. O nome do modelo do HyperDeck será exibido na página inicial do utilitário de configuração. Clique no ícone circular no canto superior direito ou na imagem do seu HyperDeck para abrir a página de configurações. Página Setup Caso você...
  • Seite 681 Caso queira aplicar a mesma LUT na sua imagem no DaVinci Resolve, basta importar o mesmo arquivo LUT .cube usado no HyperDeck Studio para o DaVinci Resolve e aplicá-la à sua gradação. Blackmagic HyperDeck Setup...
  • Seite 682 LUT através das configurações de monitoramento no menu LCD. Atualizar o Software Interno O utilitário de configuração permite atualizar o software interno do seu HyperDeck, além de definir as configurações de streaming, configurações de rede e qualidade de streaming.
  • Seite 683 Blackmagic HyperDeck Studio HD Mini e HyperDeck Studio HD Plus em um rack broadcast ou em um case técnico. Seu Blackmagic HyperDeck Studio HD Mini é tão pequeno que você pode instalá-lo próximo a outros equipamentos da Blackmagic Design que compartilham um fator de forma semelhante, como os conversores Teranex Mini, o Blackmagic MultiView 4 e o Blackmagic Web Presenter.
  • Seite 684 Usar um Controlador RS-422 Externo Todos os modelos HyperDeck atuais incluem uma porta de comando de deck compatível com o padrão de indústria RS-422 da Sony™, que tem as conexões de pino corretas para uma conexão direta com qualquer controlador remoto com RS-422, como o HyperDeck Extreme Control.
  • Seite 685 Para habilitar o controle de deck RS-422, verifique se a opção “Remoto” do HyperDeck está habilitada no menu LCD ou através do botão “Remote” no painel frontal. Todos os modelos HyperDeck suportam controle remoto através da porta RS-422 no painel traseiro.
  • Seite 686 Command Reply No Remote Notes Treated as N=1; 0x22 0x22 VarRev2 Acknowledge Disabled Same as VarRev1 0x21 0x23 ShuttleRev1 Acknowledge Disabled Treated as N=1; 0x22 0x23 ShuttleRev2 Acknowledge Disabled Same as ShuttleRev1 0x20 0x30 Preroll Acknowledge Disabled 0x24 0x31 CueData Acknowledge Disabled 0x20...
  • Seite 687 Command Reply No Remote Notes 6 - Sense Request 0x61 0x0A TimeCodeGenSense — — 0x61 0x0C CurrentTimeSense — — 0x60 0x10 InDataSense InData Enabled 0x60 0x11 OutDataSense OutData Enabled 0x60 0x12 AInDataSense AInData Enabled 0x60 0x13 AOutDataSense AOutData Enabled 0x61 0x20 StatusSense StatusData...
  • Seite 688 Command Reply No Remote Notes A - Advanced Media Protocol 8-bit signed number of 0xA1 0x01 AutoSkip Acknowledge Disabled clips to skip from current clip when x = 0 single clip request when x = 1, # 0xAX 0x15 ListNextID IDListing Enabled clips can be specified in...
  • Seite 689 HyperDeck remota baseada em outro local para sinalização digital. Conectar ao HyperDeck Studio Com o computador e o HyperDeck Studio na mesma rede, você só precisará de um cliente FTP e do endereço IP do seu HyperDeck Studio.
  • Seite 690 A maioria dos aplicativos tem uma interface de arrastar e soltar, mas verifique o método apropriado para o aplicativo que você estiver usando. É possível transferir qualquer arquivo para o HyperDeck ou a partir dele, mas vale a pena ressaltar que qualquer arquivo que você pretenda reproduzir a partir do HyperDeck Studio precisará ser compatível com os codecs e as resoluções que o seu HyperDeck suporta.
  • Seite 691: Conectar A Um Switcher Atem

    Você pode encontrar o endereço IP do HyperDeck no painel frontal e no menu LCD, acessando o menu de configurações e depois “Ethernet” no menu principal. Outra maneira de acessar o endereço IP do seu HyperDeck no Mac ou PC é através da guia “Configure” no Blackmagic HyperDeck Setup.
  • Seite 692 Para habilitar o controle Ethernet com um switcher ATEM, verifique se a opção “Remoto” do HyperDeck está habilitada no menu LCD ou através do botão “REM” do painel de controle. Noções Básicas sobre Fluxos de Trabalho de Pós-Produção Acessar seus clipes Para acessar seus clipes, basta conectar o cartão SD ou o SSD ao computador através de...
  • Seite 693 The Blackmagic HyperDeck Ethernet Protocol is a text based protocol accessed by connecting to TCP port 9993 on HyperDeck Studio models that have a built in Ethernet connection. If you are a software developer, you can use the protocol to construct devices that integrate with our products.
  • Seite 694 Command Command Description spill current recording to specified slot record: spill: slot id: {n} use current id to spill to same slot stop stop playback or recording clips count query number of clips on timeline clips get query all timeline clips clips get: clip id: {n} query a timeline clip info clips get: clip id: {n} count: {m}...
  • Seite 695 Command Command Description notify: timeline position: {true/false} set playback timeline position notifications notify: playrange: {true/false} set playrange notifications notify: cache: {true/false} set cache notifications notify: dynamic range: {true/false} set dynamic range settings notifications notify: slate: {true/false} set digital slate notifications goto: clip id: {start/end} goto first clip or last clip goto: clip id: {n}...
  • Seite 696 2 video format: NTSC Using XML While you can use the Terminal to talk to HyperDeck, if you are writing software, you can use XML to confirm the existence of a specific command based on the firmware of the HyperDeck you are communicating with.
  • Seite 697 The HyperDeck Ethernet server listens on TCP port 9993. Basic syntax The HyperDeck protocol is a line oriented text protocol. Lines from the server will be separated by an ascii CR LF sequence. Messages from the client may be separated by LF or CR LF.
  • Seite 698 Failure response codes Failure responses to commands are indicated with response codes in the range of 100 to 199: 100 syntax error 101 unsupported parameter 102 invalid value 103 unsupported 104 disk full 105 no disk 106 disk error 107 timeline empty 108 internal error 109 out of range 110 no input...
  • Seite 699 Timecode syntax Timecodes are expressed as non-drop-frame timecode in the format: HH:MM:SS:FF Handling of deck "remote" state The “remote” command may be used to enable or disable the remote control of the deck. Any attempt to change the deck state over ethernet while remote access is disabled will generate an error: 111 remote control disabled↵...
  • Seite 700 Switching to preview mode The "preview" command instructs the deck to switch between preview mode and output mode: preview: enable: {"true", "false"}↵ Playback will be stopped when the deck is switched to preview mode. Capturing will be stopped when the deck is switched to output mode.
  • Seite 701 Changing timeline position The "goto" command instructs the deck to switch to playback mode and change its position within the timeline. To go to the start of a specific clip: goto: clip id: {Clip ID}↵ To move forward/back {count} clips from the current clip on the current timeline: goto: clip id: +/-{count}↵...
  • Seite 702 Controlling asynchronous notifications The “notify” command may be used to enable or disable asynchronous notifications from the server. To enable or disable transport notifications: notify: transport: {“true”, “false”}↵ To enable or disable slot notifications: notify: slot: {“true”, “false”}↵ To enable or disable remote notifications: notify: remote: {“true”, “false”}↵...
  • Seite 703 Retrieving slot information The "slot info" command returns information about a slot. Without parameters, the command returns information for the currently selected slot: slot info↵ If a slot id is specified, that slot will be queried: slot info: slot id: {Slot ID}↵ The server will respond with slot specific information: 202 slot info:↵...
  • Seite 704 Retrieving timeline information The "clips get" command returns information for each available clip on the current timeline. Without parameters, the command returns information for all clips on timeline: clips get↵ The server responds with a list of clip IDs, names and timecodes: 205 clips info:↵...
  • Seite 705 1080i50, 1080i5994, 1080i60 HyperDeck Studio Pro and Plus models support these 4k formats: 4Kp23976, 4Kp24, 4Kp25, 4Kp2997, 4Kp30 HyperDeck Studio 4K Pro adds support for the following 4k formats: 4Kp50, 4Kp5994, 4Kp60 Video format support may vary between models and software releases.
  • Seite 706 Querying and updating configuration information The "configuration" command may be used to query the current configuration of the deck: configuration↵ The server returns the configuration of the deck: 211 configuration:↵ audio input: {“embedded”, “XLR”, “RCA”}↵ audio mapping: {n}↵ video input: {“SDI”, “HDMI”, “component”, “composite”}↵ file format: {format}↵...
  • Seite 707 Clearing the current timeline The "clips clear" command instructs the deck to empty the current timeline: clips clear↵ The server responds with 200 ok↵ Adding a clip to the current timeline The "clips add:" command instructs the deck to add a clip to the current timeline: clips add: name: {"clip name"}↵...
  • Seite 708 Suporte Técnico da Blackmagic Design em www.blackmagicdesign.com/br/support. Fórum Blackmagic Design O fórum da Blackmagic Design no nosso site é um recurso útil que você pode acessar para obter mais informações e ideias criativas. Também pode ser uma maneira mais rápida de obter ajuda, pois já...
  • Seite 709: Informações Regulatórias

    Informações Regulatórias Descarte de Resíduos de Equipamentos Elétricos e Eletrônicos na União Europeia O símbolo no produto indica que este equipamento não pode ser eliminado com outros materiais residuais. Para descartar seus resíduos de equipamento, ele deve ser entregue a um ponto de coleta designado para reciclagem. A coleta separada e a reciclagem dos seus resíduos de equipamento no momento da eliminação ajudarão a preservar os recursos naturais e a garantir que sejam reciclados de uma maneira que proteja a saúde humana e o meio ambiente.
  • Seite 710: Informações De Segurança

    Ao montar o produto em rack, certifique-se de que a ventilação não esteja restringida por equipamentos adjacentes. Não há componentes internos reparáveis pelo operador. Solicite o serviço de manutenção à assistência técnica local da Blackmagic Design. Utilize apenas em altitudes inferiores a 2000 m acima do nível do mar. Declaração do Estado da Califórnia Este produto pode expô-lo a produtos químicos, tais como vestígios de bifenilos polibromados...
  • Seite 711 Garantia 12 Meses de Garantia Limitada A Blackmagic Design garante que este produto estará livre de defeitos de materiais e fabricação por um período de 12 meses a partir da data de compra. Se o produto se revelar defeituoso durante este período de garantia, a Blackmagic Design, a seu critério, consertará...
  • Seite 712 Temmuz 2021 Kurulum ve Kullanım Kılavuzu HyperDeck Disk Kaydediciler HyperDeck Disk Kaydediciler...
  • Seite 713: Hoş Geldiniz

    Blackmagic MultiDock 10G bağlayabilir ve harici disklere kaydedebilir veya disklerdeki dosyaları oynatabilirsiniz! Hyperdeck Studio Plus ve Pro modellerinde; hızlı, yavaş ve interaktif hızlı oynatım için bir arama kadranı ile tanıdık yayın deck kontrolleri bulunur. Arama kadranının kavrama mekanizması, oynatımı hissetmenizi sağlar, böylece gözünüzü monitörden ayırmadan kliplerinizde gezinebilirsiniz.
  • Seite 714 İçindekiler HyperDeck Disk Kaydedicilerle Tanışın HyperDeck’in Web Kamerası Olarak Kullanımı Başlarken Webcam Kaynağı Olarak Ayarlanması Güç Kaynağının Takılması Open Broadcaster Video ve Sesin Bağlanması Uygulamasının Kurulumu Sesin Kontrol Edilmesi Blackmagic HyperDeck Setup Ortamın Takılması HyperDeck Setup Yazılımının Kullanımı Video Kaydı LUT’lar Sayfası...
  • Seite 715: Hyperdeck Disk Kaydedicilerle Tanışın

    Blackmagic Hyperdeck disk kaydediciniz, yapımlarınızdaki iş akışına uyacak şekilde tasarlanmış HD ve 4K disk kaydedici serisinin bir parçasıdır. Hyperdeck Studio HD Pro ve Hyperdeck Studio 4K Pro, bir ekipman rafına sığacak şekilde üretilmiştir. Hem SD kartlarla hem de 9.5mm SSD’lerle kayıt ve mevcut dosyaların oynatımını...
  • Seite 716: Başlarken

    HyperDeck’e güç sağlamak üzere standart bir IEC elektrik kablosunu, HyperDeck’in arka panelindeki güç girişine takın. HyperDeck modelinizde ek bir IEC güç girişi varsa yedeklik için başka bir güç kaynağına bağlayabilirsiniz. Örneğin, ikinci girişe UPS olarak da bilinen kesintisiz bir güç kaynağı bağladığınızda, birincil güç...
  • Seite 717: Sesin Kontrol Edilmesi

    Sesin Kontrol Edilmesi HyperDeck’inizin ön panelinde bir hoparlör ve kulaklık bağlantısı varsa dahili hoparlörü kullanarak veya kulaklıkları takarak hızlı bir şekilde sesi kontrol edebilirsiniz. Dinlemek için, hoparlör düğmesini basılı tutun ve arama kadranını döndürerek ses seviyesini ayarlayın. LCD ana ekranında bir volüm göstergesi belirir.
  • Seite 718 Şimdi, sıkı bir şekilde yerine kilitlendiğini hissedene kadar kartı yavaşça yuvaya itin. HyperDeck Studio’nuz, SD kartı teyit eder. Bu, SD kart yuvasının üzerinde yeşil yanan bir gösterge ile gösterilir. Gösterge ışığı söndüğünde ve ‘stop’ butonunun ışığı yandığında, HyperDeck’iniz kayda hazırdır.
  • Seite 719: Video Kaydı

    Bu durumda, kaydın devam edebilmesi için boş yere sahip bir disk takmanız gerekir. Boş yuvaya veya harici disk girişine boş bir disk taktığınızda, yavaş yanıp sönme durur ve zaman kodu beyaz renge geri döner. Yani, HyperDeck kaydetmeye devam edebilir, çünkü bu ikinci disk teyit edilmiştir ve kayda devam etmek boş alana sahiptir.
  • Seite 720: Oynatım

    HyperDeck Studio’ya birden fazla ortam bağlandığında, kayıt bir diskten veya bir karttan diğerine geçer. Bu, ana ekranın sağ üst köşesinde gösterilir. Kayıt Esnasında Disklerin Değiştirilmesi Kaydı yaptığınız diski değiştirmeyi istediğinizde ve boş yere sahip ikinci bir diskiniz olduğunda, sadece ‘record’ butonunu basılı tutun ve kayıt, mevcut diskten ikinci diske geçer. Kaydı durdurmadan kayıt yapılan diski HyperDeck’ten çıkarmak istediğinizde, bu çok faydalıdır.
  • Seite 721: Arama Kadranının Kullanımı

    ‘LCD menüsünü kullanma’ ve ‘ayarlar’ bölümlerine bakın. Döngülü Oynatım Oynatımın sürekli olarak devam etmesini istiyorsanız, oynatım esnasında tekrar ‘play’ butonuna basarak HyperDeck’inizi klibi döngüye alması için ayarlayabilirsiniz. Döngülü oynatım aktif olduğunda, döngü simgesinin LCD’de belirdiğini görürsünüz. Mevcut iki döngü modu vardır. Klibi döngüye al Şu anda oynatımdaki klibi döngüye alır.
  • Seite 722 Arama kadranı modları arasında; Jog (yavaş oynatım), Shuttle (hızlı oynatım) ve Scroll (interaktif oynatım) vardır. Yavaş Oynatım Klibi, ileri yönde veya geri yönde kare kare oynatarak hassas (Jog) kontrol sağlar. Hızlı Oynatım Klibi, ileri yönde veya geri yönde daha hızlı oynatır. Kadranı çevirme (Shuttle) hızınıza bağlı...
  • Seite 723: Ön Panel Kullanımı

    Medya Yuvası Göstergeleri HyperDeck’i ilk çalıştırdığınızda ya da bir SSD veya SD kart takdığınızda, yuva göstergesi ortamı kontrol ederken yeşil yanar ve kontrölün ardından kapanır. Diskin formatlaması doğru yapılmamışsa veya disk çalışmazsa yuva göstergesi, disk çıkarılana kadar turuncu renkte yanar. Bu durumda, diskin doğru formatlandığından ve bir bilgisayarla çalışdığından emin olun.
  • Seite 724: Lcd Menüsünün Kullanımı

    LCD Menüsünün Kullanımı Menü ayarlarını açmak için, ön paneldeki ‘menu’ butonuna basın. Menü seçenekleri arasında gezinmek için arama kadranını çevirin veya atlatma butonlarına basın ve bir alt menüyü seçmek için ‘set’ butonuna basın. Menü ayarlarında gezinmek için arama kadranını çevirin. Menü...
  • Seite 725: Ayarlar

    çıkarmadan, video girişleri kaydedilir. Normalde, tüm yayın deck’leri, oynatım esnasında video çıkışını kilitlemek için bir referans girişi kullanabilir. Yani, HyperDeck oynatım çıkışı, referans girişine kilitlenir ve bu sayede, büyük bir yayın sistemine bağlandığında yeniden senkronize edilmesi gerekmez. Ancak, deck kayda başladığında, bu çıkış giriş sinyaline geçer, çünkü normalde, giriş videosunun dokunulmadan kaydedilmesini ve bu dokunulmamış...
  • Seite 726 Halbuki, HyperDeck Studio, ISO kaydına yardımcı olan emsalsiz bir özelliğe sahiptir. Bu özellik, bu işlemi tamamen tersine çevirmenize ve video girişini, referans girişine yeniden senkronize etmenize imkan tanır. Yani, HyperDeck’e senkronize olmayan bir kaynak bağlayabilirsiniz ve Hyperdeck, video referansına göre video girişinin yeniden zamanlamasını yapar ve ardından kaydeder.
  • Seite 727: Monitör Menüsü

    ‘Set’ butonuna basın. Arama kadranını kullanarak, ‘3D LUT’ mavi renkte vurgulanana kadar menüde aşağı inin. LUT’u açık veya kapalı duruma getirmek için set butonuna basın. Bir LUT seçimi hakkında daha fazla bilgi için, bu kılavuzdaki Blackmagic HyperDeck Setup bölümüne bakın. BİLGİ...
  • Seite 728 Ses Menüsü Kaydedilen Ses Kanalları Hyperdeck Studio, bir seferde 16 kanala kadar PCM ses kaydedebilir. Kaydedilen kanal sayısını seçmek için, kaydedilen ses kanallarını listesini genişletin ve 2, 4, 8 veya 16 kanalı seçin. Kodek, H.264 veya H.265 olarak ayarlanmışsa, 2 kanal AAC sesi de seçebilirsiniz, böylece kayıtları...
  • Seite 729: Kurulum Menüsü

    SD Kartlar, SSD’ler ve arkadaki harici disk bağlantısı üzerinden bağlı ortam, doğrudan cihazda veya bir Mac veya Windows bilgisayar aracılığıyla formatlanabilir. Hyperdeck Studio’da Ortamın Hazırlanması: Arama kadranı ve ‘set’ butonunu kullanarak, ‘Ortamı Formatla’ seçeneğini seçin. Formatlamak için listeden ortamı seçin ve ‘set’ butonuna basın.
  • Seite 730 Bu, Blackmagic HyperDeck Setup yazılımı üzerinden veya bir terminal uygulaması kullanılarak Blackmagic Hyperdeck Ethernet Protokolü ile yapılabilir. HyperDeck Studio 13 dili destekler. Desteklenen diller arasında; İngilizce, Çince, Japonca, Korece, İspanyolca, Almanca, Fransızca, Rusça, İtalyanca, Portekizce, Türkçe, Ukraynaca ve Polonyaca bulunur.
  • Seite 731 HyperDeck Studio, kullanmak istediğiniz video standardını bazen bilemez. Bu ayar, en sık kullanmayı istediğiniz video standardını, HyperDeck’in bilmesini sağlar. Buna iyi bir örnek; bir HyperDeck Studio’yu açtınız, bağlı video sinyali yok ve 2 farklı video standardına sahip dosyalar içeren bir disk yerleştirdiniz. HyperDeck’in hangi video standardını...
  • Seite 732 Ağ Ayarları Protokol Blackmagic Hyperdeck, DHCP’ye ayarlanmış olarak gelir, yani bir kez bağlandıktan sonra, ağ sunucunuz otomatik olarak bir IP adresi atayacaktır ve başka bir ağ ayarının yapılması gerekmez. Manuel bir adres belirlemeniz gerekiyorsa, statik bir IP üzerinden bağlanabilirsiniz. Menüye erişmek için; ‘protokol’ seçiliyken yanıp sönen ‘set’ butonuna basın, ‘Statik IP’ seçeneğine gidin ve tekrar ‘set’...
  • Seite 733 Kayıt yaparken geçerli beş zaman kodu giriş seçeneği vardır. Video Girişi Video girişi seçildiğinde, SDI ve HDMI kaynaklardan gömülü zaman kodunu ve SMPTE RP 188 metaverileri alır. Bu, Hyperdeck Studio’da kaydedilen dosyaların, SDI veya HDMI kaynak ile senkronizasyonunu sağlar. Harici Arka paneldeki zaman kodu girişi bağlantısını...
  • Seite 734 örnektir. Harici Arka paneldeki ‘ref in’ ibareli referans girişine bağlı Blackmagic Sync Generator gibi harici bir referans cihazınız varsa ‘harici’ seçeneğini seçin. Harici Referans Göstergesi – HyperDeck Studio’nuz harici bir referans kaynağına kilitlendiğinde, yerleşik LCD’de bir ‘ref’ işareti görüntülenir. Referans Zamanlama Analog teyp deck’lerden arşivleme yapıyorsanız ve kare senkronizasyonuna ihtiyacınız olduğunda,...
  • Seite 735 Klip Numarası HDR Formatı Geçersiz Kıl Hyperdeck Studio 4K Pro, bir 4K video sinyalinde veya dosyasında gömülü HDR metaverilerini otomatik olarak algılar ve HDMI çıkışı üzerinden görüntüler. Sinyal veya dosya yanlış etiketlenmişse ya da ekranınız HDR uyumlu değilse HDR formatını geçersiz kılabilirsiniz.
  • Seite 736 Uzaktan Kontrol RS-422 üzerinden uzaktan kontrolü etkinleştirmek için ‘uzaktan kontrol’ü seçin. Bu, Hyperdeck Extreme Control gibi başka bir cihaz tarafından, HyperDeck’in uzaktan kontrol edilmesine izin verir. Seçildiğinde, bazı HyperDeck modellerinde olan özel ‘remote’ butonu, aktif olduğunu göstermek için yanacaktır. Cihazı yerel olarak kontrol etmek için uzaktan kontroldeki seçimini kaldırın.
  • Seite 737: Arka Panel

    Hyperdeck Studio HD modellerinde 5Gb/sn kadar hızlarda harici disklere kayıt yapabilmek için USB-C bağlantısına bir flaş disk bağlayın. 10Gb/sn’yeye ulaşan transfer hızları için Hyperdeck Studio 4K Pro modelleri, 2ci nesil bir USB 3.1 bağlantısına sahiptir. Bir veya daha çok sayıda SSD bağlamak üzere çok portlu USB-C hub cihazlarını veya Blackmagic MultiDock 10G’yi bağlayabilirsiniz.
  • Seite 738 Ayarlar menüsünü kullanarak HDR işaretini de geçersiz kılabilirsiniz. Daha fazla bilgi için, bu kullanım kılavuzundaki ‘ayarlar’ bölümüne bakın. Hyperdeck Studio HD Mini modelleri, 1080p60’a kadar olan sinyaller için bir 3G SDI bağlantısına sahiptir. Hyperdeck Studio HD Plus ve Hyperdeck Studio HD Pro modelleri, SD’den 2160P30’a varan sinyallere imkan tanıyan, 6G-SDI bağlantısına sahiptir.
  • Seite 739: Monitör Çıkışının Kullanılması

    Şuan seçili olan SDI veya HDMI kaynağı görüntüler. Ekranda ‘sinyal yok’ belirirse, geçerli bir sinyalin algılanmadığı anlamına gelir. İsim HyperDeck disk kaydedicinizin ismini gösterir. HyperDeck’in isminin nasıl değiştirildiği hakkında bilgi için, bu kılavuzun ilerleyen kısımlarındaki ‘Blackmagic HyperDeck Setup’ bölümüne bakın. Monitör Çıkışının Kullanılması...
  • Seite 740 SSD yuvası kullanılacak SD veya SSD yuvası Tüm HyperDeck modellerinde, üçüncü gösterge USB diski gösterir. Bir USB hub cihazı veya Blackmagic MultiDock 10G gibi harici bir cihaz kullanıyorsanız, aktif olan disk görüntülenir. Kart veya Disk Göstergesi İlerleme çubuğunun üzerindeki yazı, SD kart yuvasını veya SSD yuvasını belirtir. Kayıt yapıyorsanız, kaydın yapıldığı...
  • Seite 741 Ortam Çubuğu Ortam çubuğu simgesi, mevcut durumuna bağlı olarak mavi, beyaz veya kırmızı renkte olur ve ortamdaki kullanılan alanı görüntüler. Mavi disk simgesi, aktif olan diski belirtir. Oynatım ve kayıt için kullanılacak disk budur. Beyaz bir disk simgesi, ortamın mevcut olduğunu ancak aktif olmadığını...
  • Seite 742: Depolama Ortamı

    Daha güncel bilgiler için düzenli olarak bu kılavuzun en güncel sürümüne bakmanızda fayda vardır ve her zaman www.blackmagicdesign.com/tr/support adresindeki Blackmagic Design internet sitesinden indirilebilir. HyperDeck Studio 4K Pro ile hangi SD kartları kullanmalıyım? 60 fps’ye kadar 2160p kayıt için, aşağıdaki SD Kartlar önerilir. Marka Model Kapasite...
  • Seite 743 HyperDeck Studio HD Pro ile hangi SD kartları kullanmalıyım? 30 fps’ye kadar 2160p kayıt için, aşağıdaki SD Kartlar önerilir. Marka Model Kapasite Angelbird AV Pro MK2 V90 SDXC 64GB Angelbird AV Pro MK2 V90 SDXC 128GB Angelbird AV Pro MK2 V90 SDXC...
  • Seite 744: Ssd

    Testlerimizde, daha yeni ve daha büyük kapasiteli SSD modellerinin, genellikle daha hızlı olduğunu bulduk. Kullanım için önerilen SSD’ler aşağıda listelenmiştir. HyperDeck Studio 4K Pro ile hangi SSD’leri kullanmalıyım? 60 fps’ye kadar 2160p kayıt için, aşağıdaki SSD’ler önerilir. Marka Model...
  • Seite 745: Harici Disk

    Harici Disk Tüm HyperDeck modelleri, doğrudan USB-C flaş disklere kayıt yapabilir. Bu hızlı, yüksek kapasiteli diskler, uzun süreli video kaydetmenize olanak verir. Sonra, aynı flaş diski bilgisayarınıza takabilir ve doğrudan bu diskten kurgulama yapabilirsiniz! Daha da yüksek depolama kapasiteleri için bir USB-C çoğaltıcı veya harici bir sabit disk bağlayabilirsiniz.
  • Seite 746 HyperDeck Studio HD Plus ile hangi USB-C diskleri kullanmalıyım? 30 fps’ye kadar 2160p kayıt için, aşağıdaki USB-C diskler önerilir. Marka Model Kapasite Angelbird SSD2GO PKT MK2 512GB Angelbird SSD2GO PKT MK2 DelKinDevices Juggler DelKinDevices Juggler LaCie Rugged SSD STHR2000800 LaCie...
  • Seite 747: Ortamın Formatlanması

    Formatı, ‘Mac OS Extended (Journaled)’ veya “exFAT” olarak ayarlayın. Yeni disk birimi için bir isim girin ve sonra ‘erase’ butonunu tıklayın. Medyanız hızlı bir şekilde formatlanır ve HyperDeck ile kullanıma hazır hale getirilir. Ortamın bir Windows Bilgisayarda Formatlanması Bir Windows PC bilgisayarda, ‘formatlama’ diyalog kutusu, bir diski exFAT olarak formatlayabilir.
  • Seite 748: Hyperdeck'in Web Kamerası Olarak Kullanımı

    Yeni disk birimi için bir isim girin, ‘hızlı formatlama’ sekmesini seçin ve ‘Başlat’ butonunu tıklayın. Medyanız hızlı bir şekilde formatlanır ve HyperDeck ile kullanıma hazır hale getirilir. HyperDeck’in Web Kamerası Olarak Kullanımı USB üzerinden bir bilgisayara bağlandığında, HyperDeck disk kaydediciniz bir web kamerası olarak algılanır.
  • Seite 749: Open Broadcaster Uygulamasının Kurulumu

    Open Broadcaster Uygulamasının Kurulumu Open Broadcaster yazılımı; YouTube, Twitch, Facebook Live ve benzeri internet yayın yazılımları ile HyperDeck Studio’nuz arasında bir internet yayın platformu işlevi gören, açık kaynaklı bir uygulamadır. Broadcaster, videonuzu internet yayın uygulamanız tarafından kolaylıkla yönetilen bir bit oranına sıkıştırır.
  • Seite 750 Şimdi, HyperDeck’inizden alınan videonun, Open Broadcaster uygulamasının önizleme penceresinde yayınlandığını göreceksiniz. Open Broadcaster’in yayın bağlantısını YouTube ile YouTube Live’ye geri dönün ve HyperDeck’inizden bağlamak üzere, ekranın sağ alt köşesindeki ‘start alınan webcam program çıkışını, arka planda streaming’ (internet yayınını başlat) ibaresini tıklayın.
  • Seite 751: Blackmagic Hyperdeck Setup

    Kurulum sayfasını açmak için; yuvarlak ‘setup’ ikonunun üzerine veya HyperDeck görüntüsünü tıklayın. Kurulum Sayfası Bir adetten daha fazla HyperDeck Studio’nuz varsa, kolay tanınabilmeleri için her üniteye ayrı bir isim vermek isteyebilirsiniz. Bunu ‘isim’ seçeneği üzerinden yapabilirsiniz. Blackmagic HyperDeck Setup...
  • Seite 752: Lut'lar Sayfası

    LUT’lar Sayfası Arka panelinde monitör çıkış bağlantıları olan HyperDeck modelleri, 3D LUT’lar uygulanmış halde giriş videosunu görüntüleyebilir. 17 nokta, 33 nokta ve 65 nokta .cube LUT dosyaları desteklenir. Bu, kameranızda bulunan renk doygungunluğu kasıtlı azaltılmış ve ‘düz’ bir görünüme sahip ‘film’...
  • Seite 753: Dahili Yazılımın Güncellenmesi

    LUT’u açıp kapatabilirsiniz. Dahili Yazılımın Güncellenmesi Kurulum yardımcı yazılımı; internet yayın ayarlarını, ağ ayarlarını ve internet yayın kalitesini yapılandırmanın yanı sıra, HyperDeck disk kaydedicinin dahili yazılımını da güncellemenizi sağlar. Dahili yazılımı güncellemek için: En güncel Blackmagic HyperDeck Setup yükleyicisini www.blackmagicdesign.com/tr/support...
  • Seite 754: Teranex Mini Rack Shelf

    Bu modüler tasarım; portatif ve kullanımı kolay ve size özel video çözümleri oluşturmanızı mümkün kılar. Teranex Mini Rack Shelf; Blackmagic HyperDeck Studio HD Mini ve HyperDeck Studio HD Plus cihazlarınızı, aynı büyüklüğe sahip başka Blackmagic Design ekipmanlarıyla rafa montajlamanıza imkan verir.
  • Seite 755: Rs-422 Kontrol

    Protokolünden gelen dosya bazlı komutları da destekler. Bu; bir çalma listesine kliplerin eklenmesi, bir sonraki klibin dosya adının belirlenmesi, tek klibin veya zaman çizelgesinin döngüye alınması ve bir çalma listesinin silinmesi gibi AMP komutlarını kullanan harici bir cihaz ile HyperDeck’inizi kontrol etmenizi sağlar.
  • Seite 756 RS-422 deck kontrolü etkinleştirmek için, HyperDeck’inizin LCD menüsünde uzaktan kontrolünün ‘açık’ olarak ayarlı olduğundan emin olun veya ön paneldeki ‘remote’ butonunu kullanın. Tüm HyperDeck modelleri, arka paneldeki RS-422 portu aracılığıyla, uzaktan kontrolü destekler Desteklenen RS-422 Komutları Command Reply No Remote...
  • Seite 757 Command Reply No Remote Notes Treated as N=1; 0x22 0x22 VarRev2 Acknowledge Disabled Same as VarRev1 0x21 0x23 ShuttleRev1 Acknowledge Disabled Treated as N=1; 0x22 0x23 ShuttleRev2 Acknowledge Disabled Same as ShuttleRev1 0x20 0x30 Preroll Acknowledge Disabled 0x24 0x31 CueData Acknowledge Disabled 0x20...
  • Seite 758 Command Reply No Remote Notes 6 - Sense Request 0x61 0x0A TimeCodeGenSense — — 0x61 0x0C CurrentTimeSense — — 0x60 0x10 InDataSense InData Enabled 0x60 0x11 OutDataSense OutData Enabled 0x60 0x12 AInDataSense AInData Enabled 0x60 0x13 AOutDataSense AOutData Enabled 0x61 0x20 StatusSense StatusData...
  • Seite 759 Command Reply No Remote Notes A - Advanced Media Protocol 8-bit signed number of 0xA1 0x01 AutoSkip Acknowledge Disabled clips to skip from current clip when x = 0 single clip request when x = 1, # 0xAX 0x15 ListNextID IDListing Enabled clips can be specified in...
  • Seite 760: Bir Ağ Üzerinden Dosyaların Transferi

    HyperDeck ünitesine, yeni dosyalar kopyalıyor olabilirsiniz. HyperDeck Studio’ya Bağlanma Bilgisayarınız ve HyperDeck Studio’nuz aynı ağa bağlı iken, sadece bir ftp istemci ve HyperDeck Studio’nuzun IP adresi gerekir. HyperDeck’inizi bağlamak istediğiniz bilgisayara bir FTP istemci indirin ve yükleyin.
  • Seite 761 HyperDeck Studio’nuzu, bir ethernet kablosu ile ağınıza bağlayın ve IP adresini Not alın. IP adresine erişmek için ‘menu’ butonuna basın ve ‘ağ’ ekranına erişmek için arama kadranını çevirin. HyperDeck Studio’nuzun IP adresini, bu ekranın en altında göreceksiniz. HyperDeck Studio’nun IP adresini, akıllı panelin ‘ayarlar’...
  • Seite 762: Bir Atem Switcher'e Bağlanma

    çekimleri kaydetmenin, harika bir yöntemdir. ATEM 4 M/E Broadcast Studio 4K gibi ATEM switcher’ler, 4 adete kadar HyperDeck disk kaydedici ile bağlanabilir. HyperDeck’leri, bir ATEM switcher’e bağlamak için: HyperDeck’inizi, ATEM Switcher’inizin bağlı...
  • Seite 763: Post Prodüksiyon İş Akışlarının Anlaşılması

    QuickTime, Mac OS’de yerleşiktir. HyperDeck ile kaydedilen Apple ProRes, Avid DNxHD ile DNxHR QuickTime videoları, Mac OS’deki hemen hemen her video yazılımı ile açılabilir. HyperDeck ile kaydedilen DNxHD ve DNxHR MXF dosyaları, Avid Media Composer ve Mac için DaVinci Resolve ile açılabilir. DNxHD codec’leri, http://www.avid.com/products/avid-dnxhr-and-dnxhd...
  • Seite 764: Yazılım Geliştiricileri Için Bilgiler (İngilizce)

    Yazılım Geliştiricileri için Bilgiler (İngilizce) Blackmagic HyperDeck Ethernet Protokolü Blackmagic HyperDeck Ethernet Protokolü, yerleşik Ethernet bağlantısına sahip HyperDeck Studio modellerinde, TCP port 9993’e bağlanarak erişilen metin tabanlı bir protokoldür. Bir yazılım geliştiriciyseniz, ürünlerimizle entegre cihazlar oluşturmak için bu protokolü kullanabilirsiniz.
  • Seite 765 Command Command Description spill current recording to specified slot record: spill: slot id: {n} use current id to spill to same slot stop stop playback or recording clips count query number of clips on timeline clips get query all timeline clips clips get: clip id: {n} query a timeline clip info clips get: clip id: {n} count: {m}...
  • Seite 766 Command Command Description notify: timeline position: {true/false} set playback timeline position notifications notify: playrange: {true/false} set playrange notifications notify: cache: {true/false} set cache notifications notify: dynamic range: {true/false} set dynamic range settings notifications notify: slate: {true/false} set digital slate notifications goto: clip id: {start/end} goto first clip or last clip goto: clip id: {n}...
  • Seite 767 2 video format: NTSC Using XML While you can use the Terminal to talk to HyperDeck, if you are writing software, you can use XML to confirm the existence of a specific command based on the firmware of the HyperDeck you are communicating with.
  • Seite 768: Protocol Details

    The HyperDeck Ethernet server listens on TCP port 9993. Basic syntax The HyperDeck protocol is a line oriented text protocol. Lines from the server will be separated by an ascii CR LF sequence. Messages from the client may be separated by LF or CR LF.
  • Seite 769 Failure response codes Failure responses to commands are indicated with response codes in the range of 100 to 199: 100 syntax error 101 unsupported parameter 102 invalid value 103 unsupported 104 disk full 105 no disk 106 disk error 107 timeline empty 108 internal error 109 out of range 110 no input...
  • Seite 770 Timecode syntax Timecodes are expressed as non-drop-frame timecode in the format: HH:MM:SS:FF Handling of deck “remote” state The “remote” command may be used to enable or disable the remote control of the deck. Any attempt to change the deck state over ethernet while remote access is disabled will generate an error: 111 remote control disabled↵...
  • Seite 771 Switching to preview mode The “preview” command instructs the deck to switch between preview mode and output mode: preview: enable: {“true”, “false”}↵ Playback will be stopped when the deck is switched to preview mode. Capturing will be stopped when the deck is switched to output mode.
  • Seite 772 Changing timeline position The “goto” command instructs the deck to switch to playback mode and change its position within the timeline. To go to the start of a specific clip: goto: clip id: {Clip ID}↵ To move forward/back {count} clips from the current clip on the current timeline: goto: clip id: +/-{count}↵...
  • Seite 773 Controlling asynchronous notifications The “notify” command may be used to enable or disable asynchronous notifications from the server. To enable or disable transport notifications: notify: transport: {“true”, “false”}↵ To enable or disable slot notifications: notify: slot: {“true”, “false”}↵ To enable or disable remote notifications: notify: remote: {“true”, “false”}↵...
  • Seite 774 Retrieving slot information The “slot info” command returns information about a slot. Without parameters, the command returns information for the currently selected slot: slot info↵ If a slot id is specified, that slot will be queried: slot info: slot id: {Slot ID}↵ The server will respond with slot specific information: 202 slot info:↵...
  • Seite 775 Retrieving timeline information The “clips get” command returns information for each available clip on the current timeline. Without parameters, the command returns information for all clips on timeline: clips get↵ The server responds with a list of clip IDs, names and timecodes: 205 clips info:↵...
  • Seite 776 1080i50, 1080i5994, 1080i60 HyperDeck Studio Pro and Plus models support these 4k formats: 4Kp23976, 4Kp24, 4Kp25, 4Kp2997, 4Kp30 HyperDeck Studio 4K Pro adds support for the following 4k formats: 4Kp50, 4Kp5994, 4Kp60 Video format support may vary between models and software releases.
  • Seite 777 Querying and updating configuration information The “configuration” command may be used to query the current configuration of the deck: configuration↵ The server returns the configuration of the deck: 211 configuration:↵ audio input: {“embedded”, “XLR”, “RCA”}↵ audio mapping: {n}↵ video input: {“SDI”, “HDMI”, “component”, “composite”}↵ file format: {format}↵...
  • Seite 778 Clearing the current timeline The “clips clear” command instructs the deck to empty the current timeline: clips clear↵ The server responds with 200 ok↵ Adding a clip to the current timeline The “clips add:” command instructs the deck to add a clip to the current timeline: clips add: name: {“clip name”}↵...
  • Seite 779: Yardım/Destek

    Blackmagic Design destek merkezinde bulabilirsiniz. Blackmagic Design Forum Web sitemizdeki Blackmagic Design forum, daha fazla bilgi ve yaratıcı fikirler için ziyaret edebileceğiniz faydalı bir kaynaktır. Burası, yardım alabilmeniz için daha hızlı bir yol da olabilir; çünkü başka deneyimli kullanıcılar ya da Blackmagic Design çalışanları tarafından sorularınıza verilmiş...
  • Seite 780: Mevzuata İlişkin Bildirimler

    Mevzuata İlişkin Bildirimler Avrupa Birliği Dahilinde Elektrikli ve Elektronik Cihazlara Dair Atık Kontrol Yönetmeliği. Ürün üzerindeki sembol, bu cihazın başka atık malzemelerle bertaraf edilmemesi şartını gösterir. Atık ekipmanlarınızı bertaraf edebilmeniz için geri dönüşümünü sağlamak üzere, belirlenmiş toplama noktasına teslim edilmeleri gerekmektedir. Bertaraf anında atık cihazlarınızın ayrı...
  • Seite 781: Güvenlik Bilgileri

    Ürünün çevresinde yeterli havalandırma olduğundan ve hava akımının kısıtlanmadığından emin olun. Rafa monte ederken, bitişik cihazlardan dolayı hava akımının kısıtlanmadığından emin olun. Ürün içinde, kullanıcı tarafından tamir edilebilecek hiçbir parça bulunmamaktadır. Gerekli tamiratları, yerel Blackmagic Design hizmet merkezine yönlendirin. Deniz seviyesinden yüksekliğin 2000m’yi aşmadığı yerlerde kullanın. Kaliforniya Eyalet Beyannamesi Bu ürün;...
  • Seite 782: Garanti

    DEĞİLDİR. BU ÜRÜNÜN ÇALIŞTIRILMASINDAN DOĞAN RİSK, KULLANICININ KENDİSİNE AİTTİR. © Telif Hakkı Saklıdır 2021 Blackmagic Design. Tüm Hakları Saklıdır. ‘Blackmagic Design’, ‘DeckLink’, ‘HDLink’, ‘Workgroup Videohub’, ‘Multibridge Pro’, ‘Multibridge Extreme’, ‘Intensity’ ve ‘Leading the creative video revolution’ ABD ve diğer ülkelerde tescil edilmiş...

Inhaltsverzeichnis