SHX SHX20KV2002G Bedienungsanleitung
Glas konvektor

Verwandte Anleitungen für SHX SHX20KV2002G

Inhaltszusammenfassung für SHX SHX20KV2002G
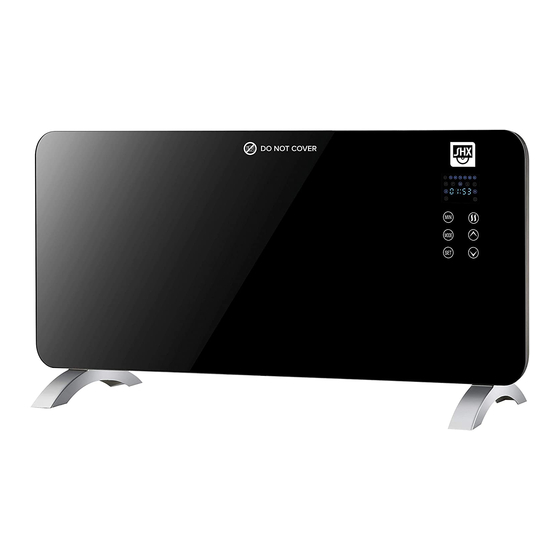
- Seite 1 BEDIENUNGSANLEITUNG GLAS KONVEKTOR SHX20KV2002G HERZLICHEN GLÜCKWUNSCH! VIELEN DANK, DASS SIE SICH FÜR EIN PRODUKT VON SHX ENTSCHIEDEN HABEN.
-
Seite 2: Inhaltsverzeichnis
Diese Bedienungsanleitung gibt es in folgenden Sprachen DEUTSCH Seite 2 – 18 ENGLISH Seite 19 – 34 INHALTSVERZEICHNIS Wichtige Informationen zur Sicherheit, Standort und zum elektrischen 2 – 4 Anschluss Recycling, Entsorgung, Konformitätserklärung Lieferumfang Beschreibung des Geräts 6 – 13 Inbetriebnahme Spar Modus Schutzeinrichtung... - Seite 3 Dieses Gerät ist ausschließlich zum Heizen von Wohnräumen in Haushalten vorgesehen und darf für keine anderen Zwecke eingesetzt werden. Das SHX-Panel ist mit einer IP24-Schutzklasse ausgestattet. Das bedeutet, dass das Gerät gegen feste Fremdkörper mit einem Durchmesser von 12,5mm und gegen Spritzwasser geschützt ist.
-
Seite 4: Verletzungsgefahr
Das Gerät ist aufgrund der Schutzklasse NICHT WASSERFEST - achten Sie daher darauf, dass kein Wasser in das Gerät gelangt. Dieses Panel dient nur zur Stand- oder Wandmontage in trockenen und feuchten Innenräumen. Sie können das Panel in feuchten Innenräumen montieren, allerdings sollte das Panel nicht direkt neben einem Schwimmbecken, Badewanne oder Dusche installiert werden. -
Seite 5: Recycling, Entsorgung, Konformitätserklärung
Hiermit bestätigen wir, dass dieser Artikel den grundlegenden Anforderungen, Vorschriften und Richtlinien der EU entspricht. Die ausführliche Konformitätserklärung können Sie jederzeit unter folgendem Link einsehen: www.shx.at/downloads Irrtümer und technische Änderungen vorbehalten. LIEFERUMFANG Im Lieferumfang der SHX-Heizpanels erhalten Sie: 1x Heizpanel 2x Standfüße ... -
Seite 6: Inbetriebnahme
8. Um die Heizeffizienz nicht zu beeinträchtigen, positionieren keine Möbel oder sonstige Gegenstände vor dem Heizpanel. 9. Verlegen Sie keinesfalls das Kabel hinter dem Panel. HINWEIS Damit das SHX-Heizpanel bei der Montage nicht beschädigt wird, empfehlen wir die Montage zu zweit durchzuführen. 1. MONTAGE VOR DER MONTAGE: 1. - Seite 7 Sie haben zwei Möglichkeiten das SHX-Heizpanel zu verwenden: A. Mobiles Standgerät B. Wandmontage A. Um das Gerät als MOBILES STANDGERÄT zu verwenden, befolgen Sie bitte folgende Anweisungen: 1. Montieren Sie die Standfüße mit den mitgelieferten Schrauben. 2. Legen Sie dazu das Gerät auf den Boden und halten die Standfüße an die dafür vorhergesehenen Öffnungen auf der unteren Seite des Heizpanels.
- Seite 8 Montieren Sie anschließend die Wandhalterung nachfolgenden Anweisungen: 1. Halten Sie die Halterung an die Wand und markieren die Bohrlöcher. Achten Sie dabei darauf, dass die Wandhalterung korrekt positioniert wird – LASCHE MIT BOHRUNG NACH OBEN. 2. Bohren Sie anschließend die markierten Löcher.
-
Seite 9: Beschreibung Des Displays Und Bedienfelds
2. BESCHREIBUNG DES DISPLAYS und BEDIENFELDS 1. Display 2. Sensor 3. Einstellen „Minuten“ 4. Modus 5. Set 6. Einstellung „Heizen“ 7. Temperatur + 8. Temperatur - 3. BESCHREIBUNG DER FERNBEDIENUNG Für den Betrieb der Fernbedienung ist die Sicherungslasche auf der Rückseite beim Batteriefach heraus zu ziehen. -
Seite 10: Funktionen Einstellen
4. FUNKTIONEN EINSTELLEN Sie können alle Funktionen des Gerätes sowohl direkt am Gerät, mithilfe des Bedienfelds, oder mit der Fernbedienung einstellen. 1. BEREITSCHAFTS-MODUS (P) Wochentag Bevor Sie das Gerät einschalten, betätigen Modus „P“ Sie bitten den ON/OFF-Schalter, der sich seitlich am Heizpanel befindet das Gerät Minute betriebsbereit, jedoch... - Seite 11 Drücken Sie die -Taste um zwischen Hohe Heizleistung der NIEDRIGEN HEIZLEISTUNG und der HOHEN HEIZLEISTUNG zu wählen. Auf dem Display erscheint das Niedrige jeweilige Symbol: Heizleistung Stellen Sie anschließend die gewünschte Temperatur mit den -Tasten Auf dem Display erscheinen nun 2 Temperatur-Anzeigen: Zieltemperatur Raumtemperatur...
- Seite 12 Die Zeit wann geheizt wird und wann nicht, wird in Stunden-Schritten mit der und der -Taste gewählt. Mithilfe der -Taste stellen Sie die Start- und Endzeit Startzeit ein und mit der -Taste die Endzeit. Beispiele für die Einstellung des Timers: Bitte beachten Sie, dass die zu Programmierende Zeit immer von 00:00 bis 24:00 Uhr gilt ...
-
Seite 13: Kindersicherung
Taste, bis das Symbol am Display erlischt. SPAR-MODUS Das SHX-Panel verfügt über einen Spar-Modus, der Ihnen dabei helfen soll Strom zu sparen! Sobald die gewünschte Raumtemperatur, die Sie eingestellt haben, erreicht wird, stoppt das Gerät die Hochtemperaturleistung – jedoch bleibt die Niedrigtemperaturleistung aktiv um die Zieltemperatur zu erhalten. -
Seite 14: Reinigungshinweise
Abdeckungen der Schrauben und anschließend die Schrauben. Wir empfehlen Ihnen diesen Arbeitsschritt immer zu zweit zu erledigen. HINWEIS Damit das SHX-Heizpanel bei der Demontage nicht beschädigt wird, empfehlen wir Ihnen diese zu zweit durchzuführen. Verpacken Sie das Gerät und bewahren Sie es an einem sicheren, kühlen und trockenen Ort auf. -
Seite 15: Behebung Von Problemen
BEHEBUNG VON PROBLEMEN Bevor Sie sich mit unserer Kundenhotline/ Servicestelle in Verbindung setzen, prüfen Sie bitte, ob sich der Fehler anhand der untenstehenden Hinweise beheben lässt. PROBLEM MÖGLICHE URSACHE LÖSUNG Stromausfall. Wiederherstellung Stromversorgung abwarten. Das Gerät ist nicht an der Gerät korrekt Das Heizpanel schaltet... -
Seite 16: Technische Informationen
Technische Informationen Artikelnummer: SHX20KV2002G Eingangsspannung: 220-240V Frequenz: 50-60Hz Stromstärke: 2.000W Heizbereich: 5C° - 40C° Gewicht: 7.4 kg Abmessungen: 965 x 130 x 470 mm Kontaktadressen für weitere Schuss Home Electronic GmbH Informationen und Serviceline: Scheringgasse 3, A-1140 Wien Tel: +43 (1) 97 0 21 – 0 Serviceline: +43 (1) 97 0 21 –... -
Seite 17: Erforderliche Angaben Zu Elektrischen Einzelraumheizgeräten
Erforderliche Angaben zu elektrischen Einzelraumheizgeräten Artikelnummer SHX20KV2002G Angabe Symbol Wert Einheit Angabe Einheit Nur bei elektrischen Speicher- Einzelraumheizgeräten: Wärmeleistung Art der Regelung der Wärmezufuhr: Nennwärmeleistung Manuelle Regelung der Wärmezufuhr Nein mit integriertem Thermostat Mindestwärmeleistung Manuelle Regelung der Wärmezufuhr (Richtwert) mit Rückmeldung der Raum- und/oder Nein Außentemperatur... -
Seite 18: Garantie
Mit diesem Qualitätsprodukt von SHX haben Sie eine Entscheidung für Innovation, Langlebigkeit und Zuverlässigkeit getroffen. Für dieses SHX Gerät gewähren wir eine Garantiezeit von 2 Jahren ab Kaufdatum gültig in Österreich und Deutschland! Sollten in diesem Zeitraum wider Erwarten dennoch Servicearbeiten an Ihrem Gerät notwendig sein, garantieren wir Ihnen hiermit eine kostenlose Reparatur (Ersatzteile und Arbeitszeit) oder (nach Ermessen der Firma Schuss) das Produkt auszutauschen.