Herunterladen Diese Seite drucken
Nash Siren R3 Bedienungsanleitung
Vorschau ausblenden Andere Handbücher für Siren R3:

Werbung

Verfügbare Sprachen
  • DE

Verfügbare Sprachen

  • DEUTSCH, seite 8
USER MANUAL
NEXT GENERATION BITE INDICATION
SIREN R3 USER MANUAL
2020 SIREN R3 USER MANUAL 25.02.20.indd 1
13/07/2020 08:41

Werbung

loading

Inhaltszusammenfassung für Nash Siren R3

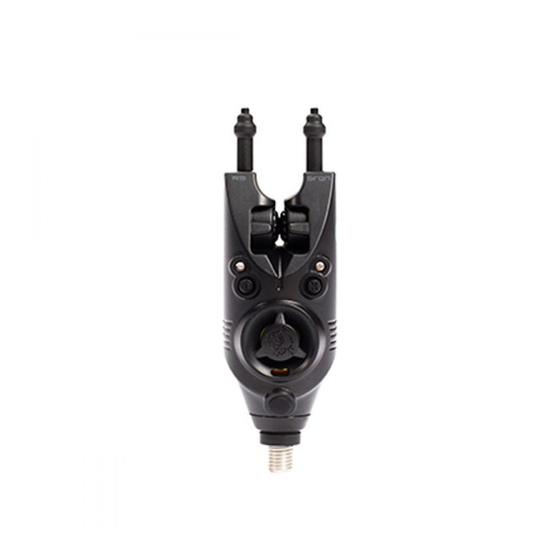
  • Seite 1 USER MANUAL NEXT GENERATION BITE INDICATION SIREN R3 USER MANUAL 2020 SIREN R3 USER MANUAL 25.02.20.indd 1 13/07/2020 08:41...
  • Seite 2: Product Registration

    PRODUCT REGISTRATION Registering your R3 alarm or Receiver with Nash Tackle extends its warranty period to 2 years. Your alarm will have a unique 7 character code both on the box and inside the battery compartment. You will need this serial number to register your alarm.
  • Seite 3 Nash Bobbin Glow Pipes Nash Bobbin Glow Pipes use fibre optic technology to replicate the unique regenerating glow of the Siren R3 LED in your Nash Bobbin head. Glow Pipes screw into the direct connection thread in the front of the R3’s body, a Nash Bobbin Head screws on to the end with the soft rubber diffuser.
  • Seite 4 The Anti-Theft alarm alerts you if an R3 head is turned off whilst your Receiver is on. Once triggered, a long press of the A button on the Receiver stops the alarm sounding. SIREN R3 USER MANUAL 2020 SIREN R3 USER MANUAL 25.02.20.indd 4 13/07/2020 08:41...
  • Seite 5 LED turns off. This signifies any existing pairings with R3 alarms have been erased. Note individual heads cannot be selected and erased from the R3 receiver, all pairings have to be erased. SIREN R3 USER MANUAL 2020 SIREN R3 USER MANUAL 25.02.20.indd 5 13/07/2020 08:41...
  • Seite 6 The end of the Glow Pipe must be touching the LED inside the R3. Your Nash Bobbin Head can now be screwed on to the end of the Glow Pipe that has the soft moulded diffuser.
  • Seite 7 Slide the drag weight on and screw into the threaded collar. Replace the moulded diffuser at the end of the Glow Pipe. Your Nash Bobbin Head can now be slid on and screwed to the Drag Weight. SIREN R3 USER MANUAL 2020 SIREN R3 USER MANUAL 25.02.20.indd 7...
  • Seite 8 Traditionelle Magnet-Rad Anzeige. Das ist die Standardeinstellung nach dem Auspacken. 2 Bieper: Speed Sensing High Sensitivity - hohe Sensibilität. Eliminiert fälschliche Bissanzeige durch Wind, Kraut oder Strömung. SIREN R3 USER MANUAL 2020 SIREN R3 USER MANUAL 25.02.20.indd 8 13/07/2020 08:41...
  • Seite 9 Glow Pipes T5019 und T5020 (nicht im Lieferumfang enthalten). Nash Bobbin Glow Pipes Nash Bobbin Glow Pipes verwenden Fiberglas- Technologie, um das einzigartig pulsierende Licht der Siren R3 LED in ihrem Nash Bobbin Head wiederzugeben. Glow Pipes werden mittels eines direkten Gewindes an der Vorderfront des R3 Bissanzeigers angeschraubt, ein Nash Bobbin Head wird dann an das andere Ende mit dem weichen Diffusor geschraubt.
  • Seite 10 Anti-Diebstahl-Alarm: Drücken Sie lange den A-Knopf. Es ertönen zwei Signale. Aufsteigende Tonfolge zeigt Modus eingeschalten, absteigende Tonfolge zeigt abgeschalteten Alarm an. Werkseitig ist der Anti-Diebstahl- Alarm ausgeschalten. SIREN R3 USER MANUAL 2020 SIREN R3 USER MANUAL 25.02.20.indd 10 13/07/2020 08:41...
  • Seite 11 Kopplung und die LED des Recievers blinkt. Drücken Sie wiederum kurz den Volume-Knopf und die LED leuchtet wieder im Dauerlicht, bereit, um weitere Bissanzeiger auf den 5. Kanal zu programmieren. SIREN R3 USER MANUAL 2020 SIREN R3 USER MANUAL 25.02.20.indd 11 13/07/2020 08:41...
  • Seite 12 -10 bis +40 Grad Celsius. Geschützt vor Wassereintritt - bitte nicht ins Wasser tauchen, etc. Anbringung der Nash Bobbin Glow Pipes an den Siren R3: Entnehmen Sie das Glow Pipe der Verpackung. Entfernen Sie NICHT den weichen Diffusor an dem einen Ende des Glow Pipes.
  • Seite 13 Diffusor) in diesen Verbindungskanal und drehen anschließend die Schraube vorsichtig fest. Das Ende des Lichtleiterkabels MUSS die innenliegende R3 LED berühren. Ihr Nash Bobbin Head kann nun an das Ende mit dem weichen Diffusor geschraubt werden. Anbringung der Drag Weights (Gewichte) an die Nash...
  • Seite 14 2 YEAR* Enregistrez-Vouz ici: www.register.nashtackle.co.uk Manuel de l’utilisateur, Siren R3 Détecteur R3 Insérer une pile: Ouvrir le compartiment avec un tournevis cruciforme et y glisser une pile CR2 3V (non fournie) Allumer/éteindre un détecteur R3: Presser et maintenir la pression pendant deux secondes sur le bouton Power.
  • Seite 15 SIREN R3 dans la tête de votre indicateur de touche. Les Glow Pipes se vissent directement sur la connexion disponible sur la façade votre SIREN R3, et une tête Nash Bobbin se visse sur l’autre extrémité, équipée du diffuseur en caoutchouc mou.
  • Seite 16 Appuyer longuement sur le bouton A de la centrale. Deux bips seront émis. Un son croissant signifie que l’antivol est activé. Un son décroissant signifie qu’il est SIREN R3 USER MANUAL 2020 SIREN R3 USER MANUAL 25.02.20.indd 16 13/07/2020 08:41...
  • Seite 17 Une fois programmés tous les détecteurs sur la LED 5, pressez et maintenez la pression pendant 3 secondes sur les boutons Power et Volume, un double bip confirme la fin de la programmation. SIREN R3 USER MANUAL 2020 SIREN R3 USER MANUAL 25.02.20.indd 17 13/07/2020 08:41...
  • Seite 18 Protection contre l’intrusion d’eau, mais ne pas submerger, arroser etc. Monter les Nash Bobbin Glow Pipes sur les Siren R3s: Enlevez le Glow Pipe de son emballage, n’enlevez PAS et surtout ne JETEZ PAS le diffuseur en caoutchouc mou présent à...
  • Seite 19 L’extrémité du GLOW PIPE DOIT toucher la LED à l’intérieur du R3. Vous pouvez maintenant visser votre tête d’indicateur Nash Bobbin à l’autre extrémité du Glow Pipe (celle munie du diffuseur). Monter des Drag Weights sur les Nash Bobbin Glow Pipes: Enlevez provisoirement le diffuseur de l’extrémité...
  • Seite 20 Sensibilità L’R3 ha 3 tipi di regolazione della sensibilità. La si può variare tenendo premuto a lungo il pulsante X, udendo i seguenti segnali acustici. SIREN R3 USER MANUAL 2020 SIREN R3 USER MANUAL 25.02.20.indd 20 13/07/2020 08:41...
  • Seite 21 Glow Pipe T5019 e T5020 (non inclusi). Nash Bobbin Glow Pipes Il Nash Bobbin Glow Pipe usa la tecnologia a fibra ottica per replicare il colore del LED del segnalatore R3 sula testina del Nash Bobbin. La Glow Pipe (cavetto in fibra ottica) si avvita...
  • Seite 22 Ogni breve premuta scorrerà le quattro possibili modalità disponibili. Vibrazione e LED – centralina silenziosa, vibrazione e LED accesi. Solo LED – Centralina silenziosa. LED acceso. Nessun suono e nessuna vibrazione. SIREN R3 USER MANUAL 2020 SIREN R3 USER MANUAL 25.02.20.indd 22 13/07/2020 08:41...
  • Seite 23 Power e di Volume per 3 secondi fino a quando non si sente un bip. SIREN R3 USER MANUAL 2020 SIREN R3 USER MANUAL 25.02.20.indd 23 13/07/2020 08:41...
  • Seite 24 R3 viene memorizzato entro 10 secondi, la centralina R3 tornerà al normale funzionamento. Frequenza di lavoro: All’interno della banda di frequenza European Licence Exempt 868MHz SIREN R3 USER MANUAL 2020 SIREN R3 USER MANUAL 25.02.20.indd 24 13/07/2020 08:41...
  • Seite 25 R3 e avvitare accuratamente. La fine della cavo a fibra NON deve toccare il LED interno al segnalatore R3. Ora avvitare la testina del Nash Bobbin all’altro capo con il diffusore in plastica morbida. Adattare ed inserire i Drag Weights al cavetto in fibra ottica...
  • Seite 26 PRODLOUŽENÁ ZÁRUKA U HLÁSIČE R3 A R3 PŘÍPOSLECHU Registrace hlásiče nebo příposlechu R3 u Nash Tackle prodlužuje záruční dobu na 2 roky. Váš hlásič bude mít unikátní 7 místní kód na balení a uvnitř prostoru pro baterii. K registraci Vašeho hlásiče budete potřebovat toto sériové číslo.
  • Seite 27 Nash Bobbin Glow Pipes Nash Bobbin Glow Pipes využívají technologii optických vláken k replikaci záře LED diody hlásiče Siren R3 ve Vaší Nash bobbině. Glow Pipes se zašroubují přímo do předního závitu umístěného na hlásiči Nash Siren R3 a do Nash bobbiny opatřené...
  • Seite 28 A tlačítkem. Pokud necháte alarm doznít celých 10 vteřin, zůstává aktivní i nadále. Programování R3 Signalizátoru a R3 Příposlechu: Stiskněte a držte současně Power a Volume tlačítka po dobu SIREN R3 USER MANUAL 2020 SIREN R3 USER MANUAL 25.02.20.indd 28 13/07/2020 08:41...
  • Seite 29 LED 1 se rozsvítí. Držte nadále obě tlačítka stisknutá po další tři vteřiny, zazní tři pípnutí a LED zhasne. To znamená, že všechny spárované hlásiče jsou vymazány. Pozn.: nelze vybrat jednotlivé hlásiče pro vymazání z paměti. SIREN R3 USER MANUAL 2020 SIREN R3 USER MANUAL 25.02.20.indd 29 13/07/2020 08:41...
  • Seite 30 Je nutné, aby se konec Glow Pipe dotýkal LED diody uvnitř signalizátoru R3 Vaše Nash bobbina může být nyní našroubována na konec Glow Pipe, která je opatřena měkkým difuzorem. Montáž závažíček (Drag Weights) na Nash Bobbin Glow Pipes: Dočasně...
  • Seite 31 14 mm, pro tři závažíčka o 21 mm. Nasaďte závažíčka a zašroubujte do závitového límce. Nasaďte zpět vylisovaný difuzor na konec Glow Pipe. Nyní může být Vaše Nash bobbina nasunuta a přišroubována k závažíčkům. SIREN R3 USER MANUAL 2020 SIREN R3 USER MANUAL 25.02.20.indd 31...
  • Seite 32 Gevoeligheid De R3 heeft 3 verschillende instellingen voor gevoeligheid. Deze stel je in door lang op de X knop te drukken.  SIREN R3 USER MANUAL 2020 SIREN R3 USER MANUAL 25.02.20.indd 32 13/07/2020 08:41...
  • Seite 33 Nash Bobbin Glow Pipes Nash Bobbin Glow Pipes gebruiken fibre optic technologie om de unieke lichtgevende gloed van de Siren R3 led na te bootsen in je Nash Bobbin Head. De Glow Pipes schroef je in het daarvoor voorziene schroefgat aan de voorzijde van de R3 body, een Nash Bobbin Head draai je aan het uiteinde met de zacht rubberen connector.
  • Seite 34 Trilalarm en brandend LED lampje – ontvanger verandert de vibratie en lampje brand. Alleen LED lampje – ontvanger verandert naar LED lampje aan maar geen geluid of vibratie. SIREN R3 USER MANUAL 2020 SIREN R3 USER MANUAL 25.02.20.indd 34 13/07/2020 08:41...
  • Seite 35 Je zult twee signalen horen als dit gelukt is. Het vijfde kanaal kan 32 verschillende R3 beetmelders ontvangen. Om een R3 beetmelder toe te voegen aan de SIREN R3 USER MANUAL 2020 SIREN R3 USER MANUAL 25.02.20.indd 35 13/07/2020 08:41...
  • Seite 36 Dan koppel je de alarmen terug aan de ontvanger. Belangrijk: Als de vijfde LED lamp, geen signaal ontvangt van een R3 beetmelder binnen tien seconden zal de ontvanger terug gaan naar de normale modus. SIREN R3 USER MANUAL 2020 SIREN R3 USER MANUAL 25.02.20.indd 36 13/07/2020 08:41...
  • Seite 37 868MHz-Band. Gebruiken bij een omgevingstemperatuur van +40C -10C. Waterbestendig, echter niet onderdompelen in water. Het monteren van de Nash Bobbin Glow Pipes aan een Siren R3s: Haal de Glow Pipe uit de verpakking. Laat de zachte connector zitten aan één zijde, verwijder of gooi deze niet weg.
  • Seite 38 Schuif het drag weight erop en draai deze vast in het schroefdraadgedeelte. Plaats de zachte connector terug aan het uiteinde van de Glow Pipe. Je Nash Bobbin Head kan daarmee vastgeschroefd worden aan de Drag weight. SIREN R3 USER MANUAL 2020 SIREN R3 USER MANUAL 25.02.20.indd 38...
  • Seite 39: Instalacja Baterii

    X zmienia głośność o jeden poziom. Sygnał dźwiękowy po naciśnięciu przycisku X reprezentuje ustawioną głośność. Czułość: Sygnalizator R3 posiada trzystopniową regulację czułości, którą zmienia się przytrzymując przycisk X. SIREN R3 USER MANUAL 2020 SIREN R3 USER MANUAL 25.02.20.indd 39 13/07/2020 08:41...
  • Seite 40 Kiedy tryb Bobbin Glow się wyłączy, usłyszysz dwa piśnięcia o spadającym tonie. Uwaga: Ta funkcja jest dostępna tylko przy użyciu światłowodów Nash Bobbin Glow Pipe T5019 i T5020 (nie występują w komplecie). Nash Bobbin Glow Pipes: Nash Bobbin Glow Pipe to produkt oparty na technologii światłowodowej, który emituje unikalną...
  • Seite 41 Alarm wibracyjny i wyciszenie: Krótkie naciśnięcie przycisku V. Każde krótkie naciśnięcie uruchamia jedną z dostępnych opcji sygnalizowanych poprzez: Wibrację, sygnał świetlny LED – centralka wyciszona, włączona wibracja i diody LED. SIREN R3 USER MANUAL 2020 SIREN R3 USER MANUAL 25.02.20.indd 41 13/07/2020 08:41...
  • Seite 42 Czynność tę wykonujemy analogicznie dla diod 1-4. Po zakończeniu programowania naciskamy i przytrzymujemy jednocześnie przyciski Volume oraz Power przez trzy sekundy. Krótki, podwójny sygnał dźwiękowy informuje o wyłączeniu trybu programowania. SIREN R3 USER MANUAL 2020 SIREN R3 USER MANUAL 25.02.20.indd 42 13/07/2020 08:41...
  • Seite 43 Power i Volume jednocześnie do momentu usłyszenia piśnięcia sygnalizatora oraz zapalenia pierwszej diody LED. Dalej postępuj według instrukcji programowania sygnalizatorów. Uwaga: Jeśli w trybie programowania przez 10 sekund nie SIREN R3 USER MANUAL 2020 SIREN R3 USER MANUAL 25.02.20.indd 43 13/07/2020 08:41...
  • Seite 44 Bobbin Glow Pipe: Ściągnij miękki dyfuzor z końcówki światłowodu Glow Pipe. Poluźnij dwie sekcje gwintowanego kołnierza na jednym z końców Nash Bobbin Glow poprzez dwa pełne obroty. Wciśnij kołnierz mocowania w głąb światłowodu na 7mm, SIREN R3 USER MANUAL 2020 SIREN R3 USER MANUAL 25.02.20.indd 44...
  • Seite 45 21 mm. Nawlecz ciężarki i ostrożnie dokręć. Załóż miękki dyfuzor na końcówkę światłowodu Glow Pipe. Głowica sygnalizatora Nash Bobbin może zostać teraz przymocowana do obciążonego światłowodu. SIREN R3 USER MANUAL 2020 SIREN R3 USER MANUAL 25.02.20.indd 45...
  • Seite 46 Directive 1999/5/EC and the provisions of EU EMC Directive 2004/108/EC The technical documentation relevant to the above equipment will be held at Kevin Nash Group PLC - Unit 18-21, Burnham Business Park, Burnham On Crouch, CM0 8TE Lee Nash - Managing Director...
  • Seite 47 Please visit www.nashtackle.co.uk/declaration for the latest Declaration of Conformity. SIREN R3 USER MANUAL 2020 SIREN R3 USER MANUAL 25.02.20.indd 47 13/07/2020 08:41...
  • Seite 48 KEVIN NASH GROUP PLC Units 18-21, Burnham Business Park, Essex, CM0 8TE T: +44 (0)1702 233232 F: +44 (0)1702 233234 www.nashtackle.co.uk 2020 SIREN R3 USER MANUAL 25.02.20.indd 48 13/07/2020 08:41...