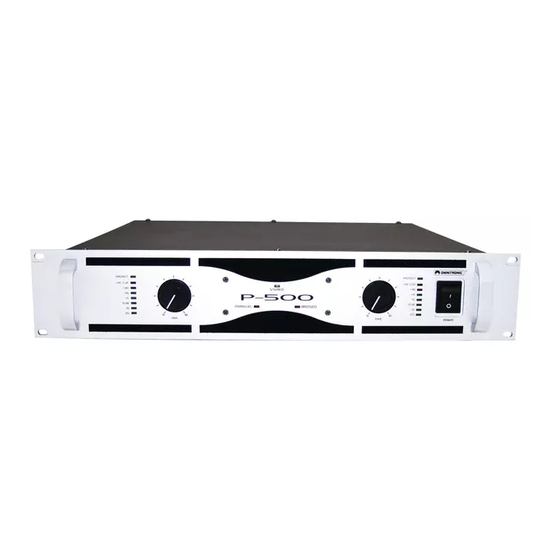
Herunterladen Inhalt Inhalt Diese Seite drucken
Omnitronic P-250 Bedienungsanleitung
Vorschau ausblenden Andere Handbücher für P-250:

Werbung

Verfügbare Sprachen

Verfügbare Sprachen

BEDIENUNGSANLEITUNG
USER'S MANUAL
MODE D'EMPLOI
P-SERIES
P-250/P-500/P-1000
P-1500/P-2000
Professional power amplifiers
©
Für weiteren Gebrauch aufbewahren!
Copyright
Keep this manual for future needs!
Nachdruck verboten!
Gardez ce mode d'emploi pour des
Reproduction prohibited!
utilisations ultérieures!
Réproduction interdit!
Guarde este manual para posteriores usos.
Prohibida toda reproducción.

Werbung

Inhaltsverzeichnis
loading

Inhaltszusammenfassung für Omnitronic P-250

  • Seite 1 BEDIENUNGSANLEITUNG USER'S MANUAL MODE D'EMPLOI P-SERIES P-250/P-500/P-1000 P-1500/P-2000 Professional power amplifiers © Für weiteren Gebrauch aufbewahren! Copyright Keep this manual for future needs! Nachdruck verboten! Gardez ce mode d’emploi pour des Reproduction prohibited! utilisations ultérieures! Réproduction interdit! Guarde este manual para posteriores usos.
  • Seite 3: Inhaltsverzeichnis

    MULTI-LANGUAGE-INSTRUCTIONS Inhaltsverzeichnis Table of contents Sommaire EINFÜHRUNG..............................5 Features ................................. 5 SICHERHEITSHINWEISE..........................5 GERÄTEÜBERSICHT............................7 Frontplatte ..............................7 Rückseite ............................... 7 INSTALLATION ..............................8 RACKINSTALLATION............................ 8 EINGÄNGE ..............................8 AUSGÄNGE..............................9 SCHALTERSTELLUNGEN ..........................9 NETZANSCHLUSS............................9 BETRIEBSARTEN ............................9 STEREOBETRIEB ............................9 PARALLELBETRIEB............................
  • Seite 4 Das neueste Update dieser Bedienungsanleitung finden Sie im Internet unter: You can find the latest update of this user manual in the Internet under: Vous pouvez trouver la dernière version de ce mode d'emploi dans l'Internet sous: www.omnitronic.com 4/34 10451130_V_2_1.DOC...
  • Seite 5: Einführung

    - sicherstellen, dass gegebenenfalls jede erhaltene Ergänzung in die Anleitung einzuführen ist EINFÜHRUNG Wir freuen uns, dass Sie sich für eine OMNITRONIC Endstufe entschieden haben. Wenn Sie nachfolgende Hinweise beachten, sind wir sicher, dass Sie lange Zeit Freude an Ihrem Kauf haben werden.
  • Seite 6 Dieses Gerät hat das Werk in sicherheitstechnisch einwandfreiem Zustand verlassen. Um diesen Zustand zu erhalten und einen gefahrlosen Betrieb sicherzustellen, muss der Anwender unbedingt die Sicherheits- hinweise und die Warnvermerke beachten, die in dieser Gebrauchsanweisung enthalten sind. Unbedingt lesen: Bei Schäden, die durch Nichtbeachtung dieser Bedienungsanleitung verursacht werden, erlischt der Garantieanspruch.
  • Seite 7: Geräteübersicht

    GERÄTEÜBERSICHT Frontplatte PROTECT PROTECT +35 CLIP +35 CLIP 0 dB 0 dB CH-1 CH-1 POWER (1) NETZSCHALTER Drücken Sie den Netzschalter, um das Gerät einzuschalten. (2) LAUTSTÄRKEREGLER Stellen Sie hier die gewünschte Lautstärke ein. (3) STEREO-LED Diese LED leuchtet im Stereobetrieb. (4) PARALLEL-LED Diese LED leuchtet im Parallelbetrieb.
  • Seite 8: Installation

    (12) MONO BRIDGE-AUSGANGSBUCHSE Zum Boxenanschluss im Brückenbetrieb. (13) CH-2-SPEAKON-AUSGANGSBUCHSE Zum Boxenanschluss für Kanal 2. (14) CH-2-BANANE-/SCHRAUBKOMBINATION Zum Boxenanschluss für Kanal 2. (15) CH-1-BANANE-/SCHRAUBKOMBINATION Zum Boxenanschluss für Kanal 1. (16) CH-1-SPEAKON-AUSGANGSBUCHSE Zum Boxenanschluss für Kanal 1. (17) VR FOR LIGHT-REGLER Zur Einstellung der LED-Intensität. (18) PARALLEL/DUAL/BRIDGE-BETRIEBSWAHLSCHALTER Zur Auswahl des gewünschten Betriebsmodus.
  • Seite 9: Ausgänge

    Belegung symmetrische XLR-Buchse: Belegung symmetrischer Stereo-Klinkenstecker: AUSGÄNGE Der hohe Dämpfungsfaktor Ihres Verstärkers sorgt für eine klare Wiedergabe. Unnötig lange und dünne Lautsprecherkabel können den Dämpfungsfaktor und damit die niedrigen Frequenzen negativ beeinflussen. Der Dämpfungsfaktor sollte mindestens bei 50 liegen um gute Audioqualitäten zu gewährleisten. Je länger ein Kabel sein muss, um so dicker sollte es sein.
  • Seite 10: Parallelbetrieb

    3 Boxen à 4 Ohm = 1 Ohm (parallel geschaltet), niemals anschließen!! D.h. an eine Endstufe, die bis 4 Ohm reicht, lassen sich bis zu 2 Boxen à 8 Ohm hängen. Achtung: Die Impedanz der angeschlossenen Lautsprecher darf niemals 4 Ohm unterschreiten. Merke: Die Eingangsimpedanz der Lautprecher solllte immer größer oder gleich der Ausgangsimpedanz der Endstufe sein.
  • Seite 11: Problembehebung

    -20 dB bis 30 dB Ausgangspegel CLIP Kurzschluss oder zu niedrige Lastimpedanz oder verzerrtes Signal PROTECT während der Stabilisierungsphase beim Einschalten aktiv, oder wenn eine der Schutzschaltungen angesprochen hat Wenn Sie die Anlage wieder abschalten wollen, schalten Sie zuerst die Endstufen und danach die Vorstufen aus, damit kein Ausschaltknacksen an die Lautsprecher gelangt.
  • Seite 12 Bitte beachten Sie: Bei 115 V und 230 V wird der gleiche Sicherungswert verwendet. Vor dem Sicherungswechsel ist das Gerät allpolig von der Netzspannung zu trennen (Netzstecker ziehen). Vorgehensweise: Schritt 1: Öffnen Sie den Sicherungshalter an der Geräterückseite mit einem passenden Schraubendreher.
  • Seite 13: Technische Daten

    TECHNISCHE DATEN P-250 & P-500 P-250 P-500 Spannungsversorgung: 115/230 V AC, 50/60 Hz ~ 115/230 V AC, 50/60 Hz ~ Spannungsfestigkeit: 230 V ± 10 % (206 V - 253 V) 230 V ± 10 % (206 V - 253 V) Gesamtanschlusswert (max.):...
  • Seite 14 TECHNISCHE DATEN P-1000, P-1500 & P-2000 P-1000 P-1500 P-2000 Spannungsversorgung: 115/230 V AC, 50/60 Hz ~ 115/230 V AC, 50/60 Hz ~ 115/230 V AC, 50/60 Hz ~ Spannungsfestigkeit: 230 V ± 10 % (206 V - 230 V ± 10 % (206 V - 253 V) 253 V) Gesamtanschlusswert...
  • Seite 15: Introduction

    - include every supplementay update with the original manual INTRODUCTION Thank you for having chosen an OMNITRONIC power amplifier. If you follow the instructions given in this manual, we can assure you that you will enjoy this device for many years.
  • Seite 16: Operating Determinations

    This device has left our premises in absolutely perfect condition. In order to maintain this condition and to ensure a safe operation, it is absolutely necessary for the user to follow the safety instructions and warning notes written in this user manual. Important: Damages caused by the disregard of this user manual are not subject to warranty.
  • Seite 17: Description Of The Device

    Operate the device only after having familiarized with its functions. Do not permit operation by persons not qualified for operating the device. Most damages are the result of unprofessional operation! Never use solvents or aggressive detergents in order to clean the device! Rather use a soft and damp cloth. Please use the original packaging if the device is to be transported.
  • Seite 18: Rear Panel

    Rear panel (9) AC-CONNECTION Used to plug the power cord in. (10) FUSEHOLDER Only replace the fuse when the device is disconnected from mains. Only use fuses of the same rating and power. (11) LIMITER (12) MONO BRIDGE-OUTPUT SOCKET For connecting the speakers in bridged mode. (13) CH-2-SPEAKON-OUTPUT SOCKET For connecting the speakers of channel 2.
  • Seite 19: Inputs

    If racks are to be transported or used for mobile use, additionally fasten the devices by connecting the rear brackets with the side or ground bars of the rack. In this way, the amplifier cannot be pushed backwards. The front panel alone is not designed to absorb acceleration forces occuring during transportation. INPUTS A good cable run improves the sound quality remarkably.
  • Seite 20: Operation Modes

    OPERATION MODES STEREO OPERATION Normal operation mode of an amplifier, in which every channel gets its own signal. The most commonly used mode of amplifiers is stereo-operation at 4 Ohms. Make sure that the operation-mode-switch Bridge/Dual/ Parallel is set to Dual. Calculation number of speakers –...
  • Seite 21: Operation

    OPERATION After having connected your amplifier to the mains, turn both gain controls counter-clockwise to Min-position. The last device to be switched on is the amplifier. The "ON" and "PROTECT" LED light up now. If it does not, check if the amplifier is connected to the mains correctly. After the turn-on delay the speakers are activated (PROTECT-LED is off).
  • Seite 22: Cleaning And Maintenance

    CLEANING AND MAINTENANCE DANGER TO LIFE! Disconnect from mains before starting maintenance operation! We recommend a frequent cleaning of the device. Please use a soft lint-free and moistened cloth. Never use alcohol or solvents! There are no servicable parts inside the device except for the fuse. Maintenance and service operations are only to be carried out by authorized dealers.
  • Seite 23: Technical Specifications

    TECHNICAL SPECIFICATIONS P-250 & P-500 P-250 P-500 Power supply: 115/230 V AC, 50/60 Hz ~ 115/230 V AC, 50/60 Hz ~ Power-range: 230 V ± 10 % (206 V - 253 V) 230 V ± 10 % (206 V - 253 V) Power consumption (max.):...
  • Seite 24 TECHNICAL SPECIFICATIONS P-1000, P-1500 & P-2000 P-1000 P-1500 P-2000 Power supply: 115/230 V AC, 50/60 Hz ~ 115/230 V AC, 50/60 Hz ~ 115/230 V AC, 50/60 Hz ~ Power-range: 230 V ± 10 % (206 V - 230 V ± 10 % (206 V - 253 V) 253 V) Power consumption...
  • Seite 25: Introduction

    - s'assurer qu'en cas de besoin, chaque modification obtenue soit ajoutée au mode d'emploi. INTRODUCTION Nous vous remercions d'avoir choisi un amplificateur OMNITRONIC. Si vous respectez les instructions de service suivantes, vous allez profiter longtemps de votre achat. Sortez l'amplificateur de son emballage.
  • Seite 26: Instructions De Sécurité

    INSTRUCTIONS DE SECURITE ATTENTION! Soyez prudent, lors de manipulations électriques avec une tension dangereuse vous êtes soumis à des risques d'électrocution! Cet appareil a quitté les ateliers dans un état irréprochable. Pour assurer un bon fonctionnement, sans danger, l'utilisateur doit suivre les instructions contenues dans ce mode d'emploi. Attention: Tout dommage occasionné...
  • Seite 27: Emploi Selon Les Prescriptions

    EMPLOI SELON LES PRESCRIPTIONS Cet appareil est un amplificateur de son professionel pour amplifier des signaux audio. Cet appareil doit être connecté avec une tension alternative de 115/230 V, 50/60 Hz et a été conçu pour un usage dans des locaux clos.
  • Seite 28: Dos De L'appareil

    (6) DELS DE NIVEAU Les DELs clignote en dépendece du niveau ajusté. (7) DEL CLIP Cet DEL clignote quand le signal de sortie est distort. (8) DEL PROTECT Cet DEL est allumé après de mettre l'appareil en service, quand les enceintes ne sont pas connectés avec l'amplificateur.
  • Seite 29: Installation

    INSTALLATION MONTAGE DU RACK Cet amplificateur est prévu pour un 19“ rack (483 mm). Le rack devrait être un modèle „Double-Door“ avec la possibilité d’ouvir la face avant, ainsi que la face arrière. Le boîtier du rack devrait être équipé d’un ventilateur.
  • Seite 30: Connexion Au Secteur

    CONNEXION AU SECTEUR Brancher l'amplificateur seulement au réseau, après avoir assuré l’existence d‘une tension de réseau de 230 V et une protection par terre. L'appareil est conforme aux normes de sécurité de catégorie I. La protection par terre ne doit pas être séparée du boîtier! MODES DE FONCTIONNEMENT MODE DE FONCTIONNEMENT STEREO Mode de fonctionnement normal d’un amplificateur, ou chaque canal reçoit son propre signal.
  • Seite 31: Mode De Fonctionnement En Pont

    MODE DE FONCTIONNEMENT EN PONT C’est la possibilité d’opérer l’amplificateur en mode mono, c’est à dire par un canal. Par cela, la puissance de sortie nominale est doublée. Par conséquent, on a besoin de 2 amplificateurs pour le mode de fonctionne- ment stéréo.
  • Seite 32: Nettoyage Et Maintenance

    parleur ou dans les haut-parleurs. • Défaut technique de l’amplifi- • Mettre l’amplificateur hors circuit cateur. et laisser vérifier l’appareil par un technicien de service. NETTOYAGE ET MAINTENANCE DANGER DE MORT! Toujours débrancher avant de proceder à l'entretien! L'appareil doit être nettoyé régulièrement de contaminations comme de la poussière etc. Pour le nettoyage, utilisez un torchon non pelucheux humide.
  • Seite 33: Caractéristiques Techniques

    CARACTERISTIQUES TECHNIQUES P-250 & P-500 P-250 P-500 Alimentation: 115/230 V AC, 50/60 Hz ~ 115/230 V AC, 50/60 Hz ~ Rigidité diélectrique: 230 V ± 10 % (206 V - 253 V) 230 V ± 10 % (206 V - 253 V) Puissance de rendement (max.):...
  • Seite 34 CARACTERISTIQUES TECHNIQUES P-1000, P-1500 & P-2000 P-1000 P-1500 P-2000 Alimentation: 115/230 V AC, 50/60 Hz ~ 115/230 V AC, 50/60 Hz ~ 115/230 V AC, 50/60 Hz ~ Rigidité diélectrique: 230 V ± 10 % (206 V - 230 V ± 10 % (206 V - 253 V) 253 V) Puissance de rendement...

Diese Anleitung auch für:

P-500P-1000P-1500P-2000

Inhaltsverzeichnis