EUFY Security T8740 Handbuch

Verwandte Anleitungen für EUFY Security T8740


Inhaltszusammenfassung für EUFY Security T8740
- Seite 1 USER MANUAL Video Doorbell Chime Anker Innovations Limited. All rights reserved. eufy and the eufy logo are trademarks of Anker Innovations Limited, registered in the United States and other countries. All other trademarks are the property of their respective owners.
- Seite 2 Table of English Contents Deutsch What’s in the Box Español What’s Required for Installation? Français Installation Replacing the Power Connector Italiano Notice Nederlands Customer Service Português لع َ ر َ ب ِ ية...
-
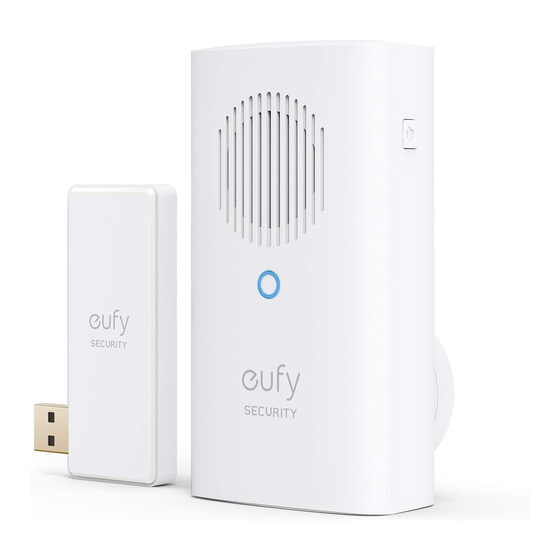
Seite 3: What's In The Box
Step 3. Plug the USB dongle into the USB port on the back of the HomeBase 2. USB dongle can control up to 4 doorbell chimes. The USB dongle can only work with HomeBase 2 when a eufy video doorbell is connected to this HomeBase 2 and the doorbell is pressed. -
Seite 4: Declaration Of Conformity
Step 4. In the eufySecurity App, go to Doorbell Settings - Indoor Chime. 2. Install the new Power Connector onto the Doorbell Chime following the same procedure mentioned at the start of the guide. Follow the onscreen instruction to add the Chime to your existing Video Doorbell. - Seite 5 This device complies with Industry Canada licence-exempt RSS standard(s). This symbol means the product must not be discarded as household subject to the following two conditions: waste, and should be delivered to an appropriate collection facility for (1) this device may not cause interference, and recycling.
- Seite 6 Der USB-Dongle ermöglicht den Anschluss der eufy HomeBase 2 an Türgongs. Ein USB-Dongle kann bis zu 4 Türgongs steuern. Der USB-Dongle funktioniert nur dann mit der HomeBase 2, wenn eine eufy Videotürklingel an diese HomeBase 2 angeschlossen ist und die Türklingel gedrückt wird.
- Seite 7 MONTAGE Schritt 1.Befestigen Sie den Netzstecker am WLAN-Türgong. A. Positionieren Sie den Netzstecker in der durch die Pfeile angegebenen Richtung auf dem Türgong. B. Richten Sie die Vorsprünge am Netzstecker mit der Aussparung unten am Türgong aus. C. Drehen Sie den Netzstecker im Uhrzeigersinn, um ihn einrasten zu lassen. Schritt 4.Gehen Sie in der eufySecurity App zu Türklingel-Einstellungen - Türgong innen.
-
Seite 8: Austauschen Des Netzsteckers
AUSTAUSCHEN DES NETZSTECKERS Tabla de contenidos 1. Drücken Sie die Entriegelungstaste und drehen Sie gleichzeitig den Netzstecker gegen den Uhrzeigersinn, um ihn vom Türgong abzunehmen. CONTENIDO DE LA CAJA REQUISITOS PARA LA INSTALACIÓN INSTALACIÓN SUSTITUCIÓN DEL CONECTOR DE ALIMENTACIÓN 2. Installieren Sie den neuen Netzstecker am Türgong wie oben in der Anleitung beschrieben. -
Seite 9: Contenido De La Caja
Una llave USB puede controlar hasta 4 dispositivos sonoros del timbre. La llave USB solo puede funcionar con HomeBase 2 cuando hay un timbre con vídeo eufy conectado a dicho dispositivo HomeBase 2 y se llama al timbre. 13 ES ES 14... - Seite 10 1. Pulse el botón Bloquear y simultáneamente gire el conector de alimentación hacia la izquierda para extraerlo de la base del dispositivo sonoro del timbre. Paso 4.En la aplicación eufy Security, vaya a Ajustes del timbre > Dispositivo sonoro interior.
-
Seite 11: Contenu De La Boîte
QUELLES SONT LES CONDITIONS REQUISES POUR L’INSTALLATION ? Ce carillon de sonnette est un accessoire exclusif de la sonnette vidéo 2K eufy Security (à piles). Le dongle USB permet à eufy HomeBase 2 de se connecter aux carillons de sonnette. - Seite 12 INSTALLATION Étape 1.Fixez le connecteur d’alimentation au carillon de sonnette. A. Placez le connecteur d’alimentation sur le carillon de sonnette dans le sens indiqué par les flèches. B. Alignez les fentes surélevées du connecteur d’alimentation avec l’encoche sur la base du carillon de sonnette. C.
- Seite 13 REMPLACEMENT DU CONNECTEUR D’ALIMENTATION Indice 1. Appuyez sur le bouton de verrouillage et tournez en même temps le connecteur d’alimentation dans le sens inverse des aiguilles d’une montre pour le retirer de la base du carillon de sonnette. CONTENUTO DELLA CONFEZIONE NECESSARIO PER L’INSTALLAZIONE INSTALLAZIONE SOSTITUZIONE DEL...
-
Seite 14: Contenuto Della Confezione
Security (alimentato a batteria). Passaggio 2. Collegare il citofono con cicalino a una fonte di alimentazione CA Il dongle USB consente a eufy HomeBase 2 di connettersi ai citofoni con nella posizione desiderata. cicalino. Un dongle USB può controllare fino a 4 citofoni con cicalino. - Seite 15 SOSTITUZIONE DEL CONNETTORE DI ALIMENTAZIONE 1. Premere il pulsante di blocco e ruotare contemporaneamente il connettore di alimentazione in senso antiorario per rimuoverlo dalla base del citofono con cicalino. Passaggio 4.Nell’app eufySecurity, accedere a Impostazioni citofono - Citofono interno. Seguire le istruzioni su schermo per aggiungere il citofono al videocitofono esistente.
-
Seite 16: Wat Zit Er In De Doos
Deze deurbelgong is een exclusieve accessoire voor de eufy Security Video Doorbell 2K (op batterijen). De USB-dongle stelt de eufy HomeBase 2 in staat om verbinding te maken met deurbelgongen. Eén USB-dongle kan tot 4 deurbelgongen bedienen. De USB-dongle kan alleen met de HomeBase 2 werken wanneer er een eufy- videodeurbel is verbonden met de desbetreffende HomeBase 2 en er op de deurbel wordt gedrukt. - Seite 17 INSTALLATIE Stap 1.Bevestig de voedingsconnector op de deurbelgong. A. Plaats de voedingsconnector in de richting van de pijlen op de deurbelgong. B. Lijn de verhoogde sleuven van de voedingsconnector uit met de inkeping op de voet van de deurbelgong. C. Draai met de klok mee om de voedingsconnector op zijn plaats te vergrendelen.
- Seite 18 DE VOEDINGSCONNECTOR VERVANGEN Índice 1. Druk op de vergrendelknop en draai de voedingsconnector tegelijkertijd tegen de klok in om deze van de deurbelgong te verwijderen. CONTEÚDO DA EMBALAGEM REQUISITOS PARA A INSTALAÇÃO INSTALAÇÃO SUBSTITUIR O CONETOR DE ALIMENTAÇÃO 2. Installeer de nieuwe voedingsconnector op de deurbelgong volgens de procedure die aan het begin van de handleiding wordt beschreven.
-
Seite 19: Conteúdo Da Embalagem
O adaptador USB permite a eufy HomeBase 2 para ligar a campainhas. Um adaptador USB pode controlar até 4 campainhas. O adaptador USB apenas pode funcionar com a HomeBase 2 quando um videoporteiro da eufy é ligado a esta HomeBase 2 e a campainha é premida. 33 PT PT 34... - Seite 20 Passo 4.Na aplicação eufySecurity, aceda às Definições da campainha - Toque interior. Siga a instrução no ecrã para adicionar a campainha ao Videoporteiro existente. Passo 5. Pode selecionar o som de toque e ajustar o nível do volume através dos botões de Música e Volume que se encontram na parte lateral da Campainha.
- Seite 21 T8741 :الموديل ما المطلوب للتثبيت؟ بقدرة 2 ألف (مشغل بواسطةeufy ي ُعد رنين جرس الباب هذا هو ملحق خاص بجرس الباب بتقنية الفيديو من .)البطارية واحدةUSB رقم 2 من االتصال برنين جرس الباب. يمكن لوحدة حمايةeufy قاعدةUSB تمكن وحدة حماية...
- Seite 22 .قم بالتدوير في اتجاه عقارب الساعة لتثبيت موصل الطاقة في مكانه .الذي قمت به استبدال موصل الطاقة .الخطوة 2. قم بتوصيل رنين جرس الباب إلى مصدر طاقة تيار متردد في الموقع المطلوب .2 في الجزء الخلفي من القاعدة رقمUSB بمنفذUSB الخطوة 3. قم بتوصيل وحدة حماية اضغط...
-
Seite 23: Customer Service
Customer Service Kundenservice | Servicio de atención al cliente | Service client Servizio clienti | Klantenservice | Serviço de Apoio ao Cliente | Warranty Garantie | Garantía | Garantie | Garanzia | Garantie | Garantia | 12-month limited warranty 12 Monate eingeschränkte Garantie | Garantía limitada de 12 meses Garantie limitée de 12 mois | Garanzia limitata di 12 mesi | 12 maanden beperkte garantie 12 meses de garantia limitada |...