Werbung
Quicklinks
A c c e s o r i o s
Z u b e h ö r
A c c e s s o r i e s
A c c e s s o i r e s
A c c e s s o r i o
A c e s s ó r i o s
Π ρ ό σ θ ε τ ο ς
To e b e h o r e n
P ř í s l u š e n s t v í
1x
1x
1x
2x
I
LH
RH
G
H
1x
1x
4x
LH
RH
O
P
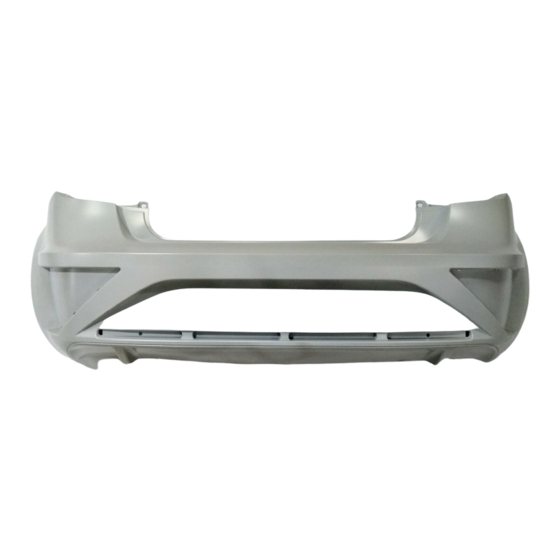
Ibiza SC 2008
Required Tools
GB
Erforderliche Werkzeuge
D
Herramientas necesarias
E
Outils indispensables
F
Strumenti necessari
I
Ferramentas necessárias:
P
Απαραίτητα εργαλεία
GR
Benodigd gereedschap
NL
Potřebné nářadí
CZ
p a r a
S E A T
f ü r
S E A T
f o r
S E A T
p o u r
S E A T
p e r
S E A T
p a r a
S E A T
ε ξ ο π λ ι σ μ ό ς
γ ι α
v o o r
S E A T
p r o
S E A T
1x
B
A
2x
2x
J
K
4x
2x
10x
Q
S
T
Cleaner
Page 1-13
S E A T
6J3 071 061
1x
1x
1x
C
D
E
1x
2x
14x
L
M
2x
2x
KB50x22
V
U
Instrucciones de montaje
Montageanleitung
Fitting instructions
Instructions de montage
Istruzioni per il montaggio
Instruções de montagem
Οδηγίες τοποθέτησης
Handleiding bij montage
Montážní návod
Reservado el derecho a modificar
el contenido de la entrega.
Änderungen des Liefer-
1x
umfanges vorbehalten.
Equipment supplied is
subject to alteration.
F
Sous réserve de modification
du volume de livraison.
Si riserva il diritto di apportare
modifiche all'oggetto della
consegna.
N
Reservado o direito de modificar
o conteúdo da entrega.
Τηρείται το δικαίωμα αλλαγών
του πλαισίου παράδοσης
Wijzigingen omtrent tijdstip van
levering voorbehouden.
W
Změny v rozsahu dodávky
vyhrazeny.
Ø3, Ø5mm
Ø18mm
Werbung

Verwandte Anleitungen für Seat Ibiza 6J3


Inhaltszusammenfassung für Seat Ibiza 6J3
- Seite 1 A c c e s o r i o s p a r a S E A T Instrucciones de montaje Z u b e h ö r f ü r S E A T Montageanleitung A c c e s s o r i e s f o r S E A T Fitting instructions...
- Seite 2 Before spraying the bumper, check whether the vehicle has been equipped with parking sensors as standard. If this is the case, drill through the four markings on the inside of the bumper in accordance with diagram PDC-1 and, after spraying the part, follow the fitting instructions PDC-2 to PDC-10 between diagrams 19 and 20...
- Seite 3 Central exhaust pipe Mittel-Auspuffrohr Tubo de escape central Tuyau d'échappement au milieu Tubo di scarico centrale Tubo de escape central Υλικό για εξατμίσεις Middenstuk-uitlaatpijp Prostřední výfuková trubka Single chromium-plated exhaust pipe Einzel-Chrom-Auspuffrohr Tubo de escape sencillo Tuyau d'échappement en chrome unique Tubo di scarico cromato singolo Tubo de escape cromado unitário Μονή...
- Seite 4 Dual-outlet exhaust pipe Doppel-Auspuffrohr Tubo de escape doble Double tuyau d'échappement Tubo di scarico doppio Tubo de escape duplo Διπλή εξάτμιση Dubbele uitlaatpijp Dvojitá výfuková trubka For vehicles with downward exhaust pipe Bei Fahrzeugen mit Auspuffrohr nach unten En vehículos con el tubo de escape hacia abajo Sur véhicules avec tuyau d'échappement vers le bas Per veicoli con tubo di scarico rivolto verso il basso Para veículos com o tubo de escape para baixo...
- Seite 5 PAINTING PROPOSAL SUGGESTION POUR LA PEINTURE ΠΡΌΤΑΣΗ ΒΑΦΉΣ LACKIERVORSCHLAG PROPOSTA DI VERNICIATURA LAKVOORBEELD PROPUESTA PARA PINTAR PROPOSTA PARA PINTAR NÁVRH LAKOVÄNÍ BLACK BODY COLOUR SCHWARZ WAGENFARBE NEGRO COLOR DEL VEHÍCULO NOIR COULEUR DE LA VOITURE NERO COLORE AUTO PRETO COR DO VEÍCULO ΜΑΎΡΟ...
- Seite 6 max. 0,5Nm Ø Ø orig. orig. orig. orig. orig. orig. orig. orig. orig. Torx T25 orig. orig. Page 6-13...
- Seite 7 orig. 2Nm ±0,25 orig. orig. orig. brown brown grey/yellow orig. grey orig. orig. orig. orig. orig. orig. orig. orig. orig. KB50x22 2Nm ±0,25 Page 7-13...
- Seite 8 orig. PDC-2 Cleaner 6J4 919 486 C PDC-3 PDC-4 Page 8-13...
- Seite 9 6J4 919 486 C 6J4 919 486 C PDC-5 10-20N/cm²! PDC-6 PDC-7 PDC-8 Page 9-13...
- Seite 10 2Nm ±0,25 2Nm ±0,25 2Nm ±0,25 orig. orig. orig. orig. orig. orig. Torx T25 orig. 2Nm ±0,25 orig. orig. orig. 2Nm ±0,25 2Nm ±0,25 2Nm ±0,25 120Nm Page 10-13...
- Seite 11 800-1000 Grind the primed component smoothly (P800-P1000). Avoid grinding through the primer. Check faulty spots, repair them and grind repaired places smoothly (P800-P1000). Re-prime ground-through spots using a suitable plastic primer. Thoroughly clean using a silicone remover. It is important to ensure adequate component support during the process of painting (distortion risk)! Paint buildup and application technique according to the paint manufacturer;...
- Seite 12 800-1000 Gegrondverfd component licht schuren (P800-P1000). Doorschuren van de grondlaag vermijden. Op onvolkomenheden controleren en herstellen alsook de gerepareerde plekken licht schuren (P800-P1000). Doorgeschuurde plekken met een geschikte kunststofgrondlaag nagronden. Met siliconenverwijderaar grondig reinigen. Let tijdens het lakken op een toereikende ondersteuning van de componenten (ivm vervorming)! Lakproces en applicatietechniek volgens de voorschriften van de lakfabrikant.
- Seite 13 800-1000 Λειάνετε το ασταρωμένο τμήμα ( P800-P 1000). Αποφύγετε τη λείανση της πρώτης στρώσης. Ελέγξτε για πιθανά προβληματικά σημεία, επιδιορθώστε τα και στη συνέχεια λειάνετε τα επιδιορθωμένα σημεία ( P800-P 1000). Τα σημεία λείανσης ασταρώστε τα συμπληρωματικά με κατάλληλο πλαστικό αστάρι. Καθαρίστε...