Monacor ESP-70/WS Anleitung
Ela-wandlautsprecher
Quicklinks
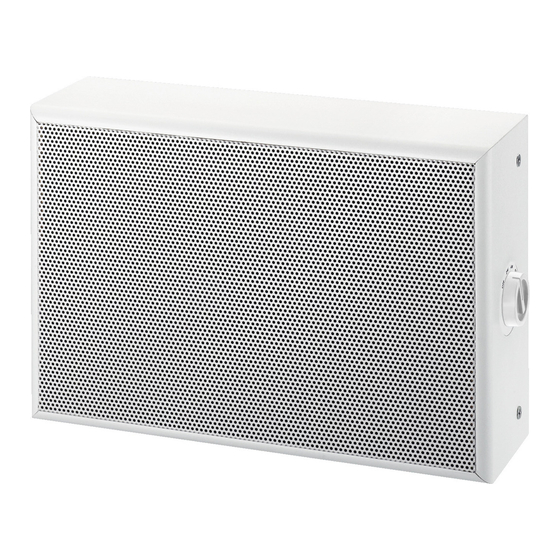
ELA-Wandlautsprecher
D
A
CH
Bitte lesen Sie diese Anleitung vor der Installation gründlich
durch und heben Sie sie für ein späteres Nachlesen auf.
1 Verwendungsmöglichkeiten
Dieser Lautsprecher ist speziell für den Einsatz in ELA-
Anlagen konzipiert. Er ist mit einem Übertrager für den Be-
trieb an 100-V-Anlagen ausgestattet. Die Anpassung der
Anschluss leis tung erfolgt über einen Drehschalter. Der
ESP-72/WS ist als 2-Wege-System zusätzlich mit einem
Hochtöner ausgestattet. Das eingebaute Relais über-
brückt bei Anlegen einer 24-V-Steuerspannung den Leis-
tungswahlschalter zur Erreichung der maximalen Leis-
tung, so dass z. B. im Notfall eine Durchsage über alle
Lautsprecher in voller Lautstärke erfolgen kann.
2 Wichtige Hinweise
Der Lautsprecher entspricht allen erforderlichen Richt -
linien der EU und ist deshalb mit
G
Der Lautsprecher ist nur zur Verwendung im Innenbe-
reich geeignet. Schützen Sie ihn vor Tropf- und Spritz-
wasser, hoher Luftfeuchtigkeit und Hitze (zulässiger
Einsatztemperaturbereich 0 – 40 °C).
PA Wall Speaker
GB
Please read these operating instructions carefully prior to
installation and keep them for later reference.
1 Applications
This speaker has especially been designed for applica-
tions in PA systems. It is equipped with a transformer for
operation at 100 V systems. The connected load is
matched via a rotary switch. As a 2-way system, the
ESP-72/WS is additionally equipped with a tweeter. When
applying a 24 V control voltage, the integrated relay will
bridge the power selector switch for reaching the maxi-
mum power, so that e. g. in case of emergency an an-
nouncement can be made via all speakers at full volume.
2 Important Notes
The speaker corresponds to all required directives of the
EU and is therefore marked with
.
G
The speaker is suitable for indoor use only. Protect it
against dripping water and splash water, high air hu-
midity, and heat (admissible ambient temperature range
0 – 40 °C).
Haut-parleur Public
F
B
CH
Adress mural
Veuillez lire la présente notice avec attention avant lʼinstallation
et conservez-la pour pouvoir vous y reporter ultérieurement.
1 Possibilités dʼutilisation
Ce haut-parleur est spécialement conçu pour une utilisa-
tion dans des installations de Public Adress. Il est équipé
dʼun transformateur pour un fonctionnement dans des ins-
tallations 100 V. Lʼadaptation de la puissance connectée
sʼeffectue via un sélecteur rotatif. Comme système
2 voies, le ESP-72/WS est en plus doté dʼun haut-parleur
dʼaigu. En cas de présence dʼune tension de commande
de 24 V, le relais intégré bridge le sélecteur de puissance
pour atteindre la puissance maximale. Ainsi en cas dʼur-
gence par exemple, une annonce peut être effectuée à
plein volume via tous les haut-parleurs.
2 Conseils importants dʼutilisation
Le haut-parleur répond à toutes les directives nécessaires
de lʼUnion Européenne et porte donc le symbole
G
Le haut-parleur nʼest conçu que pour une utilisation en
intérieur. Protégez-le de tout type de projections dʼeau,
des éclaboussures, dʼune humidité dʼair élevée et de la
Technische Daten
Frequenzbereich
Nennbelastbarkeit (100 V)
Abmessungen
Relais-Steuerspannung
Gewicht
ESP-70/WS
ESP-72/WS
G
Verwenden Sie für die Reinigung nur ein trockenes, wei-
ches Tuch, niemals Wasser oder Chemikalien.
G
Wird der Lautsprecher zweckentfremdet, nicht fachge-
recht angeschlossen oder überlastet, kann keine Haf-
tung für da raus resultierende Sach- oder Personen-
schäden und keine Garantie für den Lautsprecher
übernommen werden.
Soll der Lautsprecher endgültig aus dem Betrieb
genommen werden, übergeben Sie ihn zur um-
weltgerechten Entsorgung einem örtlichen Re-
cyclingbetrieb.
3 Montage
1) Die vier seitlichen Schrauben herausdrehen und die
Rückwand abnehmen.
2) Die Anschlusskabel durch die Öffnung der Rückwand
führen und die Rückwand mit geeignetem Montage-
gekennzeichnet.
material (z. B. Schrauben, Dübel) an der Wand oder
Decke befestigen.
3) Den elektrischen Anschluss herstellen (¡ Kapitel 4).
4) Den Lautsprecher an der Rückwand festschrauben.
G
For cleaning only use a dry, soft cloth, by no means
chemicals or water.
G
No guarantee claims for the speaker and no liability for
any resulting personal damage or material damage will
be accepted if the speaker is used for other purposes
than originally intended, if it is not connected in an ex-
pert way, or if it is overloaded.
If the speaker is to be put out of operation defini-
tively, take it to a local recycling plant for a dis-
posal which is not harmful to the environment.
3 Mounting
1) Unscrew the four lateral screws and remove the rear
panel.
2) Guide the connection cables through the opening of
the rear panel and fix the rear panel with suitable
mounting material (e. g. screws, dowels) on the wall or
ceiling.
3) Make the electrical connection (¡ chapter 4).
4) Screw down the speaker at the rear panel.
chaleur (plage de température de fonctionnement auto-
risée : 0 – 40 °C).
G
Pour le nettoyage, utilisez uniquement un chiffon sec et
doux, en aucun cas de produits chimiques ou dʼeau.
G
Nous déclinons toute responsabilité en cas de dom-
mages matériels ou corporels résultants si le haut-par-
leur est utilisé dans un but autre que celui pour lequel il
a été conçu, sʼil nʼest pas correctement branché ou sʼil y
a surcharge ; en outre, la garantie deviendrait caduque.
Lorsque le haut-parleur est définitivement retiré
du service, vous devez le déposer dans une
usine de recyclage adaptée pour contribuer à son
élimination non polluante.
3 Montage
1) Dévissez les quatre vis latérales et retirez la paroi arrière.
2) Faites passer les câbles de branchement via lʼouver-
ture de la paroi arrière et fixez la paroi arrière au mur
ou au plafond à lʼaide des accessoires de montage
.
adap tés (par exemple vis, chevilles).
3) Effectuez le branchement électrique (¡ chapitre 4).
4) Vissez le haut-parleur au panneau arrière.
Specifications
Frequency range
Power rating (100 V)
Dimensions
Relay control voltage
Weight
®
MONACOR INTERNATIONAL GmbH & Co. KG • Zum Falsch 36 • 28307 Bremen • Germany
Copyright
by MONACOR INTERNATIONAL. All rights reserved.
©
Best.-Nr. 16.2120
Best.-Nr. 16.2130
Caractéristiques techniques
Bande passante
Puissance nominale (100 V)
Dimensions
Tension de commande du relais
Poids
Änderungen vorbehalten.
4 Elektrischer Anschluss
Warnung: Im Betrieb liegt berührungsgefährliche
B
Spannung bis 100 V an den Anschlüssen an.
Die Installation darf nur durch Fachpersonal erfol-
gen. Achten Sie auf die richtige Leistungsanpas-
sung. Eine falsche Anpassung kann den ELA-Ver-
stärker zerstören!
1) Falls die ELA-Anlage eingeschaltet ist, diese zuerst
komplett ausschalten!
2) Die Anschlussklemmen „-" und „+" mit der Beschrif-
tung „100 V LINE" des Lautsprechers mit dem 100-V-
Ausgang des Verstärkers verbinden. Beim Anschluss
von mehreren Lautsprechern auf gleiche Polung ach-
ten und den Verstärker nicht überlasten. Dabei die
max. Last bei aktiviertem Relais beachten!
3) Bei Bedarf die Steuerleitung für das Pflichtempfangs-
relais an die Klemmen „-" und „+" mit der Beschriftung
„24 VDC" anschließen.
4) Den Drehschalter auf die gewünschte Anschlussleis-
tung einstellen. Wenn gewünscht, gegen nachträg -
liches Verstellen den Knopf gegen die mitgelieferte
Schutzkappe austauschen.
4 Electrical Connection
Warning: During operation, there is a hazard of
B
contact with a voltage of up to 100 V at the connec-
tions.
The installation must be carried out by skilled per-
sonnel only. Observe the correct power matching.
An incorrect matching may damage the PA amplifier!
1) If the PA system is switched on, first switch it off com-
pletely !
2) Connect the terminals "-" and "+" with the marking
"100 V LINE" of the speaker to the 100 V output of the
amplifier. When connecting several speakers, make
sure that all speakers have the same polarity and do
not overload the amplifier. Observe the maximum load
with activated relay!
3) If required, connect the control line for the emergency
priority relay to the terminals "-" and "+" with the mark-
ing "24 VDC".
4) Adjust the rotary switch to the desired connected load.
If desired, replace the button by the supplied protective
cap to protect against subsequent readjustment.
4 Branchement électrique
Avertissement : pendant le fonctionnement, une
B
tension de contact dangereuse jusquʼà 100 V est
présente aux branchements.
Seul un personnel qualifié peut effectuer lʼinstalla-
tion. Veillez à adapter la puissance correctement.
Une adaptation erronée peut endommager lʼampli-
ficateur Public Adress !
1) Si lʼinstallation Public Adress est allumée, veillez à la
débrancher totalement !
2) Reliez les bornes "-" et "+" avec le repère "100 V LINE"
du haut-parleur à la sortie 100 V de lʼamplificateur. Si
plusieurs haut-parleurs sont branchés, veillez à ce
quʼils aient la même polarité et que lʼamplificateur ne
soit pas en surcharge. Respectez la puissance maxi-
male lorsque le relais est activé !
3) Si besoin, reliez le câble de commande pour le relais
dʼannonce forcé aux bornes "-" et "+" avec le repère
"24 VDC".
4) Réglez le sélecteur sur la puissance de branchement
souhaitée. Remplacez, si vous le souhaitez, le bouton
par le cache de protection livré pour éviter tout nou-
veau réglage ultérieur.
ESP-70/WS
95 – 19 000 Hz
10/6/4/2/0 W
RMS
300 mm × 200 mm × 90 mm
24 V
2,3 kg
Subject to technical modification.
Tout droit de modification réservé.
A-0650.99.02.06.2011
ESP-72/WS
85 – 20 000 Hz
20/10/5/2,5/0 W
RMS
300 mm × 200 mm × 90 mm
24 V
2,8 kg

Verwandte Anleitungen für Monacor ESP-70/WS


Inhaltszusammenfassung für Monacor ESP-70/WS
- Seite 1 2,3 kg 2,8 kg Änderungen vorbehalten. Subject to technical modification. Tout droit de modification réservé. ® MONACOR INTERNATIONAL GmbH & Co. KG • Zum Falsch 36 • 28307 Bremen • Germany Copyright by MONACOR INTERNATIONAL. All rights reserved. A-0650.99.02.06.2011 ©...
- Seite 2 2,8 kg Con riserva di modifiche tecniche. Sujeto al cambio. Z zastrzeżeniem do możliwych zmian. ® MONACOR INTERNATIONAL GmbH & Co. KG • Zum Falsch 36 • 28307 Bremen • Germany Copyright by MONACOR INTERNATIONAL. All rights reserved. A-0650.99.02.06.2011 ©...