Herunterladen Inhalt Inhalt Diese Seite drucken
Cordis PLUS Gebrauchsanweisung

Cordis PLUS Gebrauchsanweisung

Digital raumthermostat
Inhaltsverzeichnis

Werbung

Verfügbare Sprachen

Verfügbare Sprachen

Manuale d'uso
User manual
Gebrauchsanweisung
Models:
Termostato Ambiente Digitale PLUS
PLUS Digital Raumthermostat
Digitaler Raumthermostat PLUS
www.cor divar i. co m
w w w.cor d iva r ides ig n. com
Cod. 1910000000276 - nv00

Werbung

Inhaltsverzeichnis
loading

Inhaltszusammenfassung für Cordis PLUS

  • Seite 1 Manuale d’uso User manual Gebrauchsanweisung Models: Termostato Ambiente Digitale PLUS PLUS Digital Raumthermostat Digitaler Raumthermostat PLUS www.cor divar i. co m w w w.cor d iva r ides ig n. com Cod. 1910000000276 - nv00...
  • Seite 2 IT - Manuale d'uso ..........pag.
  • Seite 3: Inhaltsverzeichnis

    Indice Italiano 1. Avvertenze generali ........... pag.
  • Seite 4: Avvertenze Generali

    • Per apparecchi in Classe I accertarsi che l’impianto elettrico domestico 1411 TERMOSTATO garantisca un corretto scarico a terra. 1807 AMBIENTE DIGITALE PLUS 1807 1200 • Se il cavo di alimentazione è danneggiato, esso deve essere sostituito dal costruttore o dal suo servizio assistenza tecnica o comunque da LUCY 18 EL.
  • Seite 5: Posizionamento In Locali Da Bagno

    Italiano 8. Collegamento subordinato alle condizioni e prescrizioni riportate di seguito. Il radiatore non abbia subito danneggiamenti durante il trasporto, le movimentazioni Tutti i modelli di Radiatori Elettrici Cordivari sono dotati di cavo di collegamento o l’installazione e non sia stata effettuata alcuna riparazione e/o con spina shuko premontata.
  • Seite 6: Accesso / Modalità Standby

    Italiano • Indicatori sul dispositivo beep Aiuto per ipovedenti: indicazioni sonore L'apparecchio emette 1 segnale breve per indicare che inizia lo Standby riscaldamento. 1. Indicatore Boost 2. Indicazione dei consumi 11.3 Selezione della modalità di funzionamento 3. Indicatore di riscaldamento Il pulsante permette di adattare il programma di funzionamento 4.
  • Seite 7: Funzione Boost

    Italiano L'apparecchio si ferma, -- appare. Il cursore si sposta su auto. Inviando il • Modalità Eco comando Comfort, il dispositivo sarà riavviato fino alla fine del cronometro. Eco indica la temperatura della modalità Comfort meno 3,5 °C. Questo permette di abbassare la temperatura senza dover modificare Se la temperatura ambiente raggiunge la temperatura massima di Boost l’impostazione della modalità...
  • Seite 8: Indicazione Dei Consumi Accumulati In Kwh, Risparmio Energetico

    Italiano Nota: è possibile limitare la temperatura Comfort. per 5 secondi. Il cursore si sposta sulla modalità di impostazione giorno e ora. 11.7 Indicazione dei consumi accumulati in KWH, risparmio energetico È possibile visualizzare la stima del consumo di energia in kWh dall’ultimo reset del contatore di energia.
  • Seite 9 Italiano giorno selezionato. , è possibile modificare l’orario, in incrementi da 30 minuti. Nota: È possibile impostare la temperatura della modalità Comfort (vedere la sezione Impostazione della temperatura della modalità Comfort). - Eco: Il dispositivo funzionerà 24 ore al giorno in modalità Eco. Nota: È...
  • Seite 10: Rilevazione Finestra Aperta, Risparmio Energetico

    Italiano temperatura desiderata fino a 18°C, per esempio. 3- Selezionare il programma desiderato per il giorno con . Salvare premendo Nota: Il cursore corrispondente alla modalità di funzionamento, cioè alla modalità Eco nel nostro esempio, lampeggia per la durata della modifica temporanea. 3- Questa modifica verrà...
  • Seite 11: Opzionale: Gestione A Distanza Tramite Telecomando A Infrarossi

    Italiano • Attivazione automatica (impostazioni di fabbrica) • Schema Il dispositivo rileva un abbassamento di temperatura. Una finestra aperta o una porta verso l’esterno possono causare un abbassamento Impostazione temperatura di temperatura. Nota: La differenza tra l’interno e l’esterno causa un notevole Boost abbassamento di temperatura percettibile dal dispositivo.
  • Seite 12: Impostazione Della Temperatura Per La Protezione Antigelo

    Italiano La modalità L3 è l'impostazione predefinita. 5- Premere per ottenere il livello di temperatura desiderato. Premere per scegliere l'impostazione desiderata. 6- Premere per salvare e passare all’impostazione successiva. Per uscire dalle impostazioni utente, premere due volte. 2- Premere per salvare e passare all'impostazione successiva. 12.5 Limite del livello di temperatura per Comfort È...
  • Seite 13: Impostazione Della Durata Massima Del Boost Consentito

    Italiano 12.6 Impostazione della durata massima del Boost consentito 12.9 Ripristino delle impostazioni di fabbrica La durata massima del Boost è preimpostata a 60 minuti. È possibile regolarla Per ritornare alle impostazioni di fabbrica, procedere nel seguente ordine: da 30 a 90 minuti, a intervalli di 30 minuti. 1- Dall’impostazione dell'unità...
  • Seite 14: Impostazioni Di Installazione

    Italiano 13. Impostazioni di installazione 13.1 Accesso Si accede alle impostazioni utente in 4 passaggi: Dalla modalità Auto, Comfort, Eco o Protezione antigelo: Visualizzazione Visualizzazione = impostazioni informazioni informazioni installazione Premere per Premere Premere per Premere 5 secondi due volte 10 secondi brevemente Sequenza delle impostazioni :...
  • Seite 15: Ripristino Impostazioni Di Fabbrica

    Italiano • Attivazione/disattivazione del codice PIN 1- Sul display appare Premere per abilitare il codice PIN. Il display visualizza = Codice PIN abilitato = Codice PIN disabilitato 3- Premere per confermare. Il nuovo codice è stato salvato. 2- Premere per salvare e tornare alla visualizzazione delle impostazioni di installazione iniziali.
  • Seite 16: Impostazioni Avanzate

    Italiano Saranno reimpostati i seguenti valori di fabbrica: Impostazioni Impostazioni di fabbrica Funzionamento Temperatura impostata Comfort 19°C Durata Boost 60 min. Blocco tastiera Disattivato Impostazioni utente Retroilluminazione Livello di abbassamento della -3,5°C temperatura modalità Eco Temperatura Protezione antigelo 7°C 3- Premere il tasto per 5 secondi.
  • Seite 17: Impostazioni Della Potenza

    Italiano 2- Per salvare e passare automaticamente all'impostazione successiva, premere . Per uscire dalle impostazioni utente, premere 3 volte Importante: Queste modifiche devono essere eseguite da un installatore professionista qualificato, durante la fabbricazione o la prima installazione sul posto. 14.3 Impostazioni della potenza Per avere un controller adattato agli scaldasalviette e stimare l'energia Diminuire la temperatura misurata dal sensore di temperatura ambiente consumata, è...
  • Seite 18: Montaggio E Connessioni

    Italiano Collocare l'O-ring fornito sulla resistenza, sotto il dado per assicurare la = Reset alle impostazioni di fabbrica. tenuta con il termostato elettronico: = Annullare reset alle impostazioni di fabbrica 3- Premere il tasto per 5 secondi. Il dispositivo torna alla sua configurazione iniziale e passa automaticamente alla modalità...
  • Seite 19: Dichiarazione Di Conformità

    DICHIARAZIONE DI CONFORMITÀ La Ditta Cordivari S.r.l. con sede a Morro D’Oro (TE) in Zona Industriale e, quindi rispondenti ai requisiti essenziali delle Direttive Europee: Pagliare dichiara, sotto la propria responsabilità, che i Radiatori con - Directive LVD 2014/35/UE termoventilatore di cui al par. 2 sono conformi alle seguenti norme: - Directive EMC 2014/30/UE EN 60335-1 :2012 EN 61000-4-2:2009...
  • Seite 20 - 20 - Cod. 1910000000276 - nv01...
  • Seite 21 Index English 1. General warnings . . . . . . . . . . . . . . . . . . . . . . . . . . . . . . . . . . . . . . . . . . . . . . . . . . . . . pag.
  • Seite 22: General Warnings

    DORY EL. WITH DIGITAL ROOM • It is recommended to have all installation and adjustment operations WITH DIGITAL ROOM THERMOSTAT PLUS performed by qualified personnel. THERMOSTAT PLUS • Once the product is removed from the package check its integrity. If the...
  • Seite 23: Instructions For Installation In Bathroom

    Never position the radiator in front of the power socket. 3. Selecting operating modes. Make sure that the resistor never operates unless it is fully submerged. 4. Plus and minus buttons, used to set temperatures, time, date and pro- grammes. 5. Save settings 6.
  • Seite 24: Power On /Standby Mode

    English • Indicators overview beep Help for the visually impaired: sound signals The device makes 1 short beep to notify that it is in standby mode. 1. Boost indicator light 11.3 Selecting the operation mode 2. Gauge consumption button allows you to adapt the operating schedule of your device 3.
  • Seite 25: Boost Feature

    English The device stops, -- appears. The cursor moves above auto. When the order • Eco mode Comfort will be sent, the device will be restarted until the count end. Eco, which means the Comfort Modetemperature minus 3.5°C. This enables you to lower the temprature without having to reset the Comfort If the ambient temperature reaches the maximal Boost temperature Mode temperature.
  • Seite 26: Consumption Indication Accumulated In Kwh, Energy Savings

    English Note: you can limit the Comfort temperature. 11.7 Consumption indication accumulated in KWH, energy savings It is possible to see the estimation of energy consumption in KWH since the last reset of the energy meter. • Display of the estimated power consumption To see this estimation, from Auto, Comfort, Eco or Frost protection mode, then press .
  • Seite 27 English - Eco: The device will operate 24 hours a day in Eco mode. Nota: You can set the temperature lowering parameters. - P1: Your device will operate in Comfort mode from 06:00 to 22:00 (and in Eco mode from 22:00 to 06:00). - P2: Your device will operate in Comfort mode from 06:00 to 09:00 and from 16:00 to 22:00 (and in Eco mode from 09:00 to 16:00 and from 22:00 to 06:00).
  • Seite 28: Open Window Detection, Energy Savings

    English temperature up to 18°C . 3- Choose the programme you want for this day with . Save by pressing Note: The cursor corresponding to the operation mode, i.e Eco mode in our example, is blinking during the duration of the temporary derogation. 3- This change will be automatically cancelled at the next change of programme or transition to 00:00.
  • Seite 29: Optional: Remotely Management By Infrared Remote Control

    English • Automatic activation (factory settings) • Scheme The device detects a temperature fall. An opened window, a door to the outside, can cause this temperature fall. Display of the ambient temperature Note: The difference between the air from the inside and the outside must cause a significant temperature fall to be perceptible by the device.
  • Seite 30: Setting The Eco Mode Temperature Lowering-Level

    English L3 mode is the default setting. Press to choose the setting you require.. 6- Press to save and move to the next setting. To exit the user settings, press twice. 2- Press to save and move to the next setting. 12.5 Comfort setpoint temperature limit You can limit the setting temperature range by introducing a maximum and/or minimum setting, preventing unintentional changes in temperature.
  • Seite 31: Setting Of The Maximum Ambient Temperature For The Automatic Stop Of The Boost

    English 9- The Boost symbol and the heating indicator appear on the display and the preset duration of 60 min flash. 10- Press to display the desires duration. Appars. Press to select 11- To save and move to the next setting, press = Factory settings reset.
  • Seite 32: Installer Settings

    English 13. Installer settings 13.1 Access To access the Installer settings in 4 steps: From Auto, Comfort, Eco or Frost protection mode: Information Information = Installer settings display display Press for 5 Press twice Press for 10 Press briefly seconds seconds Setting sequence : - Setting the Eco mode temperature lowering-level.
  • Seite 33: Restoring Factory Settings

    English • Activation/deactivation of the PIN code appears on the display. Press to enabled PIN code. appears on the display. = PIN code enabled = PIN code disabled 3- Press to confirm. The new code is now saved. 2- Press to save and return to the home installer settings display.
  • Seite 34: Expert Settings

    English The following factory values will be effective: Settings Factory settings Operation Comfort setting temperature 19°C Boost duration 60 min. Keypad lock Disabled User settings Backlighting Eco mode temperature lowering level -3,5°C Frost protection temperature 7°C Minimum set of Comfort setting 7°C 3- Press the key for 5 seconds.
  • Seite 35: Setting The Power

    English 2- To save and move to the next setting, press . To exit the installer settings, press 3 times Important: These changes should be performed by a qualified staff, it should be performed in production or on site during the first installation. 14.3 Setting the power To have a controller adapted to the towel rails and estimate the energy consumed, it is essantial to set the power of the device.
  • Seite 36: Fitting And Connections

    English Fit the joint (supplied) onto the cartridge heater to ensure that the latter = Factory settings reset. fits snugly into the electronic regulator: = Factory settings not reset 3- Press the key for 5 seconds. The device returns to its initial configuration and goes back automatically to Auto mode.
  • Seite 37: Declaration Of Conformity

    0,7/0,9/1,2 Auxiliary electricity consumption With electronic room temperature control elmax 0,4/0,5/0,6 At nominal heat output Electronic room temperature control plus day timer 0,7/0,9/1,2 At minimum heat output elmin Electronic room temperature control plus week timer Other control options In standby mode elSB <= 0,5...
  • Seite 38 - 38 - Cod. 1910000000276 - nv01...
  • Seite 39 Index Deutsch 1. Allgemeine Warnhinweise ..........pag.
  • Seite 40: Allgemeine Warnhinweise

    Lesen Sie die Anweisungen sorgfältig durch, bevor Sie das Gerät DORY EL. MIT DIGITALEM installieren und/oder benutzen. MIT DIGITALEM RAUMTHERMOSTAT PLUS • Es wird empfohlen, alle Installations- und Einstellarbeiten von RAUMTHERMOSTAT PLUS qualifiziertem Personal durchführen zu lassen. • Sobald das Produkt aus der Verpackung genommen wird, überprüfen, 1120 dass keine Beschädigungen vorliegen.
  • Seite 41: Positionierung Von Elektrischen Heizkörper Im Bad

    Heizstab von oben nach unten montiert werden oder in anderer 3. Auswahl des Betriebsmodus Richtung als von unten nach oben da der Stab während der Funktion 4. Plus-/Minustasten, zur Einstellung von Temperatur, Uhrzeit, Tag und beschädigt wird. Den HK nicht vor einer Steckdose montieren. Absolut Programmen vermeiden den E-Stab zu verwenden wenn er nicht komplett eingetausc.
  • Seite 42: Zugang / Standby-Modus

    Deutsch • Anzeigen am Gerät beep Hilfe für Sehbehinderte: akustische Hinweise Das Gerät gibt 1 kurzes Signal ab, um darauf hinzuweisen, dass der Standby-Modus der Heizung startet. 1. Anzeige Boost 2. Anzeige des Verbrauchs 11.3 Auswahl des Betriebsmodus 3. Anzeige Heizung Mit der Taste kann das Betriebsprogramm des Geräts an die 4.
  • Seite 43: Boost-Funktion

    Deutsch Das Gerät stoppt, -- wird angezeigt. Der Cursor stellt sich auf „Auto“. Bei • Modus Eco Versenden des Steuerbefehls „Komfort“ wird das Gerät erneut gestartet und „Eco“ bezeichnet die Temperatur im Modus „Komfort“ minus 3,5 °C. läuft dann bis zum Ablauf der Zeitschaltuhr. Dies ermöglicht das Absenken der Temperatur, ohne die Einstellungen des Modus „Komfort“...
  • Seite 44: Anzeige Des Erfolgten Verbrauchs In Kwh, Energieeinsparung

    Deutsch Hinweis: Die Komfort-Temperatur kann begrenzt werden. 11.7 Anzeige des erfolgten Verbrauchs in KWH, Energieeinsparung Es besteht die Möglichkeit, den geschätzten Energieverbrauch in kWh ausgehend vom letzten Reset des Energiezählers anzuzeigen. • Anzeige des geschätzten Energieverbrauchs Zur Anzeige dieser Schätzung, ausgehend vom Modus „Auto“, „Komfort“, „Auto“...
  • Seite 45 Deutsch Hinweis: Es besteht die Möglichkeit, die Temperatur des Modus „Komfort“ einzustellen (siehe den Abschnitt Temperatureinstellung des Modus „Komfort“). - „Eco“: Das Gerät läuft 24 Stunden am Tag im Modus „Eco“. Hinweis: Es besteht die Möglichkeit, die Temperatursenkungsparameter einzustellen. - P1: Das Gerät läuft von 06:00 bis 22:00 Uhr im Modus „Komfort“ (und von 22:00 bis 06:00 Uhr im Modus „Eco“).
  • Seite 46: Erfassung Eines Offenen Fensters, Energieeinsparung

    Deutsch 2- Durch das Drücken von , kann die gewünschte Temperatur vorübergehend bis auf beispielsweise 18 °C verändert werden. 3- Das für den Tag gewünschte Programm mit auswählen. Durch Drücken von speichern. Hinweis: Der dem Betriebsmodus zugehörige Cursor, blinkt beispielsweise in unserem Modus „Eco“...
  • Seite 47: Optional: Über Infrarot-Fernbedienung Aus Der Ferne Steuerbar

    Deutsch Drücken einer Taste. • Schema • Automatische Aktivierung (Werkseinstellungen) Das Gerät erfasst eine Temperatursenkung. Ein offenes Fenster oder Temperatureinstellung eine offene Außentür können eine Temperatursenkung verursachen. Boost Hinweis: Der Unterschied von drinnen und draußen verursacht eine Auswahl Betriebsmodus: „Auto“, deutliche Temperatursenkung, die vom Gerät wahrgenommen wird.
  • Seite 48: Einstellung Zur Temperatursenkung Im Eco-Modus

    Deutsch Der Modus L3 entspricht der Standardeinstellung. 5- Zum Erhalt der gewünschten Temperatur oder drücken. oder drücken, um die gewünschte Einstellung auszuwählen. drücken zum Speichern und, um mit der nächsten Einstellung fortzufahren. Zum Verlassen der Benutzereinstellungen zweimal drücken. drücken zum Speichern und, um mit der nächsten Einstellung fortzufahren.
  • Seite 49: Einstellung Der Maximal Zulässigen Boost-Dauer

    Deutsch 12.6 Einstellung der maximal zulässigen Boost-Dauer 12.9 Wiederherstellung der Werkseinstellungen Die Boost-Höchstdauer ist auf 60 Minuten eingestellt. Sie kann in Um zu den Werkseinstellungen zurückzukehren in nachstehender 30-Minutenintervallen von 30 bis 90 Minuten eingestellt werden. Reihenfolge vorgehen: 1- Ausgehend von der Maßeinheit drücken.
  • Seite 50: Installationseinstellungen

    Deutsch 13. Installationseinstellungen 13.1 Zugang Der Zugang zu den Einstellungen erfolgt in 4 Schritten: Ausgehend vom Modus „Auto“, „Komfort“, „Eco“ oder Frostschutz Informationsanzeige Informationsanzeige Installationseinstellungen 5 Sekunden Zweimal 10 Sekunden Kurz drücken drücken drücken drücken Abfolge der Einstellungen: - Einstellung der Erfassung eines offenen Fensters Automatische Erfassung offenes Fenster →...
  • Seite 51: Wiederherstellung Der Werkseinstellungen

    Deutsch • Aktivierung/Deaktivierung des PIN-Codes 1- Auf dem Display erscheint drücken, um den PIN-Code freizuschalten. Das Display zeigt = PIN-Code aktiviert = PIN-Code deaktiviert 3- Zur Bestätigung drücken. Der neue Code wurde gespeichert. drücken zum Speichern und zur Rückkehr auf die Ansicht der anfänglichen Installationseinstellungen.
  • Seite 52: Erweiterte Einstellungen

    Deutsch Nachstehende Werkseinstellungen werden zurückgestellt: Einstellungen Werkseinstellungen Betrieb Eingestellte Temperatur „Komfort“ 19°C Boost-Dauer 60 min. Tastatursperre Deaktiviert Benutzereinstellungen Hintergrundbeleuchtung Grenzwert für die Temperaturabsenkung -3,5°C im Modus „Eco“ Temperatur Frostschutz 7°C Sekunden drücken. Gerät kehrt seiner Einstellung der einstellbaren Mindest- 7°C temperatur „Komfort“...
  • Seite 53: Einstellungen Der Leistung

    Deutsch drücken zum Speichern und, um mit der nächsten Einstellung fortzufahren. Zum Verlassen der Benutzereinstellungen zweimal drücken. Wichtig: Diese Änderungen müssen durch einen qualifizierten Fachinstallateur während der Herstellung oder bei der Erstinstallation vor Ort durchgeführt werden. 14.3 Einstellungen der Leistung Die vom Raumtemperatursensor gemessene Temperatur um 2 °C Um einen für beheizte Handtuchhalter geeigneten Controller zu haben senken.
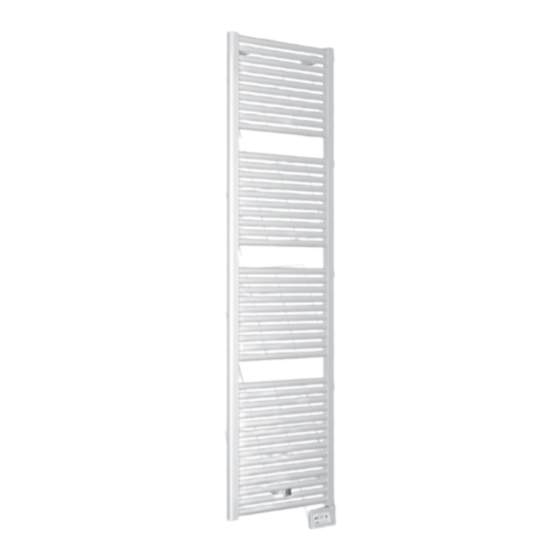
  • Seite 54: Montage Und Anschlüsse

    Deutsch Den mitgelieferten O-Ring am Widerstand unter der Mutter anschließen, = Reset der Werkseinstellungen.. um die Abdichtung mit dem elektronischen Thermostat sicherzustellen: =Das Reset der Werkseinstellungen annullieren. Sekunden drücken. Gerät kehrt seiner Ausgangskonfiguration zurück und schaltet automatisch in den Auto- Modus.
  • Seite 55: Konformitätserklärung

    KONFORMITÄTSERKLÄRUNG und die grundlegenden Anforderungen der folgenden europäischen Cordivari S.r.l. mit Sitz in Zona Industriale Pagliare, Morro D'Oro (TE) Richtlinien erfüllen: erklärt unter eigener Verantwortung, dass die Heizkörper mit Heizlüfter im Abs. 2 den folgenden Vorschriften konform sind: - Richtlinie LVD 2014/35/UE EN 60335-1 :2012 EN 61000-4-2:2009 - Richtlinie EMC 2014/30/UE...
  • Seite 56 CORDIVARI srl Zona Industriale Pagliare 64020 Morro D’Oro (TE) ITALY UNI EN ISO C.F. Part. IVA e Reg. Impr. 9001 - 14001 TE n. 00735570673 Cap. Soc. Euro 4.000.000,00 i.v. Tel: +39 085 80.40.1 Fax: +39 085 80.41.418 www.cordivari.com www.cordivaridesign.com Cod.

Inhaltsverzeichnis