Herunterladen Inhalt Inhalt Diese Seite drucken
Inhaltsverzeichnis

Werbung

Verfügbare Sprachen
  • DE

Verfügbare Sprachen

  • DEUTSCH, seite 29
User's Manual
C
C
AR
AMCORDER
-English-

Werbung

Inhaltsverzeichnis
loading

Inhaltszusammenfassung für AIPTEK X-mini

  • Seite 1 User’s Manual AMCORDER -English-...
  • Seite 2 - For your own safety, do not operate the controls of the product while driving. This product is intended to be used as a car recorder aid only. - For more details, please download the complete user manual from the official website. (http://www.aiptek.tw/download.php) www.aiptek.com Page 3...
  • Seite 3 If the time arises to throw away your product, please recycle all the components possible. Batteries and rechargeable batteries are not to be disposed in your domestic waste! Please recycle them at your local recycling point. Together we can help to protect the environment. www.aiptek.com Page 4...
  • Seite 4: Inhaltsverzeichnis

    3.1.1 Record videos while driving ..........14 3.1.2 Record all other types of videos ........... 14 3.1.3 Emergency Recording............15 3.1.4 The Recording Screen ............16 3.1.5 Using the LED Light ............. 17 3.1.6 Taking Snapshot..............17 www.aiptek.com Page 5...
  • Seite 5 Viewing Photos ..............19 3.2.3 The Playback Screen ............20 3.2.4 Deleting Files ............... 21 Adjusting the Settings ................22 Using the Menu .................. 22 Menu Tree ..................23 Installing the Software ................25 Specifications ..................26 www.aiptek.com Page 6...
  • Seite 6: Introduction

    • Supports SDHC up to 32GB 1.2 Package Contents The package contains the following items. In case there is any missing or damaged item, contact your dealer immediately. Car Recorder Bracket CD-ROM Quick start guide Car adapter www.aiptek.com Page 7...
  • Seite 7: Product Overview

    Power Button Enter Button ( USB Connector Wide Angle Lens HD Connector Speaker Reset Button LED Light Note: To operate the device, press the corresponding buttons ((9, 11, 12, 13) according to guide icons shown the screen. www.aiptek.com Page 8...
  • Seite 8: Getting Started

    Push the memory card until it clicks into place. To remove the memory card Push to eject the memory card out of the slot. Note: Do not remove or insert the memory card when the device is turned on. This may damage the memory card. www.aiptek.com Page 9...
  • Seite 9: Installing In Vehicles

    Make sure the base is securely locked in place. 2.2.2 Adjust Device Position Knob Knob Rotate the knob to swivel Rotate the knob to swivel the the device vertically. device horizontally up to 360° . www.aiptek.com Page 10...
  • Seite 10: Connecting To Power

    Please take note if the environment temperature reaches 45° C or above, the car adapter still can supply power to device, but it will not charge the Lithium-ion battery. This is the characteristic of Lithium-ion and is not a malfunction. www.aiptek.com Page 11...
  • Seite 11: Powering The Device On / Off

    10 seconds. See Delay Shutdown (4.2). 2.4.2 Manual Power On/Off To manually turn on the power, press the POWER button. To turn off, press and hold the POWER button for at least 2 seconds. www.aiptek.com Page 12...
  • Seite 12: Initial Settings

    2.5.3 Set the Date and Time To set the correct date and time, do the following: Press the button to enter the OSD menu. Press the button to select Date / Time and press the button. www.aiptek.com Page 13...
  • Seite 13: Using The Car Recorder

    One video file is saved for every 3 or 5 minutes of recording. See Using the Menu (4.1). The device saves the recording in the memory card. If the memory card capacity is full, the oldest file in the memory card is overwritten. www.aiptek.com Page 14...
  • Seite 14: Emergency Recording

    To stop the recording, press the button. Note: If the Collision Detection function is enabled and a collision is detected, the device will automatically trigger the emergency recording. See Using the Menu (4.1). www.aiptek.com Page 15...
  • Seite 15: The Recording Screen

    Press the button to stop the Guide icon recording. (Stop) Press the button to continuously Guide icon record the video in one file until the (Emergency) recording is manually stopped. Press the button to switch to Guide icon www.aiptek.com Page 16...
  • Seite 16: Using The Led Light

    When using LED lights for a long time, it may become hot. Take care not to touch the hot LED lights. 3.1.6 Taking Snapshot You can also use this device to take snapshots of the current scene. From the standby screen, press the button to take a snapshot. www.aiptek.com Page 17...
  • Seite 17: Playback Videos And Photos

    Note: From the standby screen, you can directly enter Playback mode by pressing button. The last recorded video is displayed on the screen. www.aiptek.com Page 18...
  • Seite 18: Playing Videos

    If recording is in progress, press the button to stop recording. Press the button to enter the OSD menu. Press the button to select File Playback and press the button. Press the button to select Picture and press the button. www.aiptek.com Page 19...
  • Seite 19: The Playback Screen

    Guide icon previous video/photo. (Previous) Press the button to view the next Guide icon video/photo. (Next) Press the button to pause the Guide icon video playback. (Pause) Indicates the elapse time. Duration Indicates the remaining battery power. Battery www.aiptek.com Page 20...
  • Seite 20: Deleting Files

    Delete menu. Press the button to select an option. Item Description Delete One Delete the current file. Delete All Delete all files. Press the button to confirm delete. www.aiptek.com Page 21...
  • Seite 21: Adjusting The Settings

    OSD menu. Press the button to select a menu option and press the button to enter the selected menu. Press the button to select the desired setting and press button to confirm the setting. www.aiptek.com Page 22...
  • Seite 22: Menu Tree

    Record Set the recording duration for 3 mins / 5 mins Interval each recorded video file. Motion Enable/Disable the motion On / Off Detection detection. If this function is enabled and the device detects any object movement, www.aiptek.com Page 23...
  • Seite 23 Video / Emergency / Picture TV standard Set the TV type based on NTSC / PAL your local region. Format Format the memory card. Yes / No Default Reset all settings to factory Yes / No default settings. www.aiptek.com Page 24...
  • Seite 24: Installing The Software

    2. If the CD does not execute automatically, please use Windows File Manager to execute the Install_CD.exe file in the CD. The following screen will be shown up. 3. Press the [Menu] item to start the installation process according to the instructions on-screen. www.aiptek.com Page 25...
  • Seite 25: Specifications

    Resolution: 5M (2592 x 1944) Still image (Snapshot) Format: DCF (JPEG, Exif: 2.2) Electronic shutter Shutter Auto:1/2 ~1/2000 sec. G-Sensor 3-Axis G-Force sensor Auto White Balance Auto Assist Lamp Microphone Speaker Interface Mini USB, Mini C Type HDMI www.aiptek.com Page 26...
  • Seite 26 Built-in 470mAH Li-polymer rechargeable Cigar car charger (Inpugt:12V~24V/1.0A) Power supply 5V/1A adaptor (Input AC 100V~240V, 50/60Hz) Operating 0° ~ 60° C Temperature Storage -20° ~ 80° C Temperature Dimensions 65 x 62 x 27 mm Weight Approx. 85g www.aiptek.com Page 27...
  • Seite 27 User’s manual AMCORDER Copyright © 2012 All rights reserved. All other marks, products or company names mentioned in this guide are trademarks of their respective companies. www.aiptek.com Page 28...
  • Seite 28 User’s Manual AMCORDER -German-...
  • Seite 29: Über Diese Anleitung

    User’s manual AMCORDER Über diese Anleitung Der Inhalt dieses Dokuments dient Informationszwecken und kann ohne Vorankündigung geändert werden. Wir haben alle Mühen unternommen, die Richtigkeit und Vollständigkeit dieser Bedienungsanleitung zu gewährleisten. Dennoch übernehmen wir keine Haftung für jegliche Fehler und Auslassungen. Der Hersteller behält sich das Recht vor, technische Daten ohne Vorankündigung zu ändern.
  • Seite 30: Weee-Hinweis

    User’s manual AMCORDER WEEE-Hinweis Entsorgung elektrischer und elektronischer Altgeräte und/oder Batterien/Akkumulatoren durch Verbraucher in privaten Haushalten innerhalb der Europäischen Union Dieses Symbol am Produkt oder an der Verpackung weist darauf hin, dass es nicht mit dem Hausmüll entsorgt werden darf. Sie müssen Ihr Altgerät und/oder Batterien/Akkumulatoren an entsprechende Sammelstellen zum Recycling elektrischer und elektronischer Geräte und/oder Batterien/Akkumulatoren übergeben.
  • Seite 31 User’s manual AMCORDER Achtung Verwenden Sie nur das zugelassene Ladegerät. Niemals eigenhändig demontieren. Akku niemals kurzschließen. Akku sachgemäß entsorgen. Setzen Sie den Akku keinen offenen Flammen aus, es besteht Explosionsgefahr.
  • Seite 32 User’s manual AMCORDER Inhalt Über diese Anleitung............1 FCC-Erklärung ..............1 WEEE-Hinweis ..............2 CE-Richtlinienhinweis ............2 Hinweise zur Installation .............2 Achtung ................3 Einleitung..............6 Merkmale..............6 Lieferumfang............6 Produktübersicht ............7 Erste Schritte...............8 SD-Karte einstecken ..........8 Im Fahrzeug installieren ...........9 2.2.1 An der Windschutzscheibe montieren..9 2.2.2 Geräteposition anpassen......9 Netzanschluss ............10 Gerät ein- / ausschalten .........
  • Seite 33 User’s manual AMCORDER Videos aufnehmen ..........13 3.1.1 Videos während der Fahrt aufnehmen .13 3.1.2 Sonstige Videotypen aufnehmen...13 3.1.3 Notfallaufnahme........14 3.1.4 Der Aufnahmebildschirm.......14 3.1.5 LED-Licht verwenden......16 3.1.6 Schnappschuss aufnehmen ....16 Videos und Fotos wiedergeben ......17 3.2.1 Videos wiedergeben ........18 3.2.2 Fotos anzeigen..........18 3.2.3 Der Wiedergabebildschirm ....19 3.2.4...
  • Seite 34: Einleitung

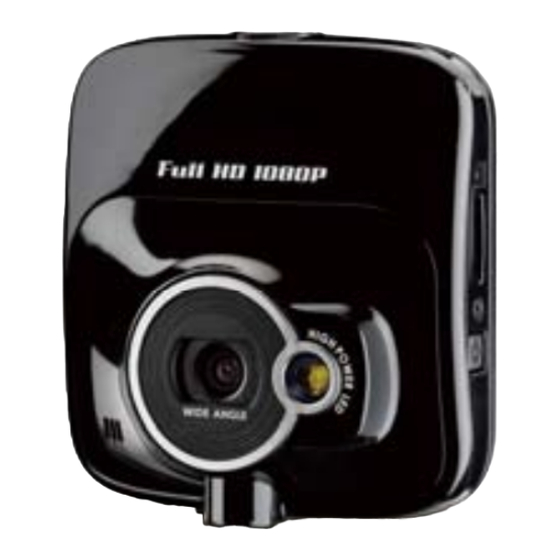
    User’s manual AMCORDER Einleitung Vielen Dank für den Kauf dieses fortschrittlichen Fahrzeugrekorders. Dieses Gerät ist spezifisch zur Echtzeitvideo- und Audioaufnahme während der Fahrt entwickelt. Merkmale • Full-HD-Kamera (1920 x 1080 bei 30 Bildern/s) • 2,4-Zoll-LCD-Farbbildschirm • Weitwinkelobjektiv • Leistungsstarke für Einsatz schlechten Lichtbedingungen...
  • Seite 35: Produktübersicht

    User’s manual AMCORDER Produktübersicht Ansicht von oben und unten Ansicht von vorne Ansicht von der Seite (links und rechts) Ansicht von hinten Element Element Mikrofon Zurück-Taste ( Halterungssockel LCD-Panel Halterungssockel Aufwärtstaste ( ) Speicherkartenschlitz Abwärtstaste ( Ein-/Austaste Enter-Taste ( USB-Anschluss Weitwinkelobjektiv HD-Anschluss Lautsprecher...
  • Seite 36: Erste Schritte

    User’s manual AMCORDER 2 Erste Schritte SD-Karte einstecken Stecken Sie die Speicherkarte so ein, dass die goldenen Kontakte in Richtung Geräterückseite zeigen. Drücken Sie die Speicherkarte so weit hinein, dass sie einrastet. So entfernen Sie die Speicherkarte Drücken Sie sanft auf die Kante der Karte, die Speicherkarte wird ausgeworfen.
  • Seite 37: Im Fahrzeug Installieren

    User’s manual AMCORDER Im Fahrzeug installieren 2.2.1 An der Windschutzscheibe montieren Bringen Sie das Gerät an der Halterungsbasis an. Drehen und befestigen Sie Fahrzeughalterung und Halterungsbasis, damit das Gerät sicher an Ort und Stelle verbleibt. Positionieren Sie den Saugnapf an der Windschutzscheibe, wobei der Saugnapf flach aufliegt.
  • Seite 38: Netzanschluss

    User’s manual AMCORDER Netzanschluss Verwenden Sie zur Stromversorgung des Gerätes und zum Aufladen des integrierten Akkus ausschließlich das mitgelieferte Fahrzeug-Netzteil. Verbinden Sie ein Ende des Fahrzeug-Netzteils mit dem USB-Anschluss des Gerätes. Schließen Sie das andere Ende des Fahrzeug-Netzteils an den Zigarettenanzünder Ihres Fahrzeugs an.
  • Seite 39: Gerät Ein- / Ausschalten

    User’s manual AMCORDER Gerät ein- / ausschalten 2.4.1 Automatisches Ein- / Ausschalten Sobald der Fahrzeugmotor gestartet wird, schaltet sich das Gerät automatisch ein. Falls die Automatische Aufnahme-Funktion aktiviert ist, startet die Aufnahme automatisch direkt nach dem Einschalten des Gerätes. Siehe Automatische Aufnahme einstellen (2.4.1). Sobald der Fahrzeugmotor ausgeschaltet wird, speichert das Gerät die Aufnahme und schaltet sich innerhalb von 10 Sekunden aus.
  • Seite 40: Grundeinstellungen

    User’s manual AMCORDER Grundeinstellungen Wir empfehlen Ihnen, vor dem Einsatz des Gerätes die Automatische Aufnahme-Funktion zu aktivieren und Datum und Uhrzeit richtig einzustellen. 2.5.1 Automatische Aufnahme einstellen So aktivieren Sie, dass die Aufnahme automatisch nach dem Einschalten des Gerätes startet: Drücken Sie zum Aufrufen des Bildschirmmenüs die -Taste.
  • Seite 41: Fahrzeugrekorder Verwenden

    User’s manual AMCORDER 3 Fahrzeugrekorder verwenden Videos aufnehmen 3.1.1 Videos während der Fahrt aufnehmen Wenn der Fahrzeugmotor gestartet wird und die Automatische Aufnahme-Funktion aktiviert ist, schaltet sich das Gerät automatisch ein und die Aufnahme beginnt. Die Aufnahme stoppt automatisch, sobald der Motor abgeschaltet wird.
  • Seite 42: Notfallaufnahme

    User’s manual AMCORDER 3.1.3 Notfallaufnahme Drücken Sie während der Videoaufnahme die -Taste, wenn das Video fortlaufend in einer Datei gespeichert werden soll, bis die Kapazität der Speicherkarte erschöpft ist bzw. die Aufnahme manuell beendet wird. Drücken Sie zum Beenden der Aufnahme -Taste.
  • Seite 43 User’s manual AMCORDER Anweisungssymbol Drücken Sie zum Aufrufen des (Menü) Bildschirmmenüs die -Taste. Zeigt die verbleibende Akku Akkuleistung. Anweisungssymbol Drücken Sie zum Beenden der (Stopp) Aufnahme die -Taste. Drücken Sie die -Taste, wenn das Video fortlaufend in Anweisungssymbol einer Datei aufgenommen (Notfall) werden soll, bis die Aufnahme manuell beendet wird.
  • Seite 44: Led-Licht Verwenden

    User’s manual AMCORDER 3.1.5 LED-Licht verwenden Mit dem LED-Licht können Sie bei ungenügender Beleuchtung zusätzliches Licht bereitstellen Gehen Sie zum Aktivieren des LED-Lichts wie folgt vor: Drücken Sie zum Aufrufen des Bildschirmmenüs die -Taste. Wählen Sie mit den Tasten die Option Zusatzleuchte, drücken Sie dann die -Taste.
  • Seite 45: Videos Und Fotos Wiedergeben

    User’s manual AMCORDER Videos und Fotos wiedergeben Falls gerade eine Aufnahme erfolgt, können Sie diese mit der -Taste beenden. Der Bereitschaftsbildschirm wird angezeigt. Drücken Sie zum Aufrufen des Bildschirmmenüs die -Taste. Wählen Sie mit den Tasten die Dateikategorie, die Sie durchsuchen möchten;...
  • Seite 46: Videos Wiedergeben

    User’s manual AMCORDER 3.2.1 Videos wiedergeben So geben Sie Videos wieder: Falls gerade eine Aufnahme erfolgt, können Sie diese mit der -Taste beenden. Drücken Sie zum Aufrufen des Bildschirmmenüs die -Taste. Wählen Sie mit den Tasten die Option Dateiwiedergabe, drücken Sie die -Taste.
  • Seite 47: Der Wiedergabebildschirm

    User’s manual AMCORDER 3.2.3 Der Wiedergabebildschirm Videowiedergabebildschirm Fotowiedergabebildschirm Beschreibung Element Zeigt das Aufnahmedatum und Datum und Zeit die Uhrzeit an. Mit der -Taste kehren Sie Anweisungssymbol zum Dateiauswahlbildschirm (Zurück) zurück. Mit der -Taste rufen Sie das Anweisungssymbol vorherige Video/Foto auf. (Vorheriges) Mit der -Taste rufen Sie das...
  • Seite 48: Dateien Löschen

    User’s manual AMCORDER 3.2.4 Dateien löschen So löschen Sie eine/mehrere Datei(en): Falls gerade eine Aufnahme erfolgt, können Sie diese mit der -Taste beenden. Drücken Sie zum Aufrufen des Bildschirmmenüs die -Taste. Wählen Sie mit den Tasten Option Dateilöschung, drücken Sie -Taste.
  • Seite 49: Einstellungen Anpassen

    User’s manual AMCORDER 4 Einstellungen anpassen Menü verwenden Sie können Videoaufnahme- und andere allgemeine Einstellungen über die Bildschirmmenüs anpassen. Falls gerade eine Aufnahme erfolgt, können Sie diese mit der Aufnahme taste beenden. Drücken Sie zum Aufrufen des Bildschirmmenüs die -Taste. Wählen Sie mit den Tasten eine Menüoption, drücken Sie zum Aufrufen des ausgewählten Menüs...
  • Seite 50: Menübaum

    User’s manual AMCORDER Menübaum Einzelheiten zu Menüelementen und verfügbaren Menüoptionen entnehmen Sie bitte der nachstehenden Tabelle. Menüoption Beschreibung Verfügbare Optionen Zusatzleuchte Zum De-/Aktivieren Ein / Aus des LED-Lichts. Dateiwiedergabe Wählen Sie die Video / Notfall / Bild Dateikategorie, die Sie betrachten möchten.
  • Seite 51 User’s manual AMCORDER Menüoption Beschreibung Verfügbare Optionen Geräteeinschaltung. Aufnahmeintervall Zum Einstellen der 3 min / 5 min Aufnahmedauer einzelner Videodateien. Bewegungserkennung Zum De-/Aktivieren Ein / Aus Bewegungserkennu ng. Falls diese Funktion aktiviert ist und das Gerät jegliche bewegliche Objekte erkennt, startet die Aufnahme automatisch.
  • Seite 52 User’s manual AMCORDER Menüoption Beschreibung Verfügbare Optionen TV-Norm Zum Einstellen des NTSC/PAL TV-Typs basierend auf Ihrer Region. Format Zum Formatieren Ja / Nein der Speicherkarte. Standard Zum Rücksetzen Ja / Nein aller Einstellungen auf die werkseitigen Standardeinstellung...
  • Seite 53: Software Installieren

    User’s manual AMCORDER 5 Software installieren 1. Legen Sie die mitgelieferte CD-ROM in das CD-Laufwerk ein. 2. Wenn das Programm auf der CD nicht automatisch ausgeführt wird, starten Sie die Datei Install_CD.exe auf dem Medium bitte über den Windows-Dateimanager. Der folgende Bildschirm wird angezeigt. 3.
  • Seite 54: Technische Daten

    User’s manual AMCORDER Technische Daten Element Beschreibung Bildsensor 1/3,2-Zoll-CMOS-Sensor 2592 (H) x 1944 (V) Effektive Pixel Unterstützt Micro SDHC, bis 32 GB, Klasse 4 Speichermedium oder höher LCD-Bildschirm 2,4-Zoll-LCD-Farb-TFT (112.000 Pixel) Objektiv Weitwinkel-Fixfokus-Objektiv F2.8, f = 3,0 mm Fokusbereich 1,5 m bis unendlich Auflösung: Full-HD (1920 x 1080), 30 Bilder/s HD (1280 x 720), 30 Bilder/s Videoclip...
  • Seite 55 User’s manual AMCORDER Element Beschreibung Lautsprecher Schnittstelle Mini-USB, Mini-HDMI (Typ C) Akku Integrierter 470-mAh-Lithium-Polymer-Akku Betriebstemperatur 0 ° – 50 ° C Aufbewahrungstemp -20° – 80 ° C eratur Abmessungen 65 x 62 x 27 mm Gewicht Ca. 85 g...
  • Seite 56 User’s manual AMCORDER Copyright © 2012 Alle Rechte vorbehalten. Alle anderen in dieser Anleitung erwähnten Marken, Produkte und Firmennamen sind Marken ihrer jeweiligen Unternehme...
  • Seite 57 User’s Manual AMCORDER -French-...
  • Seite 58: A Propos De Ce Guide

    User’s manual AMCORDER A propos de ce guide Ce guide a pour but de fournir des informations et est susceptible d’ être soumis à des modifications et sans préavis. Nous avons mis tout en œuvre pour nous assurer que le guide soit aussi complet et précis que possible.
  • Seite 59: Consignes Pour L'installation

    User’s manual AMCORDER Avis d'application de la réglementation CE Cet appareil est en conformité avec la directive du Conseil relative au rapprochement des législations des États membres concernant la Compatibilité Electromagnétique (2004/108/EC), la directive de Basse Tension (2006/95/EC), la directive relative à la limitation de l'utilisation de certaines substances dangereuses dans les équipements électriques et électroniques (2002/95/EC), la directive turque EEE, au règlement de la commission (EC) n°...
  • Seite 60 User’s manual AMCORDER Table des matières A propos de ce guide ............1 Déclaration de conformité FCC...........1 Directive WEEE ..............1 Avis d'application de la réglementation CE ......2 Consignes pour l’installation ..........2 Avertissement..............2 Présentation ..............5 Caractéristiques ............5 Contenu de la boîte..........5 Vue d’ensemble de l’enregistreur ......6 Démarrage ..............7 Insertion de la carte mémoire........7 Installation dans le véhicule ........8...
  • Seite 61 User’s manual AMCORDER Enregistrement vidéo ..........12 3.1.1 Enregistrer des vidéos pendant la conduite ……………………………………………..12 3.1.2 Enregistrer tous les autres types de vidéos ……………………………………………..12 3.1.3 Enregistrement d’urgence ......13 3.1.4 L’écran d’enregistrement ......14 3.1.5 Utiliser l’éclairage LED ......15 3.1.6 Prendre des photos........15 Lecture de vidéos et de photos ......16 3.2.1 Lecture des vidéos ........17...
  • Seite 62: Présentation

    User’s manual AMCORDER 1 Présentation Merci d’avoir choisi cet enregistreur vidéo pour véhicules. Cet appareil est spécialement conçu pour l’enregistrement vidéo et audio en temps réel pendant la conduite. 1.1 Caractéristiques • Appareil photo Full HD (1920 x 1080 @ 30fps) •...
  • Seite 63: Vue D'ensemble De L'enregistreur

    User’s manual AMCORDER 1.3 Vue d’ensemble de l’enregistreur Vue avant Vues du dessus et du dessous Vues latérales (gauche et droite) Vue arrière N° Elément N° Elément Bouton de navigation Microphone Retour ( Douille du support Ecran LCD Bouton de navigation Douille du support Haut ( Logement de la carte...
  • Seite 64: Démarrage

    User’s manual AMCORDER 2 Démarrage 2.1 Insertion de la carte mémoire Insérer la carte mémoire avec les contacts dorés dirigés vers le bas de l’appareil. Pousser à fond sur la carte mémoire jusqu’à ce qu’elle s’enclenche en position. Pour enlever la carte mémoire Pousser sur la carte mémoire pour l’éjecter hors de son logement.
  • Seite 65: Installation Dans Le Véhicule

    User’s manual AMCORDER 2.2 Installation dans le véhicule 2.2.1 Fixer au pare-brise 1. Fixer l’appareil à la base du support. Tourner en resserrant le support et la base du support pour sécuriser l’appareil en place. 2. Positionner la ventouse plate sur le pare-brise.
  • Seite 66: Branchement À Une Source D'alimentation

    User’s manual AMCORDER 2.3 Branchement à une source d’alimentation Utiliser uniquement l’adaptateur de voiture fourni pour mettre l’appareil en marche et charger la batterie intégrée. Relier une extrémité de l’adaptateur de voiture au connecteur USB de l’appareil. Brancher l’autre extrémité du chargeur dans la douille de l’allume-cigare de votre véhicule.
  • Seite 67: Mise En Marche De L'appareil

    User’s manual AMCORDER 2.4 Mise en marche de l’appareil 2.4.1 Marche/Arrêt automatique Une fois le contact du véhicule allumé, l’appareil se met automatiquement en marche. Si la fonction Enregistrement automatique est activée, l’enregistrement démarre automatiquement dès l’allumage de l’appareil. Consulter Configurer l’enregistrement automatique (2.5.1). Une fois le contact du véhicule éteint, l’appareil sauvegarde automatiquement l’enregistrement et se met hors tension après 10 secondes.
  • Seite 68: Réglages Initiaux

    User’s manual AMCORDER 2.5 Réglages initiaux Avant d’utiliser l’appareil, nous vous recommandons d’activer la fonction Enregistrement automatique et de configurer correctement la date et l’heure. 2.5.1 Configurer l’enregistrement automatique Pour permettre le démarrage automatique de l’enregistrement dès l’allumage de l’appareil, suivre les indications suivantes : Appuyer sur le bouton pour entrer dans le menu sur écran.
  • Seite 69: Utilisation De L'enregistreur De Conduite

    User’s manual AMCORDER 3 Utilisation de l’enregistreur de conduite 3.1 Enregistrement vidéo 3.1.1 Enregistrer des vidéos pendant la conduite Si la fonction Enregistrement automatique est activée, l’appareil s’allume automatiquement et commence à enregistrer dès que le véhicule est allumé. L’enregistrement s’arrête automatiquement quand le moteur est éteint.
  • Seite 70: Enregistrement D'urgence

    User’s manual AMCORDER 3.1.3 Enregistrement d’urgence Pendant l’enregistrement vidéo, appuyez sur le bouton pour enregistrer la vidéo de façon continue dans un seul fichier jusqu’à ce que la carte mémoire soit pleine ou que l’enregistrement soit interrompu manuellement. Pour arrêter l’enregistrement, appuyer sur le bouton Remarque : Lorsque la fonction Détection de collision est activée et qu’une collision est détectée, l’appareil déclenche automatiquement l’enregistrement d’urgence.
  • Seite 71: L'écran D'enregistrement

    User’s manual AMCORDER 3.1.4 L’écran d’enregistrement N° Description Elément Indique le temps d’enregistrement. Durée Indique la date et l’heure actuelles Date et time d’enregistrement. Appuyer sur le bouton pour aller Icône guide dans le menu sur écran. (Menu) Indique le niveau de charge restant. Batterie Appuyer sur le bouton pour...
  • Seite 72: Utiliser L'éclairage Led

    User’s manual AMCORDER 3.1.5 Utiliser l’éclairage LED L’éclairage LED permet de fournir une source de lumière supplémentaire quand la lumière ambiante est insuffisante. Pour activer l’éclairage LED, suivre les indications suivantes: Appuyer sur le bouton pour aller dans le menu sur écran. Appuyer sur le bouton pour sélectionner Éclairage auxiliaire, puis...
  • Seite 73: Lecture De Vidéos Et De Photos

    User’s manual AMCORDER 3.2 Lecture de vidéos et de photos Si un enregistrement est en cours, appuyer sur le bouton pour l’interrompre. L’écran de veille s’affiche. Appuyer sur le bouton pour aller dans le menu sur écran. Appuyer sur le bouton pour sélectionner le type de fichiers que vous souhaitez visionner, puis appuyer sur...
  • Seite 74: Lecture Des Vidéos

    User’s manual AMCORDER 3.2.1 Lecture des vidéos Pour lire une vidéo, suivre les indications suivantes : Si un enregistrement est en cours, appuyer sur le bouton pour l’interrompre. Appuyer sur le bouton pour aller dans le menu sur écran. Appuyer sur le bouton pour sélectionner Lecture du fichier, puis appuyer sur Appuyer sur le bouton...
  • Seite 75: Ecran D'affichage

    User’s manual AMCORDER 3.2.3 Ecran d’affichage Ecran d’affichage de vidéo Ecran d’affichage de photo N° Description Item Indique la date et l’heure Date et heure d’enregistrement. Appuyer sur le bouton pour Icône Guide revenir sur l’écran de sélection de (Retour) fichier.
  • Seite 76: Effacer Des Fichiers

    User’s manual AMCORDER 3.2.4 Effacer des fichiers Pour effacer des fichiers (s), suivre les indications suivantes : Si un enregistrement est en cours, appuyer sur le bouton pour l’interrompre. Appuyer sur le bouton pour aller dans le menu sur écran. Appuyer sur le bouton pour sélectionner Effacer, puis appuyer...
  • Seite 77: Ajustement Des Réglages

    User’s manual AMCORDER 4 Ajustement des réglages 4.1 Utilisation du Menu L’enregistrement vidéo et d’autres réglages généraux peuvent être personnalisés depuis les menus affichés sur écran. Si un enregistrement est en cours, appuyer sur le bouton Enregistrement pour l’interrompre. Appuyer sur le bouton pour ouvrir le menu sur écran.
  • Seite 78: Arborescence Du Menu

    User’s manual AMCORDER 4.2 Arborescence du menu Consulter le tableau ci-dessous pour plus de détails sur les menus et les options de menu disponibles. Option de menu Description Option disponible Éclairage Active/Désactive En service / Hors auxiliaire l’éclairage LED. service Lecture du fichier Sélectionne la catégorie Vidéo / Urgence / Image...
  • Seite 79 User’s manual AMCORDER Option de menu Description Option disponible mouvement détection de mouvement. service Quand cette fonction est activée, l’enregistrement se déclenche automatiquement lorsque l’appareil détecte le mouvement d’un objet. Détection de Activation/Désactivation Haute sensibilité / collision de la détection de Sensibilité...
  • Seite 80: Installation Du Logiciel

    User’s manual AMCORDER 5 Installation du logiciel 1. Placez le CD-Rom joint dans le lecteur de CD. 2. Si le CD ne démarre pas automatiquement, utilisez le Gestionnaire de fichiers de Windows pour exécuter le fichier Install_CD.exe sur le CD. L’écran illustré...
  • Seite 81: Spécifications

    User’s manual AMCORDER Spécifications Elément Description Capteur d’image Capteur CMOS 1/3.2” 2592 (H) x 1944 (V) Nombre de pixels Stockage des Compatible avec cartes Micro SDHC, jusqu’à 32 médias Go classe 4 ou supérieur Ecran LCD Ecran LCD TFT couleur 2.4” (112K pixels) Objectif grand angle à...
  • Seite 82 User’s manual AMCORDER Elément Description Lumière d’assistance Microphone Haut-parleur Interface Mini USB, Mini C Type HDMI Batterie intégrée rechargeable 470mAH Batterie Li-polymère Température de 0° ~ 50° C fonctionnement Température de -20° ~ 80° C stockage Dimensions 65 x 62 x 27 mm Poids Environ 85g...
  • Seite 83 Copyright © 2012 Tous droits réservés. Tous les autres marques, noms de produits et de sociétés figurant dans ce guide sont la propriété de leurs détenteurs respectif.
  • Seite 84 User’s Manual AMCORDER -Italian-...
  • Seite 85: Informazioni Su Questa Guida

    User’s manual AMCORDER Informazioni su questa Guida Il contenuto di questo documento è solo a scopo informativo ed è soggetto a modifiche senza preavviso. Noi abbiamo fatto tutto il possibile per garantire che questa Guida dell’utente fosse accurata e completa. Tuttavia non ci prendiamo alcuna responsabilità per eventuali errori e omissioni che ci possano essere.
  • Seite 86: Notifica Sui Regolamenti Ce

    User’s manual AMCORDER Notifica sui Regolamenti CE Questa apparecchiatura è conforme ai requisiti stabiliti nelle Direttive del Consiglio sul Ravvicinamento delle Leggi degli Stati Membri relative alla Compatibilità Elettromagnetica (2004/108/EC); la Direttiva per il Basso Voltaggio (2006/95/EC); la Direttiva sulla Restrizione nell’Uso di Certe Sostanze Pericolose nelle Apparecchiature Elettriche ed Elettroniche (2002/95/EC), la Direttiva EEE della Turchia;...
  • Seite 87 User’s manual AMCORDER Indice Informazioni su questa Guida ..........1 Dichiarazione FCC .............1 Notifica WEEE..............1 Notifica sui Regolamenti CE ..........2 Note sull’istallazione ............2 Avvertenze .................2 Introduzione ..............5 Caratteristiche............5 Contenuto della confezione........5 Sguardo generale al prodotto........1 Come cominciare ............7 Come inserire la Scheda di memoria......7 Istallazione nei veicoli ..........8 2.2.1 Montaggio sul Parabrezza ......8...
  • Seite 88 User’s manual AMCORDER Uso del Car Recorder..........12 Registrazione dei video..........12 3.1.1 Registrazione dei video durante la guida ..12 3.1.2 Registrazione di ogni tipo di video ....12 3.1.3 Registrazione di emergenza ......13 3.1.4 Lo schermo della registrazione ....14 3.1.5 Uso della Luce LED........15 3.1.6 Ripresa delle istantanee ......15 Riproduzione di video e foto........16...
  • Seite 89: Introduzione

    User’s manual AMCORDER Introduzione Noi vi ringraziamo per l’acquisto di questo Car Recorder avanzato. Questo dispositivo è stato specificatamente progettato per la registrazione di video e audio in tempo reale durante la guida. 1.1 Caratteristiche • Videocamera Full HD (1920x1080 @ 30fps) •...
  • Seite 90 User’s manual AMCORDER 1.3 Sguardo generale al prodotto Vedute dall’ALTO e da Sotto Veduta Frontale Veduta Laterali (Sinistra e Destra) Veduta Posteriore Voce Voce Microfono Pulsante indietro ( Presa supporto Pannello LCD Presa supporto Pulsante Su ( Slot scheda di memoria Pulsante Giù...
  • Seite 91: Come Cominciare

    User’s manual AMCORDER 2 Come cominciare 2.1 Come inserire la Scheda di memoria Inserire la Scheda di memoria con i contatti dorati rivolti al retro del dispositivo. Spingere la Scheda di memoria fino a quando fa clic al suo posto. Per rimuovere la Scheda di memoria Spingere per far uscire la Scheda di memoria dallo slot.
  • Seite 92: Istallazione Nei Veicoli

    User’s manual AMCORDER 2.2 Istallazione nei veicoli 2.2.1 Montaggio sul Parabrezza Attaccare il dispositivo alla base del supporto. Girare e stringere il supporto veicolare e la base del supporto per assicurarsi che il dispositivo sia bloccato saldamente al suo posto. Con la ventosa in piano, posizionare la ventosa sul parabrezza.
  • Seite 93: Collegamento Alla Corrente

    User’s manual AMCORDER 2.3 Collegamento alla corrente Usare solo l’adattatore per veicolo in dotazione per dare corrente al dispositivo e caricare la batteria incorporata. Collegare un capo dell’adattatore per veicolo al connettore USB del dispositivo. Inserire l’altro capo del caricatore per veicoli alla presa dell’accendisigari del veicolo.
  • Seite 94: Come Accendere E Spegnere Il Dispositivo

    User’s manual AMCORDER 2.4 Come accendere e spegnere il dispositivo 2.4.1 Accensione e spegnimento automatico Quando si avvia il motore del veicolo, il dispositivo si accende automaticamente. Se la funzione Registrazione automatica è attivata, la registazione parte automaticamente quando si accende il dispositivo.
  • Seite 95: Impostazioni Iniziali

    User’s manual AMCORDER 2.5 Impostazioni iniziali Prima di usare il dispositivo, vi consigliamo di attivare la funzione Registrazione Automatica e impostare la data e ora esatta. 2.5.1 Imposta registrazione automatica Per attivare la registrazione che inizi automaticamente quando accendete la corrente, fare come segue: Premere il pulsante per accedere al menu OSD.
  • Seite 96: Uso Del Car Recorder

    User’s manual AMCORDER 3 Uso del Car Recorder 3.1 Registrazione dei video 3.1.1 Registrazione dei video durante la guida Quando si avvia il motore del veicolo e la funzione Registrazione Automatica è attivata, il dispositivo si accende automaticamente e comincia a registrare. La registrazione si ferma automaticamente quando si spegne il motore.
  • Seite 97: Registrazione Di Emergenza

    User’s manual AMCORDER 3.1.3 Registrazione di emergenza Durante la registrazione del video, premere il pulsante per registrare in continuazione il video in un file fino a che la capienza della scheda di memoria è piena o la registrazione viene fermata manualmente. Per fermare la registrazione, premere il pulsante Nota: Se la funzione Rilevazione collisione è...
  • Seite 98: Lo Schermo Della Registrazione

    User’s manual AMCORDER 3.1.4 Lo schermo della registrazione Descrizione Voce Indica la durata della registrazione. Durata Indica la data e ora dell’attuale Data e ora registrazione. Premere il pulsante Icona guida accedere al menu OSD. (Menu) Indica la corrente della batteria Batteria restante.
  • Seite 99: Uso Della Luce Led

    User’s manual AMCORDER 3.1.5 Uso della Luce LED Voi potete usare la luce LED per fornire altra luce quando l’illuminazione non è sufficiente Per attivare la luce LED, fare quanto segue: Premere il pulsante per accedere al menu OSD. Premere il pulsante per selezionare Luce Ausiliaria e premere il pulsante Premere il pulsante...
  • Seite 100: Riproduzione Di Video E Foto

    User’s manual AMCORDER 3.2 Riproduzione di video e foto Se la registrazione è in corso, premere il pulsante fermare la registrazione. Viene mostrato lo schermo di standby. Premere il pulsante per accedere al menu OSD. Premere il pulsante per selezionare la categoria di file che desiderate sfogliare e premere il pulsante Premere il pulsante...
  • Seite 101: Riproduzione Dei Video

    User’s manual AMCORDER 3.2.1 Riproduzione dei Video Per riprodurre i video, fare in questo modo: Se la registrazione è in corso, premere il pulsante fermare la registrazione. Premere il pulsante per accedere al menu OSD. Premere il pulsante per selezionare Riproduzione File e premere il pulsante Premere il pulsante per selezionare Video o...
  • Seite 102: Lo Schermo Della Riproduzione

    User’s manual AMCORDER 3.2.3 Lo schermo della Riproduzione Schermo Riproduzione Video Schermo Riproduzione Foto Descrizione Voce Indica la data e ora registrata. Data e ora Premere il pulsante per ritornare Icona guida al display della selezione dei file. (Indietro) Premere il pulsante Icona guida visualizzare il video/foto precedente.
  • Seite 103: Eliminazione Dei File

    User’s manual AMCORDER 3.2.4 Eliminazione dei File Per eliminare i file, fare quanto segue: Se la registrazione è in corso, premere il pulsante fermare la registrazione. Premere il pulsante per accedere al menu OSD. Premere il pulsante selezionare Elimina selezioni e premere il pulsante Premere il pulsante selezionare la categoria del file e...
  • Seite 104: Regolazione Delle Impostazioni

    User’s manual AMCORDER 4 Regolazione delle impostazioni 4.1 Uso del Menu Potete personalizzare la registrazione del video e altre impostazioni generali attraverso i menu del display sullo schermo (OSD). Se la registrazione è in corso, premere il pulsante Registra per fermare la registrazione.
  • Seite 105: Albero Del Menu

    User’s manual AMCORDER 4.2 Albero del menu Consultare la tavola qui sotto per i dettagli sulle voci del menu e le opzioni del menu disponibili. Opzione del Opzione Descrizione Menu disponibile Luce Ausiliaria Attiva/Disattiva la luce LED. Attiva / Disattiva Riproduzione Seleziona la categoria di file Video / Emergenza /...
  • Seite 106 User’s manual AMCORDER Opzione del Opzione Descrizione Menu disponibile Rilevazione Attiva/Disattiva la rilevazione Alta sensibilità / collisione collisione. Se questa funzione è Normale sensibilità / attivata e viene rilevata una Bassa sensibilità / collisione, il dispositivo innesca Disattiva automaticamente la registrazione di emergenza.
  • Seite 107: Installazione Del Software

    User’s manual AMCORDER 5 Installazione del software 1. Mettere il CD ROM allegato nel CD player. 2. Se il CD non viene eseguito automaticamente, usare Windows File Manager per eseguire il file Install_CD.exe del CD. Verrà mostrato ils eguente schermo. 3.
  • Seite 108: Specificazioni

    User’s manual AMCORDER Specificazioni Voce Descrizione Sensore Sensore CMOS 1/3.2” d’immagine 2592 (H) x 1944 (V) Pixel effettivi Media di Supporta Micro SDHC, fino a 32GB classe 4 o memorizzazione superiore Display LCD TFT LCD a colori 2.4” (112K pixel) Lente Lente Grandangolare a Fuoco Fisso F2.8, f=3.0mm Gamma fuoco...
  • Seite 109 User’s manual AMCORDER Voce Descrizione Microfono Sì Altoparlante Sì Interfaccia Mini USB, Mini C Tipo HDMI Batteria Incorporata Polimeri di Litio 470mAH ricaricabile Temperatura di 0° ~ 50° C Operazione Temperatura di -20° ~ 80° C Magazzino Dimensioni 65 x 62 x 27 mm Peso 85g circa...
  • Seite 110 Copyright © 2012 Tutti i diritti riservati Tutti gli altri marchi, prodotti o nomi di società menzionati in questa guida sono marchi di proprietà delle rispettive società.
  • Seite 111 User’s Manual AMCORDER -Spanish-...
  • Seite 112: Acerca De Esta Guía

    El reciclaje de materiales ayudará a conserver los recursos naturales y asegurar que sea reciclado de manera que proteja la salud humana y el medio ambiente. www.aiptek.com Page 3...
  • Seite 113 Asegúre de que la ventana teñida no impida la posición de instalación. Precaución Use solamente el cargador autorizado. Nunca desmonte Ud. mismo. Nunca se salte la batería. Desecha la batería debidamente. Exponer la batería a llamas puede causar explosión. www.aiptek.com Page 4...
  • Seite 114 Ajustar Posición de Dispositivo....10 Conectar a Energía ..........11 Activar/Desactivar el dispositivo ......12 2.4.1 Activado/Desactivado Automático....12 2.4.2 Activado/Desactivado Manual......12 Configuraciones iniciales........13 2.5.1 Configurar Grabación Automática....13 2.5.2 Configurar Fecha y Hora ......13 Usar la Grabadora de Auto ........14 Grabar Vídeos ............14 www.aiptek.com Page 5...
  • Seite 115 Reproducir Vídeos e Imágenes ......18 3.2.1 Reproducir Vídeos........19 3.2.2 Visualizar Imágenes ........19 3.2.3 La pantalla de reproducción......20 3.2.4 Eliminar archivos .........20 Ajustar las configuraciones........22 Usar el menú ............22 Árbol de menú ............23 Instalar el software ............25 Especificaciones ............26 www.aiptek.com Page 6...
  • Seite 116: Introducción

    Soporta SDHC hasta 32GB 1.2 Contenidos del Paquete El paquete contiene los sigtes. ítems. En caso de ausencia o daño de alguno, contacte su vendedor inmediatamente. Grabadora de Auto Brazo CD-ROM Guía de inicio rápido Adaptador de auto www.aiptek.com Page 7...
  • Seite 117: Panorama Del Producto

    Botón Enter ( Conector USB Lente de ángulo ancho Conector HD Altavoces Botón Reset Luz LED Nota: Para operar el dispositivo, oprima los botones correspondientes (9, 11, 12, 13) según los íconos de guía mostrados en la pantalla. www.aiptek.com Page 8...
  • Seite 118: Empezar

    Empuje la tarjeta de memoria hasta oir el clic. Para quitar la tarjeta de memoria Empuje para expulsar la tarjeta de memoria de la ranura. Nota: No quite o inserte la tarjeta de memoria cuando el dispositivo está activado. Puede dañar la tarjeta de memoria. www.aiptek.com Page 9...
  • Seite 119: Insertar En Vehículos

    Asegúre de que la base esté bloqueada firmemente. 2.2.2 Ajustar Posición de Dispositivo Perilla Perilla Vire la perilla para girar el Vire la perilla para girar el dispositivo dispositivo verticalmente. horizontalmente hasta 360º. www.aiptek.com Page 10...
  • Seite 120: Conectar A Energía

    El LED anaranjado se enciende mientras se carga la batería. Observe si la temperatura ambiental alcanza 45° C o arriba, el adaptador aún puede suministrar energía al dispositivo, pero deja de cargar la batería de Litio-ion. Es la característica del Litio-ion, no es un malfuncionamiento. www.aiptek.com Page 11...
  • Seite 121: Activar/Desactivar El Dispositivo

    Una vez apagado el motor, el dispositivo guarda la grabación automáticamente y se apaga dentro de 10 segundos. vea Retrasar cierre (4.2). 2.4.2 Activado/Desactivado Manual Para activar manualmente, oprima el botón POWER . Para desactivar, oprima y sostenga el botón POWER por lo menos 2 segundos. www.aiptek.com Page 12...
  • Seite 122: Configuraciones Iniciales

    Fecha / Hora y oprima el botón Oprima el botón para ajustar el valor y oprima el botón para mover al otro campo. Repita el paso 3 hasta completar la configuración de fecha y hora. www.aiptek.com Page 13...
  • Seite 123: Usar La Grabadora De Auto

    Se guarda un archivo de vídeo cada 3 o 5 minutos de grabación. Vea Usar el menú (4.1). El dispositivo guarda la grabación en la tarjeta de memoria. Si la capacidad de la tarjeta de memoria está llena, el archivo más viejo será sobreescrito. www.aiptek.com Page 14...
  • Seite 124: Grabación De Emergencia

    Para dejar de grabar, oprima el botón Nota: Si la función Detección de Colisiones está desactivada y se detecta una collision, el dispositivo activará automáticamente la grabación de emergencia. Vea Usar el menú (4.1). www.aiptek.com Page 15...
  • Seite 125: La Pantalla De Grabación

    Oprima el botón para dejar de Ícono Guía grabar. (Detener) Oprima el botón para grabar el Ícono Guía vídeo contínuamente en un archivo (Emergencia) hasta manualmente detenida. Oprima el botón para cambiar al Ícono Guía modo Reproducir. (Reproducir) www.aiptek.com Page 16...
  • Seite 126: Usar La Luz Led

    También puede usar este dispositivo para tomar imágenes de la escena actual. De la pantalla de espera, oprima el botón para tomar una imagen. Nota: Si la grabación está en progreso, oprima el botón para dejar de grabar. www.aiptek.com Page 17...
  • Seite 127: Reproducir Vídeos E Imágenes

    Nota: De la pantalla de espera, puede ingresar al modo Reproducir directamente con oprimir el botón . El último vídeo grabado aparece en la pantalla. www.aiptek.com Page 18...
  • Seite 128: Reproducir Vídeos

    Reproducción de Archivos y oprima el botón Oprima el botón para seleccionar Imagen y oprima el botón Oprima el botón para examiner el archivo de imagen deseado y oprima el botón para visualizar el archivo en pantalla completa. www.aiptek.com Page 19...
  • Seite 129: La Pantalla De Reproducción

    Ícono Guía vídeo/imagen anterior. (Anterior) Oprima el botón para visualizar Ícono Guía vídeo/imagen posterior. (Posterior) Oprima el botón para interrumpir Ícono Guía la reproducción de vídeo. (Pausa) Indica el tiempo transcurrido. Duración Indica la energía restante. Batería www.aiptek.com Page 20...
  • Seite 130: Eliminar Archivos

    Descripción Eliminar una Elimina el archivo actual. Eliminar todas Elimina todos los archivos. Oprima el botón para confirmar la eliminación. Nota: No se recuperan los archivos eliminados. Asegúre de tener copia de los archivos antes de eliminarlos. www.aiptek.com Page 21...
  • Seite 131: Ajustar Las Configuraciones

    Oprima el botón para seleccionar una opción de menú y oprima el botón para ingresar al menú seleccionado. Oprima el botón para seleccionar la configuración deseada y oprima el botón para confirmarla. Oprima el botón para salir del menú. www.aiptek.com Page 22...
  • Seite 132: Árbol De Menú

    3 mins / 5 mins grabación grabación para cada archivo de vídeo grabado. Detección de Activa/Desactiva la detección Activado / movimiento de movimiento. Si esta función Desactivado está activada y el dispositivo detecta movimiento de agun objeto, empezará www.aiptek.com Page 23...
  • Seite 133 Norma de TV Configura el tipo de TV según NTSC / PAL su región local. Formato Formatea la tarjeta de memoria Sí / No Predeterminado Reconfigura todas las Sí / No configuraciones a las predeterminadas de fábrica. www.aiptek.com Page 24...
  • Seite 134: Instalar El Software

    2. Si el CD no se ejecuta automáticamente, utilice el Administrador de archivos de Windows para ejecutar el archivo Install_CD.exe. Aparecerá la pantalla siguiente. 3. Presione el elemento [Menú] para iniciar el proceso de instalación conforme a las instrucciones que aparecen en la pantalla. www.aiptek.com Page 25...
  • Seite 135: Especificaciones

    Clip de película Formato: .mov Resolución: 5M (2592 x 1944) Imagen congelada (foto) Formato: DCF (JPEG, Exif: 2.2) Obturador electrónico Obturador Auto:1/2 ~1/2000 seg. G-Sensor Sensor 3-Axis G-Force Automático Balance de Automático blanco Lámpara de Sí asistencia Sí Micrófono www.aiptek.com Page 26...
  • Seite 136 Mini USB, Mini C Tipo HDMI Batería 470mAH Li-polymer incorporada recargable Temperatura de 0° ~ 50° C operación Humedad de 20 ~ 70% RH operación Temperatura de -20° ~ 80° C almacenaje Dimensiones 65 x 62 x 27 mm Peso Aprox. 85g www.aiptek.com Page 27...
  • Seite 137 User’s manual AMCORDER Copyright © 2012 Todos los derechos reservados. Todas las otras marcas, productos o nombres de empresa mencionadas en esta guía son marcas comerciales de sus respectivas empresas. www.aiptek.com Page 28...
  • Seite 138 User’s Manual AMCORDER -Portuguese...
  • Seite 139: Sobre Este Guia

    A reciclagem de materiais ajuda a conservar os recursos naturais e certificar que eles serão reciclados de maneira adequada e assegurar a proteção da saúde humana e do meio ambiente. www.aiptek.com Page 3...
  • Seite 140 5. Certifique-se que a posição de instalação não será prejudicada pela película ou filme solar. Precaução Use somente o carregador autorizado. Nunca desmonte por conta própria. Não permita que curto-circuitos ocorram com a bateria. Descarte a bateria apropriadamente. Expor a bateria ao fogo pode causar explosões. www.aiptek.com Page 4...
  • Seite 141 Ajustar a data e a hora ........13 Usando sua câmera de vídeo ........14 Gravando vídeos............14 3.1.1 Grave vídeos quando dirigindo ....14 3.1.2 Gravando todos os tipos de vídeos....14 3.1.3 Gravação de emergência ......15 3.1.4 A tela de gravação........16 www.aiptek.com Page 5...
  • Seite 142 Tirando fotos ..........17 Reproduzindo vídeos e fotos........18 3.2.1 Reproduzindo vídeos........19 3.2.2 Ver fotos ............19 3.2.3 A tela de reprodução ........20 3.2.4 Excluindo arquivos ........21 Ajustando as configurações........22 Usando o menu............22 Funções do menu ..........23 Instalando o software..........25 Especificações ............26 www.aiptek.com Page 6...
  • Seite 143: Introdução

    Gravação automática de emergência com detecção de colisão • Suporte de cartões SDHC até 32GB 1.2 Conteúdo da embalagem Esta embalagem contém os seguintes itens: se algum item estiver faltando, contate seu revendedor imediatamente. Câmera gravadora Suporte CD-ROM Adaptador para Guia carros www.aiptek.com Page 7...
  • Seite 144: Visão Geral

    Botão aceitar ( Conector USB Lente grande angular Conector HD Alto-falante Botão de reínicio Luz LED Nota: para operar o equipamento, pressione os botões correspondentes (9, 11, 12, 13) de acordo com os ícones do guia apresentados na tela. www.aiptek.com Page 8...
  • Seite 145: Iniciando O Uso

    Para remover o cartão de memória Para remover o cartão de memória, empurre-o para dentro para liberá-lo. Nota: não remova ou insira o cartão de memória quando a câmera estiver ligada, pois poderá danificá-la. www.aiptek.com Page 9...
  • Seite 146: Instalando Em Veículos

    Certifique-se que a base esteja bem presa. 2.2.2 Ajustando a posição Regulador Regulador Gire o regulador para mover Gire o regulador para mover verticalmente. horizontalmente até 360°. www.aiptek.com Page 10...
  • Seite 147: Conectando À Energia

    Por favor, cuidado quando a temperatura do ambiente atingir 45° C ou mais, pois o adaptador do carro estará fornecendo energia à câmera, mas não carregará a bateria. Está uma característica das baterias de íon de lítio, e não uma falha ou defeito delas. www.aiptek.com Page 11...
  • Seite 148: Ligando E Desligando

    Quando o motor é desligado, a câmera automaticamente salvará a gravação e se desligará em 10 segundos. Veja Atrasar desligamento (4.2). 2.4.2 Ligar e desligar manualmente Para ligar, pressione o botão POWER. Para desligar, pressione e segure o botão POWER por pelo menos 2 segundos. www.aiptek.com Page 12...
  • Seite 149: Configurações Iniciais

    Data / Hora e pressione o botão Pressione os botões para ajustar os valores e pressione o botão para mover para outro campo. Repita o passo 3 até que a data e a hora estejam completas. www.aiptek.com Page 13...
  • Seite 150: Usando Sua Câmera De Vídeo

    Nota: um vídeo é salvo a cada 3 ou 5 minutos de gravação. Veja em Usando o menu (4.1). A câmera salva as gravações no cartão de memória. Se o cartão estiver cheio, o arquivo mais antigo será sobrescrito. www.aiptek.com Page 14...
  • Seite 151: Gravação De Emergência

    Para parar de gravar, pressione o botão Nota: se a função de detecção de colisão está ativada e a colisão é detectada, a câmera automaticamente iniciará a gravação. Veja em Usando o menu (4.1). www.aiptek.com Page 15...
  • Seite 152: A Tela De Gravação

    Ícone guia gravar. (parar) Pressione o botão continuamente para gravar em um Ícone guia mesmo arquivo até que a gravação (emergência) seja encerrada manualmente. Pressione o botão para mudar Ícone guia para o modo reproduzir. (reproduzir) www.aiptek.com Page 16...
  • Seite 153: Usando A Luz Led

    Tirando fotos Você também pode utilizar esta câmera para tirar fotos. Da tela de prontidão (standby), pressione o botão para tirar uma foto. Nota: se a gravação está em progresso, pressione o botão para encerrar a gravação. www.aiptek.com Page 17...
  • Seite 154: Reproduzindo Vídeos E Fotos

    Nota: da tela de prontidão, você pode acessar o modo reproduzir diretamente, simplesmente pressionando o botão . O último vídeo gravado será exibido na tela. www.aiptek.com Page 18...
  • Seite 155: Reproduzindo Vídeos

    Reprodução de arquivo e pressione o botão Pressione o botão para selecionar Imagem e pressione o botão Pressione o botão para selecionar o arquivo desejado e pressione o botão para ver o arquivo em tela cheia. www.aiptek.com Page 19...
  • Seite 156: A Tela De Reprodução

    (anterior) Pressione o botão para ver o Ícone guia próximo vídeo ou imagem. (próximo) Pressione o botão para pausar a Ícone guia reprodução de vídeo. (Pausar) Indica o tempo de duração. Duração Indica a carga restante. Bateria www.aiptek.com Page 20...
  • Seite 157: Excluindo Arquivos

    Descrição Excluir um Excluir o arquivo atual. Excluir tudo Exclui todos os arquivos. Pressione o botão para confirmar a exclusão. Nota: arquivos excluídos não podem ser recuperados. Certifique-se que você tenha cópias de segurança antes de exclui-los. www.aiptek.com Page 21...
  • Seite 158: Ajustando As Configurações

    Pressione o botão para selecionar a configuração desejada e pressione o botão para confirmar a configuração. Pressione o botão para sair do menu. www.aiptek.com Page 22...
  • Seite 159: Funções Do Menu

    Ajusta a duração da gravação 3 mins / 5 mins gravação para cada arquivo gravado. Detec movim Liga/desliga a detecção de Lig / Desl movimento. Se a função está ligada e a câmera detecta qualquer movimento, ela começará a gravar automaticamente. www.aiptek.com Page 23...
  • Seite 160 Vídeo / Emergência / seleções Imagem Padrão de TV Ajuste o padrão de TV NTSC / PAL conforme sua região. Formatar Formata o cartão de memória Sim / Não Modo Restaura a configuração Sim / Não Redefinir original de fábrica. www.aiptek.com Page 24...
  • Seite 161: Instalando O Software

    2. Se o CD não for executado automaticamente, por favor, use o gerenciador de arquivos para executar o arquivo “Install_CD.exe”. A seguinte tela será exibida. 3. Pressione [Menu] para iniciar o processo de instalação de acordo com as instruções da tela. www.aiptek.com Page 25...
  • Seite 162: Especificações

    Formato: .mov Resolução: 5M (2592 x 1944) Imagem estática Formato: DCF (JPEG, Exif: 2.2) Obturador eletrônico Obturador Automático:1/2 ~1/2000 seg. Sensor G Sensor de força G de 3-eixos Automático Balanço de Automático branco Luz de assistência Microfone www.aiptek.com Page 26...
  • Seite 163 Embutida e recarregável de polímero de lítio com Bateria capacidade de 470mAH Temperatura de 0° ~ 50° C operação Umidade 20 ~ 70% RH aceitável Temperatura de -20° ~ 80° C armazenamento Dimensões 65 x 62 x 27 mm Peso Aprox. 85g www.aiptek.com Page 27...
  • Seite 164 User’s manual AMCORDER Direitos autorais © 2012 Todos os direitos reservados. Todas as outras marcas, produtos ou companhias mencionadas neste guia são marcas registradas pelos respectivos proprietários. www.aiptek.com Page 28...
  • Seite 165 User’s Manual AMCORDER -Russian-...
  • Seite 166: О Данном Руководстве

    создаваемым другими приборами, включая такие помехи, которые могут стать причиной его неправильной работы. Уведомление FCC: Внесение любых изменений или выполнение любых модификаций данного устройства, не получивших четко выраженного одобрения изготовителя может лишить пользователя юридических прав, связанных с использованием данного устройства. www.aiptek.com Page 3...
  • Seite 167 Не дотрагивайтесь до объектива руками. На объективе могут остаться следы жира с пальцев, что приведет к нечеткому видео- или фотоизображению. Регулярно очищайте объектив. Не устанавливайте устройство на затемненное стекло. При этом можно повредить затемняющую пленку. Позиция установки не должна блокироваться затемненным стеклом. www.aiptek.com Page 4...
  • Seite 168 User’s manual AMCORDER Внимание! Используйте только рекомендованное зарядное устройство. Не разбирайте устройство самостоятельно. Не допускайте перемыкания полюсов батареи. Утилизируйте батарею надлежащим образом. Выбрасывание батареи в огонь может привести к взрыву. www.aiptek.com Page 5...
  • Seite 169 Установка в автомобиле ........11 2.2.1 Установка на ветровое стекло .....11 2.2.2 Настройка положения устройства..11 Подключение питания ..........12 Включение и выключение устройства ....13 2.4.1 Автоматическое включение/выключение …………………………………………….13 2.4.2 Ручное включение/выключение ..13 Первоначальная настройка .........14 2.5.1 Установка режима автоматической записи …………………………………………….14 www.aiptek.com Page 6...
  • Seite 170 Фотосъемка ..........18 Воспроизведение видеозаписей и снимков ..19 3.2.1 Воспроизведение видеозаписи ...20 3.2.2 Просмотр фотографий ......20 3.2.3 Экран воспроизведения .......21 3.2.4 Удаление файлов........22 Настройка параметров ...........23 Использование меню ...........23 Структура меню............24 Установка программного обеспечения ....26 Технические характеристики .........27 www.aiptek.com Page 7...
  • Seite 171: Введение

    регистрации столкновения • Поддержка карт памяти SDHC до 32 ГБ 1.2 Комплектация В упаковке содержатся следующие принадлежности. В случае отсутствия или повреждения какой-либо принадлежности сразу же обращайтесь к продавцу. Автомобильный Кронштейн CD-ROM регистратор Краткое Автомобильный руководство переходник www.aiptek.com Page 8...
  • Seite 172: Описание Устройства

    Гнездо карты памяти Кнопка питания Кнопка "ввод" ( Широкоугольный Разъем USB объектив Разъем HD Динамик Кнопка сброса Светодиод подсветки Примечание. Для управления устройством нажмите соответствующую кнопку (9, 11, 12, 13) в соответствии со значками, отображаемыми на экране. www.aiptek.com Page 9...
  • Seite 173: Подготовка К Работе

    направлению к устройству. Нажмите на карту памяти до ее фиксации на месте. Извлечение карты памяти Нажмите на карту памяти для ее извлечения из гнезда. Примечание. Не извлекайте и не устанавливайте карту памяти при включенном устройстве. Карту при этом можно повредить. www.aiptek.com Page 10...
  • Seite 174: Установка В Автомобиле

    нажмите на ручку фиксатора для закрепления автодержателя на ветровом стекле. Проверьте надежность крепления. 2.2.2 Настройка положения устройства Ручка Ручка Поворачивая ручку, измените Поворачивая ручку, измените положение устройства по положение устройства по горизонтали вертикали. на угол до 360°. www.aiptek.com Page 11...
  • Seite 175: Подключение Питания

    В процессе зарядки батареи горит оранжевый индикатор. Если температура окружающей среды превышает 45° C, автомобильный адаптер будет продолжать подачу питания на устройство, однако зарядка литий-ионной батареи производиться не будет. Это связано с характеристиками литий-ионных батарей и не является неисправностью. www.aiptek.com Page 12...
  • Seite 176: Включение И Выключение Устройства

    После выключения двигателя автомобиля устройство автоматически сохраняет запись и в течение 10 секунд выключается. См. раздел Задержка отключения (4.2). Ручное включение/выключение 2.4.2 Для включения устройства вручную нажмите кнопку Питание. Для выключения устройства нажмите и удерживайте кнопку Питание не менее 2 секунд. www.aiptek.com Page 13...
  • Seite 177: Первоначальная Настройка

    ажмите кнопку для входа в экранное меню. Кнопками выберите пункт Дата / Время и нажмите кнопку Кнопками установите нужное значение и нажмите кнопку для перехода в следующее поле. Повторите шаг 3 до завершения настройки даты и времени. www.aiptek.com Page 14...
  • Seite 178: Использование Автомобильного Регистратора

    Нажмите кнопку для останова записи. Примечание. Через каждые 3-5 минут записи сохраняется один видеофайл. См. раздел Использование меню (4.1). В данном устройстве записи сохраняются на карте памяти. Если карта памяти заполнена, перезаписывается самый старый по времени файл. www.aiptek.com Page 15...
  • Seite 179: Экстренная Запись

    в один файл до заполнения карты памяти или ручной остановки записи. Для прекращения записи нажмите кнопку Примечание. Если включена функция Датчик удара и столкновение произошло, устройство автоматически переключается в режим экстренной записи. См. раздел Использование меню (4.1). www.aiptek.com Page 16...
  • Seite 180: Экран Записи

    Батарея Нажмите кнопку для Значок гида прекращения записи. (Стоп) Нажмите кнопку для Значок гида непрерывной видеозаписи в один (Экстренная файл до ручного выключения запись) режима записи. Нажмите кнопку для Значок гида переключения в режим (Воспроизвед воспроизведения. ение) www.aiptek.com Page 17...
  • Seite 181: Использование Светодиода Подсветки18

    При длительном включении светодиода подсветки он может нагреваться. Не прикасайтесь к нагретому светодиоду. Фотосъемка 3.1.6 Вы можете делать снимки текущей сцены. В режиме ожидания нажмите кнопку чтобы сделать снимок. Примечание. Если выполняется запись, нажмите кнопку для останова видеозаписи. www.aiptek.com Page 18...
  • Seite 182: Воспроизведение Видеозаписей И Снимков

    Кнопками перейдите к следующему или предыдущему файлу и нажмите кнопку для просмотра файла в полный экран. Примечание. Из экрана ожидания можно прямо перейти в режим воспроизведения, нажав кнопку . При этом на экране отображается последний записанный видеофайл. www.aiptek.com Page 19...
  • Seite 183: Воспроизведение Видеозаписи

    останова видеозаписи. Нажмите кнопку для входа в экранное меню. Кнопками выберите пункт Просмотр и нажмите кнопку Кнопками выберите пункт Фото и нажмите кнопку Кнопками выберите нужный файл фотоснимка и нажмите кнопку для просмотра файла в полный экран. www.aiptek.com Page 20...
  • Seite 184: Экран Воспроизведения

    (Назад) Нажмите кнопку для Значок гида просмотра предыдущей (Предыдущий) видеозаписи/фотоснимка. Нажмите кнопку для Значок гида просмотра следующей (Следующий) видеозаписи/фотоснимка. Нажмите кнопку для Значок гида временной остановки (Пауза) воспроизведения видеозаписи. Индикация истекшего времени. Длительность Индикация заряда батареи. Батарея www.aiptek.com Page 21...
  • Seite 185: Удаление Файлов

    для входа в меню удаления файлов. Кнопками выберите режим. Элемент Описание Удалить Удалить текущий файл. один Удалить Удалить все файлы. все Нажмите кнопку для подтверждения операции удаления. Примечание. Удаленные файлы восстановить нельзя. Перед удалением создайте резервные копии файлов. www.aiptek.com Page 22...
  • Seite 186: Настройка Параметров

    останова видеозаписи. Нажмите кнопку для входа в экранное меню. Кнопками выберите пункт меню и нажмите кнопку для входа в выбранное меню. Кнопками выберите нужное значение параметра и нажмите кнопку для подтверждения. Нажмите кнопку для выхода из меню. www.aiptek.com Page 23...
  • Seite 187: Структура Меню

    Вкл. / Выкл. записи режима автоматического запуска видеозаписи при включении устройства. Длительност Установка длительности 3 мин. / 5 мин. ь файлов записи сохранения каждого видеофайла. Определени Включение/выключение Вкл. / Выкл. е движения режима определения движения. Если данная www.aiptek.com Page 24...
  • Seite 188 Видео / Аварийная файлов файлов. ситуация / Фото Стандарт ТВ Выбор стандарта ТВ, NTSC / PAL используемого в вашем регионе. Формат Форматирование карты Да / Нет памяти. По Восстановление Да / Нет умолчанию заводских настроек по умолчанию. www.aiptek.com Page 25...
  • Seite 189: Установка Программного Обеспечения

    2. Если загрузка CD не выполняется автоматически, пожалуйста, кликните на файл Install_CD.exe компакт диска в категории Windows File Manager для выполнения инсталляции. Появится следующий экран. 3. Нажмите на опцию [Меню] для начала процесса установки в соответствии с инструкциями на экране. www.aiptek.com Page 26...
  • Seite 190: Технические Характеристики

    Разрешение: Full HD (1920 x 1080), 30 кадр./с HD (1280 x 720), 30 кадр./с Видеоклип Формат: .mov Разрешение: 5M (2592 x 1944) Фотоснимок Формат: DCF (JPEG, Exif: 2.2) Электронный затвор Затвор Авто: 1/2 ~1/2000 с Датчик 3-осевой датчик G-Force положения Авто Баланс белого Авто www.aiptek.com Page 27...
  • Seite 191 Mini USB, Mini C Type HDMI Встроенная литий-полимерная перезаряжаемая Батарея 470 мА-ч Рабочая 0° ~ 50° C температура Рабочая 20 ~ 70% (относительная) влажность Температура -20° ~ 80° C хранения Размеры 65x 62 x 27 мм Масса Около 85 г www.aiptek.com Page 28...
  • Seite 192 User’s manual AMCORDER Copyright © 2012 Все права защищены. Все прочие маркировочные знаки, наименования продуктов и компаний, упомянутые в настоящем руководстве, являются товарными знаками соответствующих компаний. www.aiptek.com Page 29...

Inhaltsverzeichnis