Hama 00118571 Bedienungsanleitung
Verfügbare Sprachen
Verfügbare Sprachen
Quicklinks
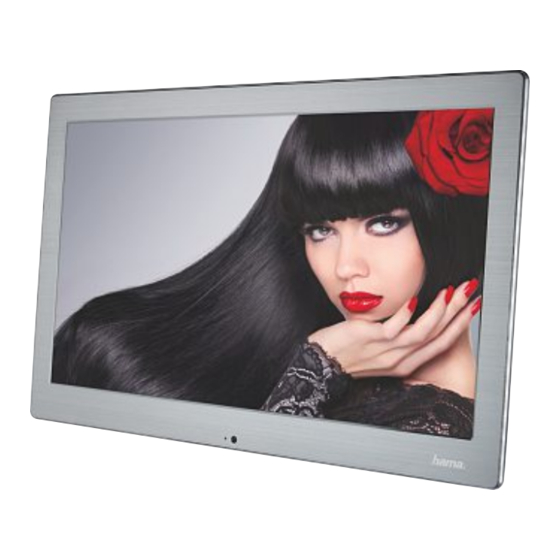
Digital Photo Frame
Digitaler Bilderrahmen
Downloaded from
www.Manualslib.com
118571
manuals search engine
00118571
Operating Instructions
Bedienungsanleitung
Mode d'emploi
Instrucciones de uso
Istruzioni per l'uso
Gebruiksaanwijzing
Instrukcja obsługi
Használati útmutató
Návod k použití
Návod na použitie
Manual de instruções
GB
D
F
E
I
NL
PL
H
CZ
SK
P
Kapitel

Verwandte Anleitungen für Hama 00118571


Inhaltszusammenfassung für Hama 00118571
- Seite 1 00118571 Digital Photo Frame Digitaler Bilderrahmen Operating Instructions Bedienungsanleitung Mode d‘emploi Instrucciones de uso 118571 Istruzioni per l‘uso Gebruiksaanwijzing Instrukcja obsługi Használati útmutató Návod k použití Návod na použitie Manual de instruções Downloaded from www.Manualslib.com manuals search engine...
- Seite 2 ► II – EXIT Downloaded from www.Manualslib.com manuals search engine...
- Seite 21 Downloaded from www.Manualslib.com manuals search engine...
- Seite 22 ► II – EXIT Downloaded from www.Manualslib.com manuals search engine...
-
Seite 23: Bedienungselemente Und Anzeigen
Bedienungselemente und Anzeigen A: Digitaler Bilderrahmen – B: Fernbedienung Bedien- und Anschlussfeld Stummschaltung Ein-/ Ausschalten Ein-/ Ausschalten Direktzugang ins Hauptmenü/ Schnellstart-Taste zum PHOTO Zurückspringen zu Abspielen von Bilddateien EXIT übergeordneter Menüseite/ Schnellstart-Taste zum MUSIC Auswahl Abspielen von Musikdateien Wiedergabe anhalten/ starten Schnellstart-Taste zum VIDEO ►... - Seite 24 Inhaltsverzeichnis 1. Erklärung von Warnsymbolen 8. Fehlerursachen- und behebung ... 37 und Hinweisen........25 9. Wartung und Pflege ..... 38 2. Packungsinhalt ......25 10. Haftungsausschluss....38 3. Sicherheitshinweise...... 25 11. Service und Support ....38 4. Pixelfehler........26 12. Unterstützte Dateiformate ..38 5.
-
Seite 25: Erklärung Von Warnsymbolen Und Hinweisen
Vielen Dank, dass Sie sich für ein Hama Produkt entschieden haben! Nehmen Sie sich Zeit und lesen Sie die folgenden Anweisungen und Hinweise zunächst ganz durch. Bewahren Sie diese Bedienungsanleitung anschließend an einem sicheren Ort auf, um bei Bedarf darin nachschlagen zu können. -
Seite 26: Pixelfehler
• Nehmen Sie keine Veränderungen am Produkt vor. Dadurch verlieren sie jegliche Gewährleistungsansprüche. • Versuchen Sie nicht, das Produkt selbst zu warten oder zu reparieren. Überlassen Sie jegliche Wartungsarbeit dem zuständigen Fachpersonal. • Halten Sie Kinder unbedingt von dem Verpackungsmaterial fern, es besteht Erstickungsgefahr. •... -
Seite 27: Technische Eigenschaften
5. Technische Eigenschaften • Unterstützte Bildformate: JPG / JPEG / BMP • Unterstütztes Audioformat: MP3 • Unterstützte Videoformate: H.264 / RM / RMVB / MOV / MJPEG / DIVX / AVI/ MKV / MP4 • Unterstützte Speicherkarten: SD / SDHC •... -
Seite 28: Batterie Einlegen, Bzw. Wechseln
• Das Netzgerät ist für eine Netzspannung von 100-240 V geeignet und daher weltweit einsetzbar. Beachten Sie, dass hierzu ein länderspezifischer Adapter notwendig ist. • Eine entsprechende Auswahl an Hama Produkten finden Sie unter www.hama.com. • Verbinden Sie das mitgelieferte Netzteil mit einer ordnungsgemäß installierten und funktionsfähigen Steckdose. -
Seite 29: Betrieb
• Drücken Sie am Produkt selbst oder auf der Fernbedienung, um das Produkt ein-/ auszuschalten. • Das Hama-Startlogo erscheint für einige Sekunden und wechselt dann standardmäßig in das Hauptmenü. • Je nach Einstellung werden Bild-/ Audio- oder Videodateien abgespielt. • Um in diesem Fall in das Hauptmenü zu wechseln, drücken Sie wiederholt EXIT auf der Fernbedienung oder am Bedienfeld des Produktes. - Seite 30 • Wählen Sie im Hauptmenü mit Hilfe der CURSOR-Tasten - / + bzw. t / u die gewünschte Option aus und drücken Sie auf der Fernbedienung oder ► II am Bedienfeld des ENTER Produktes. • Sofern Sie eine Datenoption ausgewählt haben, wählen Sie anschließend im Speichermenü mit Hilfe der CURSOR-Tasten - / + bzw.
-
Seite 31: Wiedergabe-/ Löschfunktionen
7.2 Wiedergabe-/ Löschfunktionen Auswahl Medientyp Wählen Sie im Hauptmenü mit Hilfe der CURSOR-Tasten - / + bzw. t / u die Option Bilddaten, Audiodaten oder Videodaten aus und drücken Sie ENTER auf der Fernbedienung oder ► II am Bedienfeld des Produktes. •... - Seite 32 Anzeige Funktion Pause / Wiedergabe anhalten/ starten II / ► Wiedergabe I ◄ Vorh. Vorherige Bild-/ Audio-/ Videodatei ► I Nächster Nächste Bild-/ Audio-/ Videodatei Wiedergabe beenden Stopp ALLE_WDH Wiederholung: keine/ einzelne/ alle Dateien eines EINZ_WDH Ordners(Bild, Audio oder Video) Nichts_WDH Wiedergabe der Musik des Speichermediums, von dem Musik...
-
Seite 33: Untertitel
Löschfunktion • Wählen Sie mit Hilfe der CURSOR-Tasten I ◄ ◄ / - / ► ► I / + bzw. die Bilddatei, Audiodatei oder Videodatei aus, die gelöscht werden soll. • Drücken Sie TOOLBAR, um die Löschfunktion zu aktivieren. Drücken Sie anschließend ENTER oder ►... -
Seite 34: Kalender
7.4 Kalender Wählen Sie im Hauptmenü mit Hilfe der CURSOR-Tasten - / + bzw. t / u die Option Kalender aus und drücken Sie ENTER auf der Fernbedienung oder ► II am Bedienfeld des Produktes. • Sie können sich innerhalb des Kalenders mit Hilfe der I ◄ ◄ / - / ► ► I / + bzw. bewegen. -
Seite 35: Systemeinstellungen (Setup)
Start des Firmware Updates via USB Software Update Achtung! Informationen über Verfügbarkeit und Ausführung (USB) möglicher Updates finden Sie unter Eingabe der Artikel-Nummer auf www.hama.com Autom. Ein/Aus Timer-Einstellungen für automatisches Ein- und Ausschalten Auswahl des Medientyps, der beim Einschalten des Produktes Autom._Wiedergabe wiedergegeben wird, bzw. - Seite 36 Anzeige Funktion Ausschalten der Uhrzeit-/ Datumeinblendung bzw. Auswahl des Uhrzeitformat gewünschten Uhrzeit- und/oder Datumsformates Kopiert Dateien von externen Speichermedien (nur USB) auf den Kopieren internen Speicher Zurücksetzen auf die Einstellungen bei Auslieferung. Werkeinstell._aufrufen Achtung! Alle vorher vorgenommenen Einstellungen gehen verloren. Hinweis - Helligkeit, Kontrast, Sättigung •...
-
Seite 37: Fehlerursachen- Und Behebung
8. Fehlerursachen- und behebung Hinweis Wenn Sie mit den folgenden Schritten das Problem nicht lösen können, wenden Sie sich bitte an den Kundendienst. Die nachfolgende Tabelle hilft bei der Lokalisierung und Behebung kleinerer Störungen: Fehler Mögliche Ursache Behebung Gerät ist ausgeschaltet Schalten Sie das Gerät ein. -
Seite 38: Wartung Und Pflege
Tuch ein wenig angefeuchtet werden. 10. Haftungsausschluss Die Hama GmbH & Co. KG übernimmt keinerlei Haftung oder Gewährleistung für Schäden, die aus unsachgemäßer Installation, Montage und unsachgemäßem Gebrauch des Produktes oder einer Nichtbeachtung der Bedienungsanleitung und/oder der Sicherheitshinweise resultieren. -
Seite 39: Technische Daten
13. Technische Daten Digitaler Bilderrahmen 00118571 Stromversorgung Eingang 100-240 V AC / 50/60 Hz / 0,8 A Max Stromversorgung Ausgang 9 V DC / 1,5 A Leistungsaufnahme 9.5 W Abmessungen (B x H x T) 330 x 210 x 65 mm Gewicht ca. -
Seite 40: Menüstruktur
14. Menüstruktur Foto Photo Slideshow Photo Slideshow mit Musik Musik Video Kalender Einstellungen OSD-Sprache Diashowdauer Diashowmodus Wiederholmodus Darstellungsmodus Uhrzeit Standby Modus Helligkeit Kontrast Sättigung Software Update (USB) Autom. Ein/Aus Autom._Wiedergabe Untertitel scrollen Medien_Typ Uhrzeitformat Kopieren Werkeinstell._aufrufen 15. Entsorgungshinweise Hinweis zum Umweltschutz: Ab dem Zeitpunkt der Umsetzung der europäischen Richtlinien 2002/96/EG und 2006/66/EG in nationales Recht gilt folgendes: Elektrische und elektronische Geräte sowie Batterien dürfen nicht mit dem Hausmüll entsorgt werden. - Seite 41 Downloaded from www.Manualslib.com manuals search engine...
- Seite 42 ► II – EXIT Downloaded from www.Manualslib.com manuals search engine...
- Seite 61 Downloaded from www.Manualslib.com manuals search engine...
- Seite 62 ► II – EXIT Downloaded from www.Manualslib.com manuals search engine...
- Seite 81 Downloaded from www.Manualslib.com manuals search engine...
- Seite 82 ► II – EXIT Downloaded from www.Manualslib.com manuals search engine...
- Seite 101 Downloaded from www.Manualslib.com manuals search engine...
- Seite 102 ► II – EXIT Downloaded from www.Manualslib.com manuals search engine...
- Seite 121 Downloaded from www.Manualslib.com manuals search engine...
- Seite 122 ► II – EXIT Downloaded from www.Manualslib.com manuals search engine...
- Seite 141 Downloaded from www.Manualslib.com manuals search engine...
- Seite 142 ► II – EXIT Downloaded from www.Manualslib.com manuals search engine...
- Seite 161 Downloaded from www.Manualslib.com manuals search engine...
- Seite 162 ► II – EXIT Downloaded from www.Manualslib.com manuals search engine...
- Seite 181 Downloaded from www.Manualslib.com manuals search engine...
- Seite 182 ► II – EXIT Downloaded from www.Manualslib.com manuals search engine...
- Seite 201 Downloaded from www.Manualslib.com manuals search engine...
- Seite 202 ► II – EXIT Downloaded from www.Manualslib.com manuals search engine...