Herunterladen Inhalt Inhalt Diese Seite drucken

Werbung

Verfügbare Sprachen
  • DE

Verfügbare Sprachen

  • DEUTSCH, seite 1

Werbung

Inhaltsverzeichnis
loading

Inhaltszusammenfassung für auna multimedia Soundblaster DAB

  • Seite 3: Inhaltsverzeichnis

    Sehr geehrter Kunde, wir gratulieren Ihnen zum Erwerb Ihres Gerä- tes. Lesen Sie die folgenden Hinweise sorgfäl- tig durch und befolgen Sie diese, um möglichen Schäden vorzubeugen. Für Schäden, die durch Missachtung der Hinweise und unsachgemäßen Gebrauch entstehen, übernehmen wir keine Haf- tung.
  • Seite 4: Technische Daten

    TECHNISCHE DATEN Item number 10035222 100-240 V~ 50/60 Hz Stromversorgung Battery: 12 V Stromverbrauch 48 W Standby-Verbrauch <0.5 Watt AUX-Anschluss 3,5 mm Microfonanschluss 6,3 mm Betriebstemperaturbereich 5 °C – +35 °C Ver 5.0 Empfangsfrequenzen 87,5 - 108 MHz DAB+ 174,926 MHz – 239,2 MHz CD-Player Optische Abtastung Dreistrahliger Laser Frequenzbereich...
  • Seite 5: Erklärung Der Symbole Auf Dem Gerät

    ERKLÄRUNG DER SYMBOLE AUF DEM GERÄT CAUTION RISK OF ELECTRIC SHOCK DO NOT OPEN VORSICHT: DAS GEHÄUSE NICHT ÖFFNEN, UM EINEN STROMSCHLAG UND ERNSTE PERSONENVERLETZUNGEN ZU VERMEIDEN. IM INNEREN KEINE VOM KUNDEN ZU WARTENDEN KOMPONENTEN. WENDEN SIE SICH AUSSCHLIESSLICH AN QUALIFIZIERTE FACHLEUTE. WARNUNG: UM DIE GEFAHR EINES BRANDS ODER EINES STROMSCHLAGS ZU VERRINGERN, DAS GERÄT NICHT IN WASSER, REGEN ODER FEUCHTIGKEIT AUSZUSETZEN.
  • Seite 6: Sicherheitshinweise

    SICHERHEITSHINWEISE Lesen Sie die Anleitung. Alle Anwendungshinweise müssen vor der Verwendung des Geräts gelesen werden. • Kinder ab 8 Jahren, psychisch, sensorisch und körperlich eingeschränkte Menschen dürfen das Gerät nur benutzen, wenn sie vorher von einer für sie verantwortlichen Aufsichtsperson ausführlich mit den Funktionen und den Sicherheitsvorkehrungen vertraut gemacht wurden und die damit verbundenen Risiken verstehen.
  • Seite 7 • Um die Stromzufuhr vollständig zu trennen, muss der Netzstecker des Gerätes vom Netz getrennt werden, da die Trennvorrichtungen der Netzstecker des Gerätes sind. • Der Netzstecker des Geräts darf nicht verstopft sein ODER sollte bei bestimmungsgemäßer Verwendung leicht zugänglich sein. •...
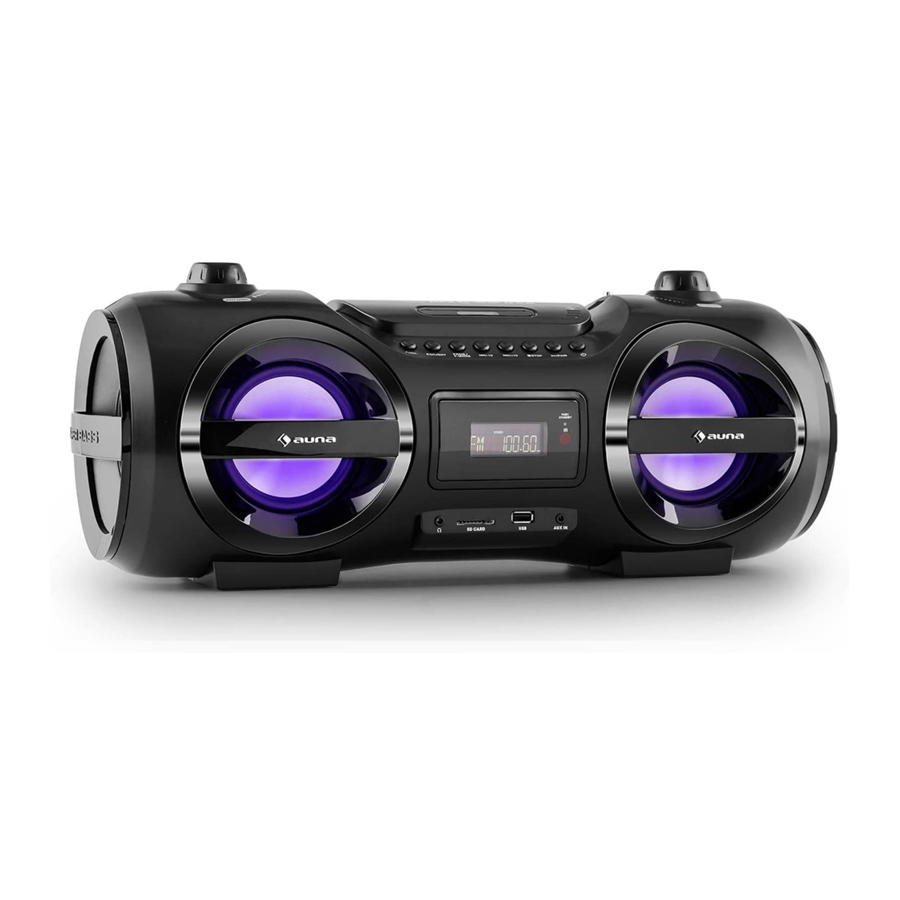
  • Seite 8: Geräteübersicht

    GERÄTEÜBERSICHT...
  • Seite 9 Bildschirm Design-Lautsprecherring Linker/ Rechter Lautsprecher Kopfhöreranschluss SD-Kartenfach USB-Anschluss Standby-/ Kopplungsanzeige AUX-IN Anschluss dekorativer Ring passiver Lautsprecher 10 Lautstärkeregler Funktionstaste 12 EQ-/ Lichttaste 13 Programm-/ Modustaste 14 Vorheriger Titel/ schnell zurückspulen/ -10 15 CD-Fachtür 16 Nächster Titel; schnell vorspulen; +10 17 Stopp; Menü; Info 18 Wiedergabe/Pause;...
  • Seite 10 Fernbedienung Funktionstaste 10 Koppeln Stummschalten Nächster Titel; schnell Speichertaste vorspulen EQ-Taste 12 ID3 Ordner; 10 M; nach oben/unten 13 Lautstärke erhöhen/ senken Vorheriger Titel/ schnell 14 Lichttaste zurückspulen 15 Mono/ Stereo Wiedergabe/Pause; 16 Standby Auswahltaste 17 Fernbedienungssensor P-Modus; Infotaste 18 Batteriefach Stopp/ Menütaste Hinweis: Entfernen Sie vor der Verwendung der Fernbedienung den Batteriefachschutz.
  • Seite 11 Verwendung der Fernbedienung Um das Gerät mit der Fernbedienung zu bedienen, richten Sie die Fernbedienung auf den Fernbedienungssensor an der Vorderseite des Geräts und drücken Sie die entsprechende Taste auf der Fernbedienung. Die Fernbedienung funktioniert am besten innerhalb einer Reichweite von 6 ~ 7 Metern zu der Vorderseite des Geräts und in einem Winkel von 30 Grad.
  • Seite 12: Grundfunktionen

    Stromversorgung Das Gerät wird über das Netzkabel mit Wechselstrom betrieben. Netzstecker Stecken Sie den Netzstecker des Geräts in eine haushaltsübliche Steckdose. Die Batterieverbindung wird automatisch getrennt. Die Batterieversorgung wird automatisch unterbrochen, sobald der Netzstecker in die Steckdose gesteckt wurde. Dieses Gerät ist als Schaltnetzteil mit einem Spannungsbereich von 100 V bis 240 V ausgelegt.
  • Seite 13: Fm-Radio

    auszuwählen: FLAT, CLASSIC, ROCK, POP und JAZZ. ID3-System: Dieses Gerät verfügt über ein ID3-System. Wenn eine MP3-Datei im ID3-Format vorliegt, durchsucht das Gerät automatisch die Informationen zu Titel, Künstler und Album, die auf dem Display angezeigt werden sollen. Um das Show-Tag-System auszuschalten, drücken Sie die ID3-Taste auf der Fernbedienung, dann kehrt das Gerät zur normalen Anzeige zurück.
  • Seite 14: Dab-Radio

    Achten Sie zusätzlich darauf, dass das Gerät an einem offenen Ort aufgestellt wird. 4. Drücken Sie die Taste FUNC. am Gerät oder auf der Fernbedienung, um zu anderen Funktionen zu wechseln, oder drücken Sie die Taste STANDBY am Gerät oder auf der Fernbedienung, um das Gerät auszuschalten.
  • Seite 15 Suchlauf abgeschlossen ist, spielt das Radio den ersten Sender auf der Senderliste ab. 2. Drehen Sie zur Auswahl eines Senders aus der Senderliste am Drehregler des Geräts oder drücken Sie TUN-/⏮ oder TUN+/⏭ auf der Fernbedienung, um die Senderliste zu durchsuchen. Drücken Sie zur Bestätigung die Taste PLAY/PAUSE/PAIR/SELECT am Gerät oder die Taste PLAY/PAUSE/SELECT auf der Fernbedienung.
  • Seite 16 Aktuelle Wiedergabeinformation Während der Wiedergabe eines Senders werden auf dem Bildschirm erscheinen dessen Name und die vom Sender gesendeten DLS- Informationen (Dynamic Label Segment) wie Programmname, Titel und Kontaktdaten. Um weitere Informationen anzuzeigen, halten Sie die STOP/ MENU/INFO-Taste am Gerät gedrückt oder drücken Sie jedes Mal die P-MODE/INFO-Taste, um den nächsten Informationssatz im Durchlauf anzuzeigen: DLS-Text, DL Plus-Informationen (diese werden nur angezeigt, wenn sie vom Sender ausgestrahlt werden), Signalstärke, Programmtyp,...
  • Seite 17: Software-Version

    TUN-/⏮ oder TUN+/⏭ auf der Fernbedienung, um die Option „System“ zu wählen. Drücken Sie die Taste PLAY/PAUSE/PAIR/SELECT am Gerät oder die Taste PLAY/PAUSE/SELECT auf der Fernbedienung, um in das Menü zu gelangen. Wählen Sie „factory reset“ und drehen Sie dann am Drehregler des Geräts oder drücken Sie TUN-/⏮...
  • Seite 18 weitere Tasten drücken. 3. Wenn sich keine CD im CD-Fach befindet oder die darin befindliche CD nicht gelesen werden kann, wird auf dem Bildschirm „NO DISC“ angezeigt. CD-Wiedergabe • Die Wiedergabe startet, nachdem die CD gelesen wurde, automatisch beim ersten Titel. Drücken Sie zum Pausieren der Wiedergabe die Taste ⏯...
  • Seite 19 Speicherliste erstellen Wenn die CD gestoppt wurde, können bis zu 20-CD und 99-MP3 Titel in beliebiger Reihenfolge gespeichert werden. 1. Drücken Sie im Stoppmodus die Taste PROG./P-MODE des Geräts oder die Taste MEM der Fernbedienung, um die Speicherfunktion zu aktivieren. Auf Dem Bildschirm des Geräts wird „PROG“ und „P01“ angezeigt.
  • Seite 20: Zufallswiedergabe

    Wiederholung eines Ordners (nur bei MP3-Discs, die mehr als einen Ordner enthalten) 1. Drücken Sie während der Wiedergabe mehrfach die Taste PROG./P- MODE auf dem Gerät oder die Taste P-MODE der Fernbedienung, bis auf dem Bildschirm „REP-ALBUM“ angezeigt wird. Der ausgewählte Ordner ⏹...
  • Seite 21: Sd-Karte

    Kopplungs-Anzeige blinkt mit hoher Geschwindigkeit. 2. Schalten Sie die BT-Funktion am Gerät ein. Suchen Sie in der Geräteliste Ihres externen BT-Geräts nach Soundblaster DAB. Stellen Sie eine Verbindung her. Geben Sie dann, falls erforderlich, das Passwort 0000 ein. Die blaue Kopplungs-Anzeige leuchtet auf, um anzuzeigen, dass die Verbindung hergestellt wurde.
  • Seite 22: Aux-In

    oder die Wiedergabetaste am Gerät, um die Wiedergabe zu starten. Wenn das Gerät die entsprechende BT-Verbindung nicht innerhalb von 2 Minuten herstellen kann, drücken Sie die Taste ⏯/PAIR/SELECT am Gerät oder die PAIR-Taste auf der Fernbedienung, um die Verbindung wiederherzustellen. 3.
  • Seite 23: Pflege Von Cds

    PFLEGE VON CDS Verwenden Sie ausschließlich CDs mit dem Symbol links. Umgang mit CDs • Entnehmen Sie die CD aus der Schutzhülle und legen Sie diese in das CD-Fach des Geräts ein. • Vermeiden Sie es, die reflektierende Aufnahmeoberfläche zu berühren.
  • Seite 24: Hinweise Zur Entsorgung

    HINWEISE ZUR ENTSORGUNG Befindet sich die linke Abbildung (durchgestrichene Mülltonne auf Rädern) auf dem Produkt, gilt die Europäische Richtlinie 2012/19/EU. Diese Produkte dürfen nicht mit dem normalen Hausmüll entsorgt werden. Informieren Sie sich über die örtlichen Regelungen zur getrennten Sammlung elektrischer und elektronischer Gerätschaften.
  • Seite 25 Dear Customer, Congratulations on purchasing this equipment. Please read this manual carefully and take care of the following hints to avoid damages. Any failure caused by ignoring the items and cautions men- tioned in the instruction manual are not covered by our warranty and any liability.
  • Seite 26: Technical Data

    TECHNICAL DATA Item number 10035222 Power supply 100-240 V~ 50/60 Hz Battery: 12 V Power consumption 48 W Standby comsumption <0.5 Watt AUX in jack 3.5 mm Microphone jack 6.3 mm Working temperature 5 °C - +35 °C 5.0 version Receiver section FM frequency rage 87.5 - 108 MHz DAB+ frequency range 174.926 MHz - 239.2 MHz...
  • Seite 27 EXPLANATION OF THE WARNING SYMBOLS CAUTION RISK OF ELECTRIC SHOCK DO NOT OPEN AUTION: TO REDUCE THE RISK OF ELECTRIC SHOCK AND SERIOUS PERSONAL INJURY, DO NOT REMOVE ANY COVER. NO USER-SERVICABLE PARTS INSIDE. REFER SERVICING TO QUALIFIED SERVICE PERSONNEL ONLY. WARNING.
  • Seite 28: Safety Instructions

    SAFETY INSTRUCTIONS Read these instructions. All uses guidelines must be read before using the device. Keep the instructions for future use. • Children over the age of 8 and persons with reduced physical, sensory or mental capabilities or those with a lack of experience and knowledge may only use the device if they are instructed on how to do so by a person responsible for their safety, or if they are supervised and understand the hazards associated with the use of the device.
  • Seite 29 easily accessed during intended use. • Battery shall not be exposed to excessive heat such as sunshine, fire or the like. • Excessive sound pressure form earphones and headphones can cause hearing loss. • Minimum distance (8 cm) around the apparatus for sufficient ventilations;...
  • Seite 30: Product Overview

    PRODUCT OVERVIEW...
  • Seite 31 Display Speaker decoration ring Left/right speakers Phones jack SD card slot USB port Standby/pair indicator Aux in jack Passive speaker decoration ring 10 Volume knob Function button 12 Eq/light button 13 Prog./P-mode butt 14 Back/fast backward/-10 button 15 CD door 16 Next/fast forward/+10 button 17 Stop/menu/info button 18 Play/ pause/pair/select button...
  • Seite 32 Remote Control Function key CD f-skip up/tun.+ Key Mute key 12 ID3 key Memory key 13 Volume up/down key EQ key 14 Light key Fold./10/M. Up/down key 15 Mo/st key CD b-skip down/tun.- Key 16 Standby key CD play/pause/select key 17 Remote sensor P-mode/info key 18 Battery compartment...
  • Seite 33 Remote control operation To operate the unit with the remote control, point the remote handset at the remote sensor on the front panel and press the appropriate button on the remote handset. The remote works best within a range of 6 ~ 7 meters from the front panel and on an angle of 30 degrees.
  • Seite 34: Basic Function

    Power source This unit is designed to be operated on AC/DC. AC operation Plug the tail of supplied AC power cord into AC socket on unit and the plug into household AC outlet. The batteries will be automatically disconnected. This unit is designed in Switched-Mode Power Source with voltage range from 100V to 240V.
  • Seite 35: Radio Operation

    TITLE NAME --> ARTIST NAME --> ALBUM NAME Mute: You can quickly shut off the sound using the Mute key, press the key again to turn the sound back on. Headphone jack For private listening, insert a 3.5mm headphone (not included) into the EADPHONE jack (4).
  • Seite 36: Dab Radio Mode

    Radio station memory operation You may pre-store 30 (FM) radio stations in memory for your preference, so as you can listen to your desired station directly and quickly, no need to tuning and search for again. ⏮ ⏭ 1. Rotate the TUNING knob on the unit or press TUN-/ or TUN+/ key on remote control to select a desired station.
  • Seite 37: Now Playing Information

    key on the remote control to confirm. This removes all invalid stations, indicated in the station list with a “?” in front of the station name. Preset stations To store a station in a preset memory, tune to the station that you want to save as a preset, then Press and hold the PROG/P-MODE button on the unit or press and hold MEM key on the remote control until the display shows ⏮...
  • Seite 38: Cd/Mp3 Operation

    System The system setting allows you to select display languages, reset to factory settings and view the software version. Language To select different languages for display messages. Press the STOP/MENU/ INFO button on the unit or press STOP/MENU key on the remote control to TUN-/⏮...
  • Seite 39 Loading a disc 1. Press the FUNC. button on unit or on remote control to select “CD” mode. 2. Press the PUSH TO OPEN button to open the CD door, “OPEN” will be shown on the display. 3. Place an audio CD/MP3 DISC into the tray with the front side facing up. 4.
  • Seite 40 ⏭ ⏮ TUN+/⏭ 10 tracks, then press the / +10 or /-10 button on the unit or TUN-/⏮ key on the remote control to select desired track. To select a desired folder for MP3 disc that contains more than one folder. To select a desired folder during playback, press and hold the FOLD./10/M UP/DOWN button on the remote control to next/previous folder.
  • Seite 41: Usb/Sd Card Operation

    2. To cancel repeat play, press the PROG./P-MODE button on the unit or press P-MODE/INFO key on remote control until “REP- ALL” disappears from the display. To repeat the folder (only for MP3 disc which contains more than one folder) 1.
  • Seite 42: Sd Card Operation

    BT function, the LCD will display “bT ” and the Pair/Standby indicator will flash at high speed. 2. Turn on the BT function on the device, scan the unit “ Soundblaster DAB” and connect, then input the password 0000 if required, the Pair/Standby blue light will light up to indicate connection done, and the display will ⏯/PAIR/SELECT...
  • Seite 43: Aux-In Operation

    key on the remote control. Note: BT works best within 10 meters. AUX-IN OPERATION 1. Press the FUNC. button on the unit or on the remote control to select “AUX” mode. 2. Insert the AUX line plug into the AUX IN jack (Φ3.5mm) on the player, music from the device would be amplified and exported from the speakers.
  • Seite 44: Compact Disc Maintenance

    COMPACT DISC MAINTENANCE 1. Always use a compact disc bearing the mark as shown. 2. Notes on handling discs • Removing the disc from its storage case and loading it. • Do not touch the reflective recorded surface. • Do not stick paper or write anything on the surface. •...
  • Seite 45: Disposal Considerations

    DISPOSAL CONSIDERATIONS According to the European waste regulation 2012/19/EU this symbol on the product or on its packaging indicates that this product may not be treated as household waste. Instead it should be taken to the appropriate collection point for the recycling of electrical and electronic equipment.
  • Seite 47 Cher client, Toutes nos félicitations pour l’acquisition de ce nouvel appareil. Veuillez lire attentivement les instructions suivantes de branchement et d’utilisation afin d’éviter d’éventuels dommages. Le fabricant ne saurait être tenu pour responsable des dommages dus au non-respect des consignes de sécurité...
  • Seite 48: Fiche Technique

    FICHE TECHNIQUE Numéro d'article 10035222 100-240 V~ 50/60 Hz Alimentation Piles: 12 V Consommation 48 W Consommation en veille <0.5 Watt Prise AUX 3,5 mm Prise micro 6,3 mm Températures de 5 °C – +35 °C fonctionnement Ver 5.0 Fréquences de réception 87,5 - 108 MHz DAB+ 174,926 MHz –...
  • Seite 49: Explication Des Symboles Sur L'appareil

    EXPLICATION DES SYMBOLES SUR L'APPAREIL CAUTION RISK OF ELECTRIC SHOCK DO NOT OPEN ATTENTION : N'OUVREZ PAS LE BOÎTIER POUR ÉVITER LES CHOCS ÉLECTRIQUES ET LES BLESSURES GRAVES. PAS DE COMPOSANTS INTERNES À ENTRETENIR PAR LE CLIENT. NE CONTACTER QUE DES PROFESSIONNELS QUALIFIÉS.
  • Seite 50: Consignes De Sécurité

    CONSIGNES DE SÉCURITÉ Lisez les instructions. Toutes les instructions d'utilisation doivent être lues avant d'utiliser l'appareil. • Les enfants à partir de 8 ans ainsi que les personnes aux capacités physiques, mentales ou sensorielles réduites ne doivent utiliser l’appareil qu'après avoir été familiarisés par une personne responsable de leur sécurité...
  • Seite 51: Avant L'utilisation

    • La fiche d'alimentation de l'appareil ne doit pas être bloquée OU doit être facilement accessible lorsqu'elle est utilisée comme prévu. • N'exposez pas la batterie à une chaleur excessive comme le soleil, le feu ou autre. • Une pression sonore excessive provenant des écouteurs et des casques peut entraîner une perte d'audition.
  • Seite 52: Aperçu Des Appareils

    APERÇU DES APPAREILS...
  • Seite 53 Ecran Bague d'enceinte design Enceinte gauche / droite Prise casque Lecteur de cartes SD Port USB Témoin de veille / d'appairage Prise AUX-IN Bague décorative de l'enceinte passive 10 Réglage du volume Touche de fonction 12 Touche d'EQ/ éclairage 13 Touche programme / mode 14 Titre précédent / retour rapide / -10 15 Tiroir CD 16 Titre suivant ;...
  • Seite 54 Télécommande Touche de fonction 12 ID3 Fonction muet 13 Augmenter / réduire le volume Touche mémorisation 14 Touche d'éclairage Touche EQ 15 Mono/ Stéréo Dossier ; 10 M ; haut/bas 16 Veille Titre précédent / retour rapide 17 Capteur de télécommande Lecture /Pause ;...
  • Seite 55 Utilisation de la télécommande Pour utiliser l'appareil avec la télécommande, pointez celle-ci vers le capteur de télécommande à l'avant de l'appareil et appuyez sur le bouton correspondant de la télécommande. La télécommande fonctionne mieux dans une plage de 6 à 7 mètres à l'avant de l'appareil et à un angle de 30 degrés.
  • Seite 56: Fonctions De Base

    Alimentation L'appareil est alimenté en courant alternatif par le câble secteur. Fiche secteur Branchez la fiche secteur de l'appareil dans une prise. Les piles sont automatiquement déconnectées. L'alimentation par piles est automatiquement coupée dès que vous branchez la fiche secteur dans la prise.
  • Seite 57: Fm-Radio

    la lecture, appuyez sur EQ / LIGHT sur l'appareil ou sur EQ sur la télécommande pour sélectionner un autre style de musique : FLAT, CLASSIC, ROCK, POP et JAZZ. Système ID3 : Cet appareil dispose d'un système ID3. Lorsqu'un fichier MP3 est au format ID3, l'appareil recherche automatiquement les informations sur le titre, l'artiste et l'album à...
  • Seite 58: Dab-Radio

    4. Appuyez sur FUNC. sur l'appareil ou sur la télécommande pour passer à d'autres fonctions, ou appuyez sur STANDBY de l'appareil ou de la télécommande pour éteindre l'appareil. Recherche automatique des stations Appuyez sur la touche d'appairage / sélection ⏯ et maintenez-la pour lancer la recherche automatique de stations.
  • Seite 59 pour confirmer. Les détails de la station s'affichent à l'écran. 3. Pour supprimer les stations répertoriées mais non disponibles, appuyez d'abord sur STOP / MENU / INFO de l'appareil ou sur STOP / MENU de la télécommande. Vous serez alors redirigé vers la sélection du menu. Tournez la molette de l'appareil ou appuyez sur TUN - /⏮...
  • Seite 60 du signal et débit binaire. Compression de la gamme dynamique (DRC) Cette fonction permet de réduire la différence entre le son le plus fort et le plus doux qui est diffusé. Il y a 3 options dans ce cadre. Les options disponibles sont "DRC off"...
  • Seite 61: Cd/Mp3

    PAUSE / SELECT de la télécommande pour confirmer. Version de logiciel La version actuelle du logiciel s'affiche ici. Appuyez sur STOP / MENU / INFO sur l'appareil ou STOP / MENU sur la télécommande pour accéder à la sélection du menu. Tournez la molette de l'appareil ou appuyez sur TUN - / ⏮...
  • Seite 62 Lecture de CD • Une fois le CD parcouru, la lecture démarre automatiquement à la première piste. Pour interrompre la lecture, appuyez sur ⏯ de l'appareil ou de la • télécommande. La durée de lecture actuelle clignote alors à l'écran. Pour reprendre la lecture, appuyez à...
  • Seite 63 par exemple titre 2). 3. Appuyez sur PROG./P-MODE de l'appareil ou sur MEM de la télécommande pour confirmer. "PROG" et "P02" apparaîtront alors sur l'écran. 4. Répétez les étapes 2 et 3 pour enregistrer toutes les pistes souhaitées dans la liste de mémoire. 5.
  • Seite 64: Usb

    Lecture aléatoire 1. Pendant la lecture, appuyez plusieurs fois sur PROG./PMODE de l'appareil ou sur P-MODE de la télécommande jusqu'à ce que "RANDOM" apparaisse à l'écran. Les pistes sont ensuite lues dans un ordre aléatoire. 2. Pour annuler la lecture aléatoire, appuyez sur PROG./PMODE de l'appareil ou sur P-MODE de la télécommande.
  • Seite 65: Carde Sd

    CARDE SD 1. Appuyez sur la touche FUNC. de l'appareil ou de la télécommande pour sélectionner le mode SD. 2. Insérez la carte SD dans le connecteur de la carte SD. L'écran affiche le nombre total de pistes sur la carte SD. La lecture commencera automatiquement à...
  • Seite 66: Aux-In

    l'appareil ou sur la touche ⏭/SELECT de la télécommande. Remarque : BT fonctionne mieux dans un rayon de 10 mètres. AUX-IN 1. Appuyez sur la touche FUNC. de l'appareil ou de la télécommande pour sélectionner le mode AUX. 2. Insérez la fiche du câble AUX dans le connecteur AUX IN. La musique de l'appareil connecté...
  • Seite 67: Entretien Des Cd

    ENTRETIEN DES CD Utilisez uniquement des CD avec le symbole de gauche Manipulation des CD • Retirez le CD de sa couverture protectrice et insérez-le dans le compartiment CD de l'appareil. • Évitez de toucher la surface d'enregistrement réfléchissante. • Ne collez pas d'autocollants sur le CD ou ne l'étiquetez pas.
  • Seite 68: Informations Sur Le Recyclage

    INFORMATIONS SUR LE RECYCLAGE Vous trouverez sur le produit l’image ci-contre (une poubelle sur roues, barrée d‘une croix), ce qui indique que le produit se trouve soumis à la directive européenne 2012/19/UE. Renseignez-vous sur les dispositions en vigueur dans votre région concernant la collecte séparée des appareils électriques et électroniques.
  • Seite 69 Estimado cliente: Le felicitamos por la adquisición de este producto. Lea atentamente el siguiente manual y siga cuidadosamente las instrucciones de uso con el fin de evitar posibles daños. La empresa no se responsabiliza de los daños ocasionados por un uso indebido del producto o por haber desatendido las indicaciones de seguridad.
  • Seite 70: Datos Técnicos

    DATOS TÉCNICOS Número de artículo 10035222 100-240 V~ 50/60 Hz Fuente de alimentación Baterías: 12 V Consumo de energía 48 W Consumo en Standby <0.5 Watt Conexión AUX 3,5 mm Conexión de micrófono 6,3 mm Rango de temperatura de 5 °C – +35 °C funcionamiento Ver 5.0 Frecuencias de recepción 87,5 - 108 MHz...
  • Seite 71: Seguridad Del Láser

    EXPLICACIÓN SÍMBOLOS DEL DISPOSITIVO CAUTION RISK OF ELECTRIC SHOCK DO NOT OPEN ATENCIÓN: PARA REDUCIR EL RIESGO DE DESCARGAS ELÉCTRICAS Y LESIONES PERSONALES, NO ABRA LA CARCASA. NO HAY PIEZAS QUE PUEDAN SER REPARADAS POR EL USUARIO DENTRO DE LA UNIDAD. EN CASO DE REPARACIÓN, CONTACTE SÓLO CON PERSONAL CUALIFICADO.
  • Seite 72: Instrucciones De Seguridad

    INSTRUCCIONES DE SEGURIDAD Lea las instrucciones. Todas las instrucciones de uso deben ser leídas antes de usar el aparato. • Los niños a partir de los 8 años de edad y las personas con discapacidades mentales, sensoriales y físicas sólo podrán utilizar el dispositivo si un supervisor responsable les ha familiarizado a fondo con las funciones y las precauciones de seguridad y comprenden los riesgos asociados.
  • Seite 73 dispositivos de desconexión son los enchufes del dispositivo. • El enchufe de la red del aparato no debe estar bloqueado O debe ser fácilmente accesible cuando se utiliza según lo previsto. • La batería no debe ser expuesta a un calor excesivo como la luz del sol, el fuego o similares.
  • Seite 74: Descripción Del Aparato

    DESCRIPCIÓN DEL APARATO...
  • Seite 75 Pantalla Altavoces de diseño Altavoz izquierdo/derecho Toma de auriculares Ranura para tarjetas SD Conexión USB Indicador Standby/acoplamiento Conector AUX-IN Anillo decorativo altavoz pasivo 10 Control de volumen Tecla de función 12 EQ/botón de luz 13 Tecla de programa/modo 14 Pista anterior/ rebobinado rápido/ -10 15 Compartimento de los CD 16 Próxima pista;...
  • Seite 76 Mando a distancia Tecla de función Próxima pista; avance rápido Silenciador 12 ID3 Botón de memoria 13 Subir/bajar el volumen Botón de EQ 14 Botón de la luz Carpetas; 10 M; arriba/abajo 15 Mono/ Estéreo Pista anterior/rebobinar 16 Standby Reproducir/Pausar/Tecla de 17 Sensor del mando a distancia selección 18 Compartimento de la batería...
  • Seite 77 Usando el control remoto Para manejar la unidad con el mando a distancia, apunte el mando a distancia hacia el sensor remoto en la parte delantera de la unidad y pulse el botón correspondiente en el mando a distancia. El control remoto funciona mejor dentro de un rango de 6 ~ 7 metros desde el frente de la unidad y en un ángulo de 30 grados.
  • Seite 78: Funciones Básicas

    Fuente de alimentación El dispositivo funciona con corriente alterna a través del cable de alimentación. Enchufe de alimentación Inserte el enchufe del aparato en una toma de corriente doméstica estándar. La alimentación de la pila se desconecta automáticamente cuando se inserta el enchufe en el enchufe de la pared. Este dispositivo está diseñado como una fuente de alimentación conmutada con un rango de voltaje de 100 V a 240 V.
  • Seite 79: Fm-Radio

    Función de ecualización: Esta unidad tiene un sistema de ecualización incorporado. Durante la reproducción, presione el botón EQ/LIGHT de la unidad o el botón EQ del mando a distancia para seleccionar un estilo de música diferente: FLAT, CLASSIC, ROCK, POP o JAZZ. Sistema ID3: Esta unidad tiene un sistema ID3.
  • Seite 80: Dab-Radio

    3. Extienda la antena de FM en toda su longitud y muévala suavemente hacia atrás y adelante para una mejor recepción. Además, asegúrese de que el dispositivo esté instalado en un lugar abierto. 4. Pulse el botón FUNC. de la unidad o del mando a distancia para cambiar a otras funciones, o pulse el botón STANDBY de la unidad o del mando a distancia para apagar la unidad.
  • Seite 81 estación de la lista. 2. Gire el dial para seleccionar una emisora de la lista o pulse TUN + /⏭ o TUN- /⏮ en el mando a distancia para buscar la lista de emisoras. Pulse PLAY / PAUSE / PAIR / SELECT en la unidad o PLAY / PAUSE / SELECT en el mando a distancia para confirmar.
  • Seite 82 INFO de la unidad o pulse el botón P-MODE/INFO cada vez para mostrar la siguiente serie de información a medida que se desplaza: texto DLS, información DL Plus (esta información se muestra sólo si es emitida por la estación), intensidad de la señal, tipo de programa, nombre del conjunto, número de canal/frecuencia, tasa de error de la señal y velocidad de bits.
  • Seite 83: Cd/Mp3

    "NO". Pulse PLAY / PAUSE / PAIR / SELECT en la unidad o PLAY / PAUSE / SELECT en el mando a distancia para confirmar. Versión de software La versión actual del software se muestra aquí. Pulse el botón STOP/MENU/INFO de la unidad o el botón STOP/MENU del mando a distancia para entrar en la selección del menú.
  • Seite 84 compartimento no puede ser reproducido, la pantalla mostrará "NO DISC". Reproducción de CD • Después de leer el CD, la reproducción se inicia automáticamente en la primera pista. Para detener la reproducción, pulse el botón ⏯ en la unidad o en el •...
  • Seite 85 Creación de una lista de reproducción Cuando el CD se detiene, se pueden almacenar hasta 20 CDs y 99-MP3s en cualquier orden. 1. En el modo Stop, pulse el botón PROG./P-MODE de la unidad o el botón MEM del mando a distancia para activar la función de memoria. PROG" y "P01"...
  • Seite 86: Usb

    ⏹ hasta que pulse 2. Para cancelar la función de repetición, pulse PROG./P-MODE en la unidad o P-MODE en el mando a distancia. "REP-ALL" desaparece de la pantalla. Repetición de carpeta (sólo para los discos MP3 que contienen más de una carpeta) 1.
  • Seite 87: Tarjeta Sd

    seleccionar el modo USB. 2. Conecte el dispositivo de memoria USB al puerto USB. La pantalla muestra el número total de canciones almacenadas en la memoria USB. La reproducción se inicia automáticamente a partir de la pista 1 después de la reproducción de la memoria USB. 3.
  • Seite 88: Bt-Función

    BT-FUNCIÓN 1. Presione el botón FUNC. en la unidad o en el control remoto para cambiar a la función BT “BT" aparece en la pantalla y el indicador de emparejamiento parpadea a alta velocidad. 2. Encienda la función BT de la unidad. Busque la Soundblaster M en la lista de dispositivos de su dispositivo BT externo.
  • Seite 89: Cuidado De Los Cd

    CUIDADO DE LOS CD Sólo use CD con el símbolo que aparece a la izquierda. Manipulación de los CD • Retire el CD de su cubierta protectora e introdúzcalo en el compartimento para CD de la unidad. • Evite tocar la superficie de grabación reflectante. •...
  • Seite 90: Retirada Del Aparato

    RETIRADA DEL APARATO Si el aparato lleva adherida la ilustración de la izquierda (el contenedor de basura tachado) entonces rige la normativa europea, directiva 2012/19/UE. Este producto no debe arrojarse a un contenedor de basura común. Infórmese sobre las leyes territoriales que regulan la recogida separada de aparatos eléctricos y electrónicos.
  • Seite 91 Gentile cliente, La ringraziamo per aver acquistato il dispositivo. La preghiamo di leggere attentamente le seguenti istruzioni per l’uso e di seguirle per evitare possibili danni tecnici. Non ci assumiamo alcuna responsabilità per danni scaturiti da una mancata osservazione delle avvertenze di sicurezza e da un uso improprio del dispositivo.
  • Seite 92: Dati Tecnici

    DATI TECNICI Numero articolo 10035222 100-240 V~ 50/60 Hz Alimentazione Batteria: 12 V Consumo energetico 48 W Consumo in standby <0.5 Watt Connessione AUX 3,5 mm Connessione microfono 6,3 mm Temperatura di utilizzo 5 °C – +35 °C Ver 5.0 Frequenze di ricezione 87,5 - 108 MHz DAB+ 174,926 MHz –...
  • Seite 93 SPIEGAZIONE DEI SIMBOLI DEL DISPOSITIVO CAUTION RISK OF ELECTRIC SHOCK DO NOT OPEN ATTENZIONE: NON APRIRE L’ALLOGGIAMENTO ONDE EVITARE SCOSSE ELETTRICHE E GRAVI LESIONI PERSONALI. IL PRODOTTO NON CONTIENE COMPONENTI CHE NECESSITANO DI ASSISTENZA DA PARTE DEL CLIENTE. RIVOLGERSI ESCLUSIVAMENTE A TECNICI QUALIFICATI.
  • Seite 94: Avvertenze Di Sicurezza

    AVVERTENZE DI SICUREZZA Leggere le istruzioni. Tutte le istruzioni per l'uso devono essere lette prima di utilizzare l'apparecchio. • Questo dispositivo può essere utilizzato dai bambini maggiori di 8 anni e dalle persone con limitate capacità fisiche, sensoriali o mentali o da persone con esperienza e conoscenze insufficienti, solo se sono stati informati sulle funzioni del dispositivo e sono consapevoli dei rischi e dei pericoli connessi.
  • Seite 95: Alimentazione Elettrica

    necessario staccare la spina del dispositivo. • La spina di rete dell'apparecchio non deve essere bloccata OPPURE deve essere facilmente accessibile quando viene utilizzata come previsto. • La batteria non deve essere esposta a calore eccessivo come la luce del sole, il fuoco o simili.
  • Seite 96: Descrizione Del Dispositivo

    DESCRIZIONE DEL DISPOSITIVO...
  • Seite 97 Schermo Anello di design altoparlante Altoparlanti sinistro/destro Connessione cuffie Vano schede SD Connessione USB Indicazione standby/accoppiamento Connessione AUX IN Anello decorativo altoparlante passivo 10 Regolazione volume Tasto funzioni 12 Tasto EQ/luce 13 Tasto programma/modalità 14 Titolo precedente/tornare indietro rapidamente/-10 15 Sportello vano CD 16 Titolo successivo/avanzare rapidamente/+10 17 Stop/Menu/Info 18 Play/Pausa/Accoppiamento/Selezione...
  • Seite 98 Telecomando Tasto funzioni Titolo successivi/avanzare Muto rapidamente Tasti di salvataggio 12 ID3 Tasto EQ 13 Alzare/abbassare il volume Cartella/10 M/in alto/in basso 14 Luce Titolo precedente/tornare 15 Mono/Stereo indietro rapidamente 16 Standby Play/Pausa/Selezione 17 Sensore telecomando Modalità P/ Info 18 Vano batterie Stop/Menu 10 Accoppiamento Nota: prima di utilizzare il telecomando, rimuovere la protezione del vano...
  • Seite 99 Utilizzare il telecomando Per utilizzare il telecomando, rivolgerlo verso il sensore sul lato anteriore del dispositivo e premere il tasto desiderato. Il telecomando funziona al meglio entro una distanza di 6-7 metri dal lato anteriore del dispositivo e a un’inclinazione di 30 gradi. Luce del sole intensa o cattive condizioni di luminosità...
  • Seite 100: Funzioni Di Base

    Alimentazione Il dispositivo funziona tramite il cavo di alimentazione con corrente alternata. Spina Inserire la spina del dispositivo in una presa di corrente casalinga. Il collegamento della batteria viene interrotto automaticamente. L’alimentazione a batteria viene fermata non appena si inserisce la spina nella presa elettrica.
  • Seite 101 Funzione EQ: questo dispositivo è dotato di un sistema di equalizzazione integrato. Durante la riproduzione, premere EQ/LIGHT sul dispositivo o EQ sul telecomando per selezionare un genere musicale: FLAT, CLASSIC, ROCK, POP e JAZZ. Sistema ID3: questo dispositivo è dotato di sistema ID3. Quando è disponibile un file MP3 in formato ID3, il dispositivo cerca automaticamente informazioni su titolo, artista e album da mostrare sul display.
  • Seite 102: Fm-Radio

    FM-RADIO Impostare emittenti radio 1. Premere FUNC su dispositivo o telecomando per selezionare la funzione radio. 2. Impostare l’emittente desiderata girando la manopola sul dispositivo o premendo TUN + / ⏭ o TUN - / ⏮ sul telecomando. Sullo schermo viene mostrata la frequenza, ad es.: FM 97,10 MHz.
  • Seite 103: Dab-Radio

    DAB-RADIO In modalità DAB si riceve la radio digitale DAB/DAB+ e vengono mostrate sullo schermo informazioni sulle relative emittenti. Premere FUNC fino a quando sullo schermo compare “Welcome to DAB”. 1. Per effettuare una ricerca completa, premere STOP/MENU/INFO sul dispositivo o premere STOP/MENU sul telecomando. Si raggiunge la selezione del menu, dove è...
  • Seite 104 Salvataggio manuale delle emittenti Per realizzare un’impostazione manuale, premere STOP/MENU/INFO sul dispositivo o STOP/MENU sul telecomando per raggiungere la selezione del menu. Selezionare l’opzione “manual tune” e premere PLAY/PAUSE/ PAIR/SELECT sul dispositivo o PLAY/PAUSE/SELECT sul telecomando per confermare. Ruotare la manopola sul dispositivo o utilizzare TUN - / ⏮ o TUN + / ⏭...
  • Seite 105: Cd/Mp3

    impostazioni realizzate potrebbero andare perse e si torna ai valori standard originali, incluse la lista di emittenti DAB e quella delle emittenti salvate. Premere STOP/MENU/INFO sul dispositivo o STOP/MENU sul telecomando per raggiungere la selezione del menu. Ruotare la manopola sul dispositivo o utilizzare TUN- /⏮...
  • Seite 106 2. Prima di premere altri pulsanti, attendere che il lettore abbia riprodotto completamente il CD. 3. Se non c'è un CD nel vano CD o se il CD nel vano non può essere riprodotto, il display mostrerà "NO DISC". Riproduzione di CD •...
  • Seite 107 1. Premere PROG./P.MODE sul dispositivo o MEM sul telecomando in modalità Stop per attivare la modalità di salvataggio. Sullo schermo del dispositivo compaiono “PROG” e “P01”. 2. Premere ⏭/+10 o ⏮/-10 sul dispositivo o TUN+/⏭ o TUN-/⏮ sul telecomando per selezionare il primo titolo da salvare (ad es. titolo 2). 3.
  • Seite 108: Usb

    Riproduzione casuale 1. Durante la riproduzione, premere ripetutamente PROG./PMODE sull'unità o P-MODE sul telecomando fino a quando sul display appare "RANDOM". Le tracce vengono riprodotte in ordine casuale. 2. Per annullare la riproduzione casuale, premere PROG./PMODE sull'unità o P-MODE sul telecomando. "RANDOM" scompare dal display. Riprodurre l’intro dei brani 1.
  • Seite 109: Scheda Sd

    SCHEDA SD 1. Premere FUNC su dispositivo o telecomando per selezionare la modalità 2. Inserire una scheda SD nella relativa connessione. Lo schermo mostra i brani totali salvati sulla scheda SD. La riproduzione inizia automaticamente dal primo titolo dopo la lettura della scheda SD. 3.
  • Seite 110: Aux-In

    AUX-IN 1. Premere il tasto FUNC. sull'unità o sul telecomando per selezionare la modalità AUX. 2. Inserire la spina del cavo AUX nel connettore AUX IN. La musica del dispositivo collegato viene riprodotta attraverso gli altoparlanti. 3. Regolare il volume dell'apparecchio o del telecomando. 4.
  • Seite 111: Cura Dei Cd

    CURA DEI CD Utilizzare solo CD che presentano il simbolo qui accanto. Gestione dei CD • Togliere il CD dalla custodia e metterlo nel vano CD del dispositivo. • Evitare di toccare la superficie riflettente di registrazione. • Non incollare adesivi sul CD e non scriverci sopra. •...
  • Seite 112: Smaltimento

    SMALTIMENTO Se sul prodotto è presente la figura a sinistra (il cassonetto dei rifiuti mobile sbarrato), si applica la direttiva europea 2012/19/UE. Questi prodotti non possono essere smaltiti con i rifiuti normali. Informarsi sulle disposizioni vigenti in merito alla raccolta separata di dispositivi elettrici ed elettronici. Non smaltire i vecchi dispositivi con i rifiuti domestici.

Diese Anleitung auch für:

10035222

Inhaltsverzeichnis