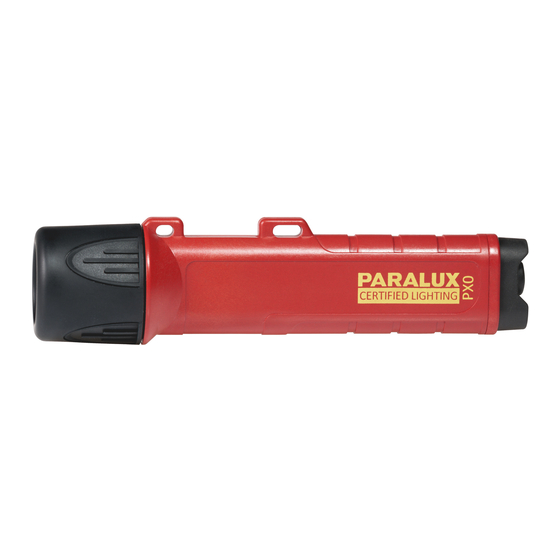
PARALUX PX0 Bedienungsanleitung Und Wichtige Hinweise
Quicklinks
9600115-3/V2
DEU
GB
FRA
ESP
ITA
POL
NL
Bedienungsanleitung und wichtige Hinweise / • Operating instructions and important notes /
• Mode d'emploi et remarques importantes / • Instrucciones de empleo e indicaciones import-
antes / • Istruzioni per l'uso e avvertenze importanti / • Instrukcja obsługi i ważne wskazówki /
• Käyttöohje ja tärkeitä huomautuksia
1
6
• Druckschalter /
• Push button /
• Commutateur à pression /
• Interruptor de pulsador /
• Interruttore a pressione /
• Przełącznik /
• Drukschakelaar
2
• PX 0 Gehäuse /
• PX 0 housing /
• Boîtier PX 0 /
• Cuerpo de la PX 0/
• Corpo PX 0 /
• Obudowa PX 0 /
• Behuizing PX 0
3
• O-Ring /
• O-ring /
• Joint torique /
• Junta tórica /
• O-ring /
4
• Pierścień uszczelniający /
• O-ring
5
• Reflektor mit Leuchtmittel LED weiß /
• Reflector with white LED bulb /
• Réflecteur avec ampoule LED, blanche /
• Reflector con LED blanco /
• Riflettore con lampadina LED di colore bianco /
• Reflektor z białymi diodami LED jako /
• Reflector met witte LED
Leuchtmittel / Bulbs / Ampoules / Fuentes de luz / Lampadina / Źródła światła / Lamp
• Reflektor mit Leuchtmittel LED weiß /
• Reflector with white LED bulb /
• Réflecteur avec ampoule LED blanche /
• Reflector con LED blanco /
• Riflettore con lampadina LED dicolor bianco /
• Reflektor z białymi diodami LED jako /
123
• Reflector met witte LED
RG-2 Achtung: Bei Betrieb nicht für längere Zeit in die Lichtquelle blicken. Kann
für Augen schädlich sein. T
25s <200mm (EN 62471)
max.
RG-2 Caution: Do not look into the light source for a long time during operation.
May be harmful to eyes. Tmax. 25s <200mm (EN 62471)
RG-2 Attention : Ne pas regarder longtemps la source de lumière en marche. Cela
peut être nocif pour les yeux Tmax 25 s <200 mm (EN 62471)
¡Atención, RG-2!: no mire a la fuente de luz de forma prolongada durante el fun-
cionamiento. Puede causar lesiones oculares. Tmáx. 25 s < 200 mm (EN 62471)
RG-2 Attenzione: non fissare la fonte di luce per un lungo periodo di tempo
durante il suo funzionamento. Potrebbe essere dannosa per gli occhi. Tmax. 25s
<200mm (EN 62471)
RG-2 Uwaga: Podczas działania lampy nie należy patrzeć przez dłuższy czas na
źródło światła. Może to być szkodliwe dla oczu. Tmax. 25s <200mm (EN 62471)
RG-2 Let op: Indien in werking niet gedurende langere tijd in de lichtbron kijken.
Kan schadelijk zijn voor de ogen. Tmax. 25 s < 200 mm (EN 62471)
Before each start-up, perform a visual inspection for functionality and possible damage.
Only use the lamp in flawless condition. Cleaning, inspection and repair work in non-ha-
GB
zardous areas only!
Unscrew the lamp head from the housing and take out the old batteries. Insert two AA batteries
into the first battery chamber in the same direction, starting either with the positive or with the
negative poles. Thanks to the reverse polarity protection of the PX 0, the batteries can be inserted
in either direction. Then insert the second two AA batteries into the empty battery chamber. These
two batteries must be inserted in the same direction as each other but in the opposite direction
from the first two batteries. Then position the lamp head onto the housing and screw it on.
Warning: The safety light must be operated only with batteries of the following types, since
only these battery types are covered by the ATEX and IECEx certifications.
Energizer Classic 1,5V AA LR6 / Duracell Plus 1,5V AA LR6 / Duracell Procell 1,5V AA LR6 /
Duracell Simply 1,5V AA LR6 / Energizer Ultimate Lithium1,5V AA LR6 / Duracell Plus Power
1,5V AA LR6 / Duracell Industrial 1,5V AA LR6/ VARTA Industrial Pro 1,5V AA LR6 / VARTA
Industrial 1,5V AA LR6.
Warnings concerning batteries:
Gases or corrosive substances may escape from batteries. You must therefore always use batteries
of the same type, age and make, check batteries for damage, leakage and corrosion before use,
take the batteries out if the light is not to be used for some time and follow the instructions of the
battery manufacturers.
Cleaning:
There is risk of ignition due to electrostatic charging on the plastic parts of the lamp! Clean the
lamp glass and housing only with cold or lukewarm water (using a mild cleaning agent if neces-
sary) and a viscose sponge or a soft, non-fibrous cloth!
Switching on and off:
Press the push button on the end of the light. Before the light is switched on, the lamp head must
be screwed firmly in place.
O-ring:
Before switching the light on, always check the O-ring and ensure it is not damaged. Keep the
O-ring clean; when replacing the O-ring, do not use any tools.
Safety notes:
Do not open up the light in areas with (potentially) explosive atmospheres. The light must only
be operated in the ambient temperature range -20°C to +40°C (PX 1 with LED Module 123). Do
not expose the light to prolonged, direct sunlight. Do not stand the light on its lamp head unless
it is switched off. Only use genuine spare parts supplied by the manufacturer. The equipment is
designed to satisfy the requirements of Clauses 1.2.7 and 1.0.6 of the Essential Health and Safety
Requirements Annex II, 1.0.6. of the ATEX Directive 2014/34/EU. Take suitable precautions if the
equipment may become exposed to excessive external stresses e.g. vibrations, heat or impacts.
Replacement of entire reflector/bulb unit:
Unscrew the lamp head and take out the reflector/bulb unit. Install a new unit, and screw the lamp
head tightly back on.
Important information on how to dispose of batteries and accumulators:
According to the Directive 2006/66/EU (in Germany - Batteries Act—BattG), every user is
obligated by law to return all used batteries (rechargeable and non-rechargeable). Batteries and
accumulators must not be disposed of with household waste. In Germany, old batteries can be han-
ded over free of charge at the local collection point, or returned to any shop that selling batteries
of this kind (please note that regulations in other countries may differ). If you have purchased any
batteries from us, you can return them after use by sending them (freepost) to the address below.
This makes an important contribution towards protecting our environment!
Cd (cadmium)
Hg (mercury)
Send all complaints or returns to:
PARAT GmbH + Co. KG
Schönenbach Straße 1, Tor 11, DE 94089 Neureichenau / Germany subject to item and technical
modifications at any time. We cannot be held liable for errors and omissions.
* = 15 hours of full brightness with one set of batteries, followed by reduced light output.
Prima di ogni utilizzo, effettuare un controllo visivo del funzionamento e di eventuali
danni. Utilizzare la torcia solo se in perfette condizioni. Eseguire i lavori di pulizia, ispe-
ITA
zione e riparazione solo in aree non pericolose!
Svitare la testa della torcia dal corpo. Rimuovere le batterie scariche. Introdurre 2 batterie AA in
serie nel primo vano batterie con i poli positivi in avanti oppure con i poli negativi in avanti, grazie
alla protezione bipolare del PX 0 la posizione delle batterie è indifferente. Poi introdurre nel vano
batterie libero le altre due batterie AA in serie, ma in posizione opposta rispetto a quelle del primo
vano batterie. Applicare la testa della torcia sul corpo, avvitarla e serrarla a fondo.
Avvertenza: la luce d'emergenza funziona solo con batterie dei seguenti tipi, poiché solo questi
tipi di batterie sono certificati ATEX e IECEx.
Energizer Classic 1,5V AA LR6 / Duracell Plus 1,5V AA LR6 / Duracell Procell 1,5V AA LR6 /
Duracell Simply 1,5V AA LR6 / Energizer Ultimate Lithium1,5V AA LR6 / Duracell Plus Power
1,5V AA LR6 / Duracell Industrial 1,5V AA LR6/ VARTA Industrial Pro 1,5V AA LR6 / VARTA
Industrial 1,5V AA LR6.
Avvertenze per le batterie:
Dalle batterie possono fuoriuscire gas/soluzioni corrosive, per cui: utilizzare sempre batterie dello
stesso tipo, della stessa marca e della stessa età; verificare che le batterie non presentino danni,
perdite o corrosione. Rimuovere le batterie in caso di mancato utilizzo della torcia per un lungo
periodo di tempo. Seguire le indicazioni del produttore delle batterie.
Pulizia:
Esiste il pericolo di ignizione a causa della carica elettrostatica presente sulle parti in plastica della
torcia! Pulire il vetro e il corpo della torcia con acqua fredda o tiepida (se necessario con un deter-
gente delicato) e una spugna di viscosa o un panno morbido non fibroso!
Accensione e spegnimento:
Azionare l'interruttore a pressione sull'estremità della torcia. A tale scopo la testa della torcia deve
essere avvitata saldamente.
O-ring:
Prima dell'uso della torcia verificare ogni volta che gli O-ring non siano danneggiati. Tenere puliti
gli O-ring, non utilizzare utensili per la sostituzione degli O-ring.
Avvertenze di sicurezza:
La torcia non deve essere aperta in zone a rischio di esplosione / deflagranti. L'escursione termica
massima della temperatura ambiente è compresa tra -20°C e +40°C (PX 1 con modulo LED 123).
La torcia deve essere protetta dall'esposizione prolungata alla radiazione solare diretta.
Appoggiare la testa della torcia su una superficie soltanto quando la torcia è spenta. Utilizzare
esclusivamente ricambi originali della casa produttrice. Il dispositivo è conforme ai requisiti di cui
ai paragrafi 1.2.7 e 1.0.6 dei requisiti essenziali in materia di sicurezza e di salute, allegato II della
Direttiva 2014/34/EU. Se il dispositivo può essere esposto a sollecitazioni esterne eccessive, come
per esempio vibrazioni, calore o urti è necessario prevedere idonee misure di protezione.
Sostituzione dell'intero riflettore / gruppo lampada:
Svitare la testa della torcia, estrarre il riflettore / gruppo lampada e sostituirlo con uno nuovo.
Avvitare la testa della torcia e serrarla.
Avvertenze importanti per il corretto smaltimento delle batterie e degli accumulatori:
Ai sensi della Direttiva 2006/66/CE (in Germania: „Batteriegesetz – BattG", legge tedesca sulle
batterie) ogni consumatore è legalmente tenuto a restituire le batterie e gli accumulatori usati o
esausti. Ne è vietato lo smaltimento con i rifiuti domestici. In Germania, le batterie e gli accumu-
latori esausti si possono portare gratuitamente presso i centri di raccolta comunali nonché presso
i luoghi dove sono in vendita le tipologie di batteria o accumulatore in questione (attenzione: le
normative di altri paesi potrebbero prevedere modalità diverse di smaltimento). Inoltre, avete la
possibilità di inviare le batterie da noi fornite all´indirizzo sotto indicato dopo l´uso (spese a carico
del destinatario). ll vostro è un contributo importante alla tutela dell´ambiente!
Cd (cadmio)
Hg (mercurio)
Inviare eventuali reclami e resi esclusivamente a:
PARAT GmbH + Co. KG
Schönenbach Straße 1, Tor 11, DE 94089 Neureichenau / Germany
Con riserva di modifiche tecniche e dell'articolo in qualsiasi momento e salvo indicazioni errate o
errori di scrittura.
* = 15 ore di luminosità piena con una serie di batterie, poi la potenza luminosa diminuisce.
• Technische Daten / • Technical data / • Caractéristiques techniques / • Datos técnicos /
• Dati tecnici / • Dane techniczne / • Technische gegevens
Ø
~ 167 mm / Ø ~ 41 mm
• Leuchtenkopf /
• Lamp head /
• Tête de la torche /
• LED weiß /
• Cabezal de la linterna /
• White LED /
• Testa della torcia /
• Głowica latarki /
• Lampenkop
• Material / • Material / • Matériau / • Material / • Materiale / • Materiał / • Materiaal
XAG
• 4x Alkaline LR6,
• Einsetzbare Leuchtmittel / • Suitable bulbs / • Ampoules intégrables /
je 1,5 V / 1.5 V each / 1,5 V chac. /
• Fuentes de luz utilizables / • Lampadine utilizzabili / • Stosowane źródła światła /
4 pilas alcalinas LR6 /
• Lampen die gebruikt kunnen worden
1,5 V ciascuna /
po 1,5 V każda / elk 1,5 V
LED weiß / white
• Zertifizierungen ATEX Zone 0/21 / • ATEX zone 0/21 certifications / • Certifications zone
0/21 ATEX / • Homologaciones ATEX zona 0/21 / • CertificazioniATEX zona 0/21 / • Certyfi-
katyATEX strefa 0/21 /• Certificeringen ATEX zone 0/21
PARAT GMBH + CO. KG, 94089 NEUREICHENAU, GERMANY
PX0 XAG – PARALUX CERTIFIED LIGHTING
WARNING | DO NOT OPEN IN HAZARDOUS AREA | CHECK INSTRUCTIONS BEFORE USE
LED 123
II 1G
II 2D
BVS 13 ATEX E021 X
www.lighting.parat.de
Avant chaque mise en service, procéder à un contrôle visuel du fonctionnement et de l'en-
dommagement. Utilisation de la lampe uniquement en bon état. Effectuer des travaux de
FRA
nettoyage, d'inspection et de réparation uniquement dans des zones non dangereuses!
Dévissez la tête de la torche du boîtier. Retirer les piles usagées. Installez deux piles AA en série
dans le premier compartiment en commençant soit par le pôle positif, soit par le pôle négatif. La
protection bipolaire de la torche PX 0 permet le choix. Installez maintenant les deux autres piles
AA en série dans l'autre compartiment à piles mais dans le sens inverse des piles installées en
premier. Remontez la tête de la torche sur le boîtier.
Attention: cette torche de sécurité ne doit être utilisée qu'avec les suivants types de piles car ce
sont les seules piles homologuées selon la norme ATEX / IECEx.
Energizer Classic 1,5V AA LR6 / Duracell Plus 1,5V AA LR6 / Duracell Procell 1,5V AA LR6 /
Duracell Simply 1,5V AA LR6 / Energizer Ultimate Lithium1,5V AA LR6 / Duracell Plus Power
1,5V AA LR6 / Duracell Industrial 1,5V AA LR6/ VARTA Industrial Pro 1,5V AA LR6 / VARTA
Industrial 1,5V AA LR6.
Avertissement relatif aux piles :
Des gaz/solutions corrosives peuvent s'échapper des piles. Utilisez donc toujours des piles du
même type, de la même marque et de la même ancienneté. Contrôlez l'absence de dommages,
de fuites et de corrosion avant l'utilisation. Enlevez les piles si la torche n' e st pas utilisée pour une
période prolongée. Respectez les instructions du fabricant.
Nettoyage :
Les éléments en matière plastique de la torche risquent d'inflammation par une charge électrost-
atique ! Nettoyer le verre et le boîtier de la torche uniquement avec de l' e au froide ou tiède (le cas
échéant un détergent doux) et une éponge de viscose ou bien un chiffon doux et non fibreux !
Mise en service / hors service :
Appuyez le commutateur à pression situé à l'extrémité de la torche. La tête de la torche doit être
correctement vissée.
Joint torique:
Contrôlez l' é tat correct du joint torique avant toute mise en service de la torche. Le joint torique
doit être propre. L' é change du joint torique doit être fait sans outils.
Remarques relatives à la sécurité:
La torche ne doit pas être ouverte dans des atmosphères potentiellement explosives ou explosives.
La plage de température ambiante autorisée va de -20 °C à +40°C (PX 1 avec un module LED
123). Protégez la torche contre l' e nsoleillement direct prolongé. Ne posez jamais la torche sur la
tête lorsqu' e lle est encore en service. N'utilisez que les pièces originales du fabricant. Cet appareil
répond aux exigences des paragraphes 1.2.7 et 1.0.6 des Règles fondamentales relatives à la santé et
à la sécurité, Annexe II de la directive ATEX 2014/34/EU.
Il faut prendre les précautions appropriées s'il y a risque que l'appareil soit exposé à des sollicita-
tions externes excessives (p. ex.vibrations, chaleur, chocs).
Échange de l'ensemble réflecteur ampoule:
Desserrez la tête de la torche. Retirez le réflecteur/ampoule. Échangez l'ensemble. Refermez la tête
de la torche.
Avis important pour l'élimination de piles et de piles rechargeables:
En vertu de la directive 2006/66/CE (loi sur les piles et les accumulateurs (loi allemande BattG))
le consommateur est tenu de faire recycler toutes les piles et piles rechargeables usagées. Il y inter-
diction de les jeter avec les ordures ménagères. En Allemagne, toutes les piles et piles rechargeables
usagées peuvent être remises gratuitement aux points de collecte publics de la commune ainsi qu'à
tous les points de vente de ce type de piles et de piles rechargeables (veuillez noter que cette procé-
dure peut différer d'un pays à un autre). Vous pouvez également retourner les piles comprises dans
la livraison gratuitement à l'adresse mentionnée ci-dessous (livraison gratuite à domicile). Vous
contribuerez ainsi à la protection de l' e nvironnement!
Pb (lead)
Cd (cadmium)
Réclamations / Retours seulement à
PARAT GmbH + Co. KG
Schönenbach Straße 1, Tor 11, DE 94089 Neureichenau / Allemagne
Sous réserve de modifications sans préavis du produit et des caractéristiques techniques et sous
réserve de fautes de frappe et d'informations éronnées.
* = Un jeu de piles pour 15 heures de lumière, ensuite luminosité réduite.
www.lighting.parat.de
Przed każdym uruchomieniem należy przeprowadzić kontrolę wzrokową pod względem
działania i uszkodzeń. Lampę należy używać tylko wtedy, gdy jest w idealnym stanie.
POL
Prace związane z czyszczeniem, inspekcją i naprawą należy wykonywać tylko w mie-
jscach nie stanowiących jakiegokolwiek zagrożenia!
Wykręcić głowicę lampy z obudowy. Wyjąć zużyte baterie. Włożyć do pierwszej komory 2 baterie
typu AA, rozpoczynając albo od biegunowości dodatnich albo ujemnych; dzięki stykom dwubie-
gunowym reflektora można dowolnie wybrać biegunowość. Następnie należy włożyć pozostałe
baterie tego samego typu do wolnej komory, ale biegunami odwrotnie do uprzednio wybranej
pozycji. Przyłożyć głowicę lampy do obudowy, przykręcić głowicę i dokręcić ją.
Uwaga: Dla lampy bezpieczeństwa proszę stosować tylko następujące typy baterii, ponieważ
jedynie te typy baterii posiadają certyfikację ATEX lub też IECEx.
Energizer Classic 1,5V AA LR6 / Duracell Plus 1,5V AA LR6 / Duracell Procell 1,5V AA LR6 /
Duracell Simply 1,5V AA LR6 / Energizer Ultimate Lithium1,5V AA LR6 / Duracell Plus Power
1,5V AA LR6 / Duracell Industrial 1,5V AA LR6/ VARTA Industrial Pro 1,5V AA LR6 / VARTA
Industrial 1,5V AA LR6.
Wskazówki dot. baterii:
Z baterii mogą się ulatniać gazy / wydobywać żrące substancje, dlatego należy zawsze: używać
wyłącznie baterii tego samego typu, daty produkcji i rodzaju budowy, przed każdym użyciem
sprawdzić baterie pod kątem uszkodzeń, wycieków, śladów korozji. W przypadku dłuższej przerwy
w używaniu lampy baterie należy wyjąć. Przestrzegać wskazówek producenta baterii.
Czyszczenie:
Istnieje niebezpieczeństwo zapłonu z powodu ładunków elektrostatycznych gromadzących się na
częściach plastikowych lampy! Szkło i obudowę lampy czyścić wyłącznie zimną lub letnią wodą (w
razie potrzeby z dodatkiem łagodnego środka czyszczącego) oraz gąbką wiskozową lub miękką,
niekłaczącą ściereczką!
Włączanie / wyłączanie:
Nacisnąć przełącznik na końcu latarki. Głowica lampy musi być mocno dokręcona.
Pierścień uszczelniający:
Przed każdym uruchomieniem lampy sprawdzić, czy pierścień uszczelniający nie jest uszkodzony.
Pierścień uszczelniający powinien być zawsze czysty, a do wymiany pierściena uszczelniającego nie
należy stosować żadnych narzędzi.
Wskazówki bezpieczeństwa:
Latarki nie wolno otwierać w środowisku zagrożonym wybuchem / wybuchowym. Maksymalne
temperatury graniczne otoczenia wynoszą od -20°C do +40°C (PX 1 z modułem diodowym 123).
Latrakę należy chronić przed dłuższą ekspozycją na promieniowanie słoneczne. Latarkę można
stawiać na głowicy lampy jedynie przy wyłączonej latarce.. Stosować wyłącznie oryginalne części
zamienne. Urządzenie spełnia wymagania zawarte w ustępach 1.2.7 i 1.0.6 podstawowych pr-
zepisów bezpieczeństwa i ochrony zdrowia oraz dodatku II do dyrektywy ATEX 2014/34/EU. Jeśli
urządzenie może być narażone na nadmierne zewnętrzne obciążenia, takie jak wibracje, wysoka
temperatura lub uderzenia, należy przewidzieć odpowiednie środki ochronne.
Wymiana całego reflektora / modułu ze źródłem światła:
Odkręcić głowicę lampy, reflektor / moduł źródła światła wyjąć i wymienić na nowy. Głowicę
lampy przykręcić i dokręcić ją.
Ważna wskazówka odnośnie usuwania baterii i akumulatorów:
Baterie i akumulatory zwierają silnie środki trujące! Zgodnie z wymogami Dyrektywy 2006/66/
WE (w sprawie baterii i akumulatorów oraz zużytych baterii i akumulatorów) każdy konsument
zobowiązany jest ustawowo do zwrotu wszystkich używanych i zużytych baterii i akumulatorów.
Usuwanie do odpadów komunalnych jest zabronione. Zużyte baterie i akumulatory można
zwracać nieodpłatnie w ogólnie dostępnych miejscach zbiórki organizowanych przez urzędy
miast i gmin oraz we wszystkich placówkach zajmujących się dystrybucją danego rodzaju baterii i
akumulatorów oraz sprzętu elektronicznego. Wprowadzone przez nas do obrotu baterie przesyłać
też można po ich zużyciu na podany poniżej adres (prosimy uwzględnić, iż w innych krajach
postępowanie może być odmienne od podanego tutaj). Stanowi to istotny wkład Państwa do
ochrony środowiska!
Pb (piombo)
Cd (kadm)
Reklamacje / zwroty należy kierować wyłącznie do:
PARAT GmbH + Co. KG
Schönenbach Straße 1, Tor 11, DE 94089 Neureichenau / Niemcy
Zastrzegamy sobie zmiany wyrobu oraz zmiany techiczne, a także możliwość błędnych danych
lub błędów drukarskich.
* = Komplet baterii zapewnia ok. 15 godzin pracy, po tym czasie zmniejsza się jasność świecenia
www.lighting.parat.de
~ 190 g, betriebsbereit ohne Zubehör
/ ready for operation without
accessories
• 4x Alkaline LR6,
je 1,5 V / 1.5 V each
~ 120 lm
~ 15 - 50 h*
~ 150m x ø 3 - 5 m
Ex ia op is IIC T4 Ga
Ex ib op is IIIC T105°C Db IP68
IECEx BVS 13.0034X
www.lighting.parat.de
Hg (mercure)
Pb (plomb)
www.lighting.parat.de
Hg (rtęć)
Pb (ołów)
www.lighting.parat.de
Vor jeder Inbetriebnahme, Sichtprüfung bezüglich Funktion und Beschädigung vor-
DEU
nehmen. Nutzung der Leuchte nur im einwandfreien Zustand. Reinigungs-, Inspek-
tions- und Reparaturarbeiten ausschließlich in nicht gefährdeten Zonen durchführen!
Wechseln der Batterien:
Leuchtenkopf vom Gehäuse abdrehen, leere Batterien entnehmen, 2 x AA Batterien in gleicher
Richtung in die erste Batteriekammer einsetzen, entweder beginnend mit den Pluspolen oder
beginnend mit den Minuspolen. Durch den Verpolungsschutz der PX 0 ist dies frei wählbar. Nun
die zwei weiteren AA Batterien in gleicher Richtung, aber umgekehrt zu der vorher gewählten
Position der Batterien in die freie Batteriekammer einsetzen. Leuchtenkopf auf das Gehäuse setzen,
zudrehen und festziehen.
Achtung: Die Sicherheitsleuchte darf nur mit den folgenden Batterietypen betrieben werden,
da nur diese Batterietypen eine ATEX- bzw. IECEx-Zertifizierung besitzhaben.
Energizer Classic 1,5V AA LR6 / Duracell Plus 1,5V AA LR6 / Duracell Procell 1,5V AA LR6 /
Duracell Simply 1,5V AA LR6 / Energizer Ultimate Lithium1,5V AA LR6 / Duracell Plus Power
1,5V AA LR6 / Duracell Industrial 1,5V AA LR6/ VARTA Industrial Pro 1,5V AA LR6 / VARTA
Industrial 1,5V AA LR6.
Warnhinweise zu Batterien:
Aus Batterien können Gase/ätzende Lösungen austreten, daher immer: ausschließlich Batterien
vom selben Typ, Alter und derselben Bauart verwenden, auf Beschädigung, Undichtigkeit und
Korrosion prüfen. Batterien bei längerer Nicht-Nutzung der Leuchte herausnehmen. Anweisungen
der Batterieherstellers befolgen.
Reinigung:
An den Kunststoffteilen der Leuchte besteht Zündgefahr durch elektrostatische Aufladung! Leuch-
tenglas und Gehäuse nur mit kaltem oder handwarem Wasser (ggf. mildes Reinigungdmittel) und
einem Viskoseschwamm bsw. einenweichen, nichtfasernden Tuch säubern!
Ein-Ausschalten:
Druckschalter am Leuchtenende betätigen. Der Leuchtenkopf muss hierzu fest aufgeschraubt sein.
O-Ring:
Vor jeder Inbetriebnahme der Leuchte O-Ring auf Beschädigung prüfen. O-Ring sauber halten,
zum Wechseln des O-Rings keine Werkzeuge verwenden.
Sicherheitshinweise:
Die Leuchte darf nicht in explosionsgefährdeten/fähigen Zonen geöffnet werden. Der max. Umge-
bungstemperaturbereich beträgt -20°C bis +40°C (PX 1 mit Led Module 123). Die Leuchte ist vor
länger, direkter Sonneneinstrahlung zu schützen. Die Leuchte nur in ausgeschaltetem Zustand auf
den Leuchtenkopf stellen. Ausschließlich Originalteile des Herstellers verwenden. Das Gerät erfüllt
die Anforderungen der Absätze 1.2.7 und 1.0.6 der Grundlegenden Gesundheits- und Sicher-
heitsanforderungen, Anhang II der ATEX Richtlinie 2014/34/EU. Wenn das Gerät übermäßigen
äußeren Belastungen wie zum Beispiel Vibrationen, Hitze oder Schlageinwirkungen ausgesetzt sein
könnte, müssen geeignete Schutzmaßnahmen vorgesehen werden.
Auswechseln des gesamten Reflektors/Leuchtmitteleinheit:
0158
Leuchtenkopf aufdrehen, Reflektor/Leuchtmitteileinheit herausnehmen und gegen neue austau-
schen. Leuchtenkopf zudrehen und festziehen.
Wichtiger Entsorgungshinweis zu Batterien und Akkus:
Jeder Verbraucher ist nach der Richtlinie 2006/66/EG (in Deutschland: Batteriegesetz – BattG)
gesetzlich zur Rückgabe aller ge- und verbrauchten Batterien bzw. Akkus verpflichtet. Eine Ent-
sorgung über den Hausmüll ist verboten. Alte Batterien und Akkus können unentgeltlich bei den
öffentlichen Sammelstellen der Gemeinden und überall dort abgegeben werden, wo Batterien und
Akkus der betreffenden Art verkauft werden. Sie können die von uns gelieferten Batterien auch
nach Gebrauch an die u.a. Adresse (frei Haus) senden. Sie leisten damit einen wesentlichen Beitrag
zum Umweltschutz!
Cd (Cadmium)
Hg (Quecksilber)
Reklamationen/Rücksendungen ausschließlich an:
PARAT GmbH + Co. KG
Schönenbach Straße 1, Tor 11, DE 94089 Neureichenau / Deutschland
Artikel- und technische Änderungen sowie irrtümliche Angaben oder Schreibfehler jederzeit
vorbehalten.
* = 15 Stunden volle Helligkeit bei 1 Satz Batterien, hiernach verringerte Lichtleistung
Antes de cada puesta en marcha, realice una inspección visual de funcionamiento y
posibles daños. Use la linterna únicamente si se encuentra en perfecto estado. ¡Realice
ESP
los trabajos de limpieza, inspección y reparación únicamente en áreas no peligrosas!
Desenrosque el cabezal del cuerpo de la linterna. Retire las pilas descargadas. Coloque 2 pilas
AA en serie, empezando por los polos positivos o por los polos negativos, en el primer comparti-
mento de pilas. Gracias a la protección bipolar de la PX 0, esta elección es totalmente opcional. A
continuación, coloque las otras dos pilas AA en serie, pero en la posición inversa a la que se había
elegido previamente, en el compartimento de pilas libre. Coloque el cabezal en el cuerpo de la
linterna y enrósquelo.
Atención: La linterna de seguridad solo se debe utilizar con los siguientes tipos de pilas, ya que
solo ellas cuentan con el certificado ATEX o IECEx.
Energizer Classic 1,5V AA LR6 / Duracell Plus 1,5V AA LR6 / Duracell Procell 1,5V AA LR6 /
Duracell Simply 1,5V AA LR6 / Energizer Ultimate Lithium1,5V AA LR6 / Duracell Plus Power
1,5V AA LR6 / Duracell Industrial 1,5V AA LR6/ VARTA Industrial Pro 1,5V AA LR6 / VARTA
Industrial 1,5V AA LR6.
Advertencias acerca de las pilas:
De las pilas se pueden filtrar gases o soluciones cáusticas. Por ello, emplee exclusivamente pilas del
mismo tipo, de la misma marca y de la misma antigüedad. Antes del uso, compruebe que las pilas
no presenten daños, fugas ni corrosión. Saque las pilas si no va a utilizar la linterna por un periodo
de tiempo prolongado. Respete las instrucciones del fabricante de las pilas.
Limpieza:
¡Existe riesgo de ignición por carga electrostática en los componentes de plástico de la linterna!
¡Limpie el cristal de la linterna y la carcasa únicamente con agua fría o tibia (o, si es necesario, con
un producto de limpieza suave) y una esponja de viscosa o un paño suave que no suelte pelusa!
Encendido y apagado:
Accione el pulsador en el extremo de la linterna. Para ello, es necesario que el cabezal de la linterna
esté bien enroscado.
Junta tórica:
Antes de la puesta en servicio de la linterna, compruebe que la junta tórica no presente daños.
Mantenga limpia la junta tórica. No emplee herramientas para cambiarla.
Indicaciones para su seguridad:
La linterna no se debe abrir en zonas donde haya peligro de explosión. El rango máx. de tempera-
turas ambiente es de -20 °C hasta + 40 °C (PX 1 con módulo LED 123). Proteja la linterna contra
la radiación solar prolongada y directa. Coloque la linterna apoyada en su cabezal únicamente
si está apagada. Emplee exclusivamente piezas originales del fabricante. Este aparato cumple los
requisitos de los apartados 1.2.7 y 1.0.6 de los requisitos básicos de salud y seguridad, Anexo II, de
la Directiva ATEX 2014/34/EU.
Si el aparato puede verse expuesto a esfuerzos exteriores excesivos, como, por ejemplo, vibraciones,
calor o impactos, se deberán prever medidas de protección adecuadas.
Cambio del reflector y de la fuente de luz:
Desenrosque el cabezal de la linterna, saque el reflector/la bombilla o LED y sustitúyalo por el
elemento nuevo. Enrosque y apriete el cabezal de la linterna.
Información importante sobre la eliminación de pilas y baterías:
Todos los consumidores están obligados por ley, según lo establecido en la Directiva 2006/66/CE
del Parlamento Europeo y del Consejo (en Alemania: Ley sobre pilas y baterías / BattG) a devolver
todas las pilas y baterías usadas y desgastadas. Está prohibido eliminar las pilas y baterías junto a
la basura doméstica. Las pilas y las baterías viejas pueden desecharse gratuitamente en los puntos
de recogida municipales y en todos aquellos lugares donde se vendan pilas y baterías del mismo
tipo (tenga en cuenta que en otros países pueden existir otras normas diferentes). También puede
enviar las pilas suministradas tras su uso a la dirección indicada abajo (a portes debidos). ¡Con ello,
realizará una importante contribución a la protección del medio ambiente!
Cd (cadmio)
Hg (mercurio)
Dirija sus reclamaciones/solicitudes de devolución exclusivamente a:
PARAT GmbH + Co. KG
Schönenbach Straße 1, Tor 11, DE 94089 Neureichenau / Alemania
Nos reservamos el derecho a realizar en cualquier momento modificaciones en los artículos por
motivos técnicos. No nos hacemos responsables de posibles errores tipográficos o información
errónea.
*=15 horas de iluminación completa con 1 juego de pilas. Posteriormente, la potencia luminosa
disminuye.
Voer voor elke inbedrijfstelling een visuele inspectie uit wat betreft functie en schade.
Gebruik de lamp alleen als deze in perfecte staat is. Voer reinigings-, inspectie- en repa-
NL
ratiewerkzaamheden alleen uit in niet-gevaarlijke zones!
Lampenkop van de behuizing afdraaien, lege batterijen eruit nemen, 2 x AA-batterijen in serie,
ofwel beginnend met de positieve polen ofwel beginnend met de negatieve polen in de eerste batte-
rijkamer plaatsen. Door de bipolaire bescherming van de PX 0 is dit vrij te kiezen. Nu de andere
twee AA-batterijen in serie, maar omgekeerd ten opzichte van de voordien gekozen posities in de
vrije batterijkamer plaatsen. Lampenkop op de behuizing zetten en vastdraaien.
Let op: de veiligheidslamp mag alleen aangedreven worden door de volgende batterijtypes
omdat alleen deze batterijtypes een ATEX- respectievelijk IECEx-certificering hebben.
Energizer Classic 1,5V AA LR6 / Duracell Plus 1,5V AA LR6 / Duracell Procell 1,5V AA LR6 /
Duracell Simply 1,5V AA LR6 / Energizer Ultimate Lithium1,5V AA LR6 / Duracell Plus Power
1,5V AA LR6 / Duracell Industrial 1,5V AA LR6/ VARTA Industrial Pro 1,5V AA LR6 / VARTA
Industrial 1,5V AA LR6.
Waarschuwingen batterijen:
Uit batterijen kunnen gassen/bijtende oplossingen lekken. Controleer daarom altijd de batterijen
op hetzelfde type, dezelfde leeftijd en dezelfde constructie op schade, lekkage en corrosie. Verwij-
der de batterijen als u de lamp langere tijd niet gebruikt. Volg de instructies van de batterijenfabri-
kant.
Reiniging:
Er bestaat gevaar voor ontbranding door elektrostatische lading op de kunststof onderdelen van de
lamp! Glas van de lamp en behuizing alleen met koud of handwarm water (eventueel een mild rei-
nigingsmiddel) en een spons gemaakt van viscose of een zachte, niet-vezelige doek schoonmaken!
In-/uitschakelen:
Drukschakelaar aan het uiteinde van de lamp gebruiken. Hierbij moet de lampenkop vast opge-
schroefd zijn.
O-ring:
Voor elke inbedrijfstelling van de lamp de O-ringen controleren op beschadigingen. Houd de
O-ring schoon. Gebruik geen gereedschap om de O-ring te vervangen.
Veiligheidsinstructies:
De lamp mag niet geopend worden in zones met ontploffingsgevaar/explosieve zones. Het maxi-
male omgevingstemperatuurbereik bedraagt -20°C tot +40°C (PX 1 met led-module 123). De lamp
moet beschermd worden tegen lang, direct zonlicht. De lamp alleen in uitgeschakelde toestand op
de lampkop zetten. Gebruik uitsluitend originele onderdelen van de fabrikant.
Het apparaat voldoet aan de voorschriften van de punten 1.2.7 en 1.0.6 van de essentiële gezond-
heids- en veiligheidseisen, bijlage II van de ATEX-richtlijn 2014/34/EU.
Als het apparaat aan overmatige uitwendige belastingen zoals trillingen, warmte of klappen zou
kunnen blootgesteld worden, moeten geschikte maatregelen worden getroffen.
Vervangen van de volledige reflector/lampeenheid:
Lampenkop opendraaien, reflector/lampeenheid uitnemen en vervangen door een nieuwe.
Lampenkop opnieuw vastdraaien.
Belangrijke verwijderingsinstructie voor batterijen en accu's:
Elke consument is in overeenstemming met de richtlijn 2006/66/EG (in Duitsland: Batteriegesetz –
BattG) wettelijk verplicht om alle gebruikte en lege batterijen of accu's in te leveren. Meegeven met
het huisvuil is verboden. Oude batterijen en accu's kunnen gratis ingeleverd worden bij de openba-
re inzamelpunten van de gemeentes en kunnen overall daar afgegeven worden waar batterijen en
accu's van hetzelfde type worden verkocht. U kunt de door ons geleverde batterijen ook na gebruik
naar het onderstaande adres (franco huis) sturen. U levert daarmee een belangrijke bijdrage aan de
bescherming van het milieu!
Cd (cadmium)
Hg (kwikzilver)
Klachten/retouren uitsluitend aan:
PARAT GmbH + Co. KG
Schönenbach Straße 1, Tor 11, DE 94089 Neureichenau / Duitsland
Artikel- en technische wijzigingen evenals onjuiste informatie of typefouten op elk moment
voorbehouden.
* = 15 uur volledige lichtsterkte bij 1 set batterijen, hierna is er verminderde lichtopbrengst
PARAT GmbH + Co. KG
Schönenbach Straße 1 · D-94089 Neureichenau
www.lighting-parat.de · www.parat.eu
Pb (Blei)
www.lighting.parat.de
Pb (plomo)
www.lighting.parat.de
Pb (lood)
www.lighting.parat.de

Verwandte Anleitungen für PARALUX PX0


Inhaltszusammenfassung für PARALUX PX0
- Seite 1 PARAT GMBH + CO. KG, 94089 NEUREICHENAU, GERMANY 0158 • Reflector met witte LED PX0 XAG – PARALUX CERTIFIED LIGHTING Leuchtenkopf aufdrehen, Reflektor/Leuchtmitteileinheit herausnehmen und gegen neue austau- WARNING | DO NOT OPEN IN HAZARDOUS AREA | CHECK INSTRUCTIONS BEFORE USE schen.
- Seite 2 • Reflektormed lyskilde LED hvid / 0158 Βιδώστε την κεφαλή λαμπτήρα, αφαιρέστε τον ανακλαστήρα/τη μονάδα φωτισμού και PX 0 XAG – PARALUX CERTIFIED LIGHTING • Reflektormed hvit lysdiode LED αντικαταστήστε τον/τη με νέα. Συναρμολογήστε τη νέα μονάδα καιβιδώστε την κεφαλή λαμπτήρα.