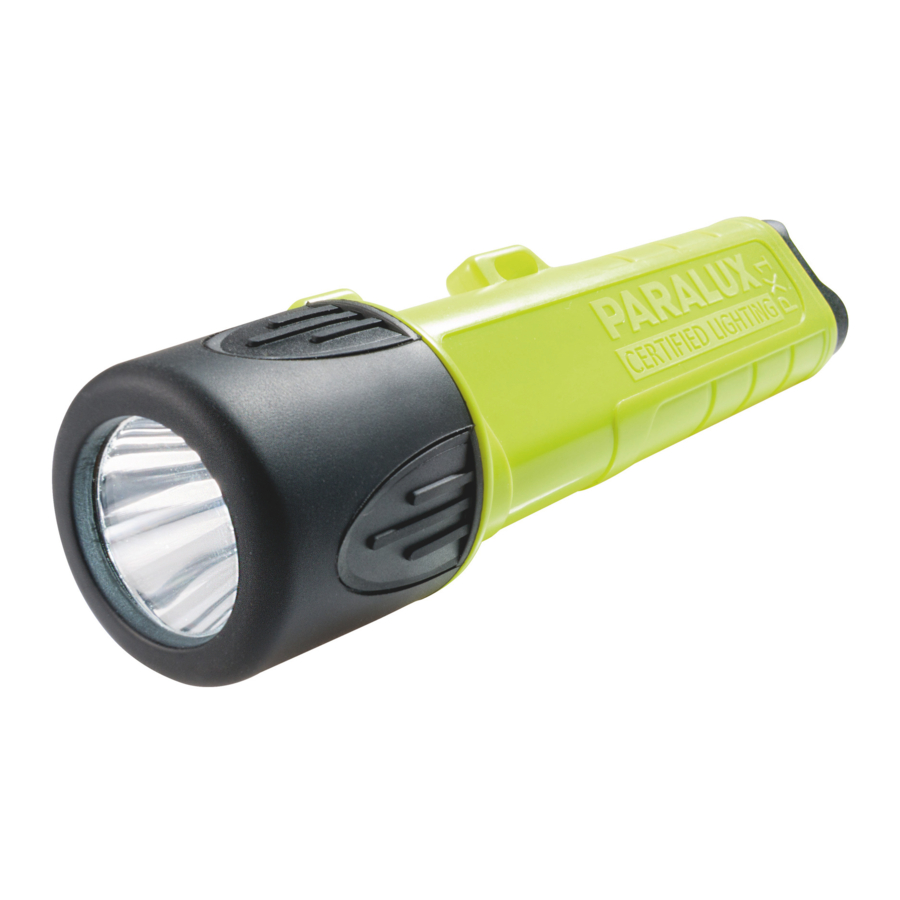
PARALUX PX 1 Bedienungsanleitung
Quicklinks
PARALUX certified lighting
9600113
PX 1
D
F
E
I
PL
UK
FIN
Bedienungsanleitung und wichtige Hinweise / • Operating instructions and important notes /
• Mode d'emploi et remarques importantes / • Instrucciones de empleo e indicaciones import-
antes / • Istruzioni per l'uso e avvertenze importanti / • Instrukcja obsługi i ważne wskazówki /
• Käyttöohje ja tärkeitä huomautuksia
1
• Druckschalter /
• Push button /
• Interrupteur /
• Interruptor de pulsador /
• Interruttore a pressione /
• Przełącznik /
• Painonappi
2
• PX 1 Gehäuse /
4
• 4x Duracell Plus,
• PX 1 housing /
• 4x Duracell Simply
• Boîtier PX 1 /
• 4x Duracell Procell,
• Cuerpo de la PX 1 /
• 4x Energizer Classic AA/LR6,
• Corpo PX 1 /
• 4x Energizer Ultimat Lithium,
• Obudowa PX 1 /
je 1,5V / 1.5 V each / 1,5 V chac. /
• PX 1-runko
cada una de 1,5 V / 1,5 V ciascuna
/ po 1,5 V każda / jokainen 1,5 V
3
• O-Ring /
• O-ring /
6
• Joint torique /
• Reflektor mit Leuchtmittel Xenon
• Junta tórica /
Glühbirne /
• O-ring /
• Reflector with xenon bulb
• Pierścień uszczelniający /
• Réflecteur avec ampoule xénon /
• O-rengas
• Reflector con bombilla de xenón /
5
• Riflettore con lampadina allo xeno
• Reflektor mit Leuchtmittel LED weiß
• Reflektor z żarówką ksenonową jak
• Reflector with white LED/
źródłem światła /
• Réflecteur avec LED, blanche /
• Ksenon-polttimoa käyttävä heijastin
• Reflector con LED blanco /
• Riflettore con lampadina LED di colore bianco /
• Reflektor z białymi diodami LED jako źródłem światła -
biał albo bursztynowe /
• Heijastin, jossa valaisevana osana valkoinen tai meripih-
kanvärinen valodiodi
Leuchtmittel / Bulbs / Ampoules / Fuentes de luz / Lampadina / Źródła światła / Valaiseva osa
• Reflektor mit Leuchtmittel LED weiß
• Reflector with white LED /
• Réflecteu avec LED blanche /
• Reflector con LED blanco /
• Riflettore con lampadina LED dicolor bianco /
• Reflektor z białymi diodami LED jako źródło światła /
• Heijastin, jossa valaisevana osana valkoinen valodiodi
• Reflektor mit Leuchtmittel Xenon (Glühbirne einzeln auswechselbar) /
• Reflector with xenon bul(bulb can be replaced individually) /
• Réflecteur avec ampoule xénon (Ampoule, remplaçable ind-viduellement) /
• Reflector con bombilla de xenón (Recambio individual de la bombilla) /
• Riflettorcon lampadina allo xeno (Lampadina sostituibile singolarmente) /
• Reflektor z żarówką ksenonowąjako źródłem światła (Żarówka, wymieniana pojedynczo) /
• Ksenon-polttimoa käyttävä heijastin (Polttimon voi vaihtaa)
8
•Sockel mit Gewinde /
9
• Auswechselbare Xenon Glühbirne /
8
• Individually replaceable xenon bulb /
• Socket with thread /
• Ampoule xénon, remplaçable individuellement /
9
• Socle avec filettage
• Bombilla de xenón recambiable /
• Base con rosca /
10
• Lampadina allo xeno sostituibile singolarmente /
• Zoccolo filettato
• Pojedyńcza, wymienna żarówka ksenonowa /
• Cokół z gwintem /
• Yksittäin vaihdettava ksenon-polttimo
• Kierrekanta
10
• Reflektor / • Reflector / • Réflecteur / • Reflector / • Riflettore / • Reflek •
Heijastin
PARALUX certified lighting
UK
Changing the batteries:
Unscrew the bezel and take out the old batteries. Insert two AA batteries into the first battery
chamber in the same direction, starting either with the positive or with the negative poles.
Thanks to the reverse polarity protection of the PX 1, the batteries can be inserted in either
direction. Then insert the second two AA batteries into the empty battery chamber. These two
batteries must be inserted in the same direction as each other but in the
opposite direction to the first two batteries. Then position the bezel and screw it on.
Warning: The safety light must be operated only with batteries of the following types as
only these battery types are covered by the ATEX and IECEx certifications.
4x Duracell Plus, each 1,5 V, 4x Duracell Procell, each 1,5 V, 4x Duracell Simply, each 1,5 V
4x Energizer Classic AA/LR6, 1.5 V each, 4x Energizer Ultimat Lithium, each 1,5 V.
Warnings concerning batteries:
Gases or corrosive substances may escape from batteries. You must always use batteries of
the same type, make and age, check batteries for damage, leakage and corrosion before use,
take the batteries out if the light is not to be used for some time, follow the instructions of the
battery manufacturers.
Switching on and off:
Press the push button on the end of the light. Before the light is switched on, the bezel must be
screwed firmly in place.
O-ring:
Before switching the light on, always check the O-ring to make sure it is not damaged. Keep the
O-ring clean; when replacing the O-ring, do not use any tools.
Safety notes:
Do not open the light in areas with (potentially) explosive atmospheres. The light must only be
operated in the temperature range 0°C to +40°C (PX 1 with Xenon Lamp Module 122); -20°C
to +40°C (PX 1 with LED Module 123). Do not expose the light to prolonged, direct sunlight.
Do not stand the light on its bezel unless it is switched off. Only use genuine spare parts supplied
by the manufacturer. The equipment is designed to satisfy the requirements of Clause 1.2.7 of
the Essential Health and Safety Requirements Annex II, 1.0.6. ATEX Directive 94/9/EC.
Where the equipment may be exposed to excessive external stresses e.g. vibration, heat,
impact take suitable precautions.
Replacement of entire reflector/bulb unit:
Unscrew the bezel and take out the reflector/bulb unit. Install a new unit,
And screw on the bezel. Warning: Only the xenon bulb can be replaced
separately.
Replacing individual bulb in xenon bulb unit.
Unscrew the bezel and take out the reflector. Unscrew the reflector from the
socket (see drawing above), take out the bulb. Position a new bulb on the spring into the socket,
Do not touch the bulb. Screw the reflector to the socket. Insert the reflector into the light and
screw
on the bezel.
Important note information on how to discard batteries and accumulators:
According to Directive 2006/66/EU (in Germany Batteries Act—BattG), any user is obligated by
law to return spent used and/or used batteries (rechargeable and non-rechargeable). Batteries
and accumulators must not be disposed of with household waste. In Germany old batteries can
be handed over free of charge at the local municipal collecting point for such items or returned
to any shop that sells batteries of that sort (please note that other countries may handle it
differently). If you have purchased any batteries from us, you may as well return them after use
by sending them to the address stated below (postage will be paid by us). You are making an
important contribution to protecting our environment!
Cd (cadmium)
Hg (mercury)
Send all complaints or returned products to:
PARAT GmbH + Co. KG
Schachtlau 3, Tor 11, DE 94089 Neureichenau / Germany
Stand: 01/13/1.0
Subject to change at any time. Errors and omissions reserved.
* = 15 hours of full brightness with one set of batteries, followed by reduced light output.
PARALUX certified lighting
I
Sostituzione delle batterie:
Svitare la testa della torcia dal corpo. Rimuovere le batterie scariche.
Introdurre 2 batterie AA in serie nel primo vano batterie con i poli positivi in avanti oppure con
i poli negativi in avanti, grazie alla protezione bipolare del PX 1 la posizione delle batterie è
indifferente. Poi introdurre nel vano batterie libero le altre due batterie AA in serie, ma in posizi-
one opposta rispetto a quelle del primo vano batterie. Applicare la testa della torcia sul corpo,
avvitarla e serrarla a fondo.
Avvertenza: la luce d'emergenza funziona solo con batterie dei seguenti tipi, poiché solo-
questi tipi di batterie sono certificati ATEX e IECEx.
4x Duracell Plus, ciascuna 1,5 V, 4x Duracell Procell, ciascuna 1,5 V, 4x Duracell Simply,
ciascuna 1,5 V, 4 x Energizer Classic AA/LR6 da 1,5 V ciascuna, 4x Energizer Ultimat Lithium,
ciascuna 1,5 V.
Avvertenze per le batterie:
Dalle batterie possono fuoriuscire gas/soluzioni corrosive, per cui: utilizzare sempre batterie
dello stesso tipo, della stessa marca e della stessa età, prima dell'uso verificare ogni volta che
le batterie non presentino danneggiamenti, perdite o corrosione, estrarre le batterie in caso di
mancato utilizzo prolungato della torcia, seguire le avvertenze dei produttori delle batterie.
Accensione e spegnimento:
Azionare l'interruttore a pressione sull'estremità della torcia. A tale scopo la testa della torcia
deve essere avvitata saldamente.
O-ring:
Prima dell'uso della torcia verificare ogni volta che gli O-ring non siano danneggiati. Tenere
puliti gli O-ring, non utilizzare utensili per la sostituzione degli O-ring.
Avvertenze di sicurezza:
La torcia non deve essere aperta in zone a rischio di esplosione / deflagranti. L'escursione
termica massima della temperatura ambiente è compresa tra 0°C e +40°C (PX 1 con modulo
Xenon 122); -20°C e +40°C (PX 1 con modulo LED 123). La torcia deve essere protetta
dall'esposizione prolungata alla radiazione solare diretta. Appoggiare la testa della torcia su una
superficie soltanto quando la torcia è spenta. Utilizzare esclusivamente ricambi originali della
casa produttrice. Il dispositivo è conforme ai requisiti di cui ai paragrafi 1.2.7 e 1.0.6 dei Requisi-
ti essenziali in materia di sicurezza e di salute, allegato II della Direttiva ATEX 94/9/CE.
Se il dispositivo può essere esposto a sollecitazioni esterne eccessive, come per esempio vibrazio-
ni, calore o urti è necessario prevedere idonee misure di protezione.
Sostituzione dell'intero riflettore / gruppo lampada:
Svitare la testa della torcia, estrarre il riflettore / gruppo lampada e
sostituirlo con uno nuovo. Avvitare la testa della torcia e serrarla. Attenzione:
Soltanto la lampadina allo xeno può essere sostituita singolarmente.
Sostituzione di una singola lampadina allo xeno:
Svitare la testa della torcia, estrarre il riflettore, svitare il riflettore dallo
zoccolo (vedere il disegno sopra), estrarre la lampadina. Applicare una nuova lampadina sulla
molla dello zoccolo senza toccarla con le mani. Avvitare il riflettore sullo zoccolo. Introdurre il
riflettore nella torcia, applicare la testa della torcia e avvitarla e serrarla.
Avvertenze importanti per il corretto smaltimento delle batterie e degli accumulatori:
Ai sensi della Direttiva 2006/66/CE (in Germania: „Batteriegesetz – BattG", legge tedesca
sulle batterie) ogni consumatore è legalmente tenuto a restituire le batterie e gli accumulatori
usati o esausti. Ne è vietato lo smaltimento con i rifiuti domestici. In Germania, le batterie e gli
accumulatori esausti si possono conferire gratuitamente presso i centri di raccolta comunali
nonché presso i luoghi dove sono in vendita le tipologie di batteria o accumulatore in questione
(attenzione: le normative di altri paesi potrebbero prevedere modalità diverse di smaltimento).
Inoltre, avete la possibilità di inviare le batterie da noi fornite all´indirizzo sotto indicato dopo
l´uso
(spese a carico del destinatario). ll vostro è un contributo importante alla tutela dell´ambiente!
Cd (cadmio)
Hg (mercurio)
Inviare eventuali reclami e resi esclusivamente a:
PARAT GmbH + Co. KG
Schachtlau 3, Tor 11, DE 94089 Neureichenau / Germany Edizione: 01/13/1.0
Con riserva di modifiche tecniche e dell'articolo in qualsiasi momento e salvo indicazioni errate
o errori di scrittura.
* = 15 ore di luminosità piena con una serie di batterie, poi la potenza luminosa diminuisce.
PARALUX certified lighting
PARALUX certified lighting
PX 1
•Technische Daten / • Technical data / • Caractéristiques techniques / • Datos técnicos / • Dati
tecnici / • Dane techniczne / • Tekniset tiedot
7
• Lampenkopf /
• Bezel /• Tête lampe /
• Cabezal de la linterna /
• Testa della torcia /
• Głowica latarki /
• Valaisinpää
• Material / • Material / • Matériau / • Material / • Materiale / • Materiał / • Materiaali
7
• Einsetzbare Leuchtmittel / • Bulbs which can be used / • Ampoules intégrables / • Fuentes de
luz utilizables / • Lampadine utilizzabili / • Stosowane źródła światła / • Polttimot, joita voidaan
käyttää
• Zertifizierungen ATEX Zone 1 / • ATEX zone 1 certifications / • Certifications zone 1 ATEX /
• Homologaciones ATEX zona 1 / • Certificazioni ATEX zona 1 / • Certyfikaty ATEX Zone 1 /
• Sertifiointi ATEX-vyöhyke 1
EG-Baumusterprüfbescheinigungen u. Konformitätserklärungen einsehbar unter... / • EC type
testing certif-cates and conformity declarations available at... / • Certificats d'homologation CE
et déclarations de conform-té, voir ... / • Los certificados de examen de tipo CE y las Declaraci-
ones de conformidad se pueden consultarbajo... / • Omologazioni CE e dichiarazioni di confor-
mità consultabili presso... / • Badania dopuszczające do obrotu w UE oraz deklaracja zgodności
- patrz poniżej: / • EY-tyyppihyväksyntätodistukset ja vaatimuksenmu-kaisuusvakuutukset ovat
nähtävissä osoitteessa...
www.parat.eu
PARALUX certified lighting
F
Changement des piles:
Dévisser la tête de la lampe du boîtier. Retirer les piles usées. Dans le premier
compartiment, insérer deux piles AA en série, soit pôle positif soit pôle négatif en premier. La
protection bipolaire de la lampe PX 1 autorise ceci. Poser maintenant les deux autres piles dans
le compartiment encore libre réservé aux piles mais en veillant à les poser dans le sens opposé.
Remonter la tête de la lampe sur le boîtier.
Attention: cette lampe de sécurité ne peut être utilisée qu'avec les types de piles suivants
car seules ces piles sont homologuées ATEX / IECEx.
4x Duracell Plus, 1,5 V chacune, 4x Duracell Procell, 1,5 V chacune, 4x Duracell Simply, 1,5 V cha-
cune, 4 x Energizer Classic AA/LR6, 1,5 V chacune, 4x Energizer Ultimat Lithium, 1,5 V chacune.
Avertissement relatif aux piles:
Des gaz/solutions acides peuvent s'échapper des piles. Donc toujours utiliser des piles du
même type, même marque et même ancienneté. Avant d'utiliser les piles, vérifier qu'elles soient
en bon état, donc ni dommages, ni fuite ni corrosion. Si les piles ne sont pas en service pour
une période prolongée, il faut les retirer de la lampe. Respecter les indications du fabricant.
Mise en service / Arrêt:
Actionner le bouton à l'extrémité de la lampe. La tête de la lampe doit être correctement vissée.
Joint torique: Avant toute mise en service de la lampe, vérifier que le joint torique est en bon état.
Le joint torique doit être propre. Pour le changer, ne pas utiliser d' outils.
Remarques relatives à la sécurité:
La lampe ne doit pas être ouverte dans les zones soumises ou présentant des risques
d'explosion. La plage de température ambiante autorisée va de 0 °C à +40°C (PX 1 avec
module xénon 122); -20 °C à +40°C (PX 1 avec module LED 123). Protéger la lampe contre
une exposition de longue durée en plein soleil. Ne poser la lampe sur sa tête que en position
éteinte. N'utiliser que les pièces d'origine du fabricant. Cet appareil répond aux critères imposés par
les paragraphes 1.2.7 et 1.0.6 des Règles fondamentales relatives à la santé et à la sécurité, Annexe
II de la directive ATEX 94/9/EC.Si l'appareil risque d' ê tre soumis à des sollicitations externes
dépassant la normale (p. ex.vibrations, chaleur, chocs), il faut prévoir des mesures de protection
appropriées.
Remplacement de l'ensemble réflecteur ampoule:
Desserrer la tête de la lampe. Retirer le réflecteur/ampoule. Remplacer
l'ensemble. Fermer la tête de la lampe. Attention: sur les versions à
ampoule Xenon, possibilité de ne changer que l'ampoule.
Remplacement de l'ampoule au xénon:
Desserrer la tête de la lampe. Retirer le réflecteur du socle (voir plan ci-dessus).
Retirer l'ampoule. Monter la nouvelle ampoule sur le ressort du socle. Ne pas toucher l'ampoule
durant cette opération. Visser le réflecteur sur le socle. Monter le réflecteur dans la lampe.
Monter et serrer la tête de la lampe.
Conseils importants pour l'élimination des batteries et des accumulateurs:
En vertu de la directive 2006/66/CE (en Allemagne: loi sur le traitement des piles) le consomma-
teur est tenu de rapporter toutes les piles et accumulateurs usagés. Il est interdit de les jeter
dans les ordures ménagères. En Allemagne, toutes les piles et accumulateurs peuvent être
remis gratuitement aux points de collecte publics de la commune ainsi qu'à tous les points de
vente de ce type de piles et d'accumulateurs (Veuillez noter que cette procédure peut différer
d'un pays à un autre). Vous pouvez également réexpédier à nos frais après usage à l'adresse ci-des-
sous les piles qui ont été livrées par nos soins. Vous contribuerez ainsi à préserver l' e nvironnement!
Cd (cadmium)
Réclamations / Renvois seulement à
PARAT GmbH + Co. KG
Pb (lead)
Schachtlau 3, Tor 11, DE 94089 Neureichenau / Allemagne
Etat: 01/13/1.0
Sous réserve de modifications sans préavis du produit, caractéristiques techniques, fautes de
frappe et informations fournies par erreur.
* = Un jeu de piles pour 15 heures de lumière, ensuite luminosité réduite.
PARALUX certified lighting
PL
Wymiana baterii:
Wykręcić głowicę lampy z obudowy. Wyjąć zużyte baterie. Włożyć do
pierwszej komory 2 baterie typu AA, rozpoczynając albo od biegunowość plusowych albo od
minusowych; dzięki stykom dwubiegunowym reflektora można dowolnie wybrać biegunowość.
Następnie należy włożyć pozostałe baterie tego samego typu do wolnej komory, ale biegunami
odwrotnie do uprzednio wybranej pozycji. Przyłożyć głowicę lampy do obudowy, przykręcić
głowicę i dokręcić ją.
Uwaga: Dla lampy bezpieczeństwa proszę stosować tylko następujące typy baterii,
ponieważ jedynie te typy baterii posiadają certyfikację ATEX lub też IECEx.
4x Duracell Plus, 1,5 V, 4x Duracell Procell, 1,5 V, 4x Duracell Simply, 1,5 V,
4 x Energizer Classic AA/LR6, 1,5V, 4x Energizer Ultimat Lithium, 1,5 V.
Wskazówki dot. baterii:
Z baterii mogą się ulatniać gazy / wydobywać żrące substancje, dlatego należy zawsze: używać
wyłącznie baterii tego samego typu, producenta, z tej samej serii/daty produkcji. Przed każdym
użyciem sprawdzić baterie pod kątem uszkodzeń, wycieków, śladów korozji. W przypadku
dłuższej przerwy w używaniu lampy baterie należy wyjąć, przestrzegać wskazówek producenta
baterii.
Włączanie / wyłączanie:
Nacisnąć przełącznik na końcu latarki. Głowica lampy musi być mocno dokręcona.
Pierścień uszczelniający:
Przed każdym uruchomieniem lampy sprawdzić, czy pierścień uszczelniający nie jest
uszkodzony. Pierścień uszczelniający powinien być zawsze czysty, do wymiany pierściena
uszczelniającego nie należy stosować żadnych narzędzi.
Wskazówki bezpieczeństwa:
Latarki nie wolno otwierać w środowisku zagrożonym wybuchem / wybuchowym. Maksymalne
temperatury graniczne otoczenia wynoszą od 0°C do +40°C (PX 1 z modułem ksenonowym
122); -20°C do +40°C (PX 1 z modułem diodowym 123). Latrakę należy chronić przed dłuższą
ekspozycją na promieniowanie słoneczne. Tylko wyłączoną latarkę wolno stawiać na głowicy
lampy. Stosować wyłącznie oryginalne części zamienne. Urządzenie spełnia wymagania
ustępów 1.2.7 i 1.0.6 podstawowych przepisów bezpieczeństwa i ochrony zdrowia, Dodatek II
do dyrektywy ATEX 94/9/EG. Jeśli urządzenie może być narażone na nadmierne zewnętrzne
obciążenia, takie jak wibracje, wysoka temperatura lub uderzenia, należy przewidzieć odpowied-
nie środki ochronne.
Wymiana całego reflektora / modułu ze źródłem światła:
Odkręcić głowicę lampy, reflektor / moduł źródła światła wyjąć i wymienić na nowy. Głowicę
lampy przykręcić i dokręcić ją. Uwaga: wymiana pojedynczej żarówki możliwa tylko przy żarów-
kach ksenonowych.
Wymiana pojedynczej żarówki w lampach ksenonowych:
Odkręcić głowicę lampy, wyjąć reflektor. Odkręcić reflektor od cokołu (patrz rysunek powyżej),
wyjąć żarówkę. Założyć nową żarówkę na sprężynkę w cokole, nie dotykając przy tym żarówki
(grozi to jej uszkodzeniem). Przykręcić reflektor do cokołu. Włożyć reflektor do lampy, założyć
głowicę i przykręcić.
Ważna wskazówka odnośnie usuwania baterii i akumulatorów:
Baterie i akumulatory zwierają silnie trujące środki! Zgodnie z wymogami Dyrektywy 2006/66/
WE (w sprawie baterii i akumulatorów oraz zużytych baterii i akumulatorów) każdy konsument
zobowiązany jest ustawowo do zwrotu wszystkich używanych i zużytych baterii i akumulatorów.
Usuwanie do odpadów komunalnych jest zabronione. Zużyte baterie i akumulatory zwracać
można nieodpłatnie w publicznych miejscach zbiórki organizowanych przez urzędy miast i
gmin oraz we wszystkich placówkach zajmujących się dystrybucją danego rodzaju baterii i
akumulatorów ora sprzętu elektronicznego. Wprowadzone przez nas do obrotu baterie przesyłać
też można po ich zużyciu na podany poniżej adres (prosimy uwzględnić, iż w innych krajach
postępowanie może być odmienne od podanego tutaj). Stanowi to istotny wkład Państwa do
ochrony środowiska!
Pb (piombo)
Cd (kadm)
Reklamacje / zwroty należy kierować wyłącznie do:
PARAT GmbH + Co. KG, Schachtlau 3, Tor 11, DE 94089 Neureichenau / Niemcy Stan: 01/13/1.0
Zastrzegamy sobie zmiany wyrobu oraz zmiany techiczne, a także możliwość błędnych danych
lub błędów drukarskich.
* = Komplet baterii zapewnia ok. 15 godzin pracy, po tym czasie zmniejsza się jasność świecenia
PARALUX certified lighting
~ 167 x 38 mm
~ 75 g
• LED weiß - Xenon /
• 4x Duracell Plus,
• White LED - Xenon /
• 4x Duracell Simply
• LED blanche - Xénon /
• 4x Duracell Procell,
• LED blanco - Xenón /
• 4x Energizer Classic AA/LR6,
• LED bianco - Xeno /
• 4x Energizer Ultimat Lithium,
je 1,5V / 1.5 V each / 1,5 V
• Biała dioda LED - Ksenon /
chac. / cada una de 1,5 V / 1,5
• Valodiodi valkoinen - Ksenon
V ciascuna / po 1,5 V każda /
jokainen 1,5 V
PC (Polycarbonate)
XAG
LED weiß / white /
~ 15 - 50 h*
blanche / blanco /
bianco / biała / valkoinen
Xenon / Xenon / Xénon
~ 3 h
/Xenón /Xeno / Ksenon
/ Ksenon
Hg (mercure)
Pb (plomb)
Hg (rtęć)
Pb (ołów)
PARALUX certified lighting
PX 1
D
Wechseln der Batterien:
Lampenkopf vom Gehäuse abdrehen, Leere Batterien entnehmen, 2 x AA Batterien in Serie,
entweder beginnend mit den Pluspolen oder beginnend mit den Negativpolen in die erste Batte-
riekammer einsetzen, durch den Bi-polaren Schutz der PX1 ist dies frei wählbar. Nun die weiteren
zwei AA Batterien in Serie, aber umgekehrt zu der vorher gewählten Position der Batterien, in die
freie Batteriekammer einsetzen. Lampenkopf auf das Gehäuse setzen, zudrehen und festziehen.
Achtung: Die Sicherheitslampe darf nur mit den folgenden Batterietypen betrieben werden, da
nur diese Batterietypen eine ATEX- bzw. IECEx-Zertifizierung haben.
4 x Duracell Plus, je 1,5 V. 4 x Duracell Procell, je 1,5 V. 4 x Duracell Simply, je 1,5 V. 4 x Energizer
Classic AA/LR6, je 1,5 V. 4 x Energizer Ultimat Lithium, je 1,5 V.
Warnhinweise zu Batterien:
Aus Batterien können Gase/ätzende Lösungen austreten, daher immer: ausschließlich Batterien
auf Beschädigung, Leck und Korrosion prüfen, Batterien bei längerer Nicht-Nutzung der Lampe
herausnehmen, Anweisungen der Batteriehersteller folgen.
Ein-Ausschalten:
Druckschalter am Lampenende betätigen. Der Lampenkopf muss hierzu fest aufgeschraubt sein.
O-Ring:
Vor jeder Inbetriebnahme der Lampe O-Ring auf Beschädigung prüfen. O-Ring sauber halten,
zum Wechseln des O-Rings keine Werkzeuge verwenden.
Sicherheitshinweise:
Die Lampe darf nicht in explosionsgefährdeten/fähigen Zonen geöffnet werden. Der max. Um-
gebungstemperaturbereich beträgt 0°C bis +40°C (PX1 mit Xenon Module 133); -20°C bis +40°C
(PX1 mit Led Module 123). Die Lampe ist vor länger, direkter Sonneneinstrahlung zu schützen.
Die Lampe nur in ausgeschaltetem Zustand auf den Lampenkopf stellen. Ausschließlich Original-
teile des Herstellers verwenden.
Das Gerät erfüllt die Anforderungen der Absätze 1.2.7 und 1.0.6 der Grundlegenden Gesundheits-
~ 120 lm
und Sicherheitsanforderungen, Anhang II der ATEX Richtlinie 94/9/EC.
~ 150m x ø 3 - 5 m
Wenn das Gerät übermäßigen äußeren Belastungen wie zum Beispiel Vibrationen, Hitze oder
Schlageinwirkungen ausgesetzt sein könnte, müssen geeignete Schutzmaßnahmen vorgesehen
werden.
~ 80 lm
~ 60 m x ø 3 - 5 m
Auswechseln des gesamten Reflektors/Leuchtmitteleinheit:
Lampenkopf aufdrehen, Reflektor/Leuchtmitteileinheit herausnehmen und gegen neue austau-
schen. Lampenkopf zudrehen und festziehen.
Achtung: Ausschließlich bei Leuchtmittel Xenon lässt sich die Glühbirne einzeln auswechseln.
Auswechseln der einzelnen Glühbirne in Leuchtmittel Xenon:
Lampenkopf aufdrehen, Reflektor herausnehmen, Reflektor vom Sockel abdrehen (siehe Zeich-
nung links), Glühbirne herausnehmen. Neue Glühbirne auf Feder im Sockel setzen, hierzu Birne
nicht berühren. Reflektor auf Sockel aufschrauben. Reflektor in Lampe einsetzen, Lampenkopf
aufsetzen, zudrehen und festziehen.
Wichtiger Entsorgungshinweis zu Batterien und Akkus:
Jeder Verbraucher ist nach der Richtlinie 2006/66/EG (in Deutschland: Batteriegesetz – BattG)
gesetzlich zur Rückgabe aller ge- und verbrauchten Batterien bzw. Akkus verpflichtet. Eine Ent-
sorgung über den Hausmüll ist verboten. Alte Batterien und Akkus können unentgeltlich bei den
öffentlichen Sammelstellen der Gemeinden und überall dort abgegeben werden, wo Batterien und
Akkus der betreffenden Art verkauft werden. Sie können die von uns gelieferten Batterien auch
nach Gebrauch an die u.a. Adresse (frei haus) senden. Sie leisten damit einen wesentlichen Beitrag
zum Umweltschutz!
Cd (Cadmium)
Reklamationen/Rücksendungen ausschließlich an:
PARAT GmbH & Co. KG
Schachtlau 3, Tor 11, DE 94089 Neureichenau / Deutschland
Stand: 01/13/1.0
Artikel- und technische Änderungen sowie irrtümliche Angaben oder Schreibfehler jederzeit
vorbehalten.
* = 15 Stunden volle Helligkeit bei 1 Satz Batterien, hiernach verringerte Lichtleistung
PARALUX certified lighting
E
Cambio de baterías:
Desenroscar el cabezal del cuerpo de la linterna. Retirar las baterías descargadas. Colocar 2 baterías
AA en serie, ya sea empezando por los polos positivos o empezando por los polos negativos, en la
primera cámara de baterías; gracias a la protección bipolar de la PX 1, esta elección es totalmente
opcional. Seguidamente colocar las otras dos baterías AA en serie, pero a la inversa de la posición de
batería que se había elegido previamente, en la cámara de baterías libre. Colocar el cabezal en el cuerpo
de la linterna, enroscar.
Atención: La lámpara de seguridad sólo debe hacerse funcionar con los siguientes tipos
de pilas, pues sólo éstos tienen el certificado ATEX o IECEx.
4x Duracell Plus, cada una de 1,5 V, 4x Duracell Procell, cada una de 1,5 V,
4x Duracell Simply, cada una de 1,5 V, 4 x Energizer Classic AA/LR6, cada una de 1,5 V,
4x Energizer Ultimat Lithium, cada una de 1,5 V.
Advertencias acerca de las baterías:
De las baterías se pueden filtrar gases / soluciones cáusticas, por ello siempre emplear exclusivamente
baterías del mismo tipo, de la misma marca y de la misma antigüedad. Antes de
todo uso, verificar las baterías para comprobar si no presentan deterioros, fugas y corrosiones.
Sacar las baterías si no se utilizará la linterna por un espacio de tiempo. Respetar las instrucciones
del fabricante de las baterías.
Encendido y apagado:
Actuar el pulsador en el extremo de la linterna. Para ello es necesario que el cabezal de la
linterna esté bien enroscado.
Junta tórica
Antes de toda puesta en servicio de la linterna, verificar la junta tórica en cuanto a deterioros.
Mantener limpia la junta tórica, no emplear herramientas para cambiarla.
Indicaciones para su seguridad:
La linterna no se debe abrir en zonas donde haya peligro de explosión. El rango máx. de temperaturas
ambiente es de 0°C hasta + 40°C (PX 1 con módulo xenón 122); -20°C hasta + 40°C
(PX 1 con módulo LED 123). Proteger la linterna contra la radiación solar prolongada y directa.
Colocar la linterna apoyada en su cabezal únicamente si está apagada. Emplear exclusivamente
piezas originales del fabricante. Este aparato cumple los requisitos de los apartados 1.2.7 y 1.0.6 de los
requisitos básicos de salud y seguridad, Anexo II, de la Directiva ATEX 94/9/EC.
Si el aparato podría quedar expuesto a esfuerzos exteriores excesivos, como por ejemplo vibraciones,
calor o impactos, se tendrán que prever unas medidas de protección idóneas.
Cambio del reflector y de la fuente de luz:
Desenroscar el cabezal de la linterna, sacar el reflector / la
bombilla o LED y sustituir por el elemento nuevo. Enroscar el cabezal de la linterna y apretar.
Atención: Solamente la bombilla de xenón se puede cambiar individualmente.
Cambio de la bombilla de xenón:
Desenroscar el cabezal, quitar el reflector. Desenroscar el
reflector de la base (ver dibujo arriba), extraer la bombilla. Colocar la bombilla nueva sobre el
resorte en la base, cuidando de no tocar la bombilla con los dedos. Enroscar el reflector en la
base. Colocar el reflector en la linterna, aplicar el cabezal y enroscar. Colcar la bombilla sobre
el resorte de la base, cuidando de no tocar la bombilla con los dedos.
Importante información a la hora de desechar pilas y acumuladores:
Todos los consumidores están obligados por ley según lo establecido en la Directiva
2006/66/CE del Parlamento Europeo y del Consejo (en Alemania: ley sobre pilas / BattG) a
devolver todas las pilas y acumuladores usados y desgastados. Está prohibido eliminar los
residuos de pilas y acumuladores con la basura doméstica. Las pilas y los acumuladores viejos
pueden desecharse gratuitamente en los puntos de recogida municipales de Alemania y en
todos aquellos lugares donde se vendan pilas y acumuladores de dicho tipo (por favor, tenga en
cuenta que en otros países pueden existir otras normas diferentes).
También cabe la posibilidad de enviar las pilas suministradas por nosotros tras su uso a la
dirección indicada abajo (a portes debidos).
¡Con ello, usted realiza una importante contribución a la protección del medio ambiente!
Cd (Cadmio)
Hg (Mercurio)
Reclamaciones / Devoluciones exclusivamente a:
PARAT GmbH + Co. KG
Schachtlau 3, Tor 11, DE 94089 Neureichenau / Alemania Fecha: 01/13/1.0
Se reserva en todo momento el derecho a realizar modificaciones en los artículos por motivos
técnicos, así como el derecho a proporcionar datos equivocados o errores de escritura.
*=15 horas de iluminación completa con 1 juego de baterías, luego con potencia luminosa menor
PARALUX certified lighting
FIN
Paristojen vaihto:
Kierrä valaisinpää irti rungosta. Ota tyhjät paristot pois. Pane kaksi AA-paristosarjaa
joko plus-napa tai miinus-napa edellä ensimmäiseen paristokoteloon - PX 1:n kaksinapaisen
suojauksen ansiosta järjestys on vapaasti valittavissa. Pane sitten toinen AA-paristosarja
päinvastaisessa järjestyksessä vapaaseen paristokoteloon. Aseta valaisinpää runkoon, kierrä se
kiinni.
Huomaa: Turvalampussa saa käyttää vain seuraavia paristotyyppejä, koska vain näillä
paristoilla on ATEX- tai IECEx-tyyppihyväksyntä.
4x Duracell Plus, jokainen 1,5 V, 4x Duracell Procell, jokainen 1,5 V, 4x Duracell Simply, jokai-
nen 1,5 V, 4 x Energizer Classic AA/LR6, jokainen 1,5 V, 4x Energizer Ultimat Lithium, jokainen
1,5 V.
Paristoja koskeva varoitus:
Paristoista voi vapautua kaasuja tai syövyttäviä liuoksia, joten käytä aina ainoastaan samaa
tyyppiä ja samaa merkkiä olevia sekä samanikäisiä paristoja. Ennen käyttöä tarkista aina, että
paristot eivät ole vaurioituneita, että ne eivät vuoda ja että niissä ei ole ruostetta. Jos lamppu on
pitkään käyttämättä, ota paristot pois. Noudata paristojen valmistajan ohjeita.
Sytyttäminen ja sammuttaminen:
Paina lampun päässä olevaa painonappia. Valaisinpään on oltava tätä varten kunnolla paikalla-
an.
O-rengas:
Tarkista aina ennen lampun käyttöönottoa, että O-rengas on ehjä. Pidä O-rengas puhtaana
äläkä käytä O-renkaan vaihtamiseen työkaluja.
Turvallisuusohjeita:
Lamppua ei saa avata räjähdysvaarallisissa/räjähdyskelpoisissa tiloissa. Käyttöympäristön
lämpötila saa olla 0°C - + 40°C (PX 1, jossa ksenon-moduuli 122); -20°C - + 40°C (PX 1, jossa
LED-moduuli 123). Älä jätä lamppua pitkäksi aikaa suoraan auringonpaisteeseen. Pane lamppu
ainoastaan sammutettuna valaisinpäähän. Käytä ainoastaan valmistajan alkuperäisiä osia. Laite
täyttää ATEX-direktiivin 94/9/EY liitteen II Olennaiset turvallisuus- ja terveysvaatimukset
kohtien 1.2.7 ja 1.0.6 vaatimukset. Jos laite saattaa altistua ylenmääräisille ulkoisille rasituksille
kuten tärinälle, lämmölle tai iskuille, siihen on kohdistettava sopivia lisäturvatoimenpiteitä.
Koko heijastus/valaisinyksikön vaihtaminen:
Kierrä valaisinpää paikaltaan ja ota heijastus/valaisinyksikkö pois ja vaihda se uuteen. Kierrä
valaisinpää kiinni. Huom.! Yksittäisen polttimon voi vaihtaa ainoastaan ksenonia käyttävissä
lampuissa.
Yksittäisen polttimon vaihtaminen ksenon-lampuissa:
Kierrä valaisinpää paikaltaan ja ota heijastin pois. Kierrä heijastin irti kannasta (ks. kuva yllä) ja
ota hehkulamppu pois. Aseta uusi polttimo kannan jouseen koskematta itse polttimoon. Kierrä
heijastin kantaan. Aseta heijastin lamppuun, pane valaisinpää paikaltaan ja kierrä se kiinni.
Tärkeä paristoja ja akkuja koskeva hävittämisohje:
Kaikki kuluttajat ovat direktiivin 2006/66/EY mukaan (Saksassa: paristolaki - BattG) velvoitettu-
ja palauttamaan kaikki vanhat ja käytetyt paristot tai akut. Hävittäminen talousjätteen mukana
on kielletty. Käytetyt paristot ja akut voidaan toimittaa kustannuksitta kunnan julkisiin keräy-
spisteisiin ja kaikkiin kyseisen tyypin paristoja ja akkuja myyviin paikkoihin. Meidän toimitta-
mamme akut voit toimittaa käytön jälkeen myös alhaalla mainittuun osoitteeseen (veloituksitta
tehtaalle). Näin osallistut olennaisesti ympäristönsuojeluun!
Cd (kadmium)
Valitukset/palautukset ainoastaan seuraavaan osoitteeseen:
PARAT GmbH + Co. KG
Schachtlau 3, Tor 11, DE 94089 Neureichenau / Saksa
Laadittu: 01/13/1.0
Pidätämme oikeuden teknisiin ja ulkoasun muutoksiin ennalta ilmoittamatta, emmekä vastaa
mahdollisista virheellisistä tiedoista tai painovirheistä.
* = 15 tuntia täysi kirkkaus yksillä paristoilla, sen jälkeen himmennettynä
PARALUX certified lighting
PARAT GmbH + Co. KG
Schachtlau 3 - 4
94089 Neureichenau
Germany
Hg (Quecksilber)
Pb (Blei)
Pb (Plomo)
Hg (elohopea)
Pb (lyijy)

Verwandte Anleitungen für PARALUX PX 1


Inhaltszusammenfassung für PARALUX PX 1
- Seite 1 0°C do +40°C (PX 1 z modułem ksenonowym lämpötila saa olla 0°C - + 40°C (PX 1, jossa ksenon-moduuli 122); -20°C - + 40°C (PX 1, jossa Xenon 122); -20°C e +40°C (PX 1 con modulo LED 123). La torcia deve essere protetta 122);...
- Seite 2 Lampen må ikke åpnes i eksplosjonsutsatte soner. Det maksimale omgivelsestemperaturområdet tur är från 0 °C till + 40 °C (PX 1 med xenonmodul 122); -20 °C till + 40 °C (PX 1 med lysdiod- er fra 0°C til + 40°C (PX 1 med Xenon-modul 122); -20°C til + 40°C (PX 1 med LED-modul modul 123).