Herunterladen Inhalt Inhalt Diese Seite drucken
Inhaltsverzeichnis

Werbung

Verfügbare Sprachen
  • DE

Verfügbare Sprachen

  • DEUTSCH, seite 41
RMD-99 ST
ATS
FM STEREO/SW/MW/LW DSP RADIO & MP3 PLAYER
A
B
POWER
AM
FM
SW
ETM
BW
VM
VF
SCAN
FM SET
12/24
9/10kHz
DISPLAY
1
2
3
4
5
6
TIME
7
8
9
ALARM
M
0
BEEP ON/OFF
DELETE
user manual
manual de usuario
mode d ' emploi
bedienungsanleitung
manualle dell ' utente
ST.
manual do usuário
2-27
28-53
54-79
80-105
106-131
132-157

Werbung

Inhaltsverzeichnis
loading

Inhaltszusammenfassung für Aiwa RMD-99 ST

  • Seite 1 RMD-99 ST user manual 2-27 manual de usuario 28-53 mode d ’ emploi 54-79 bedienungsanleitung 80-105 manualle dell ’ utente 106-131 FM STEREO/SW/MW/LW DSP RADIO & MP3 PLAYER POWER SCAN FM SET 12/24 9/10kHz DISPLAY TIME manual do usuário ALARM...
  • Seite 2: Safety Precautions

    SAFETY PRECAUTIONS Read these safety instructions before using your device and store them for posible Thank you for purchasing RMD-99 ST: FM stereo/SW/MW/LW DSP radio & MP3 player. future reference. This is your assurance of quality, performance and value. Our engineers have included many useful and convenient features in this product.
  • Seite 3 SAFETY PRECAUTIONS SAFETY PRECAUTIONS 1. READ INSTRUCTIONS: 8. VENTILATION: 12. LIGHTNING: All the safety and operating instructions Slots and openings in the cabinet are For added protection for this product b) If the product has been exposed to should be read before the product is provided for ventilation and to ensure during a lightning storm, or when it is left rain or water.
  • Seite 4: Preparation For Use

    Using the original carton and packing materials is the only proper way to protect the unit from shipping damage. FM STEREO/SW/MW/LW DSP RADIO & MP3 PLAYER POWER RMD-99 SLEEP SCAN Multiband radio In-ear Aiwa-Q Design x1 FM SET 12/24 9/10kHz DISPLAY receiver x1 ALARM BEEP ON/OFF...
  • Seite 5: Description Of Controls

    DESCRIPTION OF CONTROLS DESCRIPTION OF THE DISPLAY LCD VIEW REAR VIEW...
  • Seite 6: Battery Installation

    BATTERY INSTALLATION MP3 FUNCTION Batteries must be inserted correctly to avoid damage to the radio. Always remove the SD CARD INSTALLATION batteries when the radio will not be used for a long period of time, as this will cause Open the back stand; insert the leakage to the batteries and subsequently damage to your device.
  • Seite 7 TUNE INTO STATIONS TUNE INTO STATIONS Press the POWER ON/OFF button to turn on your radio, then select your desired band METHOD 2: MANUAL TUNING by pressing the FM, AM, SW ( ) or ( ) button. Now, you can turn into your favorite Frequency searching: stations with any of the following tuning methods: Press the VF button to switch into...
  • Seite 8: Listening To Stored Stations

    USING THE STORED STATIONS USING THE STORED STATIONS There’s a total of 550 preset memories within the unit. 100 preset memories for each METHOD 2: STORING STATIONS MANUALLY FM, MW, and LW band, and 250 for SW. Select band and tune to your desired station. METHOD 1: ATS (AUTO TUNING STORAGE) Press the M button with the word “PRESET ”...
  • Seite 9: Sleep Function

    LISTENING TO STORED STATIONS SLEEP FUNCTION METHOD 3: DIRECT KEY IN MEMORY ADDRESS Press and hold the POWER button until “SLEEP” and Press the VM button to enter the memory mode. “ON” or 1~120” show on the display. Press the numeric keys 0-9 to enter the memory address directly, and then press the button ( ) to confirm.
  • Seite 10: Snooze Function

    ALARM ALARM It is recommended to set the alarm by buzzer if you are not familiar with the local radio TURNING THE ALARM ON OR OFF frequency and air time. You can press the ( ) or ( ) button repeatedly to activate/deactivate the alarm by buzzer / radio respectively.
  • Seite 11: System Settings

    SYSTEM SETTINGS CHARGING FUNCTION INTELLIGENT LIGHT FUNCTION TURN ON/OFF THE CHARGING FUNCTION With radio off, press and hold the [ ] key until “CHA ON” and “NI-MH BATTERY” This radio has an intelligent light function with which the backlight would be on for 3 show on the display to activate the consumption display of rechargeable batte- seconds when operating any keys or knobs.
  • Seite 12: Using Batteries

    FM STEREO & BANDWIDTH LINE-IN MODE FM ST. (FM STEREO) Auxiliary input function mode This unit can be used as an active speaker for laptop computers, MP3 and other small While listening to FM stereo stations, press the [ST.] button. The “ ”...
  • Seite 13: Troubleshooting Guide

    10kHz. USB cable x1 When the alarm is Maybe you did not set the Preset your alarm station AA Batteries Aiwa Xtra+ Alkaline Power x3 activated (alarm proper radio alarm station. properly. User manual x1 by radio), there is...
  • Seite 14 FUNCTIONAL BLOCK DIAGRAM NOTES RMD-99 ST. uses DSP si4734 Microchips (from Silicon Labs, USA) to digitalize the analog AM/FM broadcasting signal base on the modern software technology and radio principles. It can highly improve the radio’s sensitivity, selectivity, S/N ratio and interferenece.
  • Seite 15: Precauciones De Seguridad

    ESPAÑOL PRECAUCIONES DE SEGURIDAD Lea estas instrucciones de seguridad antes de usar el dispositivo y guárdelas como Gracias por adquirir la RMD-99 ST: Radio multibanda estéreo/SW/MW/LW DSP con referencia para el futuro. reproductor de MP3. Si el cable del cargador está...
  • Seite 16 PRECAUCIONES DE SEGURIDAD PRECAUCIONES DE SEGURIDAD Cualquier instalación del producto debe 1. LEA LAS INSTRUCCIONES: 11. CUANDO NO UTILICE LA UNIDAD: 16. ASISTENCIA: seguir las instrucciones del fabricante y Lea todas las instrucciones de seguridad El cable de alimentación del aparato No intente reparar este producto usted usar accesorios de montaje recomendados y uso antes de usar el producto.
  • Seite 17: Antes De Usar

    9/10kHz DISPLAY Radio multibanda x1 Auriculares Aiwa-Q Design x1 ALARM BEEP ON/OFF DELETE Pilas AA Aiwa Xtra+ Cable USB x1 Alkaline Power x3 VISTA SUPERIOR NO RECARGABLES Correa de sujeción x1 Manual de usuario x1 Bolsa de transporte x1 Hoja de garantía x1 VISTA LATERAL CARACTERÍSTICAS DE LA RADIO...
  • Seite 18: Descripción De Los Controles

    DESCRIPCIÓN DE LOS CONTROLES DESCRIPCIÓN DE LA PANTALLA VISTA DE LA PANTALLA LCD VISTA POSTERIOR...
  • Seite 19: Instalación De Pilas

    INSTALACIÓN DE PILAS FUNCIÓN MP3 Las pilas deben insertarse correctamente para evitar daños en la radio. INSTALACIÓN DE TARJETA SD Retire las pilas del compartimento cuando no se vaya a utilizar por un período prolongado. Abra el SOPORTE TRASERO e Esto evitará...
  • Seite 20: Sintonizar Emisoras

    SINTONIZAR EMISORAS SINTONIZAR EMISORAS Presione el botón de ENCENDIDO Y APAGADO para encender la radio, entonces seleccione MÉTODO 2: SINTONIZACIÓN MANUAL la banda deseada pulsando las teclas FM, AM, SW ( ) o ( ). Ahora, podrá sintonizar sus Búsqueda de frecuencia: emisoras favoritas con cualquiera de los siguientes métodos de sintonización: Presione el botón VF para entrar al MÉTODO 1: ETM (EASY TUNING MODE)
  • Seite 21 EMISORAS ALMACENADAS EMISORAS ALMACENADAS Hay un total de 550 memorias preestablecidas dentro de la unidad. MÉTODO 2: ALMACENAR EMISORAS MANUALMENTE 100 memorias preestablecidas para cada banda FM, MW y LW, y 250 para SW. Seleccione la banda y sintonice la emisora deseada. MÉTODO 1: ATS (AUTO TUNING STORAGE) Presione el botón M cuando la palabra “PRESET ”...
  • Seite 22: Función Sleep

    ESCUCHAR EMISORAS ALMACENADAS FUNCIÓN SLEEP MÉTODO 3: BÚSQUEDA DE PRESINTONÍAS DIRECTAMENTE CON EL TECLADO Mantenga presionado el botón de ENCENDIDO hasta que Pulse el botón VM para acceder al modo de memoria. “SLEEP” y “ON”, o 1~120” aparezcan en la pantalla. Presione las teclas numéricas 0-9 para introducir la dirección de memoria directamente, y luego presione el botón ( ) para confirmar.
  • Seite 23: Función Snooze

    ALARMAS ALARMAS Se recomienda configurar la alarma con el pitido si no está familiarizado con la frecuencia Notas: de radio local y la hora de emisión. • Si no se vuelve a presionar el botón ( ) en 3 segundos, la unidad confirmará CONFIRGURAR LA ALARMA ZUMBADOR automáticamente la configuración de la alarma.
  • Seite 24: Configuración Del Sistema

    CONFIGURACIÓN DEL SISTEMA CONFIGURACIÓN DEL SISTEMA FUNCIÓN DE ILUMINACIÓN INTELIGENTE SILENCIAR/ACTIVAR EL TONO DE LAS TECLAS Con la radio apagada, presione y mantenga presionado el botón [BEEP ON/OFF] La radio cuenta con la Función de iluminación inteligente que hace que la pantalla se hasta que aparezca “ON”...
  • Seite 25: Entrada Auxiliar

    FM ESTÉREO Y ANCHO DE BANDA ENTRADA AUXILIAR FM ST. (FM ESTÉREO) Modo de entrada auxiliar Esta unidad se puede usar como un altavoz activo para computadoras portátiles, Mientras escucha emisoras de FM estéreo, presione el botón [ST.], en la pantalla MP3 y otros reproductores de audio pequeños siguiendo los pasos indicados a aparecerá...
  • Seite 26: Guía De Solución De Problemas

    10 kHz para AM. presionado nuevamente el botón Cable USB x1 [9 / 10kHz] para seleccionar 10kHz. Pilas AA Aiwa Xtra+ Alkaline Power x3 Cuando se activa Tal vez no configuró la emisora Resintonice su emisora de alarma...
  • Seite 27 DIAGRAMA DE BLOQUES FUNCIONAL NOTAS RMD-99 ST. utiliza microchips DSP si4734 (de Silicon Labs, EE.UU.) para digitalizar la base de señal de transmisión analógica AM/FM en la tecnología de software moderna y los principios de radio. Puede mejorar la sensibilidad, la selectividad, la relación señal / ruido y la interferencia de la radio.
  • Seite 28 INTRODUCTION PRÉCAUTIONS DE SÉCURITÉ Lisez ces consignes de sécurité avant d’utiliser votre appareil et stockez-les pour référence Merci d’avoir acheté notre RMD-99 ST: Radio multi-bandes stéréo DSP / SW / MW / LW future possible. avec lecteur MP3. Si le cordon est endommagé, faites-le L’appareil est conçu pour être utilisé...
  • Seite 29: Mesures De Sécurité Importantes

    MESURES DE SÉCURITÉ IMPORTANTES MESURES DE SÉCURITÉ IMPORTANTES 1. LIRE INSTRUCTIONS: 8. VENTILATION: 12. FOUDRE: 17. DOMMAGES NÉCESSITANT UNE RÉPARATION: Toutes les instructions de sécurité et Pour une protection supplémentaire Les fentes et les ouvertures dans d’exploitation doivent être lues avant que le l’armoire sont fournies pour la ventilation pour ce produit lors d’un orage, ou Débranchez ce produit de la prise murale...
  • Seite 30: Preparation Avant Utilisation

    9/10kHz DISPLAY Radio multi-bandes x1 Casque Aiwa-Q Design x1 ALARM BEEP ON/OFF DELETE Batteries AA Aiwa Xtra+ Alkaline Power x3 Câble USB x1 NON RECHARGEABLE VUE SUPÉRIEURE Dragonne x1 Mode d’emploi x1 Pochette de transport x1 Fiche de garantie x1 CARACTÉRISTIQUES DE LA RADIO...
  • Seite 31: Description Des Commandes

    DESCRIPTION DES COMMANDES DESCRIPTION DE L’ÉCRAN VUE D’ÉCRAN LCD VUE ARRIÈRE...
  • Seite 32: Installation De La Batterie

    INSTALLATION DE LA BATTERIE FONCTION MP3 Les piles doivent être insérées correctement pour éviter d’endommager la radio. INSTALLATION DE LA CARTE SD Retirez toujours les piles lorsque la radio ne sera pas utilisée pendant une longue période Ouvrez le SUPPORT ARRIÈRE et de temps, car cela entraînera des fuites sur les batteries et, par la suite, des dommages à...
  • Seite 33 ACCORDER DES STATIONS ACCORDER DES STATIONS Appuyez sur le bouton MARCHE ET ARRÊT pour allumer votre radio, puis sélectionnez MÉTHODE 2: SYNTONISATION MANUELLE votre bande désirée en appuyant sur le bouton FM, MW/LW, SW ( ) ou ( ). Maintenant, Recherche de fréquence: vous pouvez vous transformer en vos stations préférées avec l’une des méthodes de tuning Appuyez sur le bouton VF pour...
  • Seite 34 STATIONS STOCKÉES STATIONS STOCKÉES Il y a un total de 550 souvenirs préréglés au sein de l’unité. MÉTHODE 2: LES STATIONS DE STOCKAGE MANUELLEMENT 100 souvenirs préréglés pour chaque bande FM, MW et LW, et 250 pour SW. Sélectionnez la bande et l’accord à votre station désirée. MÉTHODE 1: ATS (AUTO TUNING STORAGE) Appuyez sur le bouton M avec le mot “PRESET ”...
  • Seite 35: Fonction Sleep

    ÉCOUTER LES STATIONS STOCKÉES FONCTION SLEEP MÉTHODE 3 : CLÉ DIRECTE DANS L’ADRESSE MÉMOIRE Appuyez et maintenez le bouton MARCHE ET ARRÊT Appuyez sur le bouton VM pour entrer dans le mode mémoire. jusqu’à ce que l’affichage “SLEEP” et “ON”, ou 1~120” Appuyez sur les touches numériques 0-9 pour entrer l’adresse mémoire sur l’écran.
  • Seite 36: Fonction Snooze

    ALARMES ALARMES Il est recommandé de régler l’alarme par buzzer si vous n’êtes pas familier avec la fréquence Notes: radio locale et le temps d’antenne. • Si vous n’appuyez pas à nouveau sur le bouton ( ) dans les 3 secondes, l’appareil RÉGLAGE DE L’ALARME PAR RONFLEUR confirmera automatiquement les réglages de l’alarme.
  • Seite 37: Paramètres Du Système

    PARAMÈTRES DU SYSTÈME PARAMÈTRES DU SYSTÈME FONCTION DE LUMIÈRE INTELLIGENTE MUET/UNMUTE LA TONALITÉ DE CLÉ Avec la radio éteinte, appuyez et maintenez le bouton [BEEP ON/OFF] jusqu’à ce Cette radio a une fonction d’éclairage intelligent avec laquelle le rétroéclairage serait que “ON”...
  • Seite 38: Entrée Auxiliaire

    FM STÉRÉO ET BANDE PASSANTE ENTRÉE AUXILIAIRE FM ST. (FM STÉRÉO) Mode d’entrée auxiliaire Cet appareil peut être utilisé comme haut-parleur actif pour les ordinateurs Tout en écoutant les stations stéréo FM, appuyez sur le bouton [ST.] l’indicateur portables, les lecteurs MP3 et autres petits lecteurs audio en suivant les étapes “...
  • Seite 39: Guide De Dépannage

    AM aux États-Unis. étape pour AM. le bouton [9 / 10kHz] enfoncé Câble USB x1 pour sélectionner 10kHz. Batteries AA Aiwa Xtra+ Alkaline Power x3 Lorsque l’alarme Peut-être que vous n’avez pas Préinitialisez votre station d’alarme est activé (alarme mis le station d’alarme radio correctement.
  • Seite 40: Schéma Fonctionnel

    SCHÉMA FONCTIONNEL NOTES RMD-99 ST. utilise des puces DSP si4734 (de Silicon Labs, USA) pour numériser la base de signaux de radiodiffusion AM/FM analogique sur la technologie logicielle moderne et les principes de la radio. Il peut améliorer considérablement la sensibilité, la sélectivité, le rapport S/N et l’interférence de la radio.
  • Seite 41: Sicherheitsanweisungen

    DEUTSCH SICHERHEITSANWEISUNGEN Lesen Sie diese Sicherheitshinweise, bevor Sie Ihr Gerät in Betrieb nehmen, und Vielen Dank für Kaufen vonb RMD-99 ST.: Multiband-Stereo-Radio / SW / MW / LW DSP bewahren Sie sie für auf mögliche zukünftige Referenz. mit MP3-Player. Das ist Ihre Versicherung von Qualität, Leistung und Wert. Unsere Ingenieure haben viele Wenn das Kabel beschädigt ist, lassen...
  • Seite 42: Sicherheitsvorkehrungen

    SICHERHEITSVORKEHRUNGEN SICHERHEITSVORKEHRUNGEN Eine Produkt- und Wagenkombination 16. WARTUNG: 1. LESEN SIE DIE ANWEISUNGEN: 11. PERIODEN DER NICHTBENUTZUNG: sollte mit Vorsicht bewegt werden - Alle Sicherheits- und Betriebsanleitungen Versuchen Sie nicht, dieses Produkt Das Netzkabel des Produkts sollte von schnelle Stopps, übermäßige Kraft selbst zu warten, da das Öffnen oder sollten vor dem Betrieb des Produkts der Steckdose abgezogen werden,...
  • Seite 43: Vorbereitung Für Den Gebrauch

    Die Verwendung des Originalkartons und der Verpackungsmaterialien ist die einzige SLEEP richtige Möglichkeit, das Gerät vor Versandschäden zu schützen. SCAN FM SET 12/24 9/10kHz DISPLAY Multiband In-ear Aiwa-Q Design x1 Funkempfänger x1 ALARM BEEP ON/OFF DELETE AA-Batterien Aiwa Xtra+ Alkaline Power x3 USB-Kabel x1 NICHT...
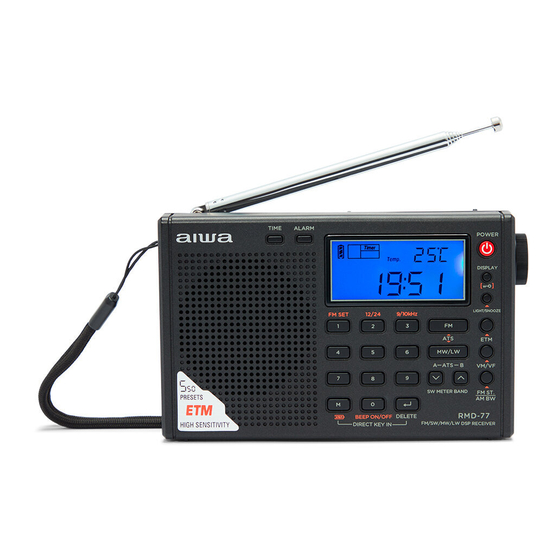
  • Seite 44: Beschreibung Der Kontrollen

    BESCHREIBUNG DER KONTROLLEN BESCHREIBUNG DER ANZEIGE LCD-ANSICHT RÜCKANSICHT...
  • Seite 45: Batterieinstallation

    BATTERIEINSTALLATION MP3-FUNKTION Batterien müssen richtig eingesetzt werden, um Schäden am Radio zu vermeiden. SD-KARTENINSTALLATION Entfernen Sie die Batterien immer, wenn das Radio für einen längeren Zeitraum nicht Öffnen Sie den RÜCKSEITIGEN verwendet wird, da dies zu Leckagen an den Batterien und anschließend zu Schäden an SUPPORT und legen Sie die SD-Karte Ihrem Gerät führenwird.
  • Seite 46: In Stationen Einstellen

    IN STATIONEN EINSTELLEN IN STATIONEN EINSTELLEN Drücken Sie die Einschalten / Ausschalten-Taste, um Ihr Radio einzuschalten, und METHODE 2: MANUELLE ABSTIMMUNG wählen Sie dann Ihr gewünschtes Band aus, indem Sie die Taste FM, MW/LW, SW ( ) Frequenzsuche: oder ( ) drücken. Jetzt können Sie mit einer der folgenden Tuning-Methoden zu Ihren Drücken Sie die VF-Taste, um in den Lieblingssendern übergehen: Frequenzmodus zu wechseln, und...
  • Seite 47: Verwendung Der Gespeicherten Stationen

    VERWENDUNG DER GESPEICHERTEN STATIONEN VERWENDUNG DER GESPEICHERTEN STATIONEN Es gibt insgesamt 550 voreingestellte Speicher innerhalb des Geräts. 100 voreingestellte METHODE 2: STATIONEN MANUELL SPEICHERN Speicher für jedes FM-, MW- und LW-Band und 250 für SW. Wählen Sie Band und stimmen Sie auf Die gewünschte Station ein. METHODE 1: ATS (AUTO TUNING STORAGE) Drücken Sie die M-Taste mit dem Wort “PRESET ”...
  • Seite 48: Speicher Löschen

    HÖREN AUF GESPEICHERTE STATIONEN SCHLAFFUNKTION METHODE 3: DIREKTE TASTE IN DER SPEICHERADRESSE Halten Sie die Einschalten / Ausschalten-Taste gedrückt, Drücken Sie die VM-Taste, um in den Speichermodus zu wechseln. bis “SLEEP” und “ON” oder 1~120” auf dem Display Drücken Sie die numerischen Tasten 0-9, um die Speicheradresse direkt angezeigt werden.
  • Seite 49: Snooze-Funktion

    ALARM ALARM Es wird empfohlen, den Alarm per Summer einzustellen, wenn Sie nicht mit der lokalen Hinweis: Radiofrequenz und Sendezeit vertraut sind. • Das Radio schaltet sich automatisch die voreingestellte Station ab, wenn es die Alarmzeit erreicht. Es wird auch automatisch ausschalten, wenn es den voreingestellten Alarm aus EINSTELLUNG DES ALARMS DURCH BUZZER Timer erreicht.
  • Seite 50: Systemeinstellungen

    SYSTEMEINSTELLUNGEN SYSTEMEINSTELLUNGEN INTELLIGENTE LICHTFUNKTION MUTE/UNMUTE DER KEY TONE Wenn das Radio ausgeschaltet ist, halten Sie die Taste [BEEP ON/OFF] gedrückt, bis Dieses Radio hat eine intelligente Beleuchtungsfunktion, mit der die Hintergrundbeleuchtung “ON” oder “OFF” im Display erscheint, um den Ton zu aktivieren bzw. zu deaktivieren. für 3 Sekunden eingeschaltet wäre, wenn sie irgendwelche Tasten oder Knöpfe bedient.
  • Seite 51: Line-In-Modus

    FM STEREO & BANDBREITE LINE-IN-MODUS FM ST. (FM STEREO) Hilfseingangsfunktionsmodus Dieses Gerät kann wie folgt als Aktivlautsprecher für Laptops, MP3-Player und andere Beim Hören von FM-Stereostationen, drücken Sie die [ST.]-Taste, die “ ” Anzeige kleine Audioplayer verwendet werden. erscheint auf dem Bildschirm, um den STEREO-Hörmodus zu aktivieren. Wenn das empfangene FM-Übertragungssignal zu schwach ist, wird empfohlen, die Schließen Sie das Audiokabel an die LINE IN Buchse an.
  • Seite 52: Anleitung Zur Fehlerbehebung

    AM-Empfang in Tuning-Schritt für AM. repeat drücken und halten Sie USB-Kabel x1 den USA. die Taste [9/10kHz], um 10kHz AA-Batterien Aiwa Xtra+ Alkaline Power x3 auszuwählen. Bedienungsanleitung x1 Wenn der Alarm Vielleicht haben Sie die Stellen Sie Ihre Alarmstation aktiviert (Alarm richtigen Funkalarmstation.
  • Seite 53 FUNKTIONSBLOCKDIAGRAMM ANMERKUNGEN RMD-77 verwendet DSP si4734 Mikrochips (von Silicon Labs, USA), um die analoge AM/ FM-Sendesignalbasis auf der modernen Softwaretechnologie und den Funkprinzipien zu digitalisieren. Es kann die Empfindlichkeit des Radios, selektiv, S /N-Verhältnis und Interferenz stark verbessern. AMPL IFIER CONTROLLER CONTROL INTERFACE...
  • Seite 54: Precauzioni Di Sicurezza

    ITALIANO PRECAUZIONI DI SICUREZZA Leggere queste istruzioni di sicurezza prima di utilizzare il dispositivo e conservarle Grazie per aver acquistato il RMD-99 ST.: Radio FM stereo / SW / MW / LW DSP con come riferimento in futuro. lettore MP3.
  • Seite 55 PRECAUZIONI DI SICUREZZA PRECAUZIONI DI SICUREZZA e superfici irregolari possono causare il 1. LEGGI ISTRUZIONI: 12. FULMINI: 17. DANNI CHE RICHIEDONO LA ribaltamento della combinazione prodotto RIPARAZIONE: Tutte le istruzioni di sicurezza e di Per una maggiore protezione per questo e carrello.
  • Seite 56: Preparazione Per L'uso

    9/10kHz DISPLAY Radio multibanda x1 Cuffia Aiwa-Q Design x1 ALARM BEEP ON/OFF DELETE Batterie AA Aiwa Xtra+ Cavo USB x1 Alkaline Power x3 NON RICARICABILE VISTA SUPERIORE Cinghia di serraggio x1 Manuale dell’utente x1 Foglio di garanzia x1 Custodia per il...
  • Seite 57: Descrizione Dei Controlli

    DESCRIZIONE DEI CONTROLLI DESCRIZIONE DELLO SCHERMO VISUALIZZAZIONE SCHERMO LCD VISTA POSTERIORE...
  • Seite 58: Installazione Della Batteria

    INSTALLAZIONE DELLA BATTERIA FUNZIONE MP3 Le batterie devono essere inserite correttamente per evitare danni alla radio. INSTALLAZIONE SCHEDA SD Rimuovere sempre le batterie quando la radio non verrà utilizzata per un lungo periodo di Aprire il SUPPORTO POSTERIORE tempo, in quanto ciò causerà perdite alle batterie e successivamente danni al dispositivo. e inserire la scheda SD nella PORTA SCHEDA SD in base all’indirizzo INSTALLAZIONE DELLA BATTERIA...
  • Seite 59 SINTONIZZARSI SULLE STAZIONI SINTONIZZARSI SULLE STAZIONI Premere il pulsante ACCENSIONE E SPEGNIMENTO per accendere la radio, quindi selezionare METODO 2: SINTONIA MANUALE la banda desiderata premendo il pulsante FM, MW/LW, SW ( ) o ( ). Ora puoi trasformarti Ricerca di frequenza: nelle tue stazioni preferite con uno dei seguenti metodi di accordatura: Premere il pulsante VF per passare alla modalità...
  • Seite 60 STAZIONI MEMORIZZATE STAZIONI MEMORIZZATE C’è un totale di 550 memorie preimpostate all’interno dell’unità. METODO 2: MEMORIZZARE MANUFACTURERS MANUALMENTE 100 memorie preimpostate per ogni banda FM, MW e LW e 250 per SW. Selezionare la banda e sintonizzare la stazione desiderata. METODO 1: ATS (AUTO TUNING STORAGE) Premere il tasto M con la parola “PRESET ”...
  • Seite 61: Funzione Sleep

    ASCOLTARE LE STAZIONI MEMORIZZATE FUNZIONE SLEEP METODO 3: CHIAVE DIRETTA NELL’INDIRIZZO DI MEMORIA Premere e tenere premuto il tasto ACCENSIONE E SPEG- Premere il pulsante VM per entrare in modalità memoria. NIMENTO fino a visualizzare hasta que “SLEEP” e “ON”, o Premere i tasti numerici 0-9 per immettere direttamente l’indirizzo di memoria, 1~120”...
  • Seite 62: Funzione Snooze

    ALLARME ALLARME Notas: Si consiglia di impostare l’allarme dal cicalino se non si ha familiarità con la frequenza radio locale e il tempo di aria. • Se il pulsante ( ) non viene premuto di nuovo entro 3 secondi, l’unità confermerà automaticamente le impostazioni di allarme.
  • Seite 63: Impostazioni Di Sistema

    IMPOSTAZIONI DI SISTEMA IMPOSTAZIONI DI SISTEMA FUNZIONE DI LUCE INTELLIGENTE MUTE/UNMUTE IL DENTE TONE Con la radio disattivata, tenere premuto il pulsante [BEEP ON/OFF] fino a quando Questa radio ha una funzione di illuminazione intelligente con cui la retroilluminazione non appare “ON” o “OFF” sul display per attivare o disattivare il tono del tasto sarebbe accesa per 3 secondi quando si utilizza qualsiasi tasto o manopole.
  • Seite 64: Ingresso Ausiliario

    STEREO FM E LARGHEZZA DI BANDA INGRESSO AUSILIARIO FM ST. (FM STEREO) Modalità ingresso ausiliario Questa unità può essere utilizzata come altoparlante attivo per laptop, MP3 e Durante l’ascolto di stazioni stereo FM, premere il pulsante [ST.], l’indicatore altri piccoli lettori audio seguendo i passaggi seguenti. “...
  • Seite 65: Guida Alla Risoluzione Dei Problemi

    Spegni la radio, premere e tenere Cavo USB x1 AM negli Stati Uniti. ottimizzazione 10kHz per AM. premuto ilpulsante [9 / 10kHz] Batterie AA Aiwa Xtra+ Alkaline Power x3 per selezionare 10 kHz. Manuale dell’utente x1 Quando l’allarme Forse non hai impostato il corretta Preimpostare la stazione di è...
  • Seite 66 DIAGRAMMA FUNZIONALE A BLOCCHI NOTE RMD-77 utilizza microchip DSP si4734 (da Silicon Labs, USA) per digitalizzare la base di segnale di trasmissione analogica AM/FM sulla moderna tecnologia software e sui principi radio. Può migliorare notevolmente la sensibilità, la selettività, il rapporto S/N e l’interferenece della radio.
  • Seite 67: Precauções De Segurança

    PORTUGUÊS PRECAUÇÕES DE SEGURANÇA Leia estas instruções de segurança antes de usar o dispositivo e salve-as como referência Obrigado por adquirir o RMD-99 ST.: Radio stereo multibanda / SW / MW / LW DSP no futuro. com MP3 player. Se o cabo do carregador estiver O dispositivo destina-sea ser utilizado É...
  • Seite 68 PRECAUÇÕES DE SEGURANÇA PRECAUÇÕES DE SEGURANÇA 1. INSTRUÇÕES DE LEITURA: 8. VENTILAÇÃO: 12. RELÂMPAGO: 17. DANOS QUE EXIJAM O SERVIÇO: Todas as instruções de segurança e de Os entalhes e as aberturas no armário Para maior proteção para este produto Desligue este produto da tomada são fornecidos para a ventilação e para funcionamento devem ser lidas antes de...
  • Seite 69: Preparação Para O Uso

    9/10kHz DISPLAY Rádio multibanda x1 Auscultadores Aiwa-Q Design x1 ALARM BEEP ON/OFF DELETE Pilhas AA Aiwa Xtra+ Cabo USB x1 Alkaline Power x3 VISTA SUPERIOR NÃO RECARREGÁVEL Cinta de aperto x1 Manual de usuário x1 Bolsa de transporte x1 Folha de garantia x1 VISTA LATERAL CARACTERÍSTICAS DO RÁDIO...
  • Seite 70: Descrição Dos Controlos

    DESCRIÇÃO DOS CONTROLOS DESCRIÇÃO DA TELA VISÃO DE TELA LCD VISTA POSTERIOR...
  • Seite 71: Instalação Da Bateria

    INSTALAÇÃO DA BATERIA FUNÇÃO MP3 As baterias devem ser inseridas corretamente para evitar danos ao rádio. INSTALAÇÃO DO CARTÃO SD Retire sempre as pilhas quando o rádio não for utilizado durante um longo período de Abra o SUPORTE TRASEIRO e tempo, pois isso causará...
  • Seite 72 SINTONIZAR ESTAÇÕES SINTONIZAR ESTAÇÕES Prima o botão LIGADO E DESLIGADO para ligar o rádio e, em seguida, seleccione a banda MÉTODO 2: SINTONIZAÇÃO MANUAL pretendida premindo o botão FM, MW/LW, SW ( ) ou ( ). Agora, você pode se transformar Procura de frequência: em suas estações favoritas com qualquer um dos seguintes métodos de ajuste: Prima o botão VF para mudar para o...
  • Seite 73 ESTAÇÕES ARMAZENADAS ESTAÇÕES ARMAZENADAS Há um total de 550 memórias predefinidas dentro da unidade. MÉTODO 2: MEMORIZAR ESTAÇÕES MANUALMENTE MÉTODO 100 memórias predefinidas para cada banda FM, MW e LW, e 250 para SW. Selecione a banda e sintonize a estação desejada. MÉTODO 1: ATS (AUTO TUNING STORAGE) Pressione o botão M quando a palavra “PRESET ”...
  • Seite 74: Função Sleep

    OUVIR ESTAÇÕES ARMAZENADAS FUNÇÃO SLEEP MÉTODO 3: CHAVE DIRETA NO ENDEREÇO DE MEMÓRIA Pressione e segure o botão LIGAR E DESLIGAR Pressione o botão VM para entrar no modo de memória. até “SLEEP” e “ON”, ou 1~120” show no visor. Prima as teclas numéricas 0-9 para introduzir o endereço de memória directamente e, em seguida, prima o botão ( ) para confirmar.
  • Seite 75: Função Snooze

    ALARMES ALARMES Recomenda-se ajustar o alarme pela campainha eléctrica se você não é familiar com a Notas: radiofrequência local e o tempo de ar. • Se o botão ( ) não for pressionado novamente em 3 segundos, a unidade REGULAÇÃO DO ALARME POR CAMPAINHA ELÉCTRICA confirmará...
  • Seite 76: Configurações Do Sistema

    CONFIGURAÇÕES DO SISTEMA CONFIGURAÇÕES DO SISTEMA FUNÇÃO DE LUZ INTELIGENTE SILENCIAR/DESLIGAR O TOM DA TECLA Com o rádio desligado, pressione e segure o botão [BEEP ON/OFF] até que “ON” ou Este rádio tem uma função de iluminação inteligente com a qual a luz de fundo estaria “OFF”...
  • Seite 77: Utilizar Pilhas

    FM ESTÉREO & LARGURA DE BANDA ENTRADA AUXILIAR FM ST. (FM ESTÉREO) Modo de entrada auxiliar Esta unidade pode ser usada como um alto-falante ativo para laptops, MP3s e outros Enquanto ouve estações estéreo FM, prima o botão [ST.], o indicador “ ”...
  • Seite 78: Guia De Solução De Problemas

    Cabo USB x1 por rádio), há adequada. único ruído com o Pilhas AA Aiwa Xtra+ Alkaline Power x3 Não há radiodifusão em aquela Certifique-se de que há um rádio transmissão. estaçãode rádio. transmitido na sua localização.
  • Seite 79 DIAGRAMA DE BLOCOS FUNCIONAIS NOTAS RMD-77 usa DSP si4734 microchips (de Silicon Labs, EUA) para digitalizar o analógico AM/FM base de sinal de radiodifusão sobre a moderna tecnologia de software e os princípios de rádio. Pode altamente melhorar a sensibilidade do rádio, a seletividade, a relação de S/N e o interferenece.
  • Seite 80 AIWA CO., LTD. TOKYO, JAPAN www.eu-aiwa.com Printed in P.R.C.

Inhaltsverzeichnis