Alphacool ES 4U Montagehinweise
Inhaltsverzeichnis
Verfügbare Sprachen
Verfügbare Sprachen
Inhaltsverzeichnis

Verwandte Anleitungen für Alphacool ES 4U


Inhaltszusammenfassung für Alphacool ES 4U
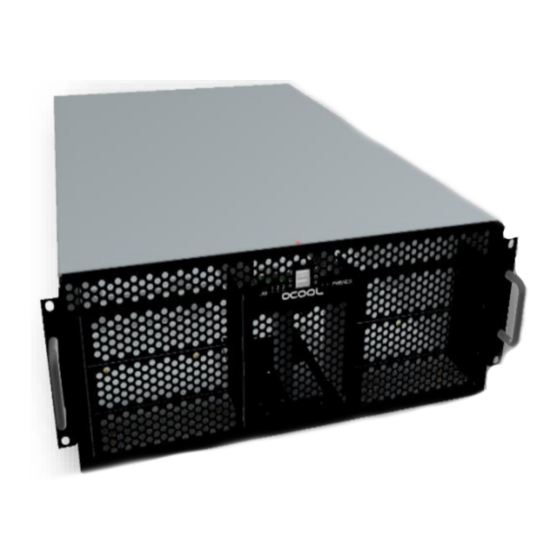
- Seite 1 ALPHACOOL ES 4U - 19" – SERVERRACK - WATERCOOLING READY V1.000.12-2019...
-
Seite 2: Inhaltsverzeichnis
Deutsch -Alphacool ES 4U - 19" – ServerRack - Watercooling ready Deutsch ..........................3 Sicherheitshinweise ........................3 Montagematerial ........................... 3 Technische Details ........................4 Montage ............................6 Gehäusedeckel entfernen ......................6 IO-Panel anschließen ........................ 6 Pinbelegung der USB-Buchse..................... 6 5 1/4-inch-Laufwerke montieren ....................7 2,5-inch-SSD-Laufwerke montieren ................... -
Seite 3: Deutsch
Alphacool ES 4U - 19" – ServerRack - Watercooling ready - Deutsch DEUTSCH SICHERHEITSHINWEISE LESEN SIE DIE SICHERHEITSHINWEISE, BEVOR SIE MIT DER INSTALLATION BEGINNEN. MONTAGEMATERIAL 18x Schraube 6-32UNC 18x Abstandhalter 4x Senkschraube M3x5 4x Schraube M4x6 4x Schraube M3x5 1x USB Kabel... - Seite 5 Alphacool ES 4U - 19" – ServerRack - Watercooling ready - Deutsch Front-Panel: 3x LAN LED, Reset-Taster, Front USB2.0, Power-Taster, Power LED, HDD LED Ansicht von vorn Ansicht von hinten • IO- Panel • Platz für 2x ATX-Netzteile • 6x 5 1/4-inch Einschübe •...
-
Seite 6: Montage
Deutsch -Alphacool ES 4U - 19" – ServerRack - Watercooling ready MONTAGE Gehäusedeckel entfernen Der Gehäusedeckel ist mit 8 Schrauben montiert. Hier im Bild rot markiert. Schrauben sie alle acht Schrauben heraus: Jeweils drei Schrauben an den Seiten, eine vorne/oben und eine an der Rückseite. -
Seite 7: 1/4-Inch-Laufwerke Montieren
Alphacool ES 4U - 19" – ServerRack - Watercooling ready - Deutsch 5 1/4-inch-Laufwerke montieren Schrauben sie die vier rot markierten Schrauben heraus. Entnehmen sie den 5 1/4-inch Rahmen, indem sie ihn leicht nach hinten und oben ziehen. Schrauben sie die Blenden ab, die durch Laufwerke ersetzt werden sollen. -
Seite 8: 2,5-Inch-Ssd-Laufwerke Montieren
Deutsch -Alphacool ES 4U - 19" – ServerRack - Watercooling ready 2,5-inch-SSD-Laufwerke montieren Montieren sie das SSD-Laufwerk an einen der zwei Plätzen. Verwenden sie die Schrauben, die beim Laufwerk dabei liegen. Radiatoren und Lüfter montieren BEACHTEN SIE BEI DER MONTAGE DER LÜFTER, DASS DER LUFTSTROM IMMER VON VORNE NACH HINTEN GEHT. -
Seite 9: Netzteil Montieren
Alphacool ES 4U - 19" – ServerRack - Watercooling ready - Deutsch Stecken sie einen oder beide montierten Radiatorrahmen in das Gehäuse. Diese können mit Hilfe der seitlich am Gehäuse zu findenden Lochreihen ausgerichtet werden. Schrauben sie die Radiatorrahmen wieder mit den rot markierten Schrauben fest. -
Seite 10: Mainboard Einsetzen
Deutsch -Alphacool ES 4U - 19" – ServerRack - Watercooling ready Mainboard einsetzen Schrauben sie die rot markierten Schrauben falls vorhanden aus den Abstandshaltern heraus. Schrauben sie die Abstandshalter an die Stellen, welche zum Mainboard passen. Klipsen sie die beim Mainboard beiliegende ATX-Blende in die Öffnung... -
Seite 11: Montage Der Pumpe
Alphacool ES 4U - 19" – ServerRack - Watercooling ready - Deutsch Montieren sie die optional erhältlichen Verteiler, wie auf dem Bild zu sehen. Durch die Langlöcher können die Verteiler frei platziert werden. Befestigen sie die Verteilerleiste wieder mit den rot dargestellten Schrauben an einem freien Platz im Gehäuse. - Seite 12 Deutsch -Alphacool ES 4U - 19" – ServerRack - Watercooling ready Alphacool Eisstation Montage Demontieren sie die Halterung für die Laing DDC-Pumpen. Schrauben sie die rot markierten Schrauben heraus. Bewahren sie alle Teile sorgfältig auf. Schrauben sie nun die Alphacool Eisstation mit den rot markierten Schrauben an den Einschub.
- Seite 34 Français -Alphacool ES 4U - 19" – ServerRack - Watercooling ready Imprint: Alphacool International GmbH Marienberger Str. 1 38122 Braunschweig Support: +49 (0) 531 28874 – 0 Fax: +49 (0) 531 28874 – 22 E-Mail: info@alphacool.com General Managers: Andreas Rudnicki, Nathanael Draht, Fabian Noelte WEEE-Reg.-Nr.: DE 544444...