Werbung
Quicklinks
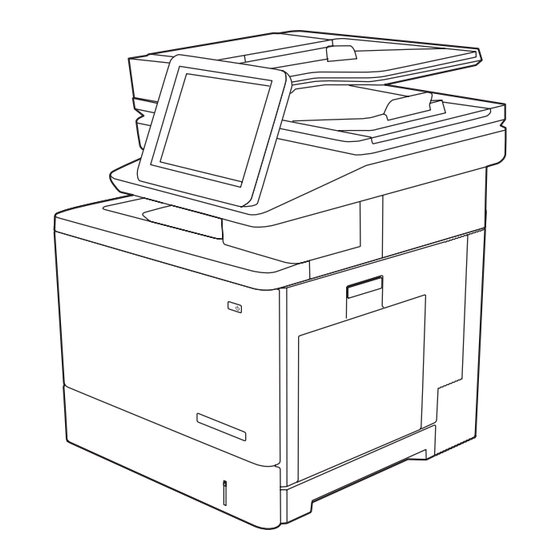
HP Color LaserJet Enterprise MFP M578
Installation Guide
EN
Guide d'installation
FR
Installationshandbuch
DE
Guida all'installazione
IT
Guía de instalación
ES
Guia d'instal·lació
CA
Vodič kroz instalaciju
HR
Instalační příručka
CS
Installationsvejledning
DA
Installatiehandleiding
NL
Asennusopas
FI
Οδηγός εγκατάστασης
EL
Telepítési útmutató
HU
Lea esto primero
ES
www.hp.com/videos/LaserJet
www.hp.com/support/colorljM578MFP
M578dn, M578f, M578c, M578z
Орнату нұсқаулығы
KK
Installasjonsveiledning
NO
Instrukcja instalacji
PL
Guia de instalação
PT
Ghid de instalare
RO
Руководство по установке
RU
Inštalačná príručka
SK
Priročnik za namestitev
SL
Installationsguide
SV
Kurulum Kılavuzu
TR
Посібник зі встановлення
UK
AR
Werbung

Verwandte Anleitungen für HP Color LaserJet Enterprise M578-Serie


Inhaltszusammenfassung für HP Color LaserJet Enterprise M578-Serie
- Seite 1 HP Color LaserJet Enterprise MFP M578 M578dn, M578f, M578c, M578z Installation Guide Орнату нұсқаулығы Guide d’installation Installasjonsveiledning Installationshandbuch Instrukcja instalacji Guida all’installazione Guia de instalação Guía de instalación Ghid de instalare Guia d’instal·lació Руководство по установке Vodič kroz instalaciju Inštalačná príručka Instalační...
- Seite 2 Select a sturdy, well-ventilated, dust-free area, away from direct Принтерді берік, жақсы желдетілетін, шаңсыз және күн сәулесі sunlight to position the printer. тікелей түспейтін жерге орнатыңыз. Plasser skriveren i et stabilt, støvfritt område med god ventilasjon Choisissez un support solide et un endroit propre, bien aéré et à og utenfor direkte sollys.
- Seite 4 Remove all tape and packing material. Бүкіл таспаны және орауыш материалын алып тастаңыз. Retirez tous les rubans adhésifs et les matériaux d'emballage. Fjern all tape og emballasje. Entfernen Sie das Klebeband und das Verpackungsmaterial. Usuń wszystkie fragmenty taśmy i materiały pakunkowe. Rimuovere tutto il nastro adesivo e il materiale di imballaggio.
- Seite 6 CAUTION: Do not extend more than one paper tray at a time. FORSIKTIG: Du må ikke dra ut mer enn én papirskuff om gangen. ATTENTION : N’utilisez pas plus d’un bac à papier à la fois. PRZESTROGA: Nie należy rozsuwać więcej niż jednego podajnika papieru jednocześnie.
- Seite 7 If you are connecting to a network, connect the network cable now. Ha hálózathoz csatlakozik, csatlakoztassa most a hálózati kábelt. CAUTION: Do not connect the USB cable now. FIGYELEM! Még ne csatlakoztassa az USB-kábelt. NOTE: The cables are not included with the printer. MEGJEGYZÉS: A kábelek nincsenek mellékelve a nyomtatóhoz.
- Seite 8 Connect the power cable between the printer and a grounded AC outlet. Turn on the printer. On the Initial Setup screen, set the language, the location, the date/time format, and other features. NOTE: For advanced setup for network-connected printers, enter the printer IP address in the address bar of a web browser after the printer is in a ready state.
- Seite 9 Endolleu el cable d'alimentació a la impressora i a una presa de CA connectada a terra. Engegueu la impressora. A la pantalla de Configuració inicial, establiu l’idioma, la localització, el format de data i hora i altres funcions. NOTA: per fer la configuració avançada de les impressores que es connecten a la xarxa, escriviu l'adreça IP de la impressora a la barra d'adreces d'un navegador web un cop la impressora estigui preparada.
-
Seite 10: Initial Setup
3.1Принтерді қуат сымы арқылы жерге тұйықталған айнымалы ток розеткасына жалғаңыз. 3.2Принтерді қосыңыз. Initial Setup (Бастапқы параметрлерді орнату) экранында тіл, мекенжай, күн және уақыт форматы мен басқа мүмкіндіктерді орнатыңыз. ЕСКЕРТПЕ. Желіге қосылатын принтерлердің қосымша параметрлерін орнату үшін, принтер дайын күйде болғаннан кейін принтердің IP мекенжайын... - Seite 11 Anslut skrivarens strömkabel till ett jordat växelströmsuttag. Starta skrivaren. På skärmen Initial Setup anger du språk, plats, datum-/ tidsformat och andra funktioner. OBS! För avancerad installation av nätverksanslutna skrivare anger du skrivarens IP-adress i adressfältet i en webbläsare, när skrivaren är klar. För att hitta IP-adressen väljer du knappen Information och sedan Ethernet-ikonen VARNING:...
- Seite 12 M578c, M578z Some languages require installing a keyboard overlay. Pull the keyboard out. Peel at a sharp angle to remove the paper backing from the overlay. All labels should adhere to the clear sheet. Align the top corners of the clear sheet to the corners of the esc and delete keys. Support the keyboard from the bottom, and firmly press the labels in place.
- Seite 13 Alcune lingue richiedono l'installazione di un overlay della tastiera. Estrarre la tastiera. Togliere la pellicola mantenendo un angolo di incidenza molto stretto per rimuovere la carta sul retro dell'overlay. Tutte le etichette devono aderire al foglio trasparente. Allineare gli angoli in alto nel foglio trasparente agli angoli dei tasti Esc ed Elimina. Tenere la tastiera dal basso e premere con decisione le etichette apposte.
- Seite 14 Noen språk krever at du installerer et tastaturoverlegg. Trekk ut tastaturet. Trekk av papirbeskyttelsen fra overlegget i en skarp vinkel. Alle etikettene skal henge fast på det gjennomsiktige arket. Juster de øverste hjørnene av det gjennomsiktige arket parallelt med esc- og delete-knappen. Støtt tastaturet fra undersiden, og trykk etikettene på...
- Seite 15 Windows: Do not connect the USB cable until prompted during Windows: Tilslut ikke USB-kablet, før du bliver bedt om det under the software installation in the next step. If the network cable was softwareinstallationen i næste trin. Hvis netværkskablet blev connected previously, proceed to the next section.
- Seite 16 Mac: priključite kabel USB. OPOMBA: kabli niso priloženi tiskalniku. Download the software installation files. Téléchargez les fichiers d'installation du logiciel. Method 1: Download HP Easy Start (Windows and macOS clients) Méthode 1 : Téléchargement de HP Easy Start (clients Windows et macOS) Go to 123.hp.com and click Download.
- Seite 17 Laden Sie die Software-Installationsdateien herunter. Descarregueu els fitxers d'instal·lació del programari. Methode 1: Download von HP Easy Start (Windows- und MacOS- Mètode 1: Descàrrega de l'HP Easy Start (clients Windows i macOS) Clients) Aneu a 123.hp.com i feu clic a Descàrrega.
- Seite 18 αποθηκεύτηκε το αρχείο και ακολουθήστε τις οδηγίες που HP Universal-printerdriveren. εμφανίζονται στην οθόνη. Μέθοδος 3: Ρύθμιση διαχειριζόμενη από IT (υπολογιστές-πελάτες και διακομιστές Windows μόνο) Download de software-installatiebestanden. Methode 1: Download HP Easy Start (Windows en macOS clients) Επισκεφθείτε τη διεύθυνση hp.com/go/upd για λήψη και Ga naar 123.hp.com en klik op Downloaden.
- Seite 19 Faça download dos arquivos de instalação do software. Бағдарламалық құралды орнату файлдарын жүктеп алыңыз. Método 1: Faça download do HP Easy Start (clientes Windows 1-әдіс: HP Easy Start бағдарламасын жүктеп алу e macOS) (Windows және macOS клиенттері) 123.hp.com сайтына өтіп, Download (Жүктеп алу) түймесін...
- Seite 20 Prevezmite inštalačné súbory softvéru. Yazılım yükleme dosyalarını indirin. Metóda č. 1: Prevzatie aplikácie HP Easy Start 1. Yöntem: HP Easy Start'ı indirme (Windows ve macOS istemciler) (klienty so systémom Windows a macOS) 123.hp.com adresine gidin ve Indir öğesine tıklayın. Prejdite na stránku 123.hp.com a kliknite na tlačidlo Download Ekrandaki yönergeleri izleyin.
- Seite 22 Embedded Web Server, and remote and mobile printing using microprogramari, configuració avançada mitjançant Embedded HP ePrint go to www.hp.com/support/colorljM578MFP. Web Server i impressió remota i mòbil mitjançant HP ePrint, aneu Press the Help button on the printer control panel to access a www.hp.com/support/colorljM578MFP.
- Seite 23 încorporat (EWS) şi despre server, και πληροφορίες σχετικά με την απομακρυσμένη εκτύπωση imprimarea de la distanţă şi mobilă utilizând HP ePrint, accesaţi και την εκτύπωση από φορητές συσκευές μέσω του HP ePrint, www.hp.com/support/colorljM578MFP. μεταβείτε στη διεύθυνση www.hp.com/support/colorljM578MFP.
- Seite 24 The information contained herein is subject to change without notice. Les informations contenues dans ce document peuvent être modifiées The only warranties for HP products and services are set forth in the sans préavis. express warranty statements accompanying such products and services.