Netatmo NOC01 Benutzerhandbuch
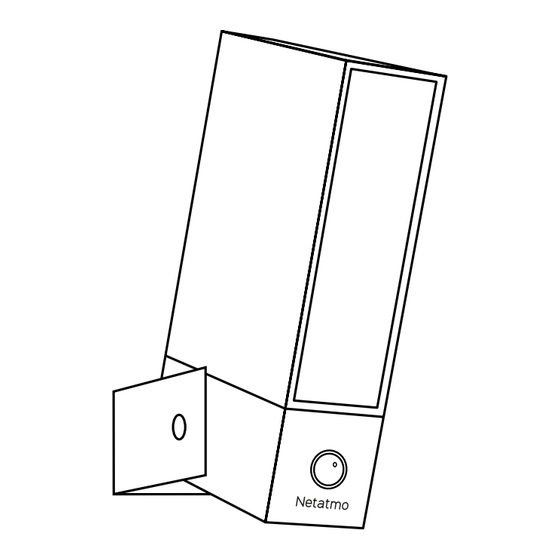
Smart outdoor camera
Vorschau ausblenden
Andere Handbücher für NOC01:
- Benutzerhandbuch (73 Seiten) ,
- Benutzerhandbuch (60 Seiten)
Smart Outdoor Camera
Smart Outdoor Camera with Siren
EN
FR
DE
ES
IT
NL
PT
RU
CN
TW
JP
More languages available at netatmo.com/outdoor-cam-setup
User guide
Guide de l'utilisateur
Benutzerhandbuch
Guía del usuario
Manuale di istruzioni
Gebruikershandleiding
Guia de utilizador
Руководство пользователя
用户指南
使用者指南
ユーザーガイド
1

Verwandte Anleitungen für Netatmo NOC01


Inhaltszusammenfassung für Netatmo NOC01
- Seite 1 Smart Outdoor Camera Smart Outdoor Camera with Siren User guide Guide de l'utilisateur Benutzerhandbuch Guía del usuario Manuale di istruzioni Gebruikershandleiding Guia de utilizador Руководство пользователя 用户指南 使用者指南 ユーザーガイド More languages available at netatmo.com/outdoor-cam-setup...
- Seite 2 Smart Outdoor Camera Smart Outdoor Camera Pack content: (E) 6 mounting screws (A) 1 Smart Outdoor (3 sizes). Camera. (F) 2 wall screws (B) 1 mounting strap and 2 anchors. and green screws. (G) 1 protective (C) 1 mounting holder envelope.
- Seite 3 Contenuto della confezione: (D) 1 Brugola (A) 1 Videocamera Esterna (E) 6 viti di montaggio Intelligente. (3 formati). (B) 1 staffa di montaggio (F) 2 viti da parete e 2 tasselli. e viti verdi. (G) 1 involucro protettivo. (C) 1 accessorio di supporto (H) 1 Manuale di istruzioni.
- Seite 4 Required Tools (not included): - Phillips and slotted - Caulking gun and Silicone screwdrivers. sealant (recommended tool). - Step ladder. - Level (recommended tool). - Drill - Ø6mm (only required if there is no junction box where the product is installed). Outils requis (non inclus) - Tournevis cruciforme et plat.
- Seite 5 Ferramentas necessárias (não incluídas) - Pistola de calafetagem e - Phillips e chaves de fenda. selante de silicone (ferramenta - Escada. recomendada). - Broca - Ø6mm (necessária - Nível (ferramenta recomen- apenas se não houver caixa dada). ). de junção onde o produto está instalado).
- Seite 6 4 meters (8 and 14 ft.) with a tilt angle of around 30°. Guided installation video available at: https://www.netatmo.com/outdoor-cam-setup Read carefully the safety information on page 48 before proceeding to the installation. Pour un fonctionnement optimal, installez la Caméra Extérieure Intelligente à...
- Seite 7 Per una prestazione ottimale, installare della Videocamera Esterna Intelligente ad un'altezza compresa tra 2,5 e 4 metri, con un angolo di inclinazione di circa 30°. https://www.netatmo.com/outdoor-cam-setup Leggere attentamente le istruzioni di sicurezza indicate a pag.49, prima di procedere all'installazione. Voor optimale prestaties installeert u Slimme Buitencamera op een hoogte van 2,5 tot 4 meter met een kantelhoek van ongeveer 30°.
- Seite 8 Pick a spot on the wall to install the Smart Outdoor Camera. Check with your smartphone that you have Wi-Fi reception at the spot you chose. If you do not, try to move your Wi-Fi router closer. Choisissez un endroit sur le mur pour installer la Caméra Extérieure Intelligente.
- Seite 9 Scegliere il punto di installazione della Videocamera Esterna Intelligente sulla parete esterna della casa. Controllare con lo smartphone che in questo punto sia raggiunto dal segnale WiFi. In caso negativo, avvicinare il router WiFi. Kies een plek op de muur om Slimme Buitencamera te installeren.
- Seite 10 Caution: electrical danger. Disconnect power at fuse or circuit breaker before proceeding to the installation. Avertissement : danger électrique. Coupez le courant au disjoncteur général avant de procéder à l'installation. Vorsicht: elektrische Gefahr. Schalten Sie den Strom der Sicherung oder Schutzschalter ab, bevor Sie mit der Installation beginnen.
- Seite 11 Attenzione: rischio elettrico. Staccare i fusibili o il contatore della corrente, prima di effettuare l'installazione. Let op: gevaar door elektriciteit. Schakel de stroom uit bij de zekering of stroomonderbreker voordat u de installatie uitvoert. Cuidado: perigo elétrico. Desligue a energia no disjuntor antes de prosseguir para a instalação.
- Seite 12 Prepare the installation. If you are replacing an old light fixture, disassemble the light fixture. If there is a junction box behind it, go to step (3A). If there is no junction box behind it or if you ran a new wire to power Smart Outdoor Camera, go to step (3B).
- Seite 13 Preparare l'installazione. Nel caso in cui si voglia sostituire un faretto esistente, smontarne la struttura di supporto. Nel caso in cui il punto prescelto corrisponda al punto in cui è collocata una scatola di derivazione, andare al passo (3A). Se non c'è nessuna scatola di derivazione o se viene utilizzato un nuovo cavo dell'elettricità...
- Seite 14 Secure the mounting strap to the junction box. Fasten the mounting strap (B) to your junc- tion box. Make sure that the UP sign is at the top. You can use the screws provided (E). Skip (3B) and go directly to step (4). Sécurisez la plaque de fixation à...
- Seite 15 Fissare la staffa di montaggio alla scatola di derivazione. Assicurare la staffa di montaggio (B) alla scatola di derivazione. Verificare che la scritta UP si trovi nella parte superiore. Utilizzare le viti in dotazione (E). Saltare il passo (3B) e andare direttamente al passo (4). Bevestig de montagebeugel op de aansluitdoos.
- Seite 16 Secure the mounting strap to the wall. 45˚ 6 cm 2.5 in Drill two holes above and to the left of the power cable and secure the mounting strap as shown in the picture. You can use the screws and anchors provided (F) or others that are better suited for your wall.
- Seite 17 Fissare la staffa di montaggio alla parete. Eseguire due perforazioni in alto e a sinistra del cavo di alimentazione e fissare la staffa di montaggio, come mostrato nella figura. Utilizzare le viti e i tasselli in dotazione, o altri eventualmente più...
- Seite 18 Hang the camera with the wire tie. Carefully hang the camera with the wire tie from the green screw. Put the camera in the protective envelope (G) to avoid any damage. Suspendez la caméra à l'aide de la sangle. Suspendez avec précaution la caméra à l'aide de la sangle sur la vis verte.
- Seite 19 Appendere la telecamera con il cavo d'aggancio. Appendere accuratamente la telecamera alla vite verde con il cavo d'aggancio. Proteggere la telecamera con l'involucro protettivo (G) per evitare danni. Hang de camera op met behulp van de kabelbinder. Hang de camera zorgvuldig met behulp van de kabelbinder op aan de groene schroef.
- Seite 20 Connect the wires. Use the wire terminal behind the plate. Blue/White (NEUTRAL) supply wire to Blue wire Brown/Black (HOT) supply wire to Brown wire Yellow and Green (GROUND) supply wire to Yellow and Green wire Make sure the ground (GND) wire from the wire terminal is also screwed to the mounting strap (B) with the second green screw Connectez les fils.
- Seite 21 Collegare i cavi. Utilizzare il mamut che si trova dietro la placca. - Cavo di alimentazione Blu/Bianco (NEUTRO) al cavo Blu. - Cavo di alimentazione Marrone/Nero (DI FASE) al cavo Marrone. - Cavo di alimentazione Giallo e Verde (MESSA A TERRA) al cavo Giallo e Verde. Assicurarsi che anche il cavo della messa a terra (GND) avvitato al mamut arrivi alla staffa di montaggio (B) e fissarlo con il secondo chiodo verde.
- Seite 22 Secure the plate on the mounting strap. Align the central holes of the wall plate with those of the mounting strap and pass the green screw through one of the holes of the “U” shaped guide. Then turn the plate horizontal (use a level if needed) and fasten the green screw tight.
- Seite 23 Assicurare la placca sulla staffa di montaggio. Allineare i fori centrali della placca da parete a quelli della staffa di montaggio e inserire la vite verde in uno dei fori della fessura a forma di "U". Successivamente collocare la placca in posizione orizzontale (utilizzare una livella se necessario) e avvitare bene la vite verde.
- Seite 24 Secure the camera to the plate. Use the provided mounting holder and black screw (C) to secure the camera to the mounting strap and plate. You can now cut and remove the wire tie and the protective envelope. Fixez la caméra au boîtier mural. Utilisez le support de montage fourni et la vis noire (C) pour sécuriser la caméra au boîtier mural.
- Seite 25 Fissare la telecamera alla placca. Utilizzare l'accessorio di supporto per il montaggio e la vite nera (C) in dotazione per fissare la telecamera alla staffa di montaggio e alla placca. Solo adesso il cavo d'aggancio e l'involucro protettivo possono essere rimossi. Bevestig de camera aan de plaat.
- Seite 26 Tilt the camera to record video from the correct angle. Use the Allen key (D) to untighten the screws on the side or the back to tilt the camera. Make sure to secure them properly afterwards The screws on both sides must be tight for the camera to be securely installed.
- Seite 27 Inclinare la telecamera per registrare i video dall'angolazione corretta. Utilizzare la brugola(chiave di Allen) (D) per allentare le viti laterali o posteriori e poter inclinare la telecamera. Successivamente, fissarle di nuovo adeguatamente. Le viti presenti su entrambi i lati devono essere serrate affinché la videocamera sia installata in modo sicuro.
- Seite 28 Reconnect the power. The Smart Outdoor Camera will start for the first time and the floodlight will turn on. This can take up to a minute. If the floodlight does not turn on, go to page 34 for troubleshooting advice. Rétablissez le courant.
- Seite 29 Ricollegare la corrente. La Videocamera Esterna Intelligente si attiverà per la prima volta e si accenderà la luce. Questo processo può durare fino ad un minuto. Se la luce non si accende, andare alla pagina di risoluzione di problemi (pag.36). Schakel de stroom opnieuw in.
- Seite 30 Protect the wiring. We recommend that you caulk the mounting surface on the top and sides of the plate with silicone weather sealant. Leave bottom unsealed so moisture can drain out. Protégez le câblage. Nous vous recommandons de calfeutrer l'espace entre le mur et le dessus et les côtés du boîtier mural avec le mastic silicone d'étanchéité.
- Seite 31 Protezione dei fili. Raccomandiamo di sigillare bene la superficie di montaggio sulla parte superiore e ai lati della placca con silicone sigillante. Non sigillare il lato inferiore, per permettere la fuoriuscita dell'umidità. Bescherm de bedrading. We raden u aan het montageoppervlak aan de bovenkant en zijkanten van de plaat te kitten met weerbestendige siliconenkit.
- Seite 32 Download the app. netatmo security To set up your Camera from your smartphone or tablet, go to netatmo.com/outdoor-cam-setup. The Smart Outdoor Camera cannot be setup from a computer. Téléchargez l'application. Pour configurer votre Caméra de votre smartphone ou tablette, rendez-vous sur netatmo.com/outdoor-cam-setup.
- Seite 33 De Slimme Buitencamera kan niet worden ingesteld op een computer. Baixe a aplicação. Para configurar a Câmara Externa Conectada a partir do seu smartphone ou tablet, vá a para www.netatmo.com/ outdoor-cam-setup. A Câmara não pode ser configurada a partir de um computador.
- Seite 34 Apple homeKit HomeKit setup code Your Camera is compatible with Apple HomeKit. You will need to scan the code in the provided card, “Homekit setup code”, during the setup of Apple HomeKit through the App. The code is unique and cannot be generated again.
- Seite 35 La Videocamera Esterna Intelligente è compatibile con Apple HomeKit. Sarà necessario scansionare il codice presente sulla scheda in dotazione, “HomeKit setup code”, durante la configurazione di Apple HomeKit con l' A pp. Il codice è unico e non può essere rigenerato. Conservarlo in un luogo sicuro.
- Seite 36 Setup card During the product setup, show this black QR To perform a factory reset, show this red QR code to the camera only when required by code to the camera. the App. Until the floodlight starts to blink. The floodlight will make five fast blinks twice to confirm the operation.
- Seite 37 Carte de configuration Cette carte contient des codes uniques de configuration. Vous en aurez besoin pour reconfigurer votre Caméra. Gardez la carte dans un endroit sûr. Ne la jetez pas. Code QR de configuration (noir) : Montrez ce code à la caméra durant l'installation ou la configuration du Wi-Fi, seulement quand l'application vous le demande.
- Seite 38 During the product setup, show this black QR To perform a factory reset, show this red QR code to the camera only when required by code to the camera. the App. Until the floodlight starts to blink. The floodlight will make five fast blinks twice to confirm the operation.
- Seite 39 Installatiekaart Op deze kaart staan unieke configuratiecodes. Deze heeft u nodig voor de configuratie van uw Camera. Bewaar de kaart op een veilige plek. Gooi hem niet weg. QR INSTALLATIE-code (zwart): Tijdens de productinstallatie of wifi-configuratie houdt u de zwarte QR-code voor de camera, alleen wanneer de app daarom vraagt.
- Seite 40 During the product setup, show this black QR To perform a factory reset, show this red QR code to the camera only when required by code to the camera. the App. Until the floodlight starts to blink. The floodlight will make five fast blinks twice to confirm the operation.
- Seite 41 安装代码卡 这张卡片上有独一无二的安装代码。若想重新设置Smart Outdoor Camera摄像头,您将会需要这些代码。因此,请妥 善保存,不要将卡片扔掉。 安装二维码(黑色):在安装产品或设置 网络的过程 Wi-Fi 中,应用程序会要求您手持卡片让摄像头扫描黑色二维 码,一直到泛光灯开始闪动。 B. 重置二维码(红色):若想恢复出厂设置,必须手持卡 片让摄像头扫描红色二维码。泛光灯将快闪五次,再度 快闪五次后,即完成操作。此举将永久删除所有的数据 和设置。 让Smart Outdoor Camera扫描二维码时,卡片与摄像头的距 离应为30厘米。必须有足够的光源,黑夜中可能无法读取 二维码。 安裝代碼卡 這張卡片上有獨一無二的安裝代碼。若想重新設定Smart Outdoor Camera攝影機,您將會需要這些代碼。因此,請 妥善保存,不要將卡片丟掉。 安裝二維碼(黑色):在安裝產品或設定Wi-Fi網路的 過程中,App會要求您手持卡片讓攝影機掃描黑色二 維碼,一直到泛光燈閃動為止。 重設二維碼(紅色):若想恢復出廠設定,必須手持 卡片讓攝影機掃描紅色二維碼。泛光燈將快閃五次, 再度快閃五次後,即完成操作。此舉將永久刪除所有 的資料和設定。 讓 掃描二維碼時,卡片與攝影機 Smart Outdoor Camera 的距離應為 。必須有足夠的光源,黑夜中可能無 30 cm 法讀取二維碼。...
- Seite 42 Coupez d'abord le courant. (Retournez à l'étape 5). Pour plus de conseils d'aide, consultez la section FAQ sur l'application ou rendez-vous sur http://support.netatmo.com. Vous avez besoin de remplacer la carte microSD ? Rendez-vous sur : https://www.netatmo.com/change-sd-card.
- Seite 43 Corta primero la el disyuntor salta. conectado a la tierra. corriente. (Vuelve al paso 5) Para más ayuda, consulta la sección de preguntas frecuentes (FAQ) en la aplicación o visita http://support.netatmo.com. ¿Necesitas cambiar la tarjeta microSD? Obtén más información en: https://www.netatmo.com/change-sd-card.
- Seite 44 (Tornare la luce. al passo 5). Per ulteriore assistenza, consultare la sezione FAQ sull'applicazione o consultare il sito web http://support.netatmo.com. Devi sostituire la scheda microSD? Per saperne di più, visita il sito: https://www.netatmo.com/change-sd-card. Installatieproblemen oplossen Probleem Mogelijke oorzaken...
- Seite 45 à terra. Desligue a energia disjuntor dispara. primeiro. (Volte ao passo 5) Para obter mais ajuda, consulte a seção de perguntas frequentes na aplicação ou aceda https://helpcenter.netatmo. com. Behöver du byta ut microSD-kortet? Läs mer om det på: https://www.netatmo.com/change-sd-card.
- Seite 46 выключатель. электропитание. (Вернитесь к шагу 5). Для получения дополнительной помощи обратитесь к разделу FAQ в приложении или перейдите по адресу http://support.netatmo.com. Вам требуется заменить карту памяти microSD? Информацию о том, как это сделать, вы найдете по ссылке: https://www.netatmo.com/change-sd-card. 安装故障排除 问题...
- Seite 47 打開舊開關,使其一 關處於關閉狀 直處於打開狀態。攝 態。 像頭需要持續供電。 電路線路不正 檢查導線接頭。 確。 首先切斷電源。 (返回第5步) 燈被打開時,保 導線交叉或電源 檢查導線接頭。 險絲熔斷或斷路 線接地。 首先切斷電源。 器跳閘。 (返回第5步) 如需更多説明,請查看應用程式中的FAQ部分或登錄 http://support.netatmo.com。 若需要更換microSD記憶卡,請查閱https://www.netatmo.com/change-sd- card頁面。 取り付けトラブルシューティング 問題 考えられる原因 解決法 ライトが点灯しませ ヒューズが溶断され ヒューズを交換する ん(Smart Outdoor るか、または回路遮 か、回路ブレーカー Cameraがスタート 断器がオフになって をオンにします。 しません)。 います。 古い照明取付具を 古いスイッチの電源を入...
- Seite 48 IMPORTANT: Safety information Class I electrical appliance: use only on 100-240 V AC 50-60Hz. Risk of electric shock or fire. A good knowledge of electrical systems is required. If not qualified, do not attempt to install. Contact a qualified electrician. Disconnect power at fuse or circuit breaker before installing or servicing.
- Seite 49 IMPORTANTE: Información de seguridad Dispositivo eléctrico de clase I: utilizar sólo a 100-240 V CA 50- 60Hz. Riesgo de descarga eléctrica o incendio. Se requiere un buen conocimiento de los sistemas eléctricos. Si no estás cualificado, no intentes realizar la instalación. Ponte en contacto con un electricista cualificado.
- Seite 50 Informações Importantes sobre Segurança Aparelho elétrico classe I: use somente em 100-240 V CA 50-60Hz. Risco elétrico ou incêndio. É necessário um bom conhecimento de sistemas elétricos. Se não estiver qualificado, não tente instalar. Entre em contato com um eletricista qualificado. Desligue a energia do fusível ou do disjuntor antes de instalar ou fazer a manutenção.
- Seite 51 重要提示:安全資訊 I 類電氣:只能在100-240伏交流電及50-60赫茲的情況下使 用。觸電或火災危險!需要具備良好的電氣系統知識。如無資 質,請勿嘗試安裝。聯繫具備資質的電工。 安裝或維修前,請斷開電源保險絲或斷路器。 不含使用者可維修零件。為了避免觸電,請勿拆卸本產品。 為防止線路損壞或磨損,請勿使線路與尖銳物體接觸,如金屬 薄板邊緣。 安裝過程中可能需要幫助。 安裝過程中,對本產品應輕拿輕放。鋒利邊緣對用戶或牆壁會 造成傷害。正面的玻璃遭受碰撞後可能會破碎。玻璃破碎後應 進行更換。 燈光與眼睛或正前方的表面之間最低應保持相距1米(3.3英 尺)。 重要: 安全に関する情報 100-240 V AC 50-60Hz クラスI機器 : でのみ使用すること。 感電や火災の危険があります。 電気システムの十分な知識が必要とされ ます。 十分な知識がない場合、取り付けを行わないでください。 有資 格の電気技術者にお問い合わせください。 取り付けまたはメンテナンスを行う際には事前に、ヒューズまたは回路 ブレーカーの電源を切ってください。 製品内部には手を触れないでください。 感電を避けるため、製品を分解 しないでください。 配線の損傷や摩耗を防ぐために、金属シートのエッジなど尖ったもので 傷をつけないでください。 取り付け時にアシスタントが必要になる場合があります。 取り付け時には注意して取り扱ってください。 尖ったエッジにより怪我 の恐れまたは壁に傷がつくことがあります。...
- Seite 52 FCC Statement This equipment has been tested and found to comply with the limits for a Class B digital device, pursuant to part 15 of the FCC rules. These limits are designed to provide reasonable protection against harmful interference in a residential installation. This equipment generates,...
- Seite 53 Sicherheitshinweise Dieses Gerät darf nicht von Personen (einschließlich Kindern) verwendet werden, deren körperliche, sensorische oder geistige Fähigkeiten beeinträchtigt sind oder die keine Erfahrung und kein Wissen haben, es sei denn, sie werden beaufsichtigt oder von einer für ihre Sicherheit verantwortlichen Person in die Benutzung des Geräts eingewiesen wurde.
- Seite 54 Canadian Compliance Statement This device complies with Industry Canada license-exempt RSS standard(s). Operation is subject to the following two conditions: (1) this device may not cause interference, and (2) this device must accept any interference, including interference that may cause undesired operation of the device.
- Seite 55 The original EU declaration of conformity may be found at http://www. netatmo.com/declaration/noc. Español [Spanish] - Por medio de la presente Netatmo declara que el NOC01 cumple con los requisitos esenciales y cualesquiera otras disposiciones aplicables o exigibles de la Directiva 2014/53/EU y ROHS 2011/65/CE.
- Seite 56 Directivei 2014/53/EU și ROHS anului 2011/65/CE. O copie a declarației de conformitate completă poate fi obținută la http:// www.netatmo.com/declaration/noc. Slovensko [Slovenian] - Netatmo izjavlja, da je ta NOC01 v skladu z bistvenimi zahtevami in ostalimi relevantnimi določili direktive 2014/53/ EU in ROHS 2011/65/ES.
- Seite 57 WARNING Privacy The Netatmo Smart Outdoor Camera was designed for an outdoor personal use. Countries’ laws and regulations may restrict the use of your Smart Outdoor Camera. Please check the laws of your country. To respect privacy, please avoid installing your Smart Outdoor Camera monitoring the street or your neighbors’...
- Seite 59 CE marking is the manufacturer's declaration that the product meets the requirements of the applicable EC directives. WEEE symbol designates safe and responsible collection, recycling and recovery procedures for all types of electronic waste The product complies with the requirements of the relevant ACMA Standards.
- Seite 60 QSG-PR Product model: NOC01 FCC ID: N3A-NOC01 IC : 10860A-NOC01 Copyright Netatmo © 2020 All rights reserved. Reproduction and distribution prohibited without written authorization from Netatmo...