Herunterladen Inhalt Inhalt Diese Seite drucken

Werbung

Verfügbare Sprachen
  • DE

Verfügbare Sprachen

  • DEUTSCH, seite 12
'SPIDER' LIGHT EFFECT
Ref.
QUAD6-FX
MANUAL
FR - Manuel d'Utilisation - p. 7
DE - Bedienungsanleitung - S. 11
NL - Handleiding - p. 16
RO - Manual de Instrucţiuni - p. 20
SI - Navodila za uporabo - p. 25
DMX Channel Chart - p. 30

Werbung

Inhaltsverzeichnis
loading

Inhaltszusammenfassung für IBIZA LIGHT QUAD6-FX

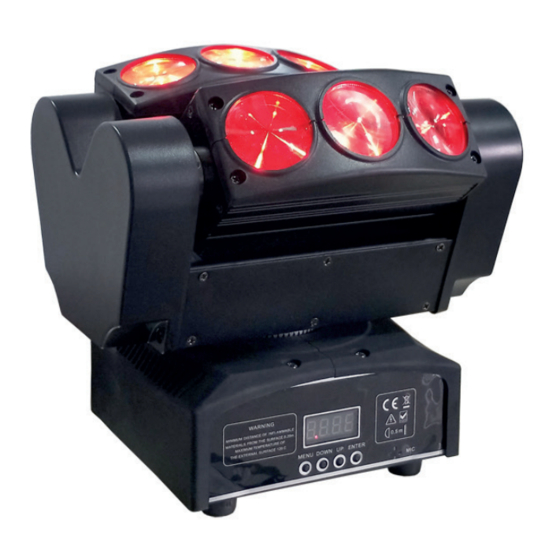
  • Seite 1 'SPIDER' LIGHT EFFECT Ref. QUAD6-FX MANUAL FR - Manuel d'Utilisation - p. 7 DE - Bedienungsanleitung - S. 11 NL - Handleiding - p. 16 RO - Manual de Instrucţiuni - p. 20 SI - Navodila za uporabo - p. 25...
  • Seite 2 Manual - QUAD6-LED ‘SPIDER’ LIGHT EFFECT INSTRUCTION MANUAL CONTENTS OF THE CARTON: • 1 x ‘SPIDER’ LIGHT EFFECT • 1x Mains lead • 1x User Manual UNPACKING INSTRUCTIONS Immediately upon receiving a fixture, carefully unpack the carton, check the contents to ensure that all parts are present and have been received in good condition.
  • Seite 3: Installation

    Manual - QUAD6-LED est authorized technical assistance center. Always use the same type of spare parts. • Don’t connect the device to a dimmer pack. • Make sure the power cord is never crimped or damaged. • Never disconnect the power cord by pulling or tugging on the cord. •...
  • Seite 4: Master/Slave Fixture Linking

    Manual - QUAD6-LED CAUTION Do not allow contact between the common and the fixture’s chassis ground. Grounding the common can cause a ground loop, and your fixture may perform erratically. Test cables with an ohm meter to check correct polarity and to make sure the pins are not grounded or shorted to the shield or each other.
  • Seite 5 Manual - QUAD6-LED SETTINGS DMX ADDRESS SETTING 1. Press the MENU, UP or DOWN button until “ADDR” is displayed, press ENTER. 2. The current address will now be displayed and flashing. Press the UP or DOWN buttons to find your desired address. Press ENTER to confirm. DMX CHANNEL MODE 1. Press the MENU button until “CHND”...
  • Seite 6: Display Backlight

    Manual - QUAD6-LED DISPLAY BACK LIGHT 1. Press the MENU button until “LED” is displayed, press ENTER. 2. The display will show either “ON” or “OFF”. Press the UP or DOWN buttons to select “ON” to keep the LED display on at all times, or “OFF” to switch to have the LED display switch off after 10 seconds. 3. Press ENTER and then press and hold the MENU button for at least three seconds to confirm.
  • Seite 7: Manuel D'utilisation

    Manual - QUAD6-LED EFFET DE LUMIERE ‘SPIDER’ MANUEL D'UTILISATION CONTENU DE L ’EMBALLAGE: • 1 EFFET DE LUMIERE ‘SPIDER’ • 1 cordon secteur • Mode d’emploi DÉBALLAGE Dès réception de l’appareil, ouvrez le carton et vérifiez que le contenu est complet et en bon état. Sinon, pré- venez immédiatement le transporteur et conservez l’emballage s’il montre des signes de mauvais traitements.
  • Seite 8 Manual - QUAD6-LED • Assurez-vous que le cordon d’alimentation n’est jamais écrasé ni endommagé. • Ne jamais débrancher l’appareil en tirant sur le cordon. • Le luminaire ne doit servir qu’à des fins décoratives et ne convient pas comme éclairage domestique normal. •...
  • Seite 9: Montage

    Manual - QUAD6-LED ATTENTION Il ne doit y avoir aucun contact entre le commun et la masse du châssis de l’appareil. La mise à la masse du commun peut provoquer une boucle de masse et votre appareil fonctionne d’une façon étrange. Testez les câbles à...
  • Seite 10 Manual - QUAD6-LED SÉLECTION DES CANAUX DMX 1. Appuyez sur la touche MENU jusqu’à ce que “CHND” s’affiche et appuyez sur ENTER. Soit “11CH”, soit “15CH” s’affichera. 2. Sélectionnez le nombre de canaux souhaités au moyen des touches UP / DOWN et confirmez avec ENTER. SÉLECTION MAÎTRE/ESCLAVE 1.
  • Seite 11 Manual - QUAD6-LED INVERSION DE L ’AFFICHEUR À 180° 1. Appuyez sur la touche MENU jusqu’à ce que “DISP” s’affiche et appuyez sur ENTER. 2. Appuyez sur UP pour sélectionner “DSIP” pour inverser l’afficheur ou “DISP” pour revenir à l’affichage nor- mal.
  • Seite 12: Sicherheitshinweise

    Manual - QUAD6-LED Entspricht den Richtlinien der CE Nur für Innengebrauch Schutzklasse I: Nur an eine geerdete Netzsteckdose mit Schutzkontakt anschließen Mindestentfernung zwischen dem Gerät und anderen Gegenständen 0.5m Niemals direkt in den Lichtstrahl blicken VORSICHT NICHT DAS GEHÄUSE ÖFFNEN STROMSCHLAGGEFAHR SICHERHEITSHINWEISE Diese Anleitung sorgfältig vor der ersten Inbetriebnahme lesen.
  • Seite 13 Manual - QUAD6-LED gen zu vermeiden. Die Montagefläche muss stabil sein und mindestens 10-mal das Gewicht des Geräts tragen können. Bei der Montage das Gerät immer zusätzlich durch ein Sicherheitskabel absichern, dass mindestens 12-mal das Gewicht des Geräts tragen kann. Das Gerät darf nur von einem Fachmann installiert werden. Es muss an einer Stelle installiert werden, wo es für Menschen unzugänglich ist und niemand unter dem Montagebereich stehen oder gehen kann.
  • Seite 14 Manual - QUAD6-LED Auf MENU drücken, um ins Hauptmenü zu gehen. Mit den UP / DOWN Tasten zur gewünschten Funktion gehen und auf ENTER drücken. Wenn eine Funktion gewählt ist, mit den UP / DOWN Tasten die Einstellung ändern und auf ENTER drücken.
  • Seite 15: Klangempfindlichkeit

    Manual - QUAD6-LED KLANGAKTIVIERTER BETRIEB 1. Die MENU Taste drücken bis “SOUN” erscheint. ENTER drücken. 2. Auf dem Display erscheint entweder “ON” oder “OFF”. Mit den UP/DOWN Tasten “ON” wählen, um den klan- gaktivierten Betrieb zu wählen oder “OFF”, um ihn abzuschalten. 3.
  • Seite 16: Technische Daten

    Manual - QUAD6-LED TECHNISCHE DATEN Versorgung ........................100-240V~ 50/60Hz Verbrauch ............................80W max. Sicherung ..............................2A Leuchtmittel ......................6x 10W RGBW 4-in-1 LED Pan ................................540° Tilt ................................90° Strahlenwinkel ............................. 4° Abmessungen ........................225 x 145 x 220mm Gewicht ..............................3,38kg WICHTIGER HINWEIS: Elektrogeräte gehören nicht in den Hausmüll. Sie müssen in speziellen Betrieben recycelt werden. Bringen Sie sie zu einer speziellen Entsorgungsstelle für Elektrokleingeräte (Wertstoffhof)! ‘SPIDER’...
  • Seite 17 Manual - QUAD6-LED Wees zeker dat de ventilatie openingen niet geblokkeerd zijn. • Verwijder het stopcontact alvorens u het toestel onderhoud of de zekering vervangt. Gebruik alleen een zeke- ring met dezelfde specificaties. • Gebruik het toestel niet in ruimtes met een temperatuur van meer dan 40°C. •...
  • Seite 18 Manual - QUAD6-LED 2. Sluit het contra eind van de kabel dat van het eerste toestel komt op de ingang (3-pin stekker) van het naaste toestel aan. 3. Sluit de uitgang van het naaste toestel op de ingang van het volgende toestel aan enz. Het is vaak het geval bij master-slave en automatische werking dat het eerste toestel in de rij door instellingen op de controle paneel of DIP schakelaars moet geïnitieerd worden.
  • Seite 19 Manual - QUAD6-LED SHOW MODES 0-15 (FACTORY PROGRAMMA’S). De show modus kan met of zonder geluidsactivatie werken. 1. Druk MENU totdat “SHND” verschijnt en druk ENTER 2. “Sh X” verschijnt, “X” is een cijfer tussen 0-15. De programma’s 1-15 zijn fabriekprogramma’s en “Sh 0” is random mode.
  • Seite 20: Explicarea Semnelor

    Manual - QUAD6-LED DMX KANAALTABEL ZIE AAN HET EIND VAN DE HANDLEIDING REINIGING Het is belangrijk dat het toestel altijd schoon is om een optimale lichtkracht te garanderen en de leeftijd te ver- lengen. De reinigingsfrequentie is afhankelijk van de omgevingsomstandigheden: vochtige, berookte of bijzon- ders vuile omgeving veroorzaakt meer vuil op de optische delen.
  • Seite 21: Înlocuirea Siguranței

    Manual - QUAD6-LED • Acest produs este destinat doar pentru utilizare în interior !! • Este important ca dispozitivul să fie legat la împământare. Doar personalul calificat poate efectua conexiunea electrică. • Pentru a preveni riscul unui șoc electric, nu expuneți aparatul la ploaie sau umezeală. Asigurați-vă că nu sunt materiale inflamabile în apropierea unității în timpul funcționării.
  • Seite 22 Manual - QUAD6-LED de toate dispozitivele pe o legătură de date în serie determină numărul elementelor pe care le poate suporta legătura de date. 1. Conectati conectorul cu 3 pini (tata)a cablului DMX la iesirea conectorului de 3 pini (mama) a dispozitivului de control.
  • Seite 23 Manual - QUAD6-LED RSET DA, NU Revenire la setarile e fabrica SETĂRI ADDR – SETARE ADRESĂ DMX 1. Apăsați butoanele MENIU, SUS sau JOS până când este afișat “ADDR” , apoi apăsați ENTER. 2. Adresa curentă va fi afișată și va pâlpâi. Apăsați butoanele SUS sau JOS pentru a găsi adresa dorită. Apăsați ENTER pentru a seta adresa DMX dorită.
  • Seite 24 Manual - QUAD6-LED înseamnă că alegeți direcția Tilt1, iar dacă alegeți ”No” înseamnă direcția negativă Tilt1. 3. După ce ați selectat setarea dorită, apăsați ENTER pentru a confirma. TIN2 - CU ACEASTĂ FUNCȚIE PUTEȚI ALEGE DIRECȚIA POZITIVĂ SAU DIRECȚIA INVERSĂ A TILT 2. 1.
  • Seite 25 Manual - QUAD6-LED ‘SPIDER’ SVETLOBNI EFEKT NAVODILA ZA UPORABO POJASNILO SIMBOLOV V skladu z zahtevami CE standarda Izdelek je namenjen samo za uporabo v zaprtih prostorih Najmanjša razdalja med napravo in drugimi predmeti 0.5m Zaščitni razred I Ne glejte neposredno v vir svetlobe Strela s simbolom puščice v enakostraničnem trikotniku je namenjena opozarjanju uporabnika na prisotnost nevarnih napetosti, ki niso izolirane, v ohišju izdelka in so lahko dovolj močne, da predstavljajo nevarnost električnega udara za osebe.
  • Seite 26 Manual - QUAD6-LED LASTNOSTI Dinamičen, reaktivni svetlobni efekt z dvema vrsticama, vsaka vsebuje LED reflektorje 4-v-1, moči 3 × 10W RGBW. • 11 / 15 DMX kanalov • 6 x 10W RGBW LED’s dolge življenske dobi (>50.000 ur) • Načini kontrole: Samodejno, DMX in zvočna kontrola •...
  • Seite 27 Manual - QUAD6-LED KAKO UPORABLJATI ENOTO Do funkcij nadzorne plošče dostopate s štirimi gumbi ki se nahajajo neposredno pod LCD zaslonom. Gumb Funkcija 8.8.8.8. MENU Uporablja se za dostop do menija ali za vrnitev na prejšnjo možnost menija Pomikanje po možnostih menija po naraščajočem vrstnem redu DOWN Pomikanje po možnostih menija po padajočem vrstnem redu MENU...
  • Seite 28 Manual - QUAD6-LED 1. Pritisnite gumb MENU da se prikaže “SHND” pritisnite ENTER. 2. “Sh X” bo sedaj prikazan, “X” predstavlja število med 0-15. Programi 1-15 so tovarniški programi, medtem “Sh 0” je naključni način. Pritisnite gumbe UP ali DOWN da najdete želeni show. 3.
  • Seite 29: Tehnični Podatki

    Manual - QUAD6-LED či večje nabiranje umazanije na optiki enote. • Čistite z mehko krpo z normalno tekočino za čiščenje stekla. • Vedno previdno posušite občutljive dele. • Čiščenje zunanjih optičnih leč vsaj vsakih 20 dni. Čiščenje notranjih leč vsaj vsakih 30/60 dni TEHNIČNI PODATKI Napajanje ........................
  • Seite 30 Manual - QUAD6-LED DMX CHANNEL TABLES 11-CHANNEL TABLE Channel DMX Value Function Fonctions 0---255 0---255 Tilt 1 Tilt 1 0---255 Tilt 2 Tilt 2 0---255 P/T Speed Vitesse P/T 0---255 Dimmer from 0-100% Dimmer 0-100% Strobe Stroboscope 000-007 Fermer le stroboscope 008-015 Ouvrir le stroboscope 016-131...
  • Seite 31 Manual - QUAD6-LED 15-CHANNEL TABLE Channel DMX Value Function Fonctions 0---255 0---255 Tilt 1 Tilt 1 0---255 Tilt 2 Tilt 2 0---255 P/T Speed Vitesse P/T 0---255 Dimmer from 0-100% Dimmer 0-100% Strobe Stroboscope 000-007 Fermer le stroboscope 008-015 Ouvrir le stroboscope 016-131 Strobe from slow to fast Stroboscope lent ->...
  • Seite 32 View the item on our website Any questions? Please contact us on facebook Assembled in PRC for LOTRONIC S.A. Avenue Zénobe Gramme 9 B-1480 Saintes www.ibiza-light.com ©Copyright LOTRONIC 2020...

Inhaltsverzeichnis