Herunterladen Inhalt Inhalt Diese Seite drucken
auna multimedia Digidab Bedienungsanleitung

auna multimedia Digidab Bedienungsanleitung

Retro dab-digitalradio ukw pll wecker

Werbung

Verfügbare Sprachen

Verfügbare Sprachen

Digidab
Retro DAB-Digitalradio UKW PLL Wecker
10026442
www.auna-multimedia.com

Werbung

Inhaltsverzeichnis
loading

Inhaltszusammenfassung für auna multimedia Digidab

  • Seite 1 Digidab Retro DAB-Digitalradio UKW PLL Wecker 10026442 www.auna-multimedia.com...
  • Seite 2: Sicherheitshinweise

    Sehr geehrter Kunde, zunächst möchten wir Ihnen zum Erwerb Ihres Gerätes gratulieren. Bitte lesen Sie die folgenden Anschluss- und Anwendungshinweise sorgfältig durch und befolgen Sie diese um möglichen technischen Schäden vorzubeugen. Sicherheitshinweise • Diese Bedienungsanleitung dient dazu, Sie mit der Funktionsweise dieses Produktes vertraut zu ma- chen.
  • Seite 3: Technische Daten

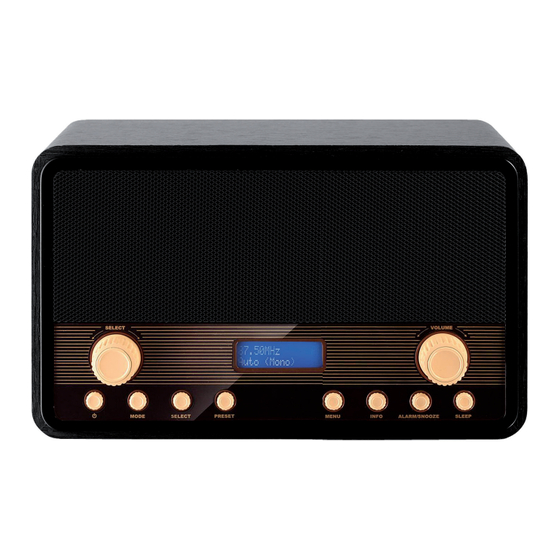
    Technische Daten Artikelnummer 10026442 Netzteil (AC 230-240V-50Hz -> DC 6V Stromversorgung Batterie DC 6V (4 x 1.5V(UM3)) Ausgangsleistung 2 x 2W (interne Lautsprecher) DAB 174-240 MHz Frequenzbereich Radio 87.5- 108 MHz Encoding-Bitrate 128 kbps, 44,1 khz Maße 230 x 99 x 138mm Lieferumfang Gerät, Netzteil, Bedienungsanleitung...
  • Seite 4 Bedienelemente Front: SEARCH MENU INFO Einschalten / Standby MODE ALARM / SNOOZE SELECT SLEEP PRESET VOLUME Display Lautsprecher...
  • Seite 5 Bedienelemente Rückseite: Batterie-Fach AUX-Eingang und Kopfhörer-Anschluss Antenne Netzteil-Anschluss...
  • Seite 6 Nutzung Allgemein • Schließen Sie das Gerät mit dem mitgelieferten Netzteil an einer gewöhnlichen Haushaltssteckdose an (Netzteilanschluss, 16) oder öffnen Sie das Batteriefach und legen Sie vier Batterien vom Typ „AA“ in der im inneren des Batteriefachs angezeigten Richtung ein. Verwenden Sie niemals Netzstrom, wenn Batterien eingelegt sind! •...
  • Seite 7 Einstellen von Uhrzeit und Datum Die integrierte Uhr stellt sich beim Empfang von DAB-Signalen automatisch, nachdem das Gerät eingeschal- tet und im DAB-Modus benutzt wird (der Empfang des Uhrzeit-Signals kann einige wenige Minuten dauern). Für den Fall, dass kein DAB-Signal emfangen wird, können Sie die Uhrzeit auch manuell einstellen: •...
  • Seite 8 Prune Mit dieser Funktion entfernen Sie unerreichbare Sender von der Liste. Drücken Sie im DAB-Modus auf MENU und wählen Sie PRUNE mit dem SEARCH-Knopf. Bestätigen Sie mit „YES“. Display Modi Drücken Sie mehrfach INFO, um durch die verschiedenen auf den DAB-Frequenzen mitgesendeten Zusatz- informationen auf dem Display anzuzeigen: Signal Strength / Signalstärke Zeigt die Empfangsqualität als Balkendiagramm.
  • Seite 9 Batteriekapazität (20% oder weniger). Time/Date / Datum/Uhrzeit Anzeige von Datum und Uhrzeit Senderspeicher (FM / DAB) Das DigiDab bietet 10 je Speicherplätze, auf denen Sie FM- oder DAB-Sender ablegen können. • Stellen Sie einen Sender/eine Frequenz ein und halten Sie PRESET gedrückt. •...
  • Seite 10 Alarm (=Wecker) einstellen • Drücken Sie ALARM/SNOOZE einmal, um ALARM 1 einzustellen bzw. zweimal, um ALARM 2 einzustel- len. (Drücken Sie ein drittes Mal, um das Einstellungsmenü zu beenden.) • Wählen Sie Werte jeweils mit SEARCH aus und bestätigen Sie jeden Schritt mit SELECT: Parameter: •...
  • Seite 11: Hinweise Zur Entsorgung

    Sonstige Funktionen Kopfhörer-Anschluss: Schließen Sie Kopfhörer an den Kopfhörer-Anschluss an der Rückseite des Geräts an. Die internen Lautsprecher werden dadurch abgeschaltet. Reset: Öff nen Sie das Menü und blättern Sie zu „SYSTEM SETTINGS“. Wählen Sie „FACTORY RESET“ und bestätigen Sie mit „YES“. Achtung: Alle gespeicherten Sender werden gelöscht. Beim nächsten EInschalten des Geräts wird ein neuer Sendersuchlauf ausgeführt.
  • Seite 12: Important Safety Advice

    Dear Customer, Congratulations on purchasing this product. Please read and follow these instructions, in order to avoid damaging the item. We do not cover any damages that may arise from improper use of the item or the disregard of the safety instructions. Important Safety Advice •...
  • Seite 13: Technical Data

    Technical Data Art. no. 10026442 Netzteil (AC 230-240V-50Hz -> DC 6V Power supply Batterie DC 6V (4 x 1.5V(UM3)) Output power 2 x 2W (interne Lautsprecher) DAB 174-240 MHz Frequency range (radio) 87.5- 108 MHz Encoding bitrate 128 kbps, 44,1 khz Dimensions 230 x 99 x 138mm Scope of delivery Device, AC adaptor, instruction manual...
  • Seite 14 Controls Front: SEARCH MENU INFO On / Standby MODE ALARM / SNOOZE SELECT SLEEP PRESET VOLUME Display Speaker...
  • Seite 15 Controls Rear: Battery compartment AUX In & Headphones Out Antenna DC In...
  • Seite 16: Operation

    Operation Basics • Connect the device to any household mains socket, using the supplied adaptor OR open the battery compartment and insert 4 batteries (type "AA"). Do never use mains power when batteries are inserted! • Press to switch the device on or off. Being switched on for the first time, the device perfoms a com- plete DAB stations scan automatically.
  • Seite 17 Setting Time / Date The clock in this radio is equipped to receive a DAB radio frequency time signal. After the unit has been tur- ned on, it will automatically tune into a DAB radio station and update the clock. It may be necessary to wait for 1-2 minutes to allow the unit to receive the time signal.
  • Seite 18 Prune You may remove all unavailable station form on the list: During DAB mode, press MENU and then rotate the SEARCH control to select “Prune”. Press SELECT to confirm. Rotate the SEARCH control to select <Yes> to confirm delete. Or select <No> to cancel. Press SELECT to confirm the setting. Display Modes Press the INFO button repeatedly to make the display cycle through the following display modes: This shows a slide bar to indicate the signal strength, the stronger the...
  • Seite 19 Display Modes Press the INFO button repeatedly to make the display cycle through the following display modes: Radio Text This displays the information about the current programme. Programme Type This describes the “style” or “genre” of the programme that is being broadcast. Frequency This displays the frequency of the present station, such as “87.8MHz”.
  • Seite 20 Set the alarm • Press ALARM/SNOOZE once, to set ALARM 1 - press twice for ALARM 2 settings. (Press a third time to exit the alarm setting menu.) • Change values with SEARCH and confirm each step with SELECT. Values •...
  • Seite 21: Environment Concerns

    Other Functions Headphones: Connect your headphones to the headphone jack on the rear (3.5mm audio). The internal speakers will be muted, Reset: Open the MENU and scroll through to "SYSTEM SETTINGS“. Choose "FACTORY RESET“ an confi rm with "YES“. Please note: All presets will be deleted. On switching on the device again, a station scan will be performed again.
  • Seite 22 Chère cliente, cher client, Toutes nos félicitations pour l’acquisition de ce nouvel appareil. Veuillez lire attentivement et respecter les instructions de ce mode d’emploi afin d’éviter d’éventuels dommages. Nous ne saurions être tenus pour responsables des dommages dus au non-respect des consignes et à la mauvaise utilisation de l’appareil.
  • Seite 23: Fiche Technique

    Fiche technique Numéro d’article 10026442 Bloc d’alimentation (AC 230-240 V - 50 Hz -> DC 6 V Alimentation électrique Ou Piles DC 6 V (4 x 1,5 V(UM3)) Puissance de sortie 2 x 2 W (haut-parleurs intégrés) DAB 174 - 240 MHz Plages de fréquence radio FM 87.5 - 108 MHz Valeur d’encodage...
  • Seite 24: Éléments De Commande

    Éléments de commande Avant : SEARCH MENU INFO Marche/veille MODE ALARM/SNOOZE SELECT SLEEP PRESET VOLUME Affichage Haut-parleurs...
  • Seite 25 Éléments de commande Arrière : Compartiment des piles Sortie AUX et prise casque Antenne Prise secteur...
  • Seite 26 Utilisation Généralités • Brancher l’appareil à une prise de courant domestique habituelle (prise secteur) au moyen du bloc d’alimentation fourni ou ouvrir le compartiment des piles et y insérer quatre piles de type « AA » en respectant les polarités. Ne jamais utiliser le courant du réseau lorsque les piles sont dans l’appareil ! •...
  • Seite 27 Paramétrage de l’heure et de la date L’horloge interne se règle automatiquement à la réception des signaux DAB, une fois que l’appareil est al- lumé en mode DAB (la réception du signal de l’horloge peut durer quelques minutes). Dans le cas où aucun signal DAB n’est reçu, il est possible de régler l’heure manuellement : •...
  • Seite 28 Prune Cette fonction permet de retirer de la liste les stations indisponibles. En mode DAB, appuyer sur MENU et sélectionner PRUNE avec le bouton SEARCH. Confirmer avec « YES ». Modes d’affichage Appuyer plusieurs fois sur INFO pour faire apparaître sur l’affichage les informations complémentaires des différentes fréquences DAB.
  • Seite 29 Time/Date / Heure/Date Affiche la date et l’heure Sauvegarde des stations (FM / DAB) Le DigiDab propose 10 emplacements de sauvegarde permettant de classer les stations FM ou DAB. • Sélectionner une station/fréquence et rester appuyer sur le bouton PRESET.
  • Seite 30 Paramétrer le réveil (Alarm) • Appuyez sur ALARM / SNOOZE une fois pour régler 1 ou deux fois pour régler l‘alarme 2 ALARM. (Ap- puyez une troisième fois pour quitter le menu des paramètres.) • Sélectionnez les valeurs RECHERCHE respectivement, et confirment chaque étape avec SELECT: Paramètres : On Time (Heure du réveil) Heures / minutes...
  • Seite 31: Information Sur Le Recyclage

    Autres fonctions Prise casque : brancher un casque à la prise casque située à l’arrière de l’appareil. Les haut-parleurs intég- rés sont alors déconnectés. Réinitialisation : ouvrir le menu et le faire dérouler jusqu’à « SYSTEM SETTINGS ». Sélectionner « FACTORY RESET »...

Diese Anleitung auch für:

10026442

Inhaltsverzeichnis