HomeMatic HM-LC-Dim1T-DR Installations- Und Bedienungsanleitung
Funk-dimmaktor 1-fach
Vorschau ausblenden
Andere Handbücher für HM-LC-Dim1T-DR:
- Installations- und bedienungsanleitung (68 Seiten)

Verwandte Anleitungen für HomeMatic HM-LC-Dim1T-DR


Inhaltszusammenfassung für HomeMatic HM-LC-Dim1T-DR
- Seite 1 Installations- und Bedienungsanleitung Installation and operating manual Funk-Dimmaktor 1-fach, Hutschienenmontage S. 2 Wireless Dimming Actuator 1 channel, DIN Rail p. 29 HM-LC-Dim1T-DR Downloaded from www.Manualslib.com manuals search engine...
-
Seite 2: Lieferumfang
Lieferumfang Anzahl Artikel Homematic Funk-Dimmaktor 1-fach, Hutschienenmontage Bedienungsanleitung Dokumentation © 2016 eQ-3 AG, Germany Alle Rechte vorbehalten. Ohne schriftliche Zustimmung des Herausgebers darf diese Bedienungsanleitung auch nicht auszugsweise in irgendeiner Form reproduziert werden. Es ist möglich, dass die vorliegende Bedienungsanleitung noch druck tech- nische Mängel oder Druckfehler aufweist. -
Seite 3: Inhaltsverzeichnis
Installation..............10 Inbetriebnahme ............15 Einfache Bedienfunktionen am Gerät ......15 Anlernen ..............16 6.2.1 Anlernen an Homematic Geräte ......16 6.2.2 Anlernen an eine Homematic Zentrale ....17 Werkseinstellungen wiederherstellen ......21 Fehler- und Rückmeldungen der Geräte-LED ..22 Blinkcodes ...............22 Anzeige des Betriebszustands ........23 Duty Cycle ...............23 Deinstallation ............24... -
Seite 4: Hinweise Zu Dieser Anleitung
Hinweis. Dieser Abschnitt enthält zusätzliche wichtige Informationen! Hinweis. Dieser Abschnitt enthält zusätzliche wichtige Informationen zur Verwendung des Geräts in Verbindung mit der Homematic Zentrale. Gefahrenhinweise Bei Sach- oder Personenschäden, die durch unsach- gemäße Handhabung oder Nichtbeachten der Gefahrenhinweise verursacht werden, übernehmen wir keine Haftung. - Seite 5 Gefahrenhinweise Öffnen Sie das Gerät nicht. Es enthält keine durch den Anwender zu wartenden Teile. Das Öffnen des Geräts birgt die Gefahr eines Stromschlags. Im Fehlerfall lassen Sie das Gerät von einer Fachkraft prüfen. Verwenden Sie das Gerät nicht, wenn es von außen erkennbare Schäden z.
- Seite 6 Gefahrenhinweise Das Gerät darf nur für ortsfeste Installationen verwen- det werden. Das Gerät ist sicher innerhalb einer festen Installation zu fixieren. Der Betrieb des Geräts ist ausschließlich am Wech- selspannungsnetz von 230 V/50 Hz zulässig. Arbeiten am 230-V-Netz dürfen nur von einer Elektrofachkraft (nach VDE 0100) erfolgen.
- Seite 7 Gefahrenhinweise Beachten Sie die Installationsvorschriften für Installati- onen in Verteilersystemen. Es dürfen nur dimmbare 230-V-LED-Leuchtmittel eingesetzt werden. Der Einsatz von nicht dimmbaren 230-V-LED-Leuchtmitteln kann das Gerät und/oder das Leuchtmittel zerstören. Eine Überlastung kann zur Zerstörung des Geräts, zu einem Brand oder zu einem elektrischen Schlag führen. Achten Sie unbedingt auf die angeschlossene Last! Der Dimmer ist nur für Glühlampen, HV-Halogenlam- pen für NV-Halogenlampen mit elektronischen Trafos...
-
Seite 8: Funktion Und Geräteübersicht
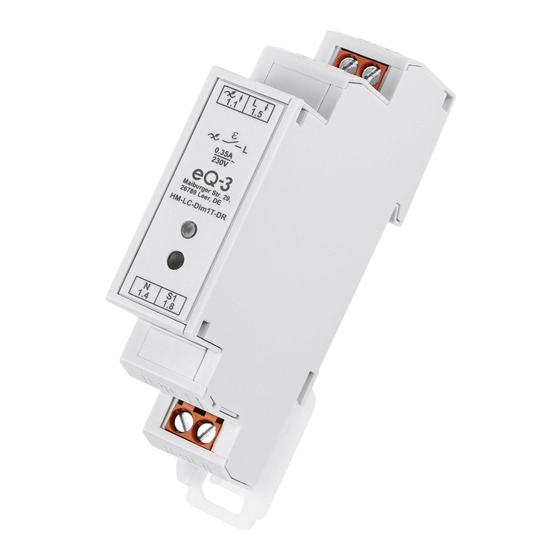
Homematic Fernbedienung) bzw. die Homematic Zentrale. Gleichzeitig verfügt der Funk-Dimmaktor über einen Tasterein- gang, an den 230-V-Taster angeschlossen werden können. Durch das Anlernen des Geräts an eine Homematic Zentra- le, werden die Konfigurationsmöglichkeiten des Dimmaktors erweitert. Sie können individuelle Schaltzeiten bzw. Ablauf- zeiten für den Dimmaktor hinterlegten oder das Gerät mit... - Seite 9 Funktion und Geräteübersicht Alle Funktionen des Geräts können in Verbindung mit einer CCU2 über die Homematic Bedienoberfläche WebUI konfiguriert werden. A – Gerätetaste B – Geräte-LED C – Außenleiteranschluss/Phase (230 V) D – Lastanschluss E – Tastereingang S1 (230 V) F –...
-
Seite 10: Allgemeine Systeminformation Zu Homematic
Allgemeine Systeminformation zu Homematic Allgemeine Systeminformation zu Homematic Dieses Gerät ist Teil des Homematic Smart-Home-Systems und arbeitet mit dem bidirektionalen Homematic Funkprotokoll. Alle Geräte werden mit einer Standardkonfiguration ausge- liefert. Darüber hinaus ist die Funktion des Geräts über ein Programmiergerät und eine Software konfigurierbar. Wel-... - Seite 11 Installation - Freischalten; - gegen Wiedereinschalten sichern; - Spannungsfreiheit feststellen; - Erden und Kurzschließen; - benachbarte, unter Spannung stehende Teile abdecken oder abschranken; • Auswahl des geeigneten Werkzeugs, der Messgeräte und ggf. der persönlichen Schutzausrüstung; • Auswertung der Messergebnisse; • Auswahl des Elektro-Installationsmaterials zur Si- cherstellung der Abschaltbedingungen;...
- Seite 12 Installation Der Steuereingang (S1) führt berührungsgefährliche Netzspannung. Verwenden Sie ausschließlich entsprechende für Netzspannung zugelassene (VDE-geprüfte) Taster und Leitungen! Die maximale Leitungslänge für den Anschluss eines Tasters an den Klemmen S1 beträgt 30 m. Für den sicheren Betrieb muss das Gerät in einen Stromkreisverteiler entsprechend VDE 0603, DIN 43871 (Niederspannungsunterverteilung (NSUV)), DIN 18015-x eingebaut werden.
- Seite 13 Installation • Achten Sie darauf, dass die Rastnasen komplett ein- rasten und das Gerät fest auf der Schiene sitzt. • Isolieren Sie die Drahtenden der Netzzuleitung und der Leitungen zur Last auf eine Länge von 6,5 mm ab, ohne dabei die blanke Ader zu verletzen. Beach- ten Sie die zugelassenen Leitungsquerschnitte! •...
- Seite 14 Installation Zugelassene Leitungsquerschnitte zum Anschluss an den Aktor: starre und flexible Leitung [mm 0,75 – 2,50 Downloaded from www.Manualslib.com manuals search engine...
-
Seite 15: Inbetriebnahme
LED aus – abgeschaltet Um das Gerät in seinem vollen Funktionsumfang in Ih- rem Homematic System nutzen und konfigurieren sowie Verbraucher bzw. Homematic Geräte per Funk steuern zu können, müssen Sie das Gerät zunächst anlernen (vgl. Ab- schnitt „6.2 Anlernen“ auf Seite 16). -
Seite 16: Anlernen
Anlernmodus gebracht werden. Dafür gehen Sie wie folgt vor: Halten Sie beim Anlernen einen Mindestabstand von 50 cm zwischen den Homematic Geräten ein. Aktivieren Sie zunächst den Anlernmodus am Funk-Dimmaktor. • Halten Sie die Gerätetaste (A) für mindestens 4 Se- kunden gedrückt. -
Seite 17: Anlernen An Eine Homematic Zentrale
• direkt mit anderen Geräten verknüpfen oder • in Zentralenprogrammen nutzen zu können, muss es zunächst an die Homematic Zentrale angelernt werden. Das Anlernen neuer Geräte an die Zentrale erfolgt über die Homematic Bedienoberfläche WebUI. Downloaded from www.Manualslib.com... - Seite 18 Jedes Gerät kann immer nur an eine Zentrale ange- lernt werden. Halten Sie beim Anlernen einen Mindestabstand von 50 cm zwischen den Homematic Geräten und der Zentrale ein. Zum Anlernen Ihres Geräts an die Zentrale gehen Sie wie folgt vor: •...
- Seite 19 Inbetriebnahme • Der Anlernmodus ist für 60 Sekunden aktiv. Das Info- feld zeigt die aktuell noch verbleibende Anlernzeit. • Versetzen Sie innerhalb dieser Anlernzeit auch den Funk-Dimmaktor in den Anlernmodus. Halten Sie die Gerätetaste (A) für mindestens 4 Sekunden gedrückt. Langsames Blinken der Geräte-LED (B) signalisiert den Anlernmodus.
- Seite 20 Posteingang wie im Abschnitt „Neu angelernte Ge- räte konfigurieren“ beschrieben. Neu angelernte Geräte konfigurieren Nachdem Sie Ihr Gerät an die Homematic Zentrale angelernt haben, wird es in den „Posteingang“ verschoben. Hier müs- sen Ihr Gerät und die dazugehörigen Kanäle zunächst kon- figuriert werden, damit das Gerät für Bedien- und Konfigu-...
-
Seite 21: Werkseinstellungen Wiederherstellen
Dabei gehen alle Einstellun- gen und Informationen verloren. Bevor Sie die Werkseinstellungen des Geräts wiederherstellen, löschen Sie es zuerst aus der Homematic Bedienoberfläche WebUI. Gehen Sie wie folgt vor: Halten Sie die Gerätetaste (A) für mindestens 4 Se- •... -
Seite 22: Fehler- Und Rückmeldungen Der Geräte-Led
Fehler- und Rückmeldungen der Geräte-LED Fehler- und Rückmeldungen der Geräte-LED 8.1 Blinkcodes Blinkfolge Bedeutung Lösung Langsames Anlernmodus aktiv Versetzen Sie den Blinken Anlernpartner in den Anlernmodus. Langsames Vorstufe zum Gerät wartet auf Blinken Zurücksetzen auf die langen Tas tendruck Werkseinstellungen der Geräte taste zum Zurücksetzen oder kurzen Tastendruck zum... -
Seite 23: Anzeige Des Betriebszustands
36 Sekunden in einer Stunde). Die Geräte dürfen bei Errei- chen des 1-%-Limits nicht mehr senden, bis diese zeitliche Begrenzung vorüber ist. Gemäß dieser Richtlinie werden Homematic Geräte zu 100 % normenkonform entwickelt und produziert. Im normalen Betrieb wird der Duty Cycle in der Regel nicht erreicht. -
Seite 24: Deinstallation
Fehler- und Rückmeldungen der Geräte-LED nahme oder Erstinstallation eines Systems durch vermehrte und funkintensive Anlernprozesse der Fall sein. Eine Über- schreitung des Duty Cycle-Limits wird durch einmal langes und einmal kurzes Blinken der Geräte-LED angezeigt und kann sich durch temporär fehlende Funktion des Geräts äu- ßern. -
Seite 25: Verhalten Nach Spannungswiederkehr
Sollte der Test ohne Fehler durchlaufen, sendet der Funk- Dimmaktor ein Funktele gramm mit seiner Statusinformation aus. Damit bei Spannungswiederkehr (etwa nach Netzspan- nungsausfall oder Abschaltung) nicht alle Homematic Ak- toren gleichzeitig senden, wartet der Funk-Dimmaktor eine zufällige Verzögerungszeit vor dem Senden. In dieser Zeit blinkt die Geräte-LED langsam. -
Seite 26: Allgemeine Hinweise Zum Funkbetrieb
Wird beim Funk-Dimmaktor die „gesicherte Übertra- gung“ (AES) aktiviert, bedeutet dies: • höheres Kommunikationsaufkommen, • Aktor-Gruppen können nicht mehr gleichzeitig Be- fehle ausführen. Weitere Informationen zur gesicherten Übertragung (AES) fin- den Sie im Homematic WebUI Handbuch unter www.eQ-3.de. Downloaded from www.Manualslib.com manuals search engine... -
Seite 27: Technische Daten
Technische Daten Hiermit erklärt die eQ-3 AG, Maiburger Str. 29, 26789 Leer, Deutschland, dass der Funkanlagentyp Homematic HM- LC-Dim1T-DR der Richtlinie 2014/53/EU entspricht. Der vollständige Text der EU-Konformitätserklärung ist unter der folgenden Internetadresse verfügbar: www.eq-3.de. 12 Technische Daten Geräte-Kurzbezeichnung: HM-LC-Dim1T-DR... - Seite 28 Technische Daten Empfängerkategorie: SRD-Category 2 Typ. Funk-Freifeldreichweite: 140 m Duty Cycle: < 1 % pro h Abmessungen (B x H x T): 18 x 65 x 87 mm Gewicht: 52 g Technische Änderungen vorbehalten. Entsorgungshinweis Gerät nicht im Hausmüll entsorgen! Elektronische Geräte sind entsprechend der Richtlinie über Elektro- und Elektronik-Altgeräte über die örtlichen Sammel- stellen für Elektronik-Altgeräte zu entsorgen.
- Seite 56 Bevollmächtigter des Herstellers: Manufacturer’s authorised representative: eQ-3 AG Maiburger Straße 29 26789 Leer / GERMANY www.eQ-3.de Downloaded from www.Manualslib.com manuals search engine...