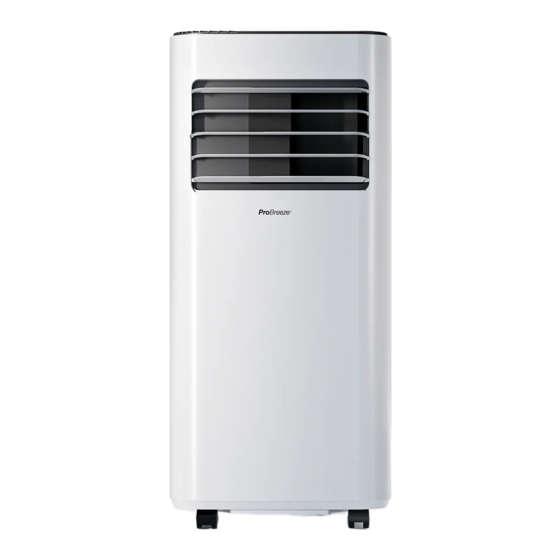
Inhaltszusammenfassung für ProBreeze PB-AC04
- Seite 1 instruction manual bedienungsanleitung MODEL PB�AC04 7000 BTU Portable Air Conditioner...
-
Seite 18: Sicherheitshinweise
Mobiles Klimagerät Vielen Dank, dass Sie sich für ein Produkt von Pro Breeze entschieden haben. Bitte lesen Sie die gesamte Anleitung vor dem ersten Gebrauch sorgfältig durch und bewahren Sie sie zum späteren Nachschlagen an einem sicheren Ort auf. Seite Inhaltsverzeichnis Sicherheitswarnung Spezifische Information zu dem R290 Kältemittel... - Seite 19 es darf nur das mitgelieferte Zubehör • Reinigung und Wartung darf nur durch verwendet werden. Kinder erfolgen, wenn diese durch Platzieren oder verwenden Sie das Gerät, Erwachsene entsprechend überwacht • das Netzkabel oder jegliches Zubehör nicht werden. • in einem Badezimmer oder in einer anderen Bewahren Sie das Gerät und sämtliche feuchten oder nassen Umgebung.
-
Seite 20: Spezifische Hinweise Und Informationen Zum Kältemittelgas R290
Spezifische Hinweise und Informationen zum Kältemittelgas R290 branchenweit anerkannten Bewertungsspezi- • Das Gerät muss in einem Bereich von einer fikation sichergestellt. • Fläche von über 4 m installiert, verwendet • Wartungs- und Instandhaltungsarbeiten, für und aufbewahrt werden. die die Unterstützung durch anderes •... -
Seite 21: Technische Daten
Vorsicht • Das Gerät sollte nicht bei einer Raumtemperatur von über 32 °C im Kühlmodus oder von unter 5 °C im Entfeuchtungsmodus bedient werden. Technische Daten • Größe: 31 cm x 31 cm x 64 cm • Nettogewicht: 19,5 kg •... -
Seite 22: Vorderansicht
Teile Vorderansicht Bedienfeld Horizontale Lüftungsschlitze Vertikale Lüftungsschlitze Gehäuse Rollfüße Griff Griff Rückansicht Gehäuse Verdunster-Filter Feinfilter Wärmeabluftschlauchanschluss Wärmeabluftschlauchanschluss- Sicherungsklammer Kondensator-Filter Rollfüße Stopfen / Wasserauslass Zubehör Fernbedienung Rechteckiger Wärmeabluftschlauchanschluss Wärmeabluftschlauch Kurzer Anschluss Wärmeabluftschlauch Dichtungsrahmen für Schiebefenster Textildichtungsrahmen für Klappfenster Dichtungsklettband Wasserschlauch 21 | Deutsch... -
Seite 23: Bedienfeld
Bedienfeld Tasten von rechts nach links Digitalanzeigefeld von rechts nach links • Ein-/Aus-Schalter • • Lüftergeschwindigkeitstaste Timer-Kontrollleuchte • • ,Runter'-Taste Kontrollleuchte Grad Celsius • Modus-Taste • Timer-Taste Fernbedienung • ,Hoch'-Taste • Oszillationstaste • Schlafmodus-/Verriegelungstaste Ein-/Aus-Schalter Oszillationstaste Kontrollleuchtensymbole von rechts nach links ‚Hoch'-Taste Modus-Taste •... - Seite 24 Installation Bitte befolgen Sie vor und nach der Installation folgende Hinweise: • Achten Sie beim Platzieren des Geräts an der gewünschten Stelle darauf, dass es in aufrechter Position bewegt wird. • Platzieren oder verwenden Sie das Gerät, das Netzkabel oder jegliches Zubehör nicht in einem •...
-
Seite 25: Wärmeabluftschlauch Anschließen
Wärmeabluftschlauch anschließen Die linke kurze Seite des rechteckigen Wärmeabluftschlauchanschlusses nach der rechten kurzen Seite des Wärmeab- luftschlauchanschlusses ausrichten. Den rechteckigen Wärmeabluftanschluss links voll in den Wärmeabluftschlauchan- schluss hinein schieben. Dann wird der rechteckige Wärmeablufts- 2 & 3 chlauchanschluss durch die Sicherungsk- lammer fest arretiert. -
Seite 26: Textildichtungsrahmen Für Klappfenster Anbringen
Textildichtungsrahmen für Klappfenster anbringen Rahmen Öffnen Sie das Fenster und reinigen Sie Seite A den Rahmen und die Fensterflügel von Staub und Partikeln. Kleben Sie das Klettband rund um den gesamten Fensterrahmen. Kleben Sie das Flügel Klettband niemals an das Fensterbrett, da sich das Fenster dann nicht mehr ganz schließen lässt. -
Seite 27: Bedienelemente
Bedienelemente Jahreszeiten. Sobald die Temperatur gleich oder höher als 15 °C oder gleich oder niedriger als 35 °C ist, beginnt das Gerät zu Ein-/Aus-Schalter entfeuchten, während der Ventilator bei niedriger Geschwindigkeit weiter läuft. Zum Ein- und Ausschalten des Geräts. Wenn die Raumtemperatur auf weniger als Lüftergeschwindigkeitstaste 15 °... - Seite 28 Verriegelungstaste Drücken Sie die Hoch- und Runter-Tasten, um die gewünschte Zeit (1-24 Stunden) bis Verriegelt die gewählten Einstellungen, während zum Ausschalten einzustellen. das Gerät im Kühlmodus ist. Die Timer-Kontrollleuchte leuchtet fünfmal kurz auf und leuchtet dann weiter konstant, Die Verriegelungstaste lange gedrückt halten, um die Einstellung einer Zeituhr zu um die Funktion zu aktivieren.
-
Seite 29: Wassertank Entleeren
Wassertank entleeren Wenn der Wassertank voll ist, werden 20 Piepsignale ertönen. Das Display zeigt den Warnhinweis E4 und das Gerät hält an, damit der Wassertank nicht überläuft. Zum Entleeren des Wassertanks: Schalten Sie das Gerät aus und trennen Sie es vom Stromnetz. Stellen Sie ein flaches Tablett unter das Wasserablaufventil. -
Seite 30: Reinigung
Anschließen des Wasserablaufschlauchs für permanenten Wasserablauf Bei langfristigem Betrieb ist es zu empfehlen, einen Wasserablaufschlauch für den kontinuier- lichen Wasserablass anzuschließen. Anbringen des Schlauchs: Den Stopfen entfernen. Führen Sie den Wasserablaufschlauch in das Wasserablaufrohr ein. Darauf achten, dass das Schlauchende in einen geeigneten Auslass (z. -
Seite 31: Reinigen Des Wärmeabluftschlauchs
Reinigen des Wärmeabluftschlauchs: Nehmen Sie den Wärmeabluftschlauch von der Rückseite des Geräts und von dem betreffenden Fenster-Dichtungsrah- men ab. Verwenden Sie ein trockenes, weiches Tuch zum Entfernen von Staub oder Schmutz. Montieren Sie den Wärmeabluftschlauch wieder an. Einlagerung des Geräts Für die langfristige Einlagerung: Entleeren Sie den Wassertank und lassen Sie den Stopfen offen. -
Seite 32: Schutzfunktionen
Room temperature sensor failure. related circuits. Schutzfunktionen Arrange for a professional to check the room temperature sensor and Display showing E2. Anti-frost protection. related circuits. Verzögerter Kompressorstart Appliance returns to operating at chosen settings once the internal Display showing E4. Das Gerät verfügt über eine eingebaute pipe temperature exceeds 8°C. -
Seite 33: Entsorgung
other heat sources. other heat sources. Dirty filters. Clean filters. Air inlet or air outlet clogged. Remove the obstruction. Stellen Sie das Gerät auf einen Laute Geräusche. Das Gerät steht uneben. ebenen Untergrund. Lassen Sie den Kompressor drei Der Kompressor Minuten lang abkühlen, bevor Sie Der Überhitzungsschutz ist aktiv. - Seite 34 65 | Español...


