Caleffi 202 Serie Bedienungsanleitung
Thermostatkopf mit temperaturanzeige
Quicklinks
Comando termostatico con indicatore di temperatura
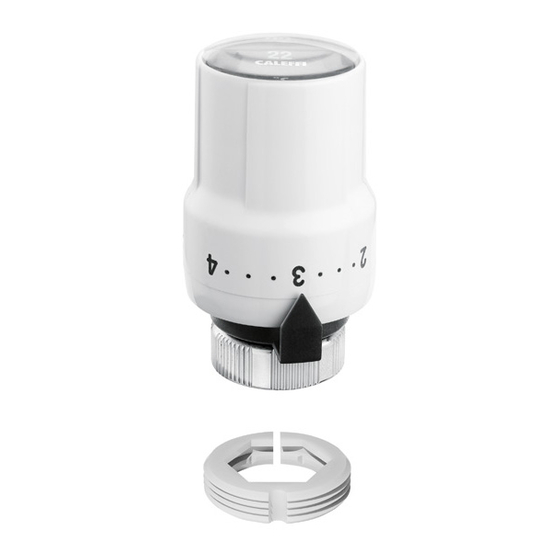
Thermostatic control head with temperature indicator
Thermostatkopf mit Temperaturanzeige
Tête thermostatique avec indicateur de température
Thermostaatkop met aanduiding van de temperatuur
Comando termostático com indicador de temperatura
Mando termostático con indicador de temperatura
ермостатический привод с индикатором температуры
©
opyright 2012
Funzione - Function - Funktion - Fonctionnement -
Función - Função - Werking -
I comandi termostatici con indicatore di temperatura vengono utilizzati
sulle valvole termostatiche o termostatizzabili per radiatore per regolare
automaticamente e visualizzare l'effettiva temperatura ambiente.
The thermostatic control heads with temperature indicator are used on
thermostatic or convertible radiator valves for the automatic control and
display of the actual ambient temperature.
Die
Thermostatköpfe
Ventilkompaktheizkörpern
Heizkörper für die automatische Regelung und Anzeige der
Raumtemperatur eingesetzt.
Les têtes thermostatiques avec indicateur de température sont utilisées
sur
les
robinets
automatiquement et visualiser la température ambiante.
De thermostaatkoppen met aanduiding van de temperatuur kunnen op
thermostatische of thermostatiseerbare radiatorventielen geplaatst
worden voor het automatisch regelen en visualiseren van de actuele
kamertemperatuur.
Os comandos termostáticos com indicador de temperatura são
utilizados nas válvulas termostáticas ou termostatizáveis, para
radiadores para regular automaticamente e visualizar a temperatura
ambiente efectiva.
Los mandos termostáticos con indicador de temperatura se montan en
las válvulas termostáticas o termostatizables para radiadores y permiten
regular automáticamente y visualizar la temperatura ambiente.
ермостатические приводы с индикатором температуры используются на термостатических
или термостатируемых вентилях радиаторов отопления для автоматической регулировки и
отображения фактической температуры воздуха.
Product Range
202000
Technical specifications
Scale of adjustment:
Temperature range:
Room temperature gauge scale:
Frost protection cut-in:
Maximum room temperature:
alef fi
mit
Temperaturanzeige
und
thermostatiques
1
www.c leffi.com
ункция
Thermostatventil-Unterteilen
de
radiateur
28088.01
I
GB
D
F
NL
P
E
RU
202 series
werden
auf
für
pour
régler
❄–5
7–28°C
16–26°C
~ 7°C
50°C

Verwandte Anleitungen für Caleffi 202 Serie


Inhaltszusammenfassung für Caleffi 202 Serie
- Seite 1 28088.01 www.c leffi.com Comando termostatico con indicatore di temperatura Thermostatic control head with temperature indicator Thermostatkopf mit Temperaturanzeige Tête thermostatique avec indicateur de température Thermostaatkop met aanduiding van de temperatuur Comando termostático com indicador de temperatura Mando termostático con indicador de temperatura ермостатический...
- Seite 2 Installatie - Instalação - Instalación - Установка Installazione - Installation - Einbau - Installation - Il comando termostatico va installato in posizione orizzontale. The thermostatic control head should be fitted in a horizontal position. Die Thermostatköpfe müssen waagerecht eingebaut werden. Les têtes thermostatiques doivent être installées horizontalement.
- Seite 3 L’elemento sensibile dei comandi termostatici non deve essere installato in: nicchie, cassonetti, dietro tendaggi, oppure all’esposizione diretta dei raggi solari, che ne falserebbero le rilevazioni. The thermostatic control head should not be fitted in: recesses, boxing, behind curtains or be exposed directly to excessive heat as this may affect the valve’s performance.
- Seite 4 Em caso de longos períodos de ausência durante o Inverno deve- se regular el comando termostático na posição anti-gelo correspondente a uma temperatura ambiente não inferior a 7°C. Durante o Verão é aconselhável regular el comando termostático na posição 5, ou seja com a válvula toda aberta. En caso de largos períods de ausencia durante el período invernal, regular el mando termostático en la posición antihielo correspondiente a una temperatura ambiente no inferior a 7°C.
- Seite 5 - Guscio antimanomissione ed antifurto - Tamperproof and antitheft shell - Manschette als Diebstahl- und Verstellschutz - Capuchon de protection antivandalisme et antivol - Blokkerings- en anti-diefstalkap - Protecção anti-manipulação e anti-furto - акладка, предохраняющая от повреждений и краж - Capuchón antimanipulación y antirrobo La versione antimanomissione ed antifurto del comando termostatico si ottiene montando sulla manopola...
- Seite 6 Applicando il guscio al comando si otterranno i seguenti effetti: Con comando senza alcuna ´ limitazione o bloccaggio Solamente antifurto della temperatura Antimanomissione della limitazione ed Comando con limitazione ´ antifurto della temperatura Antimanomissione del bloccaggio ed Comando con bloccaggio ´...
- Seite 7 - Limitazione della temperatura - Temperature limit setting - Begrenzung der Temperatur - Limitation de la température - Begrenzing van de temperatuur - Limitação da temperatura - Ограничение температуры - Limitación de la temperatura Ruotare la manopola in posizione tutta aperta (pos. 5). Con l’aiuto di un cacciavite sganciare la ghiera spingendola verso il corpo valvola fino a...
- Seite 8 Riagganciare la ghiera. A questo punto la valvola avrà una limitazione campo temperatura valore impostato. Secure the locking nut again. At this point there will be a limit on the temperature range from 0 to the set value on the valve. Ring wieder blockieren.
- Seite 9 Posizionare la valvola alla temperatura desiderata e ruotare la ghiera in senso orario fino a battuta. Position the valve at the desired temperature and turn the locking nut in the clockwise direction. Handgriff auf die gewünschte Temperatur stellen und den Ring Uhrzeigersinn Anschlag drehen.
- Seite 10 Maak met behulp van een schroevendraaier de ring los door deze naar het ventiellichaam te duwen tot tegen de aanslag. Com a ajuda de uma chave de parafusos desprender o anel na direcção do corpo da válvula até ao fim. Con la ayuda de un destornillador deseganchar el anillo exterior apretándolo hacia el cuerpo de la válvula a tope.