
Verwandte Anleitungen für Nordmende CSG50LPGWH


Inhaltszusammenfassung für Nordmende CSG50LPGWH
- Seite 1 CSG50LPGWH CSG60LPGWH OPERATING AND INSTALLATION INSTRUCTIONS OF FREESTANDING GAS COOKER...
- Seite 29 CSG50LPGWH CSG60LPGWH BETRIEBS-UND INSTALLATIONSANLEITUNG VON FREISTEHENDEN GASHERD...
- Seite 30 Werte Kunden, Unser Ziel ist es, Ihnen Produkte mit hoher Qualität anzubieten, die Ihre Erwartungen übertreffen. Ihr Gerät ist in modernen Einrichtungen sorgfältig und vor allem auf Qualität geprüft produziert. Dieses Handbuch wurde erstellt, um Ihnen bei der Verwendung Ihres Gerätes, das nach neuesten Technologien hergestellt wurde, zu helfen und Ihnen zu zeigen, wie Sie das Gerät möglichst vorteilhaft einsetzen.
- Seite 31 INHALTSVERZEICHNIS: 1. KURZÜBERSICHT ÜBER DAS GERÄT 2. WARNHINWEISE 3. INSTALLATION UND VORBEREITUNGEN FÜR DIE VERWENDUNG Umfeld wo das Gerät installiert werden muss Installation des Produkts Einstellung der Standfüsse Gasanschluss Elektrischer Anschluss und Sicherheitshinweise Gas Umbau VERWENDUNG IHRES HERDS Verwendung der Gasbrenner 4.1.1 Kontrolle von Herd-Brennern 4.1.2...
-
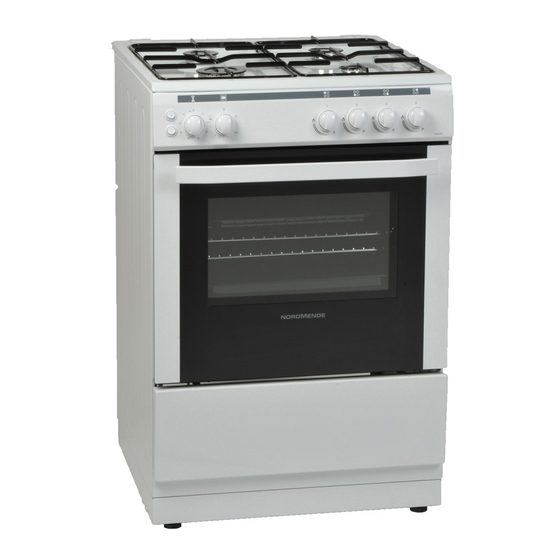
Seite 32: Kurzübersicht Über Das Gerät
1. KURZÜBERSICHT ÜBER DAS GERÄT MODELL TIEFE BREITE HÖHE (cm) (cm) (cm) CSG60LPGWH CSG50LPGWH LISTE DER BESTANDTEILE : 1- Kochfeld 9- Grill-Brenner 2 - Bedienfeld 10 - Ofenlampe 3 - Klappengriff 11 - Halbschnellkochplatte 4- Auszugsblende 12 - Schnellkochplatte 5- Verstellbare Füße 13 - Zusatzkochplatte 6 - Backraumtür... -
Seite 33: Warnhinweise
2. WARNHINWEISE TREFFEN SIE ALLE NOTWENDIGEN SICHERHEITSVORKEHRUNGEN UND LESEN SIE DIESES HANDBUCH VOLLSTÄNDIG DURCH, BEVOR SIE DIESES GERÄT VERWENDEN! Allgemeine Sicherheitshinweise • Diese Warnungen sind im Interesse Ihrer Sicherheit bereitgestellt wurden. Lesen Sie das Handbuch sorgfältig durch, bevor Sie den Herd verwenden. •... - Seite 34 2. WARNHINWEISE • Der Gasanschluss des Geräts befindet sich auf der rechten Seite. Wenn der Anschlusspunkt auf die linke Geräteseite verlegt werden soll, können Sie bei Ihrem autorisierten Kundendienst ein Verlängerungsrohr anfordern. Während des Gebrauchs • Wenn Sie den Herd das erste Mal einschalten, kommt es zu einer gewissen Geruchsentwicklung, die von den Isoliermaterialien und den Heizelementen herrührt.
- Seite 35 2. WARNHINWEISE • Schützen Sie das Gerät vor Umwelteinflüssen. Setzen Sie es niemals Einflüssen wie Sonne, Regen, Schnee oder Staub etc. aus. • Halten Sie leicht entzündliche Substanzen vom Herd fern, wenn er in Betrieb ist. • Geben Sie acht, dass die Kabel anderer Geräte, die Sie in der Nähe des Herds betreiben, nicht mit heißen Stellen in Berührung kommen.
-
Seite 36: Installation Und Vorbereitungen Für Die Verwendung
3. INSTALLATION UND VORBEREITUNGEN FÜR DIE VERWENDUNG Dieser moderne, zweckmäßige und praktische Herd wurde aus hochwertigen Teilen und Materialien gefertigt und wird all Ihren Ansprüchen in jeder Hinsicht gerecht werden. Damit Sie im Betrieb auf keine Probleme stoßen und Sie das Gerät erfolgreich verwenden können, müssen Sie dieses Handbuch unbedingt genau durchlesen. -
Seite 37: Installation Des Produkts
3. INSTALLATION UND VORBEREITUNGEN FÜR DIE VERWENDUNG Dunstabzug- shaube Elektrischer Ventilator Lufteinlass mit Lufteinlass mit mindestens 100cm² mindestens 100cm² Querschnitt Querschnitt Abb. 3 Abb. 4 Mind. 60cm. DUNSTABZUG Abb. 5 3.2 Installation des Produkts Bei der Installation Ihres Herds müssen bestimmte Faktoren beachtet werden. Seien Sie sehr vorsichtig, während der Installation Ihres Produktes. -
Seite 38: Einstellung Der Standfüsse
3. INSTALLATION UND VORBEREITUNGEN FÜR DIE VERWENDUNG 3.3 Einstellung der Standfüsse Der Herd steht auf 4 einstellbaren Standfüßen. Wenn das Gerät dort aufgestellt ist, wo es benutzt werden soll, kontrollieren Sie ob es ausgewogen ist. Wenn es nicht ausgewogen ist, können Sie, wenn erforderlich, eine Einstellung durchführen, indem Sie die Füße im Uhrzeigersinn drehen. -
Seite 39: Elektrischer Anschluss Und Sicherheitshinweise
3. INSTALLATION UND VORBEREITUNGEN FÜR DIE VERWENDUNG Die Dichtungen die während der Verbindung benutzt werden, sollten ebenfalls genehmigt sein, um in Gas-Verbindungen verwendet zu werden. Verwenden Sie keine Sanitär-Dichtungen für Gas- Verbindungen. Beachten Sie, dass dieses Gerät bereit ist, um an die Gasversorgung des Landes, für die sie hergestellt worden ist, verbunden zu werden. -
Seite 40: Gas Umbau
3. INSTALLATION UND VORBEREITUNGEN FÜR DIE VERWENDUNG • Das Gerät ist für 230V 50Hz Strom eingestellt. Wenn das Stromnetz anders ist, melden Sie sich bei Ihrem autorisierten Service Abb. 8 • Das Netzkabel sollte von den heißen Teilen des Gerätes ferngehalten werden. Andernfalls kann das Kabel beschädigt werden, und zum Kurzschluss führen. - Seite 41 3. INSTALLATION UND VORBEREITUNGEN FÜR DIE VERWENDUNG Schlüssel Düse Abb. 10 Abb. 9 Backofen / Grill Injektoren Der Brenner im Backraum ist mit einer einzelnen Schraube versehen, die sich an der Brennerspitze befindet. Für Grillbrenner, ist diese Schraube bereits sichtbar (Abbildung 11). Entfernen Sie die Schraube, ziehen Sie den Grill-Brenner zu sich selbst und sehen Sie den Injektor enthüllt auf der Rückseite des Garraums (Abbildung 12).
- Seite 42 3. INSTALLATION UND VORBEREITUNGEN FÜR DIE VERWENDUNG Zur Bestimmung der minimalen Position, zünden Sie die Brenner und lassen sie auf ihrer minimalen Stellung brennen. Verändern Sie nun mit einem kleinen Schraubendreher die Bypassschraube um etwa 90° (festziehen oder lockern). Wenn die Flamme mindestens 4 mm hoch ist, wird das Gas gut verteilt. Stellen Sie sicher, dass die Flamme nicht ausgeht, wenn sie von der Maximal- in die Minimalstellung geregelt wird.
-
Seite 43: Verwendung Ihres Herds
4. VERWENDUNG IHRES HERDS 4.1 Verwendung der Gasbrenner Zündung der Brenner Um festzustellen, welche Regler welchen Brenner kontrolliert, überprüfen Sie die Das Stellungssymbol oberhalb des Reglers. • anuelle Zündung der Gasbrenner st Ihr Herd nicht mit elektrischer Zündung ausgestattet, oder bei einem Ausfall des Stromnetzes, gehen Sie wie folgt vor: Für Kochfeld-Brenner: Zum Zünden der Brenner, drücken und drehen Sie den Regler gegen den Uhrzeigersinn, so dass der Regler in maximaler Position ist, an ein Konus oder andere manuelle Hilfe... -
Seite 44: Kontrolle Von Herd-Brennern
4. VERWENDUNG IHRES HERDS Flammensicherheitsvorrichtung Hob-Brenner (Wenn Ihr Kochfeld mit einer Gas-Sicherheitsvorrichtung ausgestattet ist) Kochfelder, die mit Zündsicherung ausgestattet sind, bieten Sicherheit im Falle von versehentlich gelöschten Flammen. Wenn ein solcher Fall eintritt, wird das Gerät die Gasleitung des Brenners blockieren und jede Ansammlung von unverbranntem Gas vermeiden. - Seite 45 4. VERWENDUNG IHRES HERDS Ihr Herd hat Brenner mit unterschiedlichen Durchmessern. Die wirtschaftlichste Art und Weise der Verwendung von Gas ist auf die richtige Gasbrenner Größe für Ihre Pfannengröße zu wählen und die Flamme auf ein Minimum zu bringen, sobald der Siedepunkt erreicht ist. Es wird empfohlen, das Kochgeschirr stets mit dem Deckel zu schließen.
-
Seite 46: Kontrolle Von Ofen-Brennern
4. VERWENDUNG IHRES HERDS 4.1.2 Kontrolle von Ofen-Brennern Nachdem Sie wie zuvor beschrieben den Backofen-Brenner zünden, können Sie mit Hilfe der Zahlen auf dem Bedienfeld oder des Knopf-Rings, die Temperatur im Inneren des Ofens, nach Ihrem Wunsch einstellen. Größere Zahlen bedeuten höhere Temperaturen, während kleinere Zahlen niedrigere Temperaturen bedeuten. -
Seite 47: Kontrolle Von Grill-Brennern
4. VERWENDUNG IHRES HERDS • Wenn Sie mehr als ein Tablett mit ähnlichen Produkten kochen, zum Beispiel Kuchen oder Kekse, tauschen Sie die Tabletten während des Kochens oder Sie können das obere Fach entfernen, wenn das Essen gekocht ist und das untere Tablett auf das höhere Regal verschieben, um das Kochen zu beenden. -
Seite 48: Das Benutzen Vom Digitalen Kurzzeitwecker
4. VERWENDUNG IHRES HERDS • Um das Spritzen zu minimieren, sollten Lebensmittel vor dem Grillen gründlich getrocknet werden. Mageres Fleisch und Fisch leicht mit ein wenig Öl oder zerlassener Butter bepinseln, um die Feuchtigkeit während des Kochens zu bewahren. • Lebensmittel sollten in der Mitte des Gitters platziert werden, um eine maximale Luftzirkulation zu ermöglichen. -
Seite 49: Im Backraum Verwendetes Zubehör
4. VERWENDUNG IHRES HERDS 4.2 Im Backraum verwendetes Zubehör • Es sind verschiedene Zubehörteile für den Backraum vorhanden. Sie können auch handelsübliches Zubehör verwenden (dieses muss jedoch hitze- und feuerfest sein). Sie können auch handelsübliches Glasgeschirr, Kuchenformen, Backbleche etc. verwenden. •... -
Seite 50: Ofen Zubehör
4. VERWENDUNG IHRES HERDS Garraum Regal-Positionen für geformte Regale 5. Einschub 4. Einschub 3. Einschub 2. Einschub 1. Einschub Ofen Zubehör * Wegen des Modells Ihres Produktes kann das Zubehör des Backofens unterschiedlich sein. Bratgitter Drahtgitter wird zum Grillen verwendet oder um unterschiedliches Kochgeschirr darauf zu platzieren. -
Seite 51: Reinigung Und Wartung
5. REINIGUNG UND WARTUNG 5.1 Reinigung Stellen Sie vor der Reinigung sicher, dass alle Regler abgedreht sind und das Gerät ausgekühlt ist. Trennen Sie das Gerät vom Netz. Überprüfen Sie vor der Verwendung spezieller Reiniger, ob diese für das Produkt geeignet sind oder vom Hersteller empfohlen werden. Verwenden Sie keine ätzenden Mittel, Scheuerpulver, Stahlwolle oder harte Werkzeuge, da diese die Oberflächen beschädigen können. - Seite 52 5. REINIGUNG UND WARTUNG Ausbau der Backraumtür Ausbau der Backraumtür • Öffnen Sie die Backraumtür vollständig (1). • Öffnen Sie die Spannklinke bis zur Endstellung (2). • Schließen Sie die Tür, bis es fast die volle rd geschlossene Position wie in Abbildung 3 gezeigt, erreicht und entfernen Sie die Klappe, indem sie es zu sich selbst ziehen.
-
Seite 53: Wartung
5. REINIGUNG UND WARTUNG Brenneraufsätze Emaillierte Pfannenträger, emaillierte Deckel, Brenner Köpfe müssen in regelmäßigen Abständen, mit warmem Seifenwasser abgespült und getrocknet werden. Nach dem Sie sie gründlich getrocknet haben, ersetzen Sie sie richtig. Emaillierte Teile: Um diesen ein neues Aussehen zu erhalten, müssen sie regelmäßig mit mildem warmem Seifenwasser gereinigt und dann mit einem weichen Tuch trockengerieben werden. -
Seite 54: Wartung Und Transport
WARTUNG UND TRANSPORT 6.1 Grundlegenede Fehlerbehebung, bevor Sie den Service kontaktieren Wenn der Herd nicht funktioniert: • Überprüfen Sie, ob der Herd ausgesteckt ist oder ein Stromasufall vorliegt. Wenn der Herd nicht heiß wird: • Überprüfen Sie, ob die Temperatur mit dem Temperaturregler eingestellt wurde. Wenn die Innenraumbeleuchtung nicht funktioniert: •... - Seite 55 INJEKTOR TABELLE Kategorie : II 2H3+ IE Klasse: 1 G30 28-30 mbar G20 20 mbar SCHNELLBRENNER Düsendurchmesser (1/100mm) Nennleistung (kW) Verbrauch per h 210.9 gr/h 285.7 lt/h SEMI-RAPID BRENNER Düsendurchmesser (1/100mm) Nennleistung (kW) 1,75 Verbrauch per h 123,6 gr/h 166.7 lt/h ZUSATZBRENNER Düsendurchmesser (1/100mm) Nennleistung (kW)
- Seite 56 Dieses Symbol auf dem Produkt oder der Verpackung weist darauf hin, dass dieses Produkt nicht als Haushaltsmüll entsorgt werden darf. Statt dessen muss es an einem entsprechenden Sammelpunkt für das Recycling von elektrischen und elektronischen Geräten abgegeben werden. Indem Sie sicherstellen, dass dieses Produkt richtig entsorgt wird, helfen Sie, mögliche schädliche Auswirkungen auf die Umwelt und Gesundheit zu vermeiden, die durch unsachgemäße Handhabung dieses Produktes entstehen können.