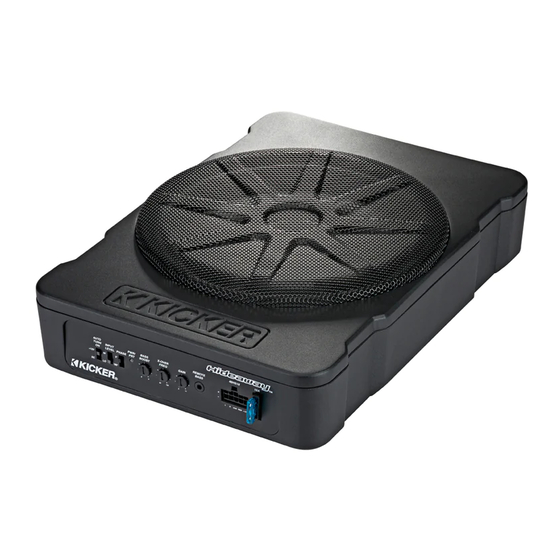
Kicker HS10 Benutzerhandbuch
Aktivsubwoofer gehäuse

Verwandte Anleitungen für Kicker HS10


Inhaltszusammenfassung für Kicker HS10
- Seite 1 HS10 POWERED SUB ENCLOSURE Owner’s Manual 2019 Hideaway Rev E.indd 1 2019 Hideaway Rev E.indd 1 5/8/2019 2:26:25 PM 5/8/2019 2:26:25 PM...
-
Seite 2: Specifications
10-3/8, 26.3 Depth [inches, cm] 14, 35.4 Note: All specifi cations and performance fi gures are subject to change. Please visit www.kicker.com for the most current information. INSTALLATION Mounting: Choose a structurally sound location to mount your KICKER powered subwoofer enclosure. Make sure the mounting screws will not puncture the gas tank/brake lines/wiring or interfere with any mechanical parts on the underside of the mounting surface. - Seite 3 Mount the brackets to the bottom of the enclosure using the supplied smaller screws. Securely attach the enclosure to the vehicle with the supplied larger screws. 2019 Hideaway Rev E.indd 3 2019 Hideaway Rev E.indd 3 5/8/2019 2:26:32 PM 5/8/2019 2:26:32 PM...
- Seite 4 Observe the polarity of input connections to avoid signal loss. Use the KICKER KISL for source units with RCA outputs or splice the quick-connect harness leads directly to your source unit’s speaker-level outputs. Do not use a Line Output Converter with the HS10.
- Seite 5 fi nd the position that gives you the best bass response. Input Level: The inputs on KICKER powered enclosures are capable of receiving either Hi (speaker-level) or Low-level (RCA) signals from your source unit. Set the Input Level switch on the side panel to match the outputs of your source unit.
- Seite 6 REMOTE BASS CONTROL INSTALLATION Surface-mount the CXARC remote using the supplied screws. 46HS10 AUTO BASS X-OVER REMOTE PWR/ TURN INPUT BOOST FREQ GAIN BASS LEVEL PHASE +12V 0° 180° REM +12V Connect the supplied 1/8th inch back view [3.5mm] patch cable to the CXARC remote and the Remote Bass jack on the amplifi...
-
Seite 7: Troubleshooting
Improper connections can result in blown amplifi er fuses as well as the failure of other critical systems in the vehicle. If you have more questions about the installation or operation of your new KICKER product, see the Authorized KICKER Dealer where you made your purchase. For more advice on installation, click on the SUPPORT section on the KICKER homepage, www.kicker.com. -
Seite 8: Instalación
Estos sistemas han sido diseñados meticulosamente por los ingenieros de KICKER para proporcionar un desempeño y un sonido asombrosos sin la lenta confi guración que requiere una actualización de amplifi cador-subwoofer típica. - Seite 9 Montaje Soportes: Monte los soportes al fondo de la caja que utiliza los tornillos más pequeños suministrados. Monte la caja al vehículo con los tornillos más grande suministrados. 2019 Hideaway Rev E.indd 9 2019 Hideaway Rev E.indd 9 5/8/2019 2:26:34 PM 5/8/2019 2:26:34 PM...
- Seite 10 Observe la polaridad de las conexiones de entrada para evitar la pérdida de la señal. Utilice el KISL KICKER para las unidades de fuente con salidas RCA o empalme el arnés de conexión rápida conduce directamente a las salidas de la unidad fuente de nivel de altavoz.
- Seite 11 Mueva el interruptor para encontrar la posición que le proporcionará la mejor respuesta de los bajos. Nivel de entrada: Las entradas en los gabinetes con tecnología de KICKER tienen capacidad para recibir señales de alto o de bajo nivel desde la unidad fuente. Confi gure el interruptor del nivel de entrada que se encuentra en el panel lateral para que coincida con las salidas de su unidad fuente.
- Seite 12 CONTROL REMOTO DE BAJOS INSTALACIÓN Para instalar en superfi cie el control remoto CXARC use los tornillos suministrados. 46HS10 AUTO PWR/ BASS X-OVER REMOTE TURN INPUT BOOST FREQ GAIN BASS LEVEL PHASE +12V 0° 180° REM +12V Conecte el cable de extensión de 1/8 pulgadas [3.5mm] suministrado al control remoto CXARC y a la entrada de grave remoto en el...
-
Seite 13: Solución De Problemas
Si tiene más preguntas acerca de la instalación o de la operación de su nuevo producto KICKER, consulte a su Distribuidor de KICKER autorizado en donde realizó la compra. Para obtener más consejos sobre la instalación, haga clic en la sección SOPORTE de la página principal de KICKER, www.kicker.com. -
Seite 14: Technische Daten
14; 35,4 INSTALLATION Einbau: Wählen Sie einen geeigneten Platz für den Einbau Ihres KICKER Subwoofer-Gehäuses. Kontrollieren Sie genau, wo die Sie die Montagebügel anbringen wollen. Vergewissern Sie sich, dass die Einbauschrauben nicht den Kraftstofftank, die Bremsleitungen oder Drähte beschädigen oder die mechanischen Teile auf der Unterseite der Einbaufl... - Seite 15 Halterungen Einbau: Befestigen Sie die Halterungen mit beiliegenden kleineren Schrauben an beiden Seiten des Gehäuses. Befestigen Sie dann das Gehäuse zum Fahrzeug mit den beiliegenden größeren Schrauben. 2019 Hideaway Rev E.indd 15 2019 Hideaway Rev E.indd 15 5/8/2019 2:26:35 PM 5/8/2019 2:26:35 PM...
- Seite 16 Masse-Anschluss Achten Sie auf die Polung der Eingangsverbindungen, um einen Signalverlust zu vermeiden. Verwenden Sie die KICKER KISL für Quelle Geräte mit Cinch-Ausgänge oder Spleiß der Schnellkupplung Kabelbaum führt direkt auf Ihrem Quellgerät die Lautsprecher-Ausgänge. Verwenden Sie nicht mit Line-Ausgangskonverter.
- Seite 17 Subwoofer abgestimmt sind. Drehen Sie den Schalter in die Position, die die beste Basswiedergabe ermöglicht. Eingangspegel: Die Eingänge an den KICKER Powered Enclosures können hohe und niedrige Signale von der Haupteinheit empfangen. Legen Sie den Eingangspegel an der Seite fest, um diesen an die Ausgänge der Haupteinheit anzupassen.
-
Seite 18: Basspegel-Fernbedienung Installation
BASSPEGEL-FERNBEDIENUNG INSTALLATION Montieren Sie den CXARC- Remote-Regler mit den mitgelieferten Schrauben. 46HS10 AUTO BASS X-OVER REMOTE PWR/ TURN INPUT BOOST FREQ GAIN BASS LEVEL PHASE +12V 0° 180° REM +12V Stecken Sie das mitgelieferte 1/8 Zoll [3.5mm] Patchkabel in den CXARC-Remote-Regler und in die “Remote-Bass”-Steckerbuchse Rückansicht... -
Seite 19: Problembehandlung
Verstärkersicherungen durchbrennen oder andere wichtige Systeme im Fahrzeug beschädigt werden. Falls Sie weitere Fragen zur Installation oder den Betrieb Ihres neuen KICKER-Produkts haben, wenden Sie sich an den autorisierten KICKER-Händler, bei dem Sie das Produkt gekauft haben. Weitere Informationen zur Installation fi... -
Seite 20: Spécifications
Numéro de série de l’amplifi cateur : Les enceintes KICKER Powered à gain de place sont le moyen le plus rapide et le plus simple d’ajouter un caisson des basses (« subwoofer ») dans votre véhicule. Ces systèmes ont été conçus avec le plus grand soin par les ingénieurs de chez KICKER pour assurer des performances et un son exceptionnels sans nécessiter les... - Seite 21 Montage Pattes : Obtenir les pattes de montage au fond de le caisson utilisant les plus petites vis fournies. Attacher le caisson au véhicule avec les plus grandes vis fournies. 2019 Hideaway Rev E.indd 21 2019 Hideaway Rev E.indd 21 5/8/2019 2:26:37 PM 5/8/2019 2:26:37 PM...
- Seite 22 Attention à la polarité des bornes d’entrée pour éviter la perte du signal. Utilisez le KISL KICKER pour les unités de source avec des sorties RCA ou une épissure le harnais de connexion rapide mène directement aux sorties de votre unité source de niveau haut-parleur.
- Seite 23 Basculez ce commutateur pour trouver la position qui vous assurera le meilleur rendu des graves. Niveau d’entrée : Les entrées des enceintes KICKER peuvent recevoir des niveaux de signal Hi ou Low en provenance de l’unité source. Réglez le commutateur de niveau d’entrée situé sur le panneau latéral pour adapter les sorties de votre unité...
- Seite 24 TÉLÉCOMMANDE DU NIVEAU DES GRAVES INSTALLATION Installez la télécommande CXARC en surface en utilisant les vis fournies. 46HS10 AUTO BASS X-OVER REMOTE PWR/ TURN INPUT BOOST FREQ GAIN BASS LEVEL PHASE +12V 0° 180° REM +12V Raccordez le cordon de raccordement de 1/8 pouces [3.5mm] alimentant la télécommande CXARC et...
-
Seite 25: Dépistage Des Erreurs
Bruit de terre ? Les amplifi cateurs KICKER sont conçus pour être parfaitement compatibles avec les installations centrales de tous les fabricants. Certaines de ces unités peuvent nécessiter une mise à la terre supplémentaire pour empêcher que des bruits ne viennent parasiter le signal audio. - Seite 26 Please use common sense when controlling volume. When purchased from an Authorized KICKER Dealer, KICKER warrants this product to be free from defects in material and workmanship under normal use for a period of ONE (1) YEAR from date of original purchase. If this product is identifi...
-
Seite 27: International Warranty
à faire le maximum (“ vivre plein pot “) dans tous les aspects de leur vie. Les haut-parleurs et amplifi cateurs KICKER sont les meilleurs dans le domaine des équipements audio et représentent donc pour nos client le “ carburant pour vivre plein pot “... - Seite 28 ©2018 Stillwater Designs 2019 Hideaway Rev E.indd 28 2019 Hideaway Rev E.indd 28 5/8/2019 2:26:39 PM 5/8/2019 2:26:39 PM...